Painting DIY Built-Ins a Dark Blue
As you guys know, the built-ins are, well…built! And Finn and I breathed a huge sigh of relief when that monstrous task was complete. But we didn’t relax for long, because there was still a lot left to do to complete this project. Sanding, caulking, filling holes, priming, painting. Yeah, we still had a big punch list to tackle.
Today, I want to walk you through all of these very important steps. These are the tasks that can take your project from average to extraordinary. Many people assume you can just start painting right away, but I spent hours and hours prepping before I even opened a can of paint. And even though it was monotonous work, it was well worth it.
Supplies for Painting DIY Built-Ins

- Wood Filler
- Putty Knife
- Painter’s Putty
- Caulk
- Caulk Gun
- Tack Cloth
- Rags
- Gloves
- Respirator
- Palm Sander & Sandpaper
- Painter’s Tape
- Plastic Tarps
- Brown Construction Paper
- Primer
- Paint Sprayer
- Buckets
- Goggles
- Painting Suits
- Paint (I went with the color “Chimney Smoke” in a satin finish)
Choosing a Color
Before I got to the prep work, I wanted to figure out the paint color for the built-ins. I’ve done a lot of white built-ins in the past (you can see the ones from our condo here) and this time around I figured some color would look nice. I settled on finding a deep dark blue that I would pair with gold hardware. I hit up Lowe’s and walked away with these samples…
I always recommend painting samples on a few different places in a room (or in this case on the shelves) and then reviewing the colors at various times throughout the day. 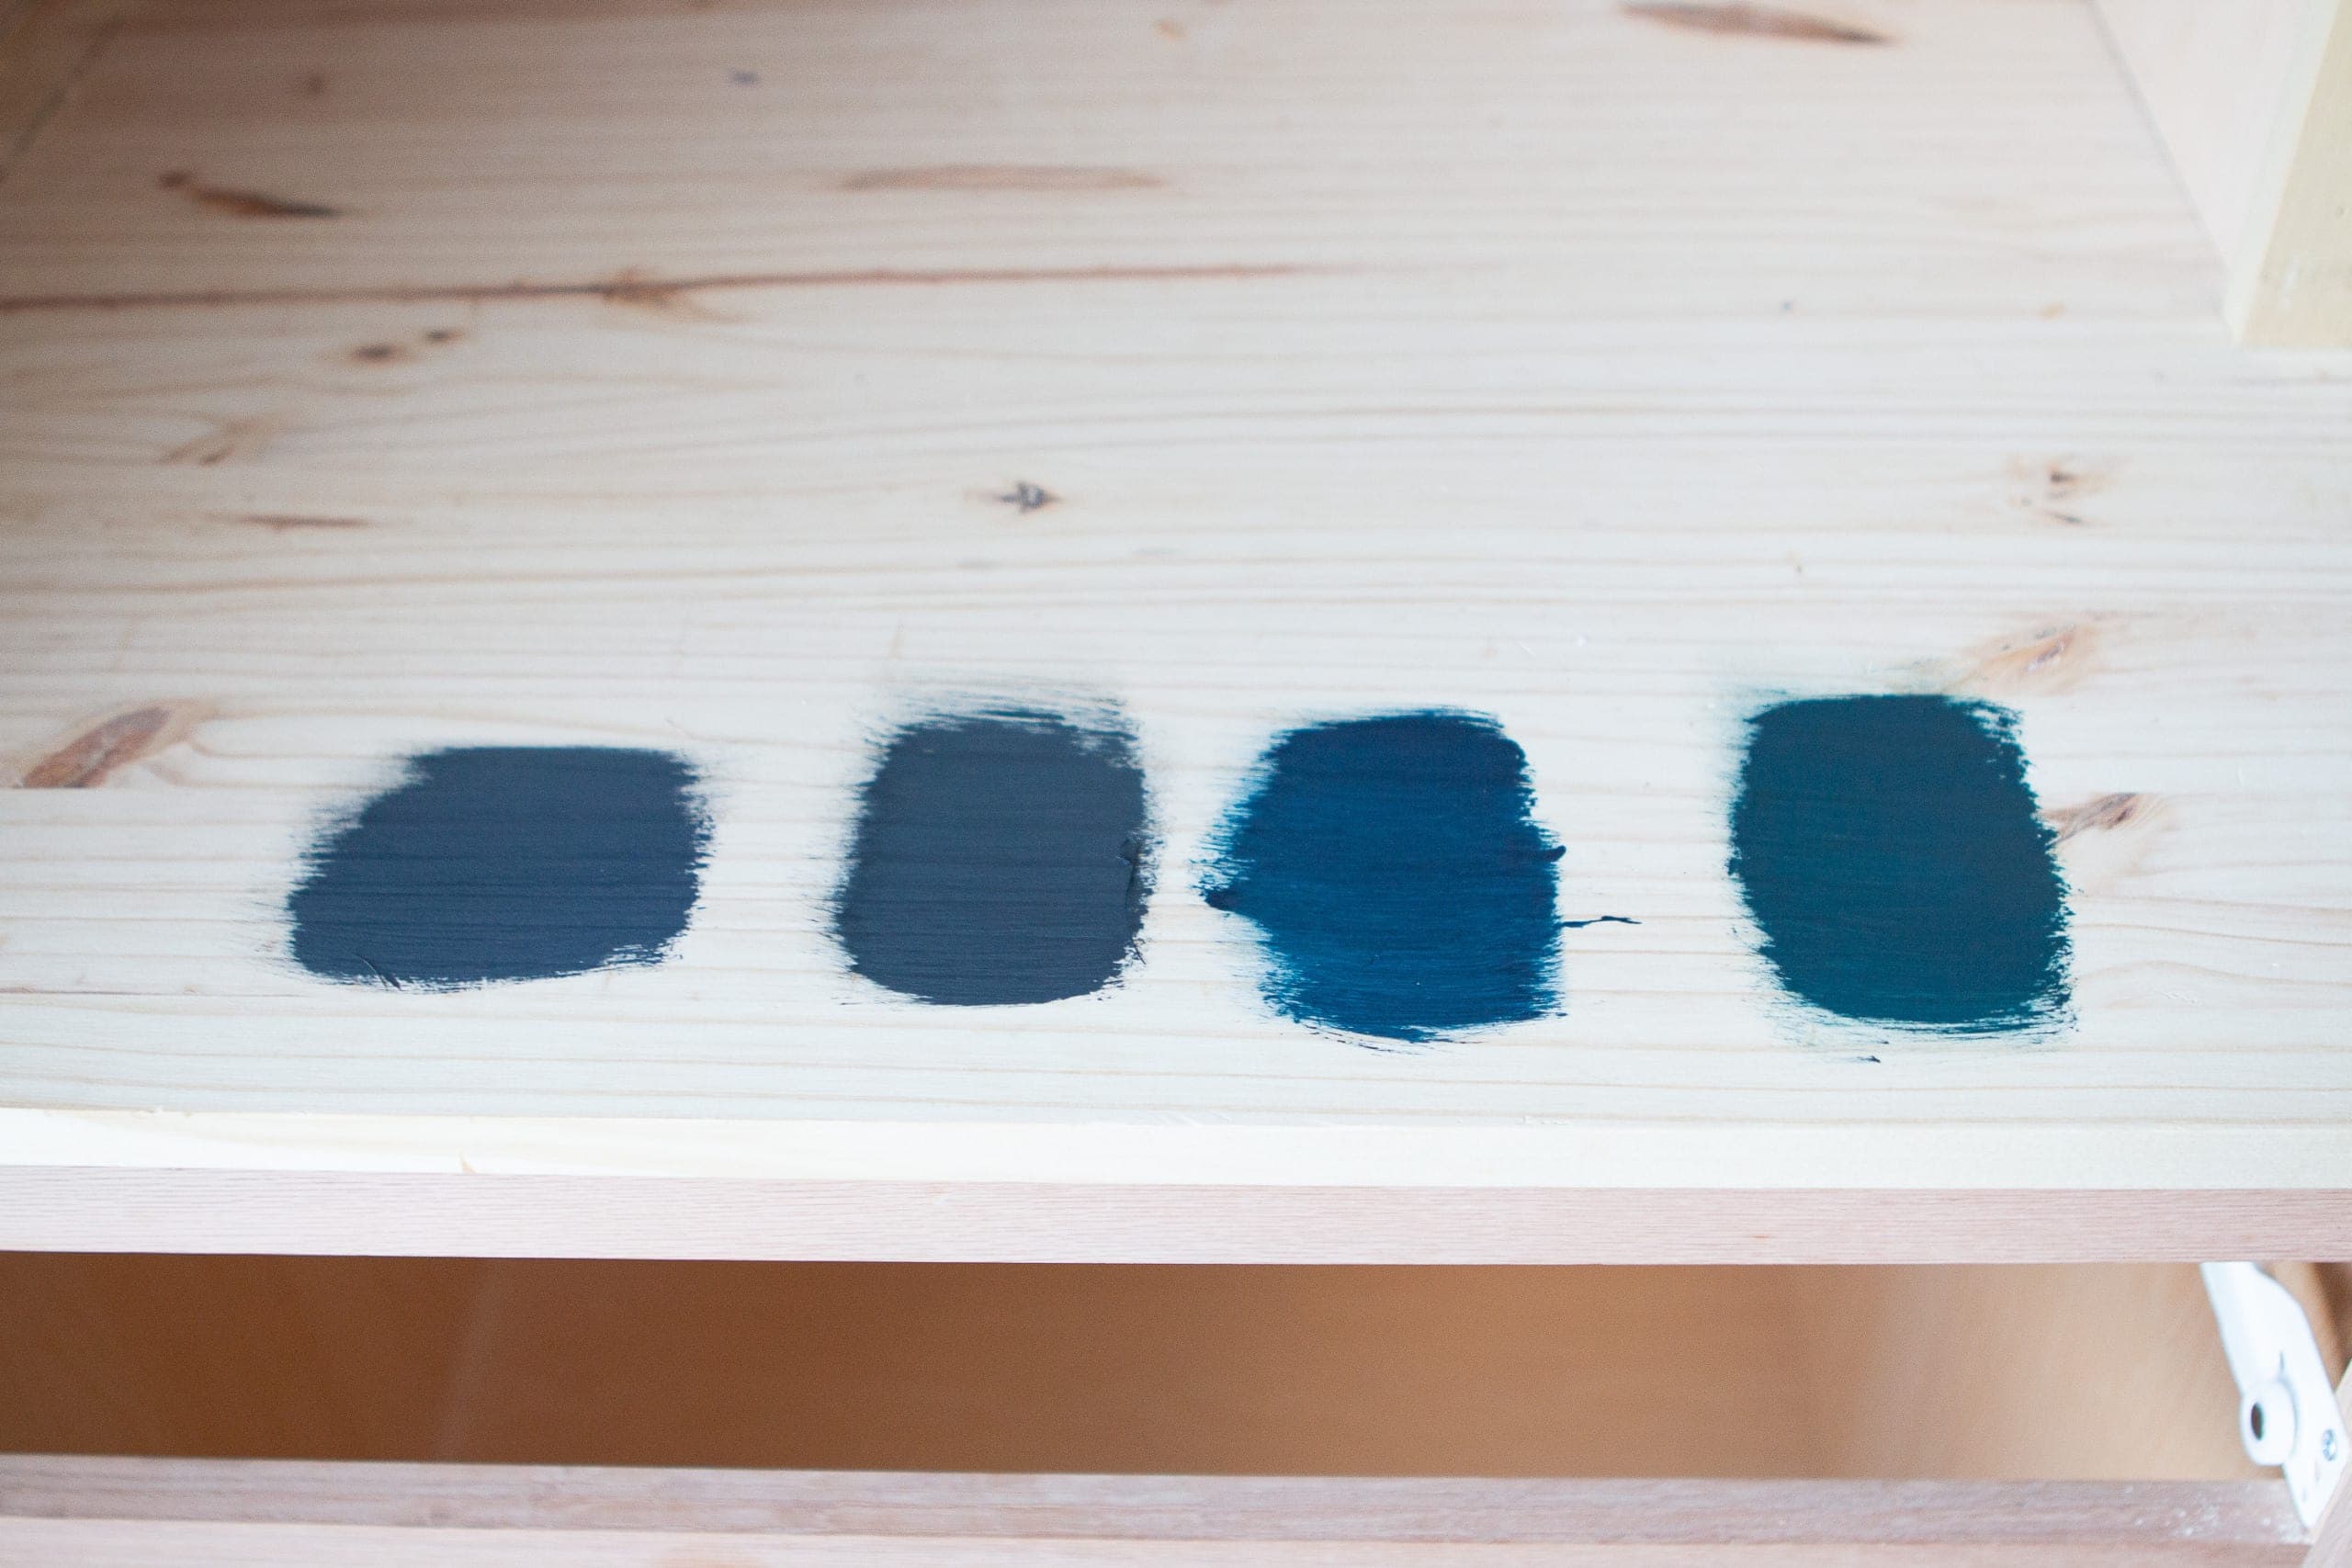
(From Left to Right) Valspar, Gotham Gray // Valspar, Chimney Smoke // HGTV Home by Sherwin Williams, Anchors Aweigh // HGTV Home by Sherwin Williams, Dark Knight
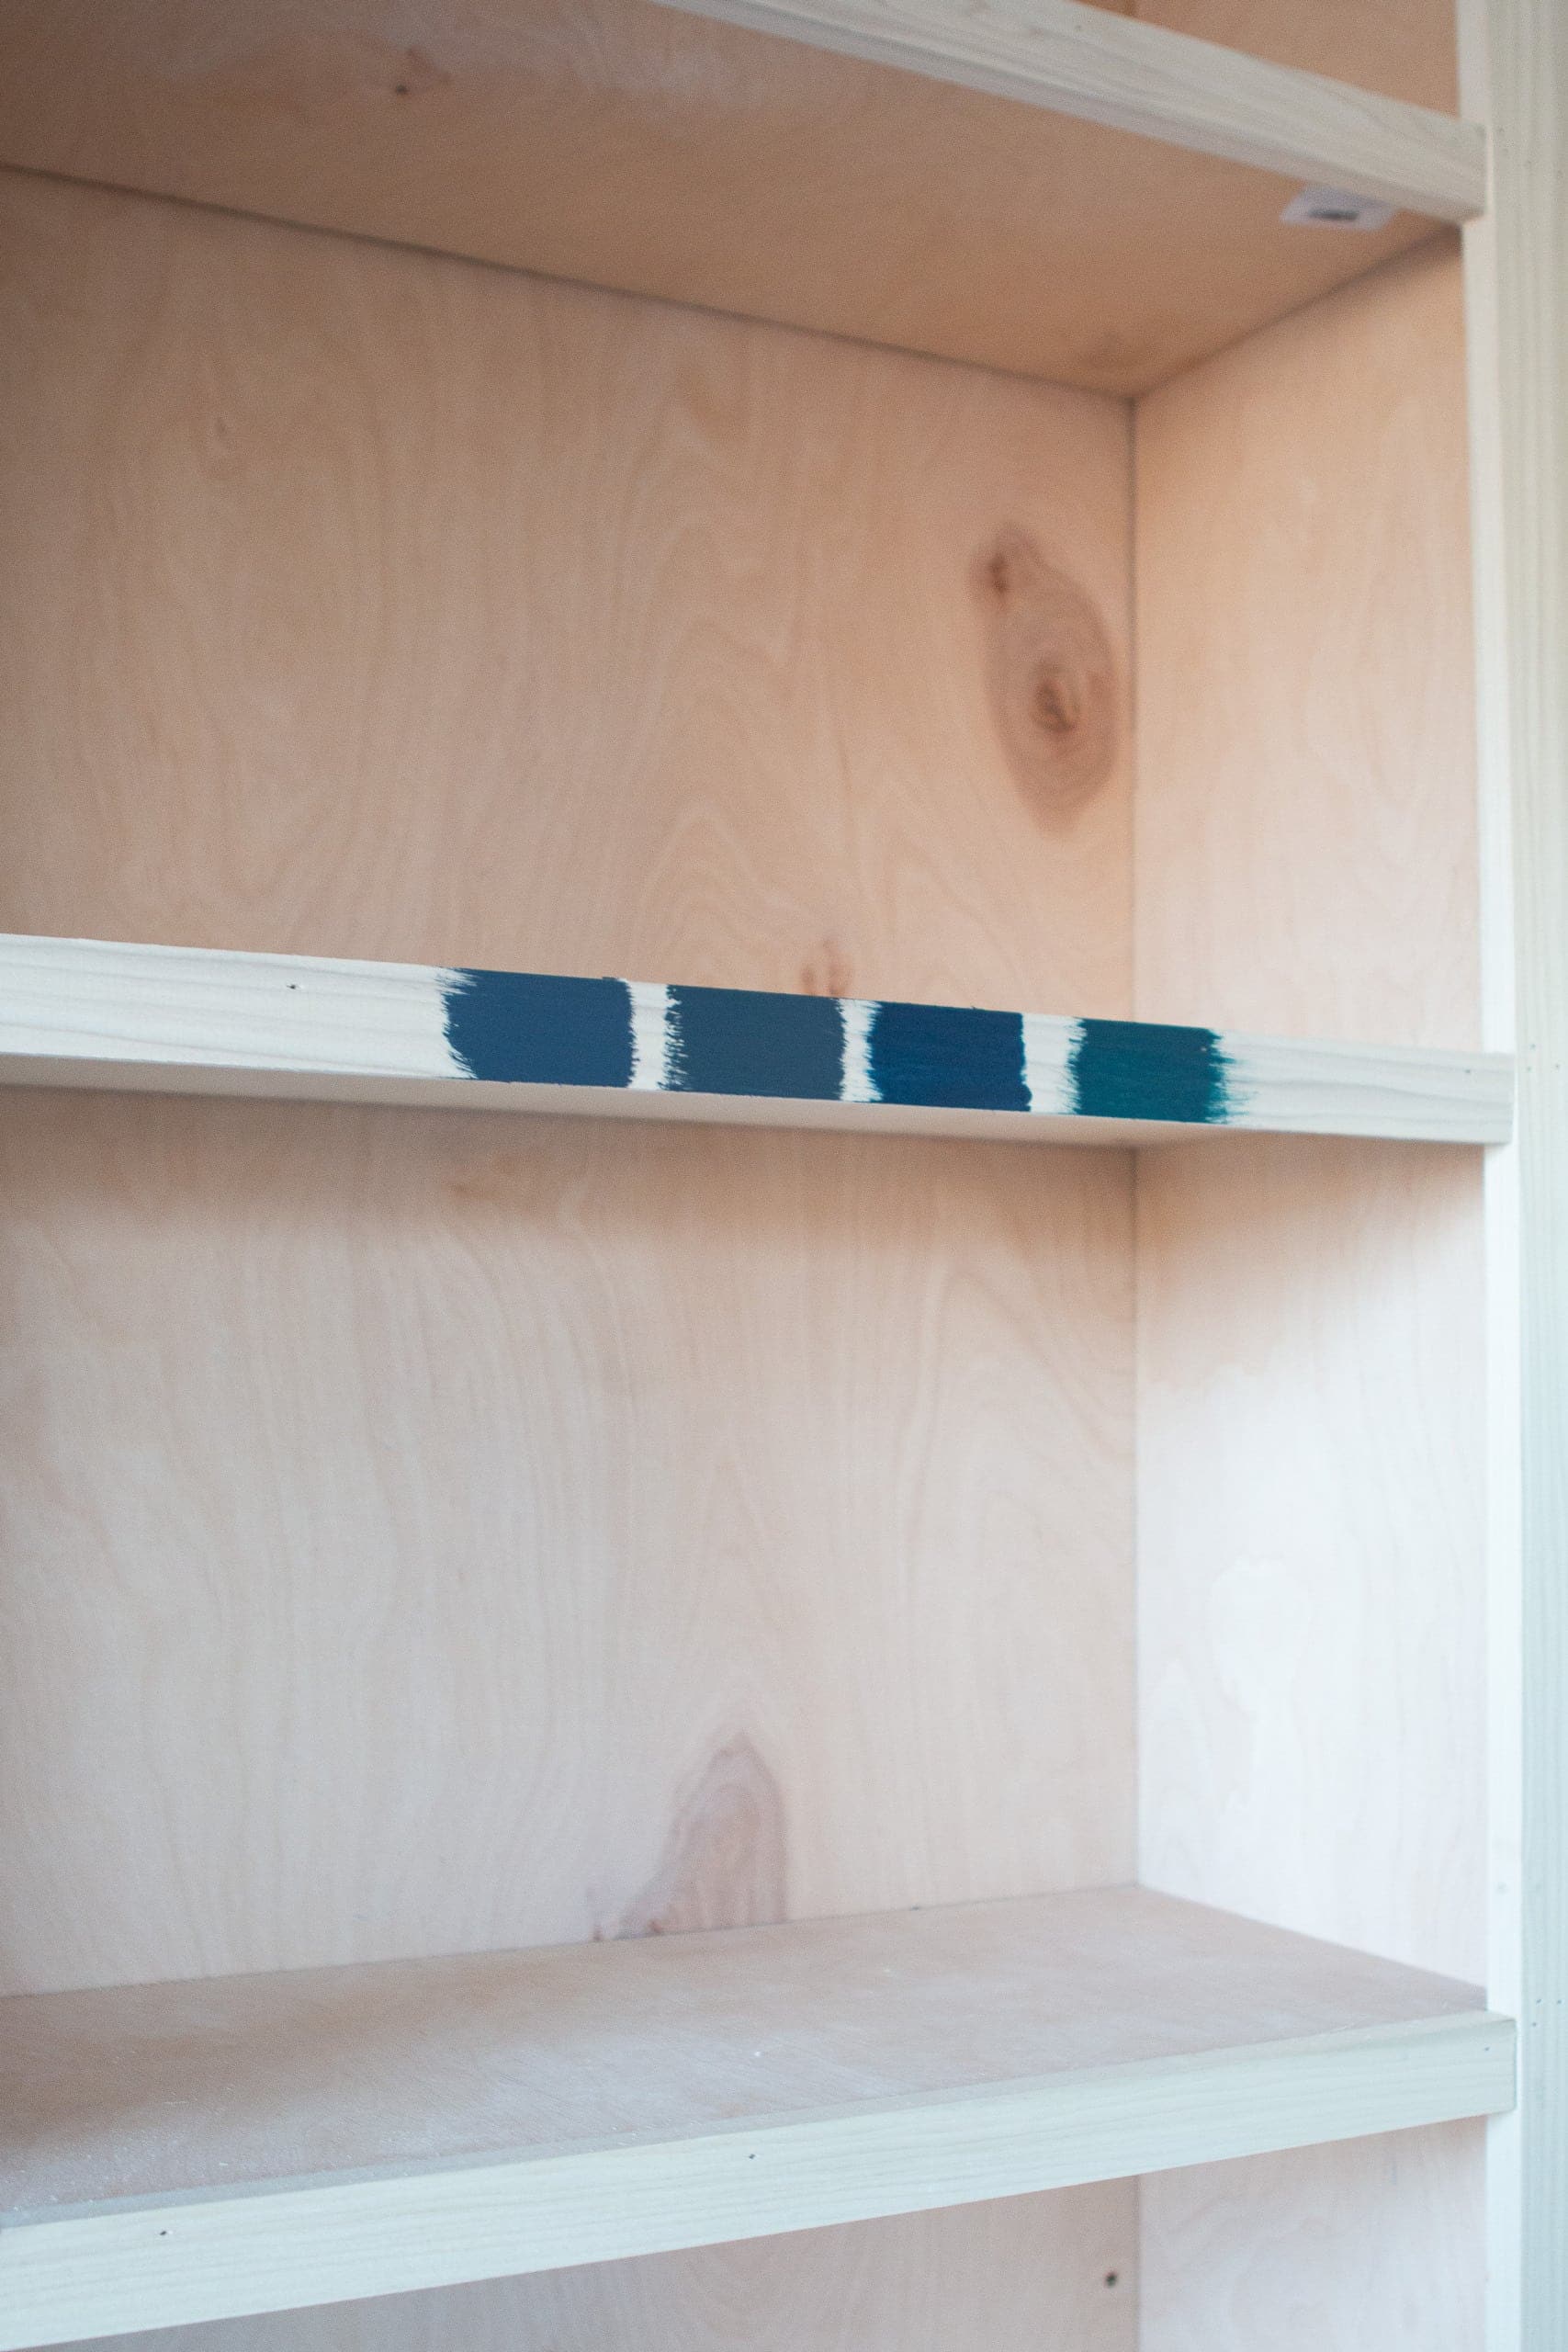 After seeing the colors on the wood, I immediately knew the two on the right were not the winners. One was too navy and the other too turquoise.
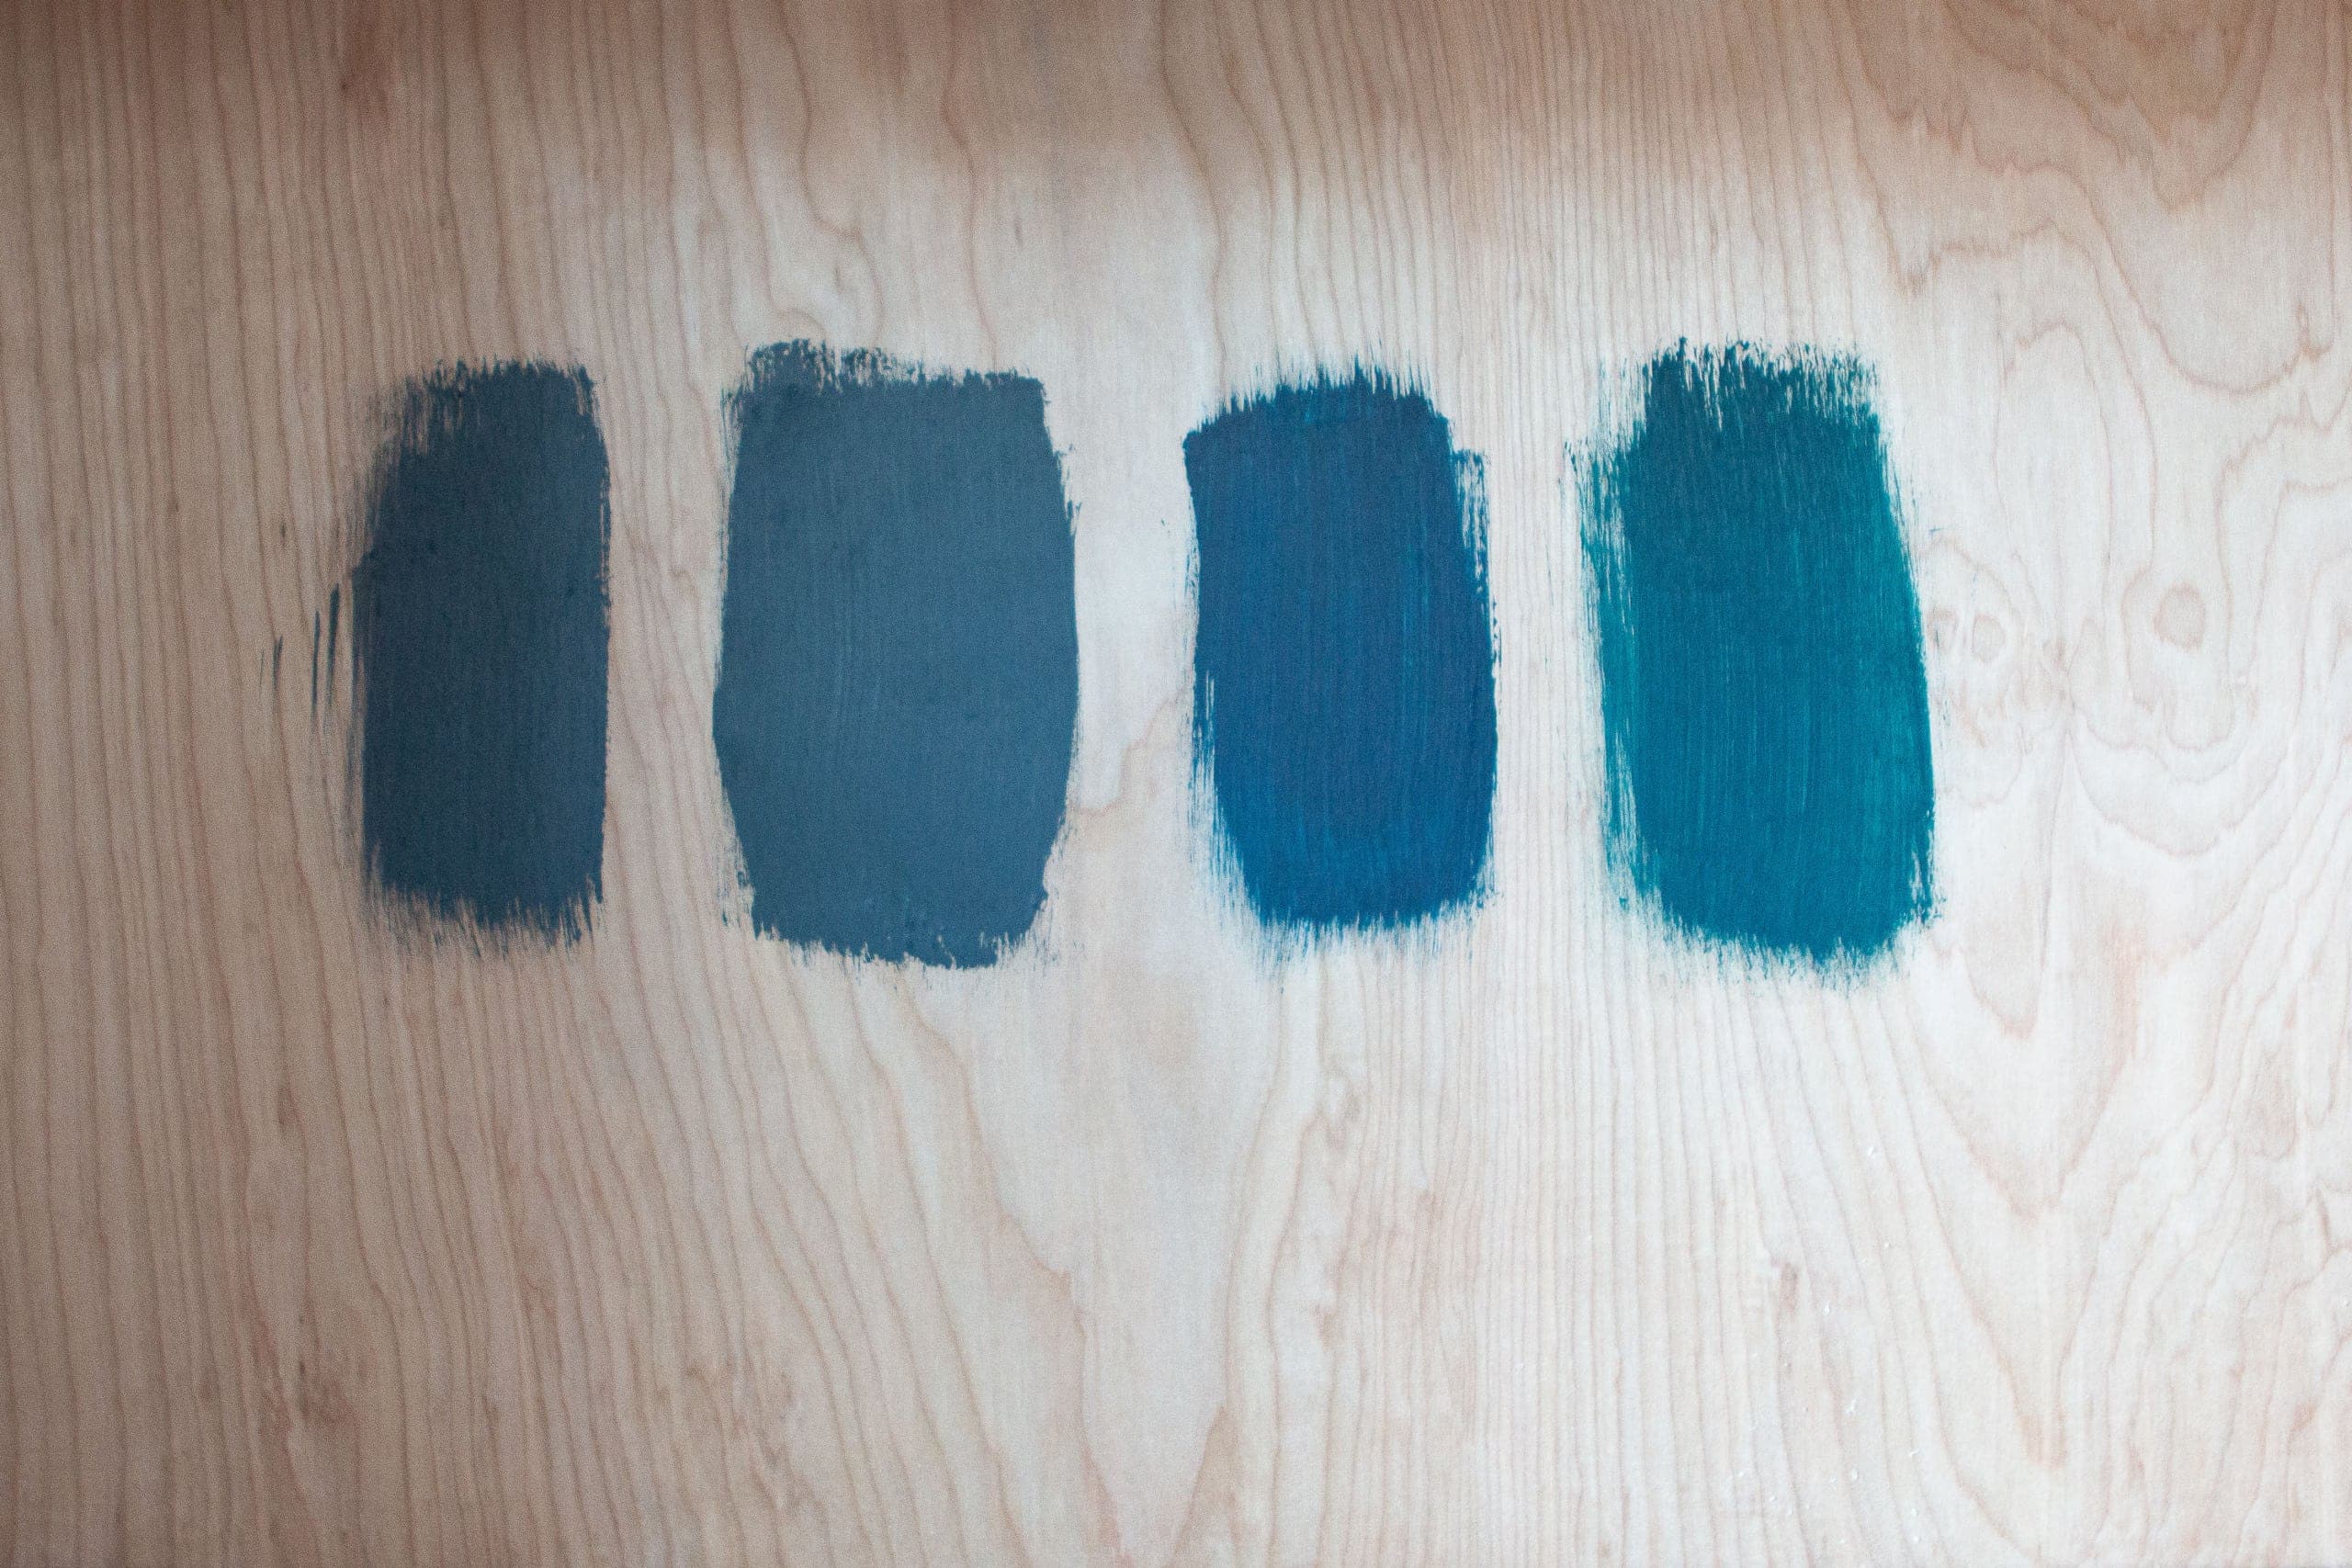
It was between the two on the left and I ended up going with Valspar’s Chimney Smoke! It’s a grayish dark blue and I know it will look amazing on these DIY built-ins we’ve worked so hard on.
The Prep Work
Next, it was time to prep these wood built-ins for paint. As I mentioned a minute ago, these are important steps that shouldn’t be skipped. Filling holes, getting rid of seams, and sanding all go a long way to make the end result look professional (and less DIY). I spread out these steps over the course of a few days during the week, knocking each one out in a few hours.
Fill Nail Holes
I had a lot of nail holes on the front of the built-ins where I attached the poplar trim. To fill those, I used painter’s putty. Just roll a small bit into a ball and press it into each hole. This should only take a few minutes and works really, really well.
Cover Recessed Screws
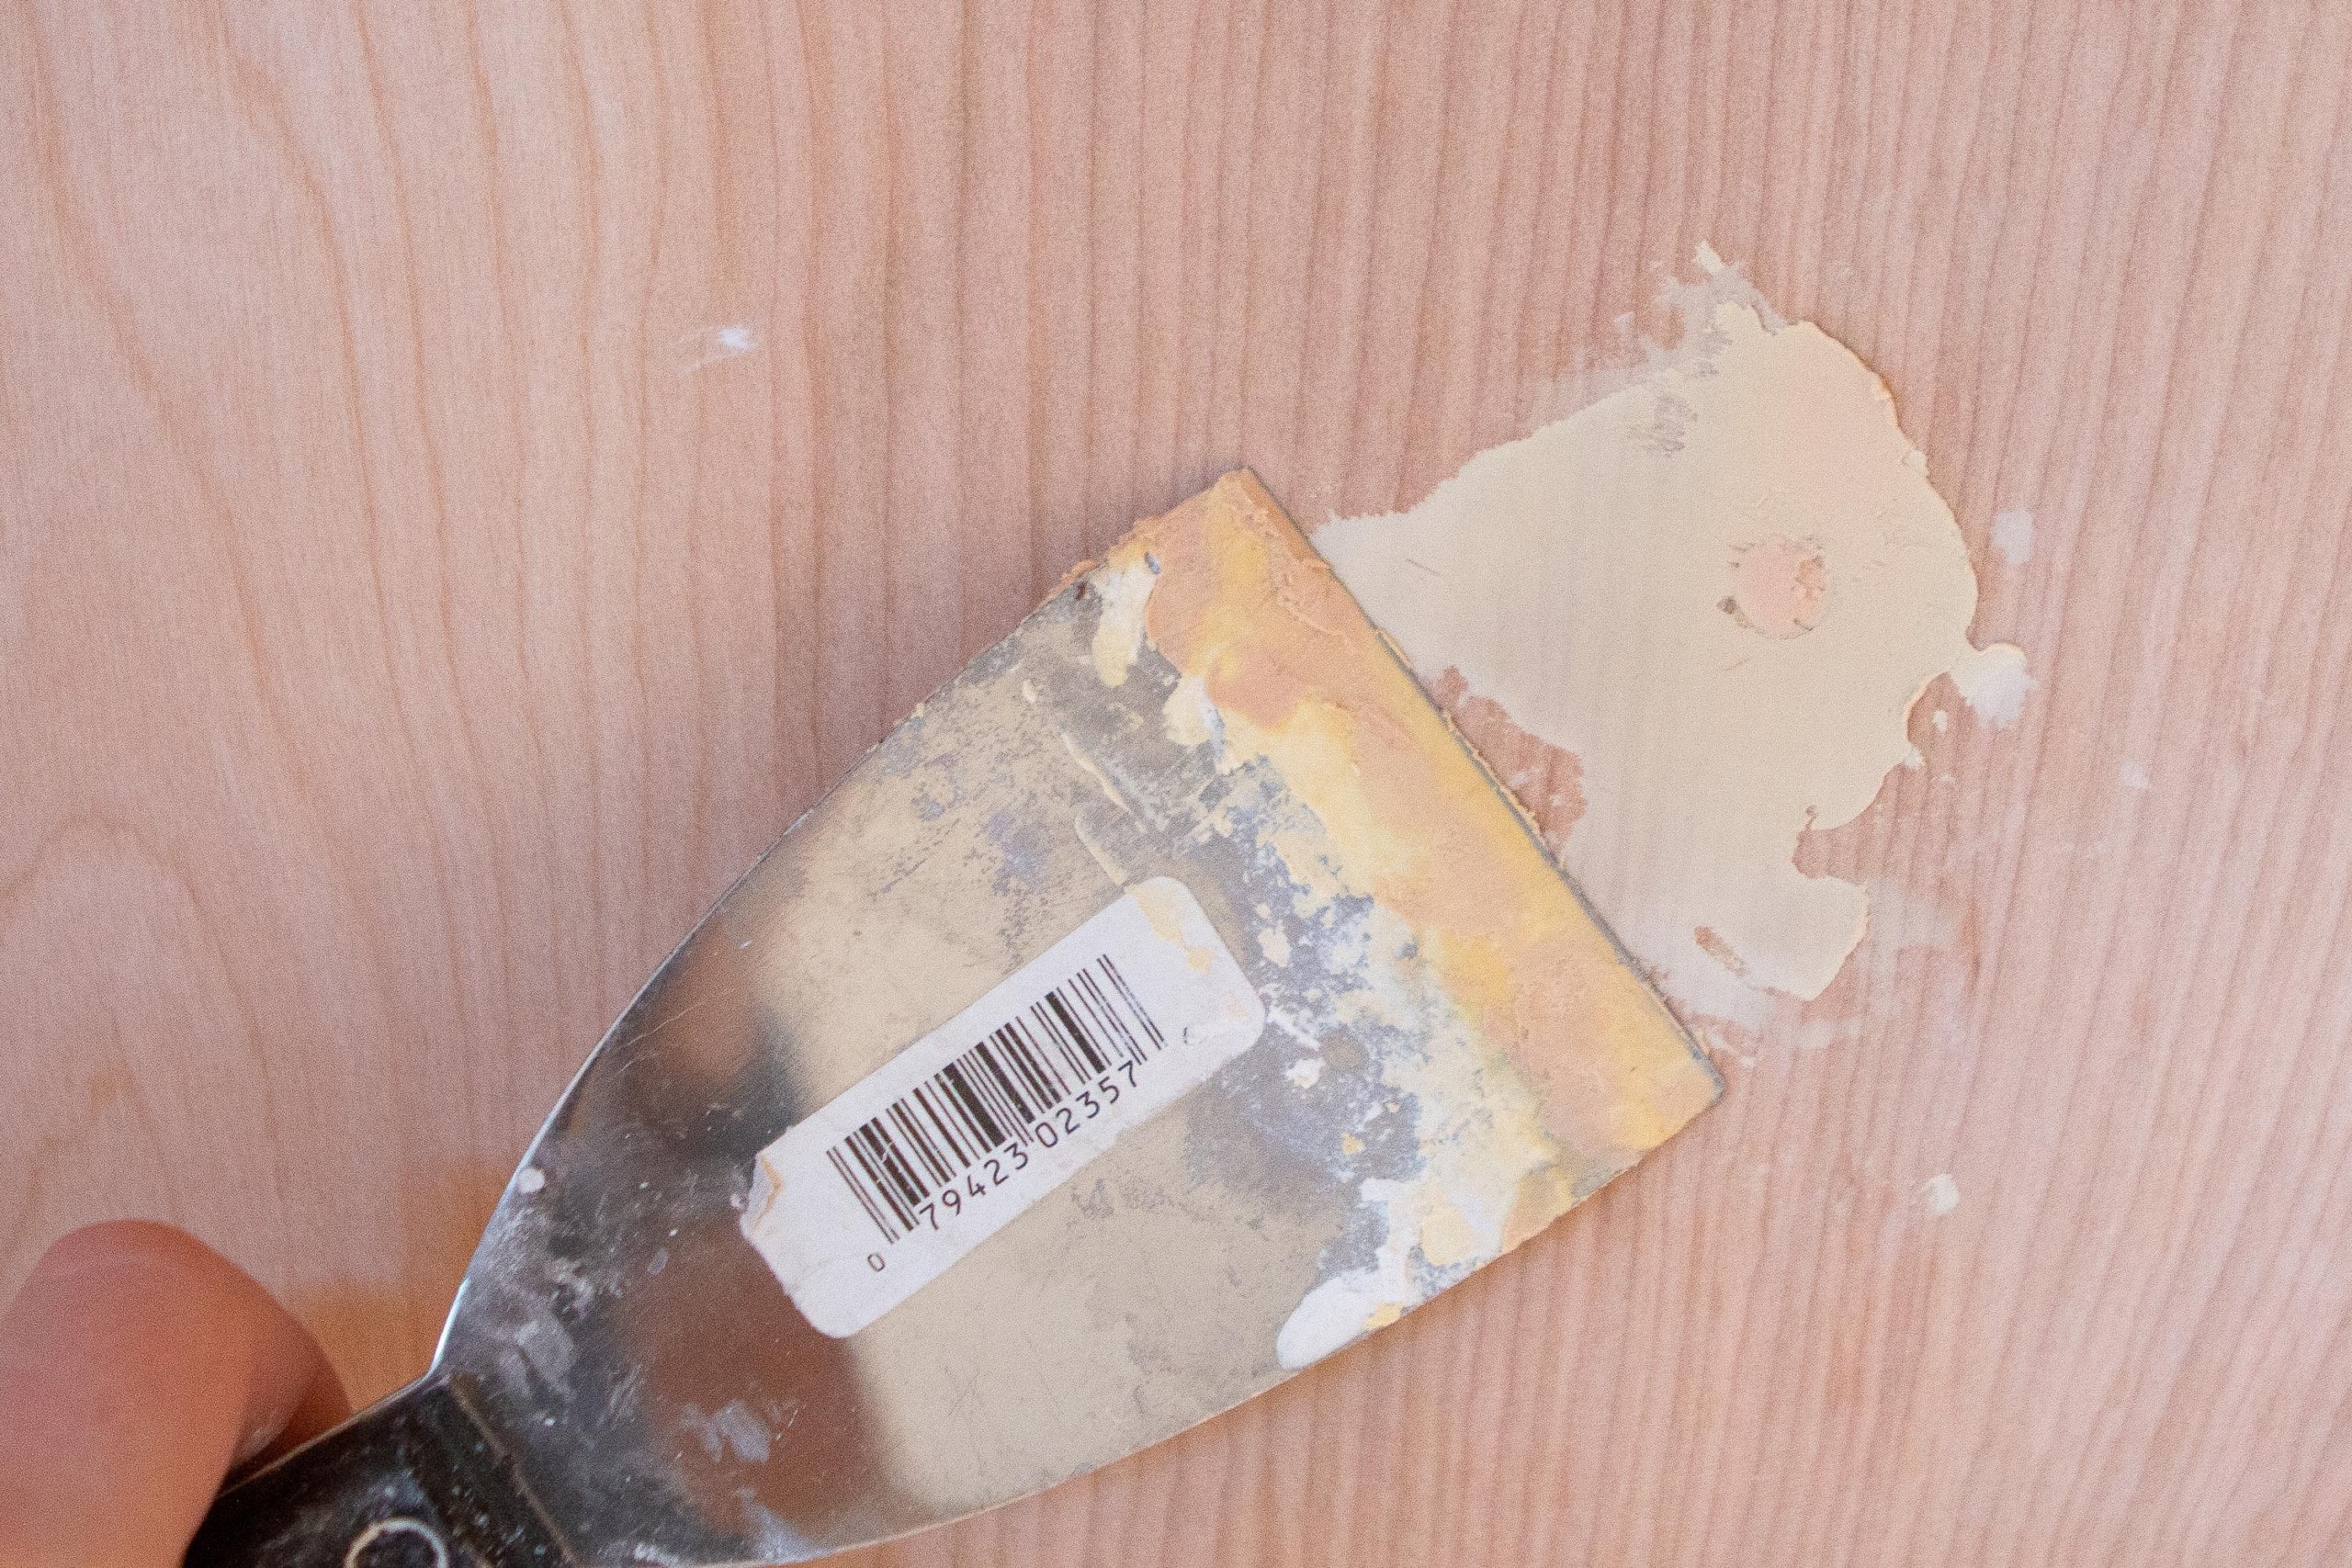
We had a lot of screws throughout, where we attached the bookcases to the back wall and to each other. Luckily, we recessed these screws using a countersink bit during installation. That meant I could just go over those spots with wood filler to completely hide each screw! Just take a putty knife, smear the wood filler on generously, and let it dry!
Sand…A Lot
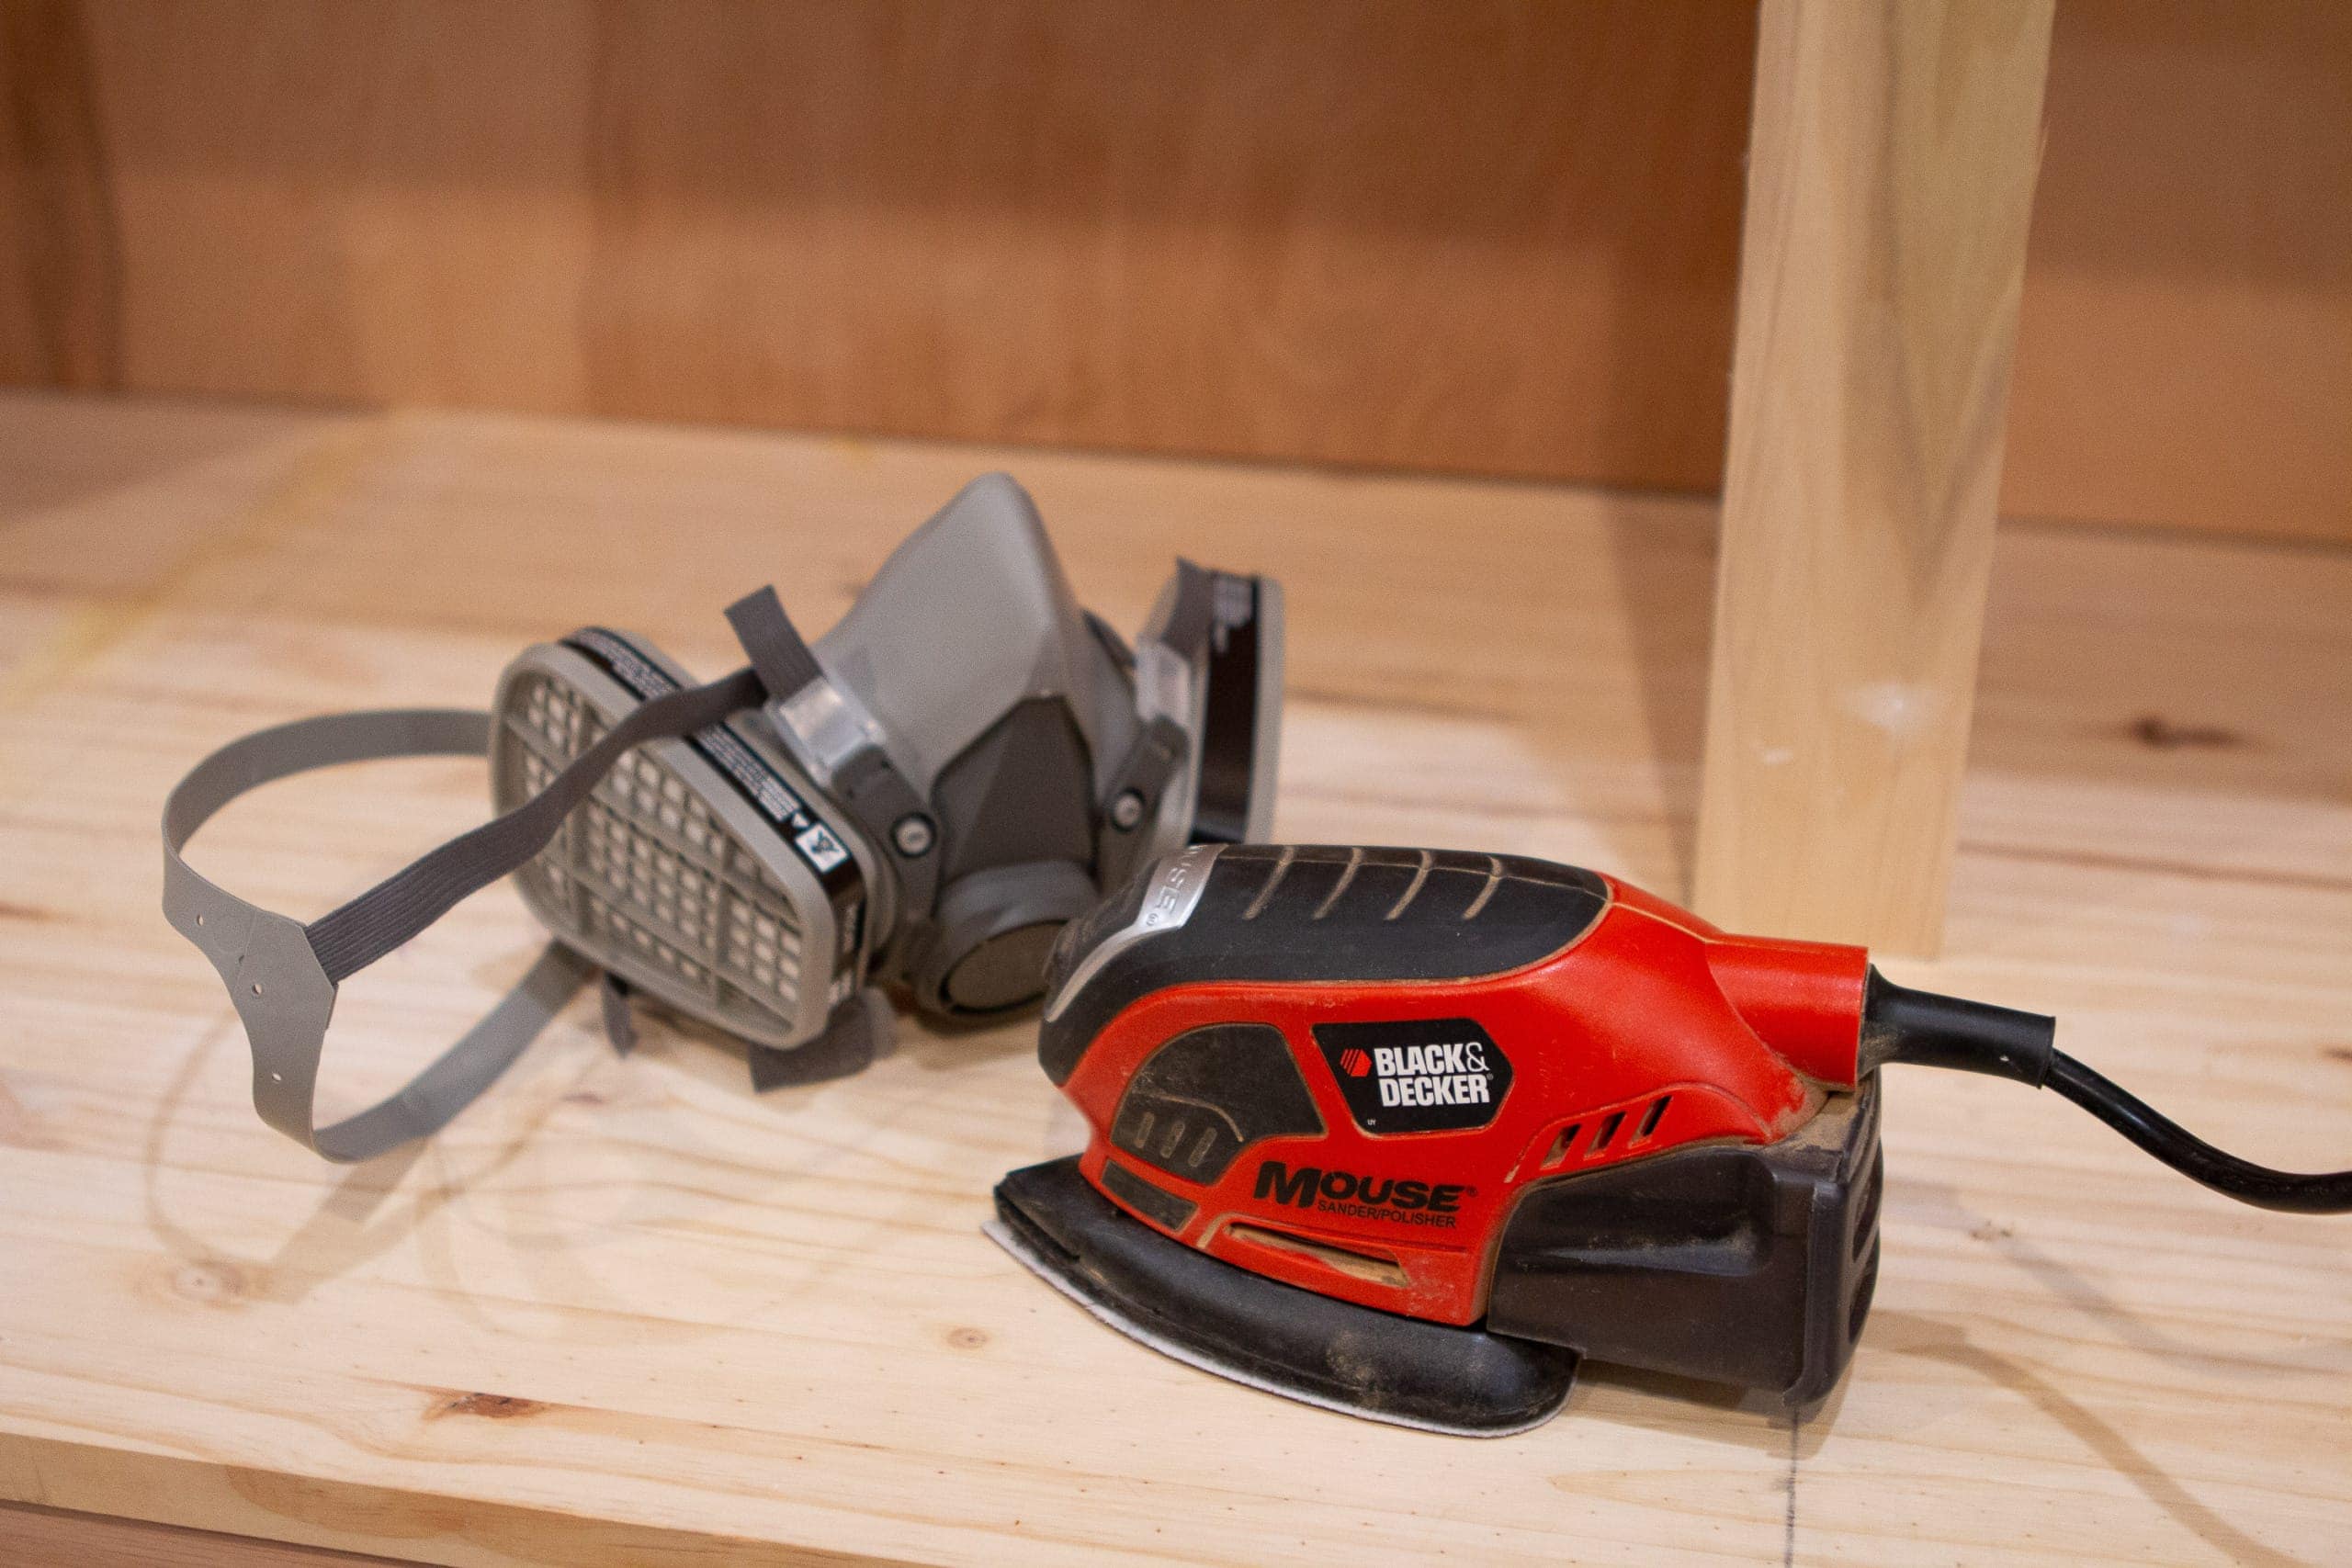
This was a time-consuming part of the prep work. First, let me urge you to wear a respirator, gloves, and goggles for this step because you will get dust everywhere and you don’t want to breathe it in! Originally I just had safety glasses on and my eyes were burning. Goggles to the rescue. This small palm sander is actually one of the first DIY tools I bought (like 7 years ago!) and I didn’t even realize I still had it. It worked great and I bought this variety pack of sandpaper to use on it.
I started with a rough grit (80), then a medium grit (120), and finally made it to a fine grit (220). I sanded every single surface of these DIY built-ins to make sure each was smooth and ready for paint. Go with the grain of the wood, don’t press too hard, and change your sandpaper often. Also, make sure you go over your wood filler areas well with the rough grit to sand it down nicely.
In the end, the wood should all be smooth to the touch. When I was done sanding, I used tack cloth to wipe down every shelf and get rid of any dust on the surface.
Caulk.Every.Seam.

Then it was time for my least favorite part, caulking. Caulking isn’t necessarily hard, but it is definitely messy! I recommend caulking every single seam on the built-ins. That’s a hell of a lot of seams. Caulk is good because it’s flexible and it should be used where two planes meet. It hides any imperfections and makes a piece like this look like it’s all one piece (instead of multiple pieces of wood put together).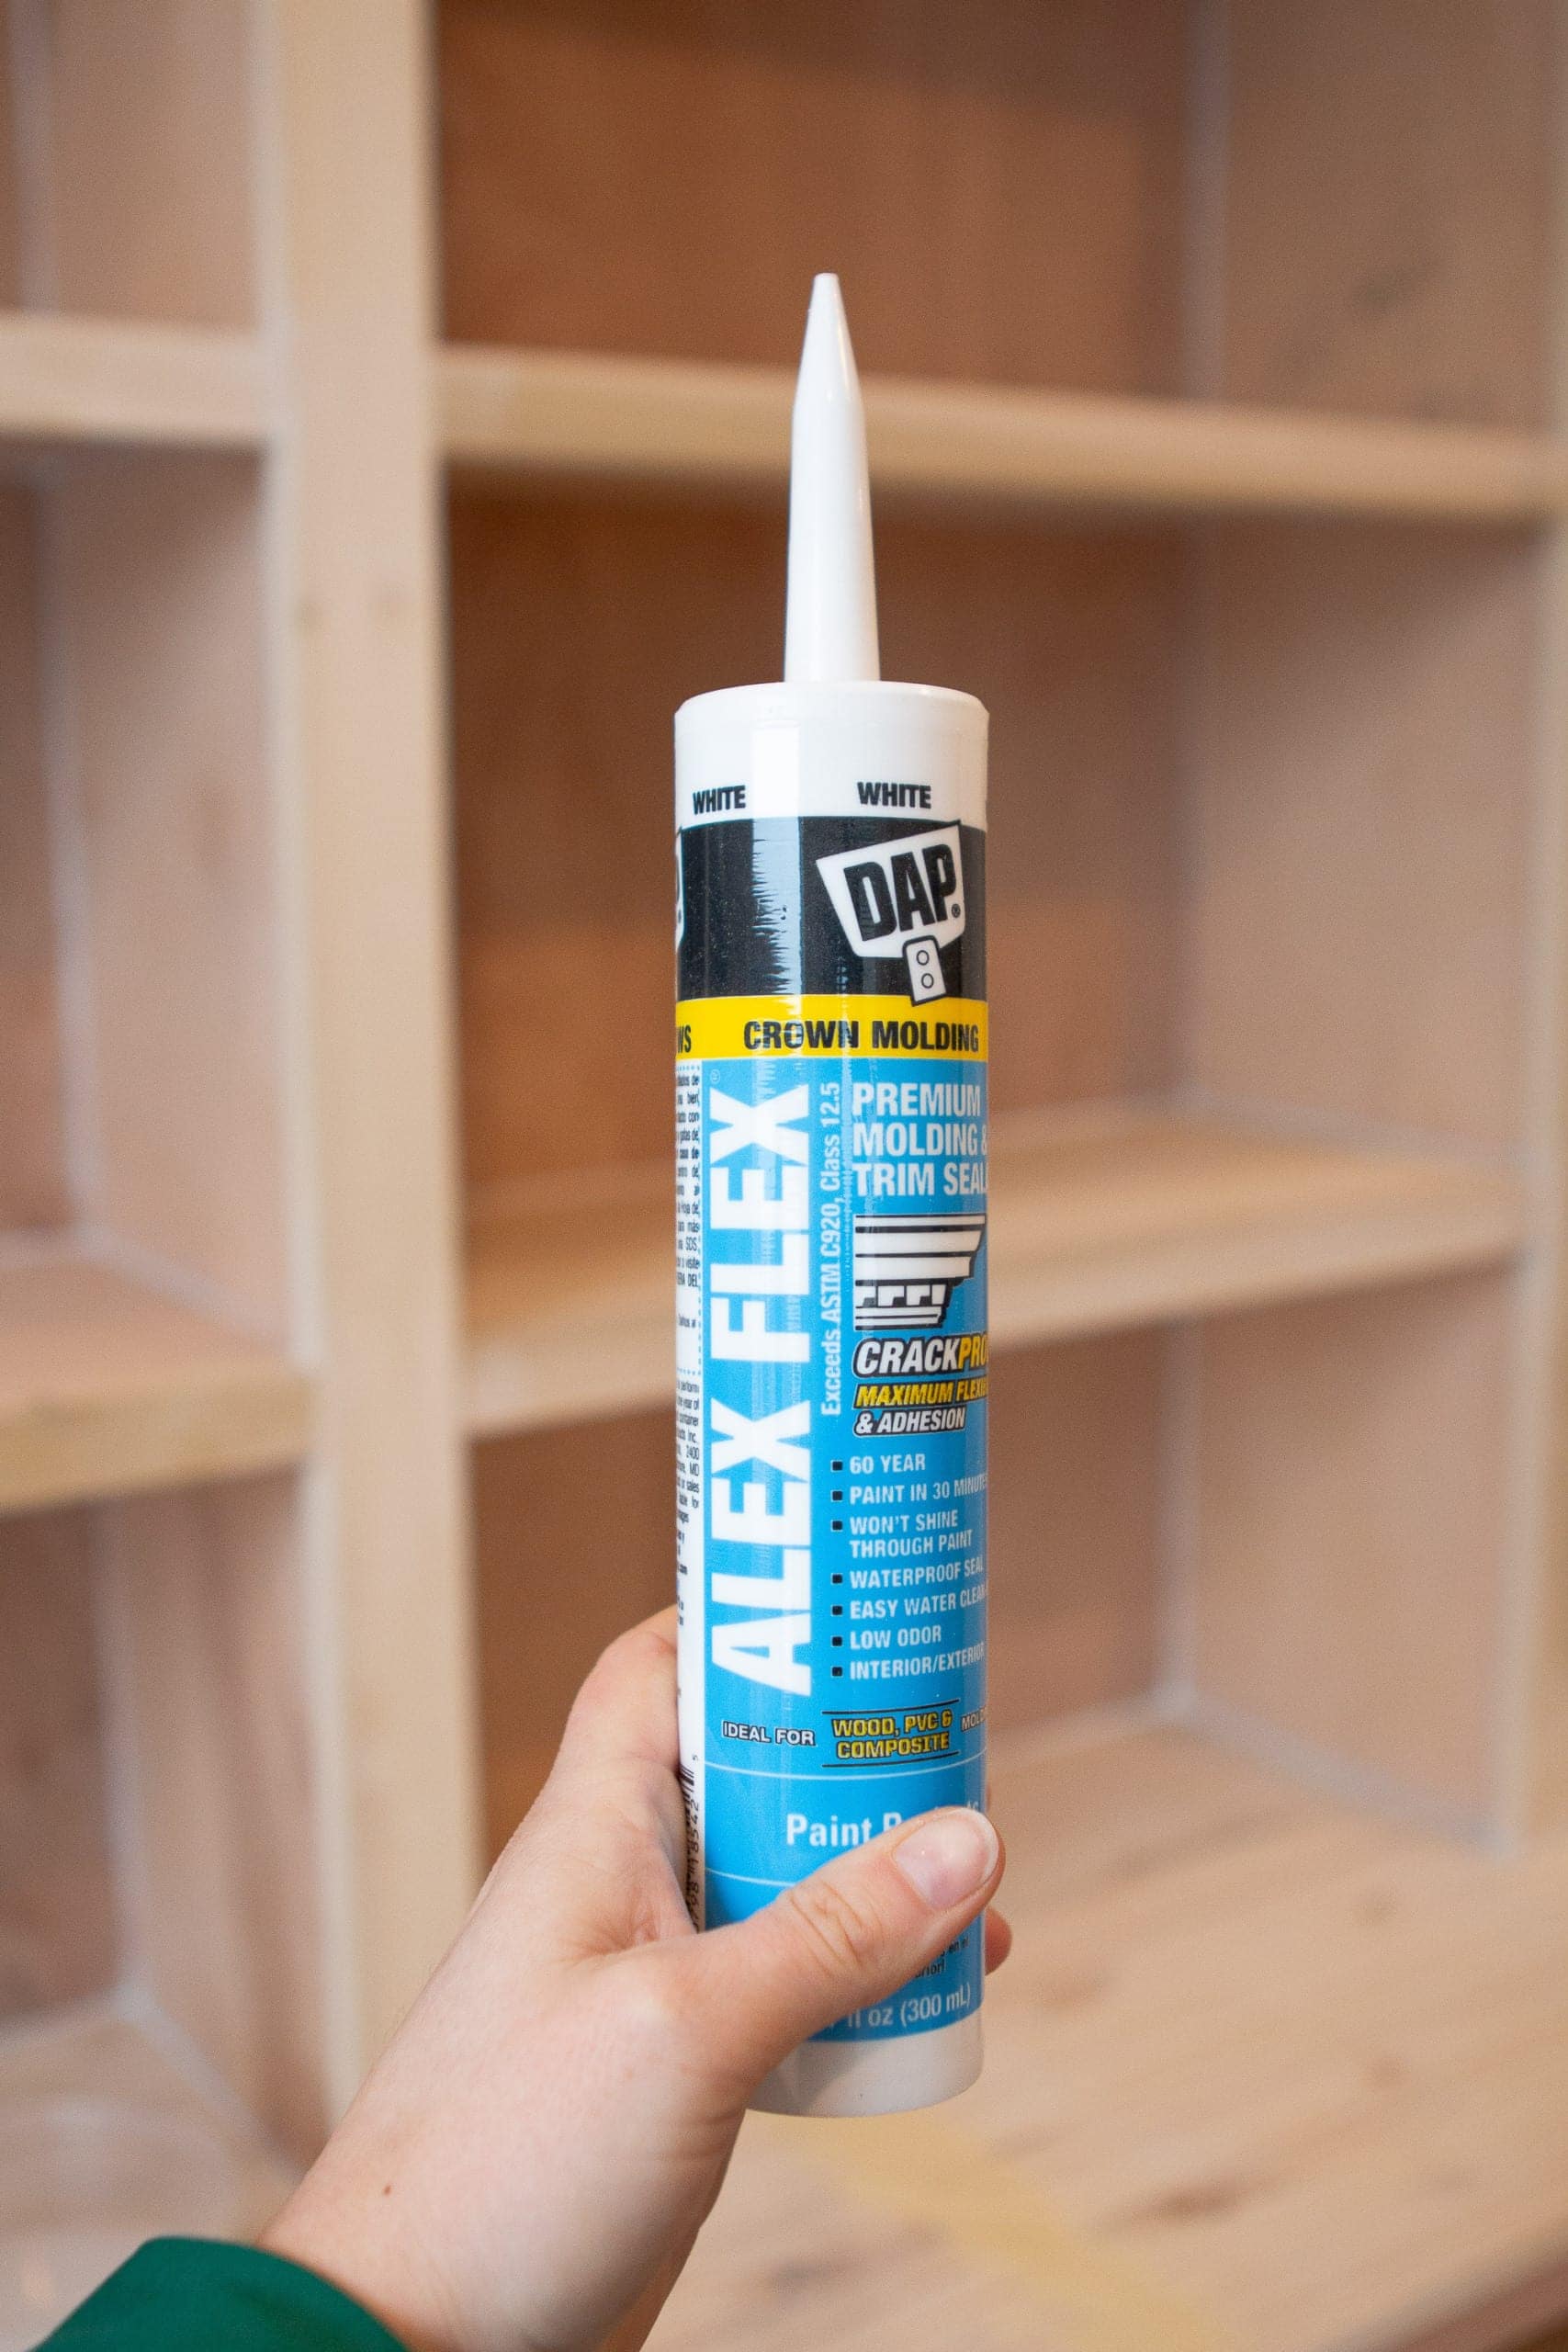
This is the caulk I used. Latex caulk should be used for woodworking projects, whereas silicone caulk is the kind you would use in a bathroom or for a tiling project. Luckily, latex is a lot easier to use than silicone and it’s easy to clean up! Here are some of my best tips for caulking…
- Wear gloves. It gets messy.
- Keep a bowl of water handy and change it often.
- Buy tons of rags.
- Cut the tip of the caulk at an angle so the opening is a 1/4 inch hole (more than that and you’ll have a mess on your hands).
My technique is to run a small bead of caulk along the seam. I then dip my finger in water and smooth it along the caulk line. I take a damp rag and wipe any excess off the surrounding walls. This does the trick! It took me many hours to get these built-ins caulked, but once I was done it looked amazing.
Wipe Down Reaaaally Well
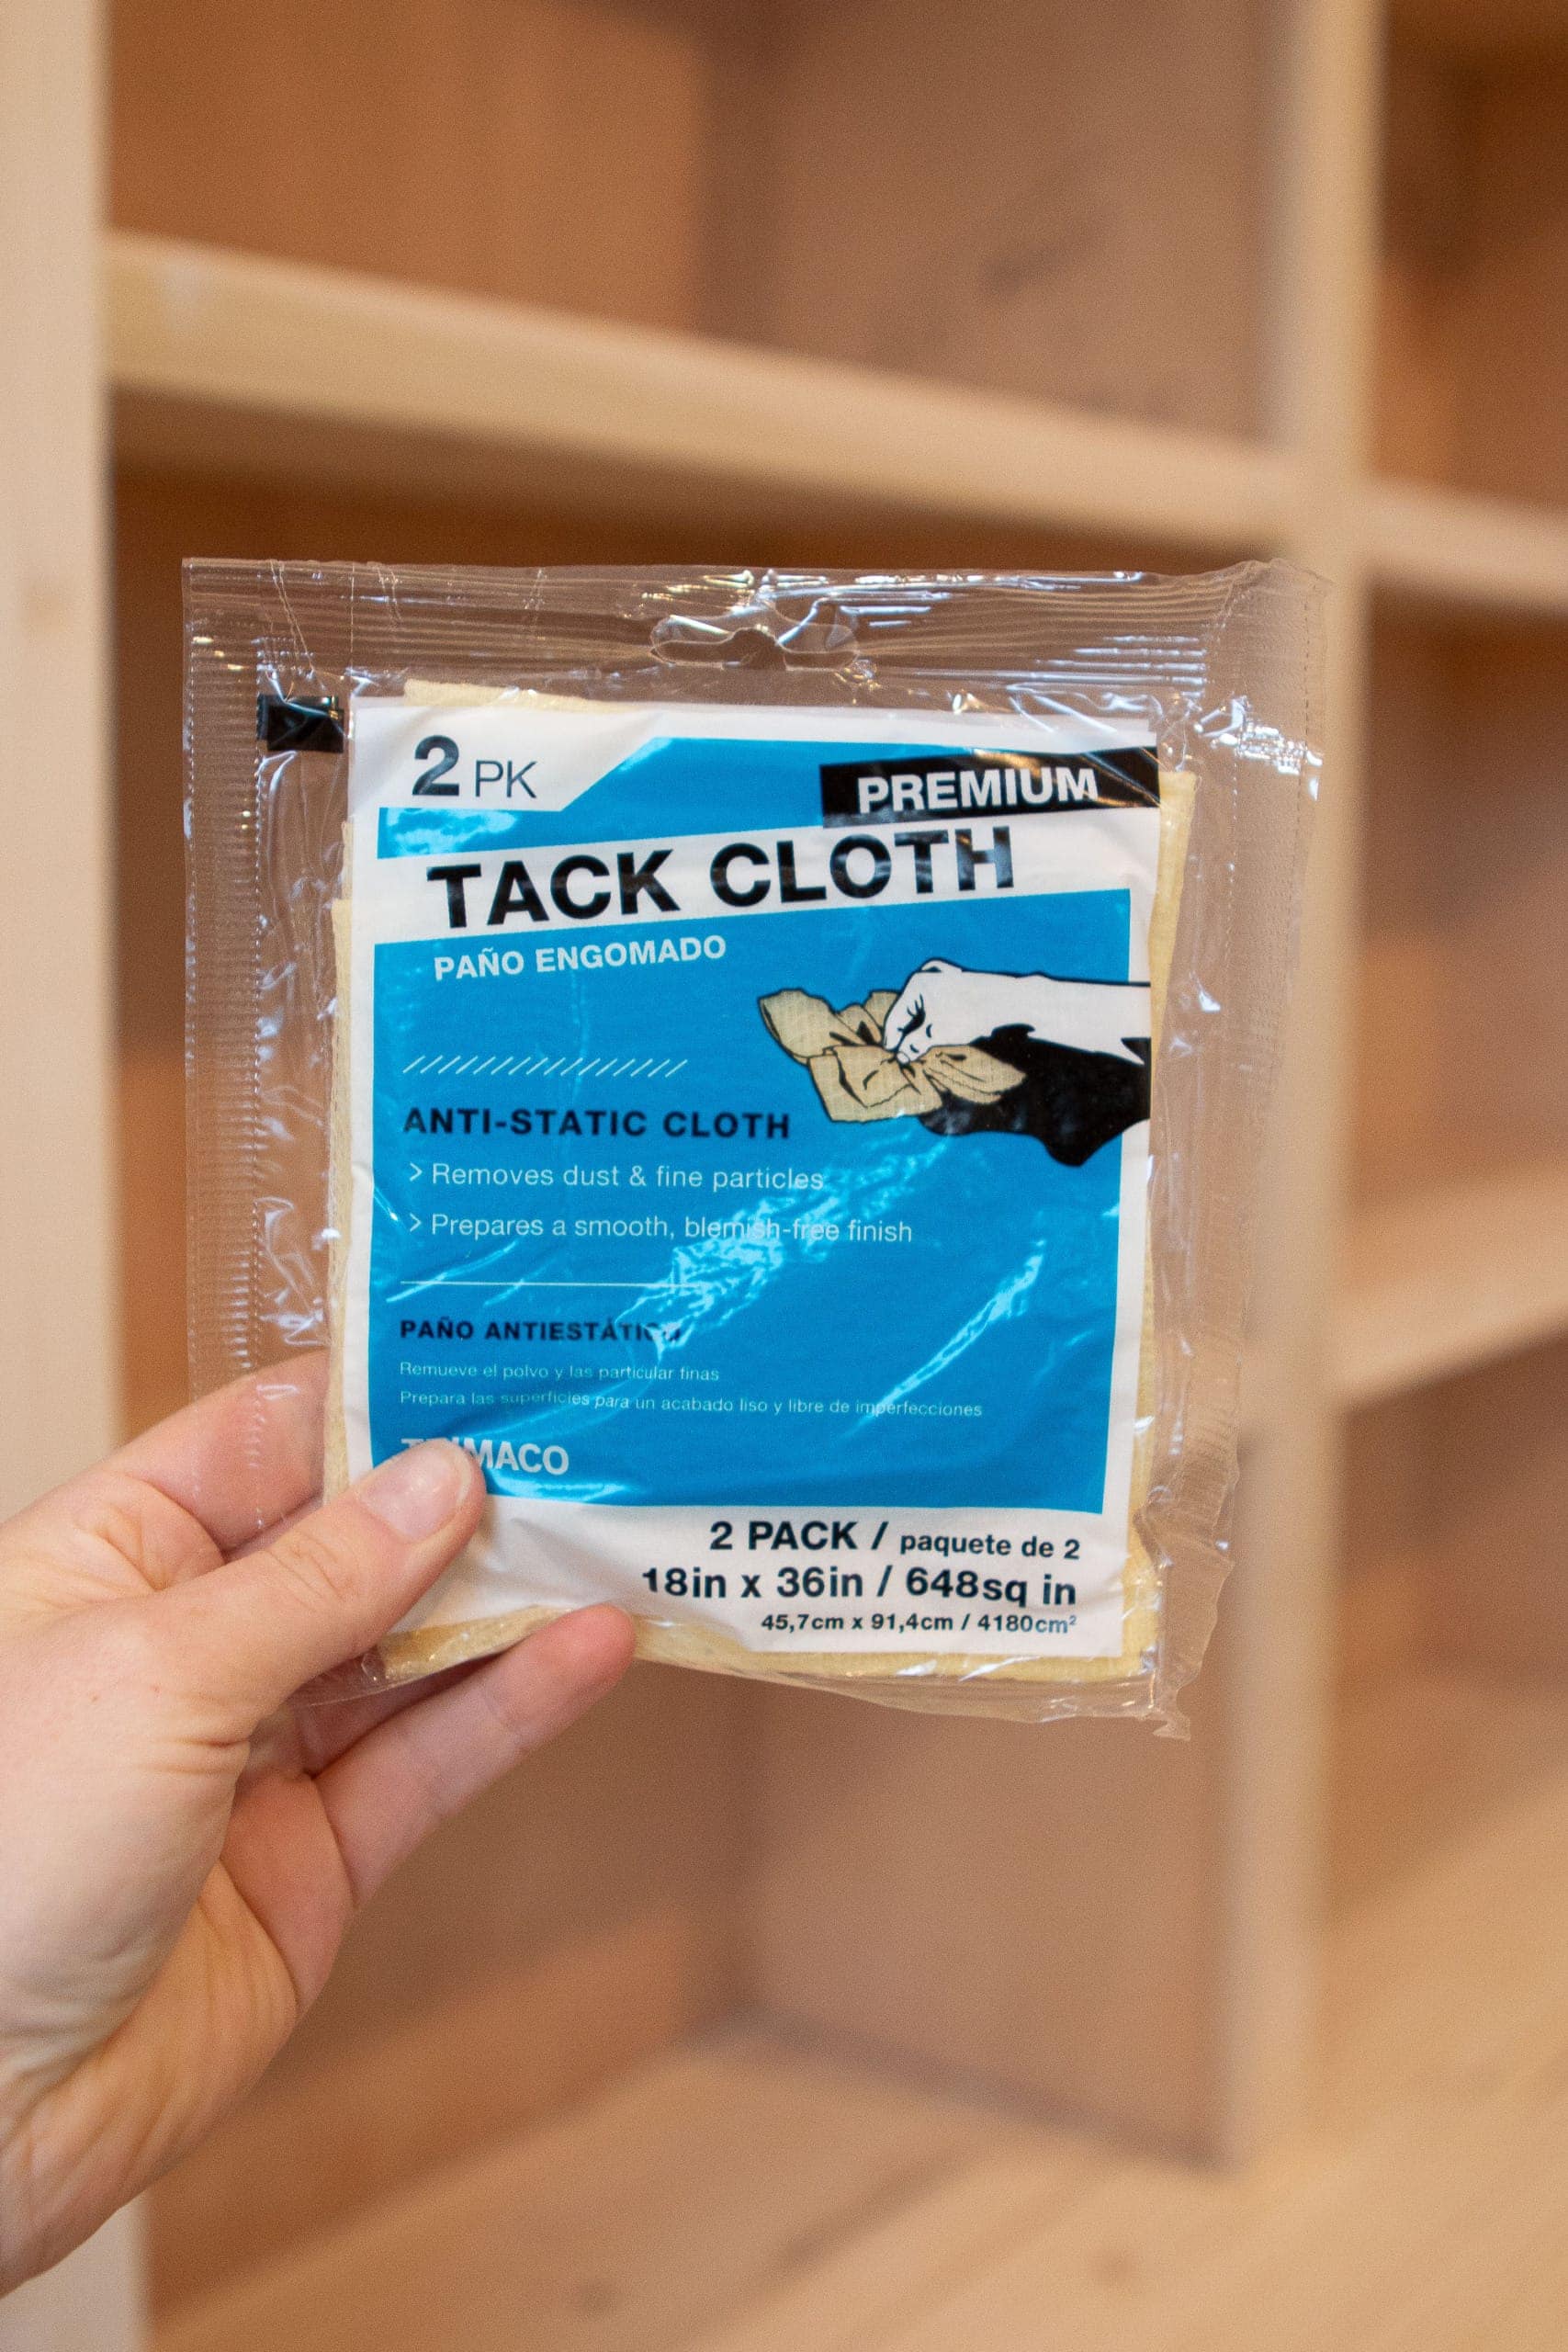
Once the caulk dries, you can wipe everything down with tack cloth again to get it really really clean!
Prepping the Room

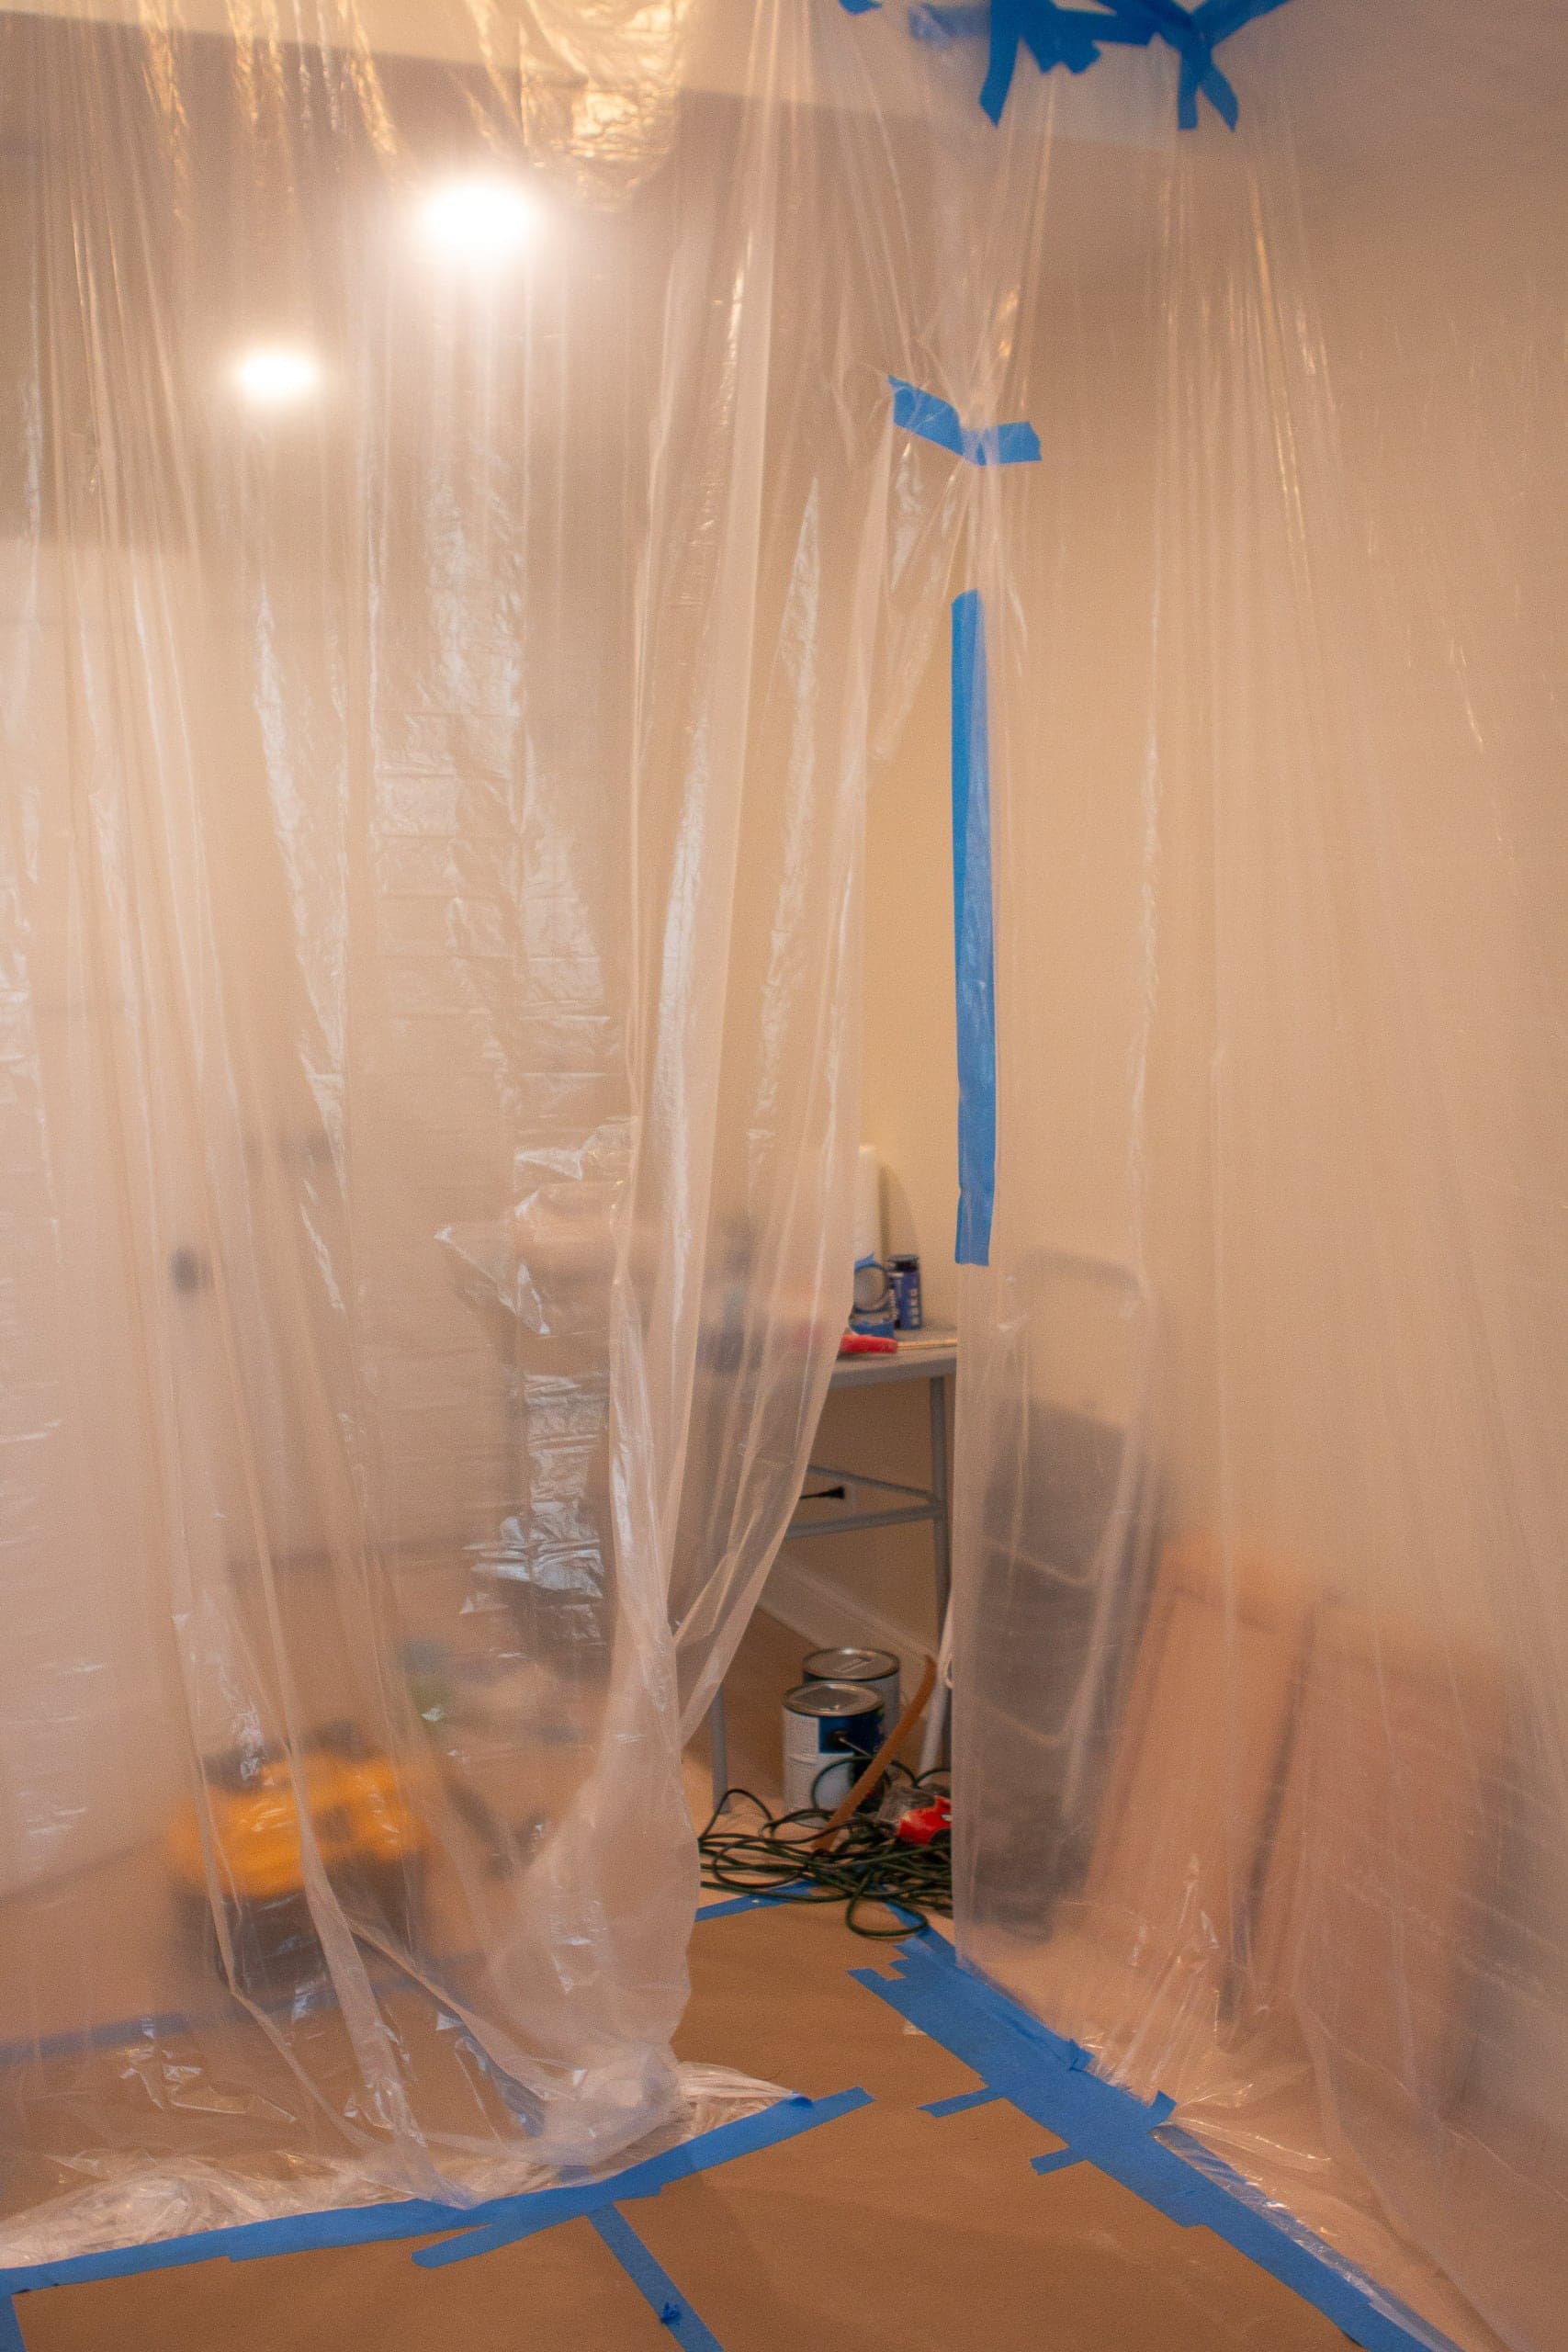
At this point, the built-ins were ready for paint, but the rest of the room wasn’t. Because we were planning to use a paint sprayer for this project, we had to cover the rest of the room because we didn’t want any surface, except the built-ins, to be dark navy. Yep, that meant going “Dexter style” on this space to put up tarps, plastic, and cardboard on every surface near the built-ins. 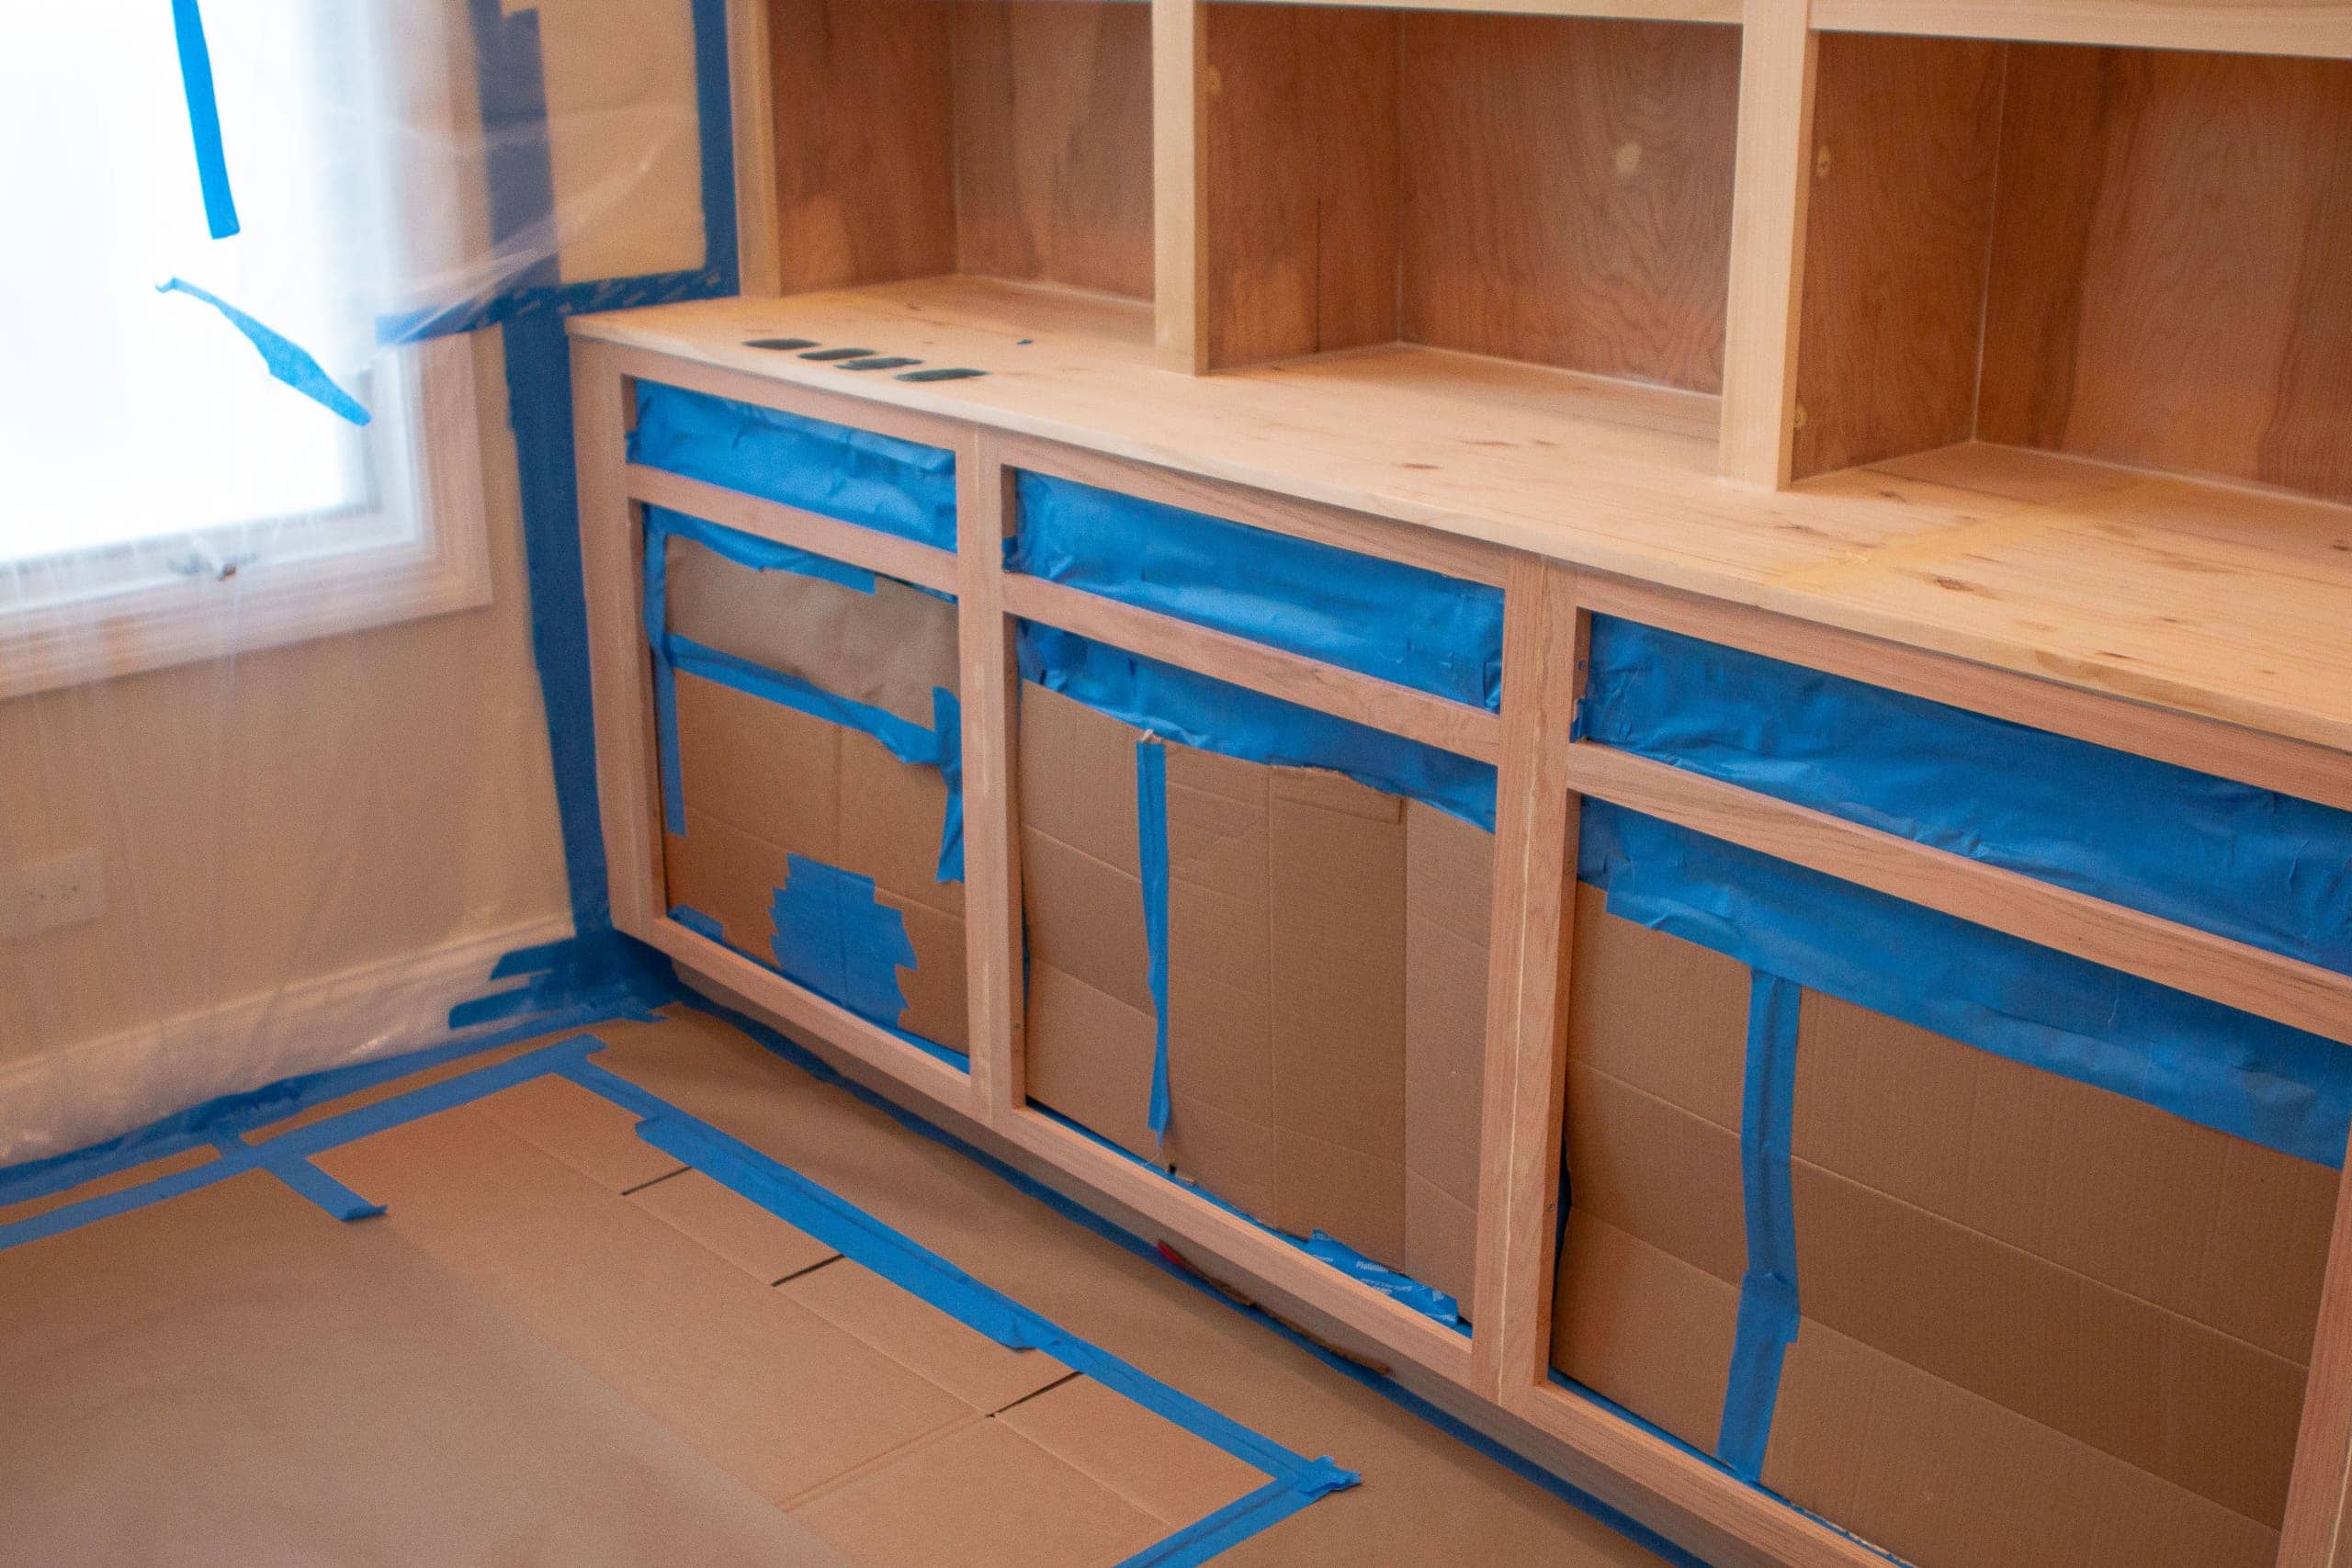 Definitely take time for this step because you don’t want any navy overspray on your walls, ceiling, or floors.
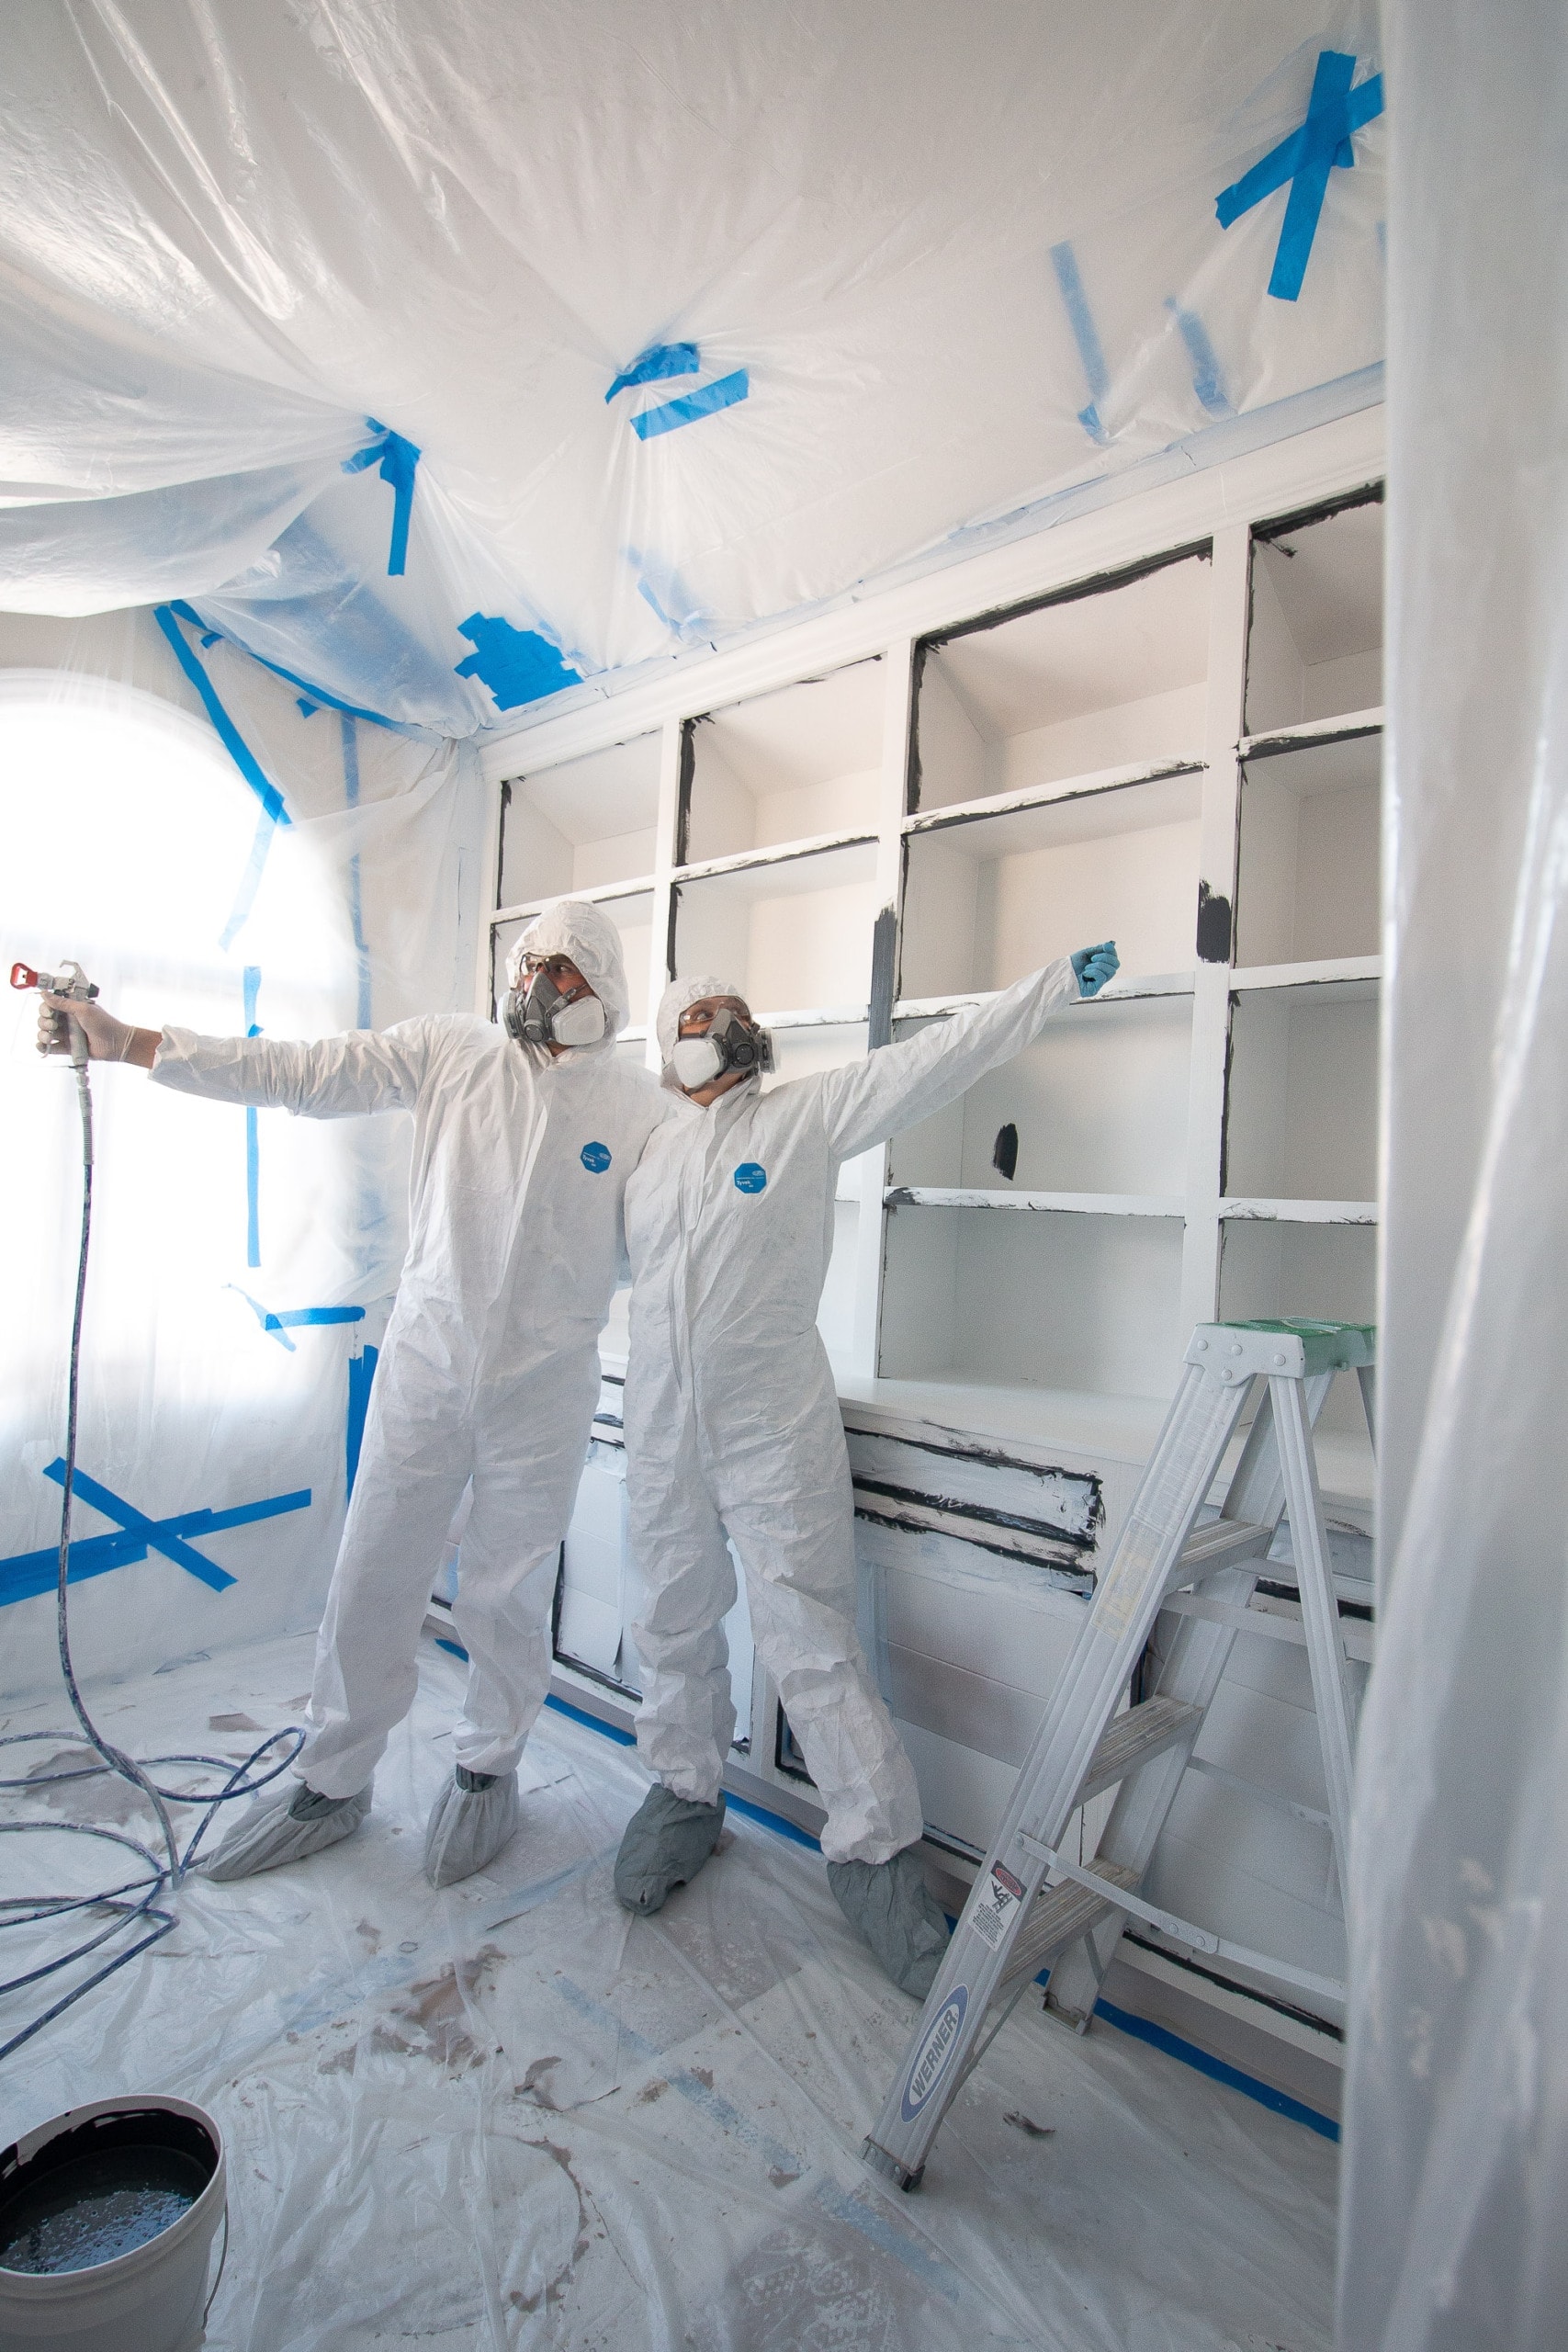
We also had to prep ourselves! I got these painting suits, shoe covers, goggles, gloves, and respirators to completely cover every inch of our bodies. We looked crazy, but the sprayer makes the paint go everywhere and the last thing we wanted was to have it all over our bodies and skin.
Finally…Time to Paint
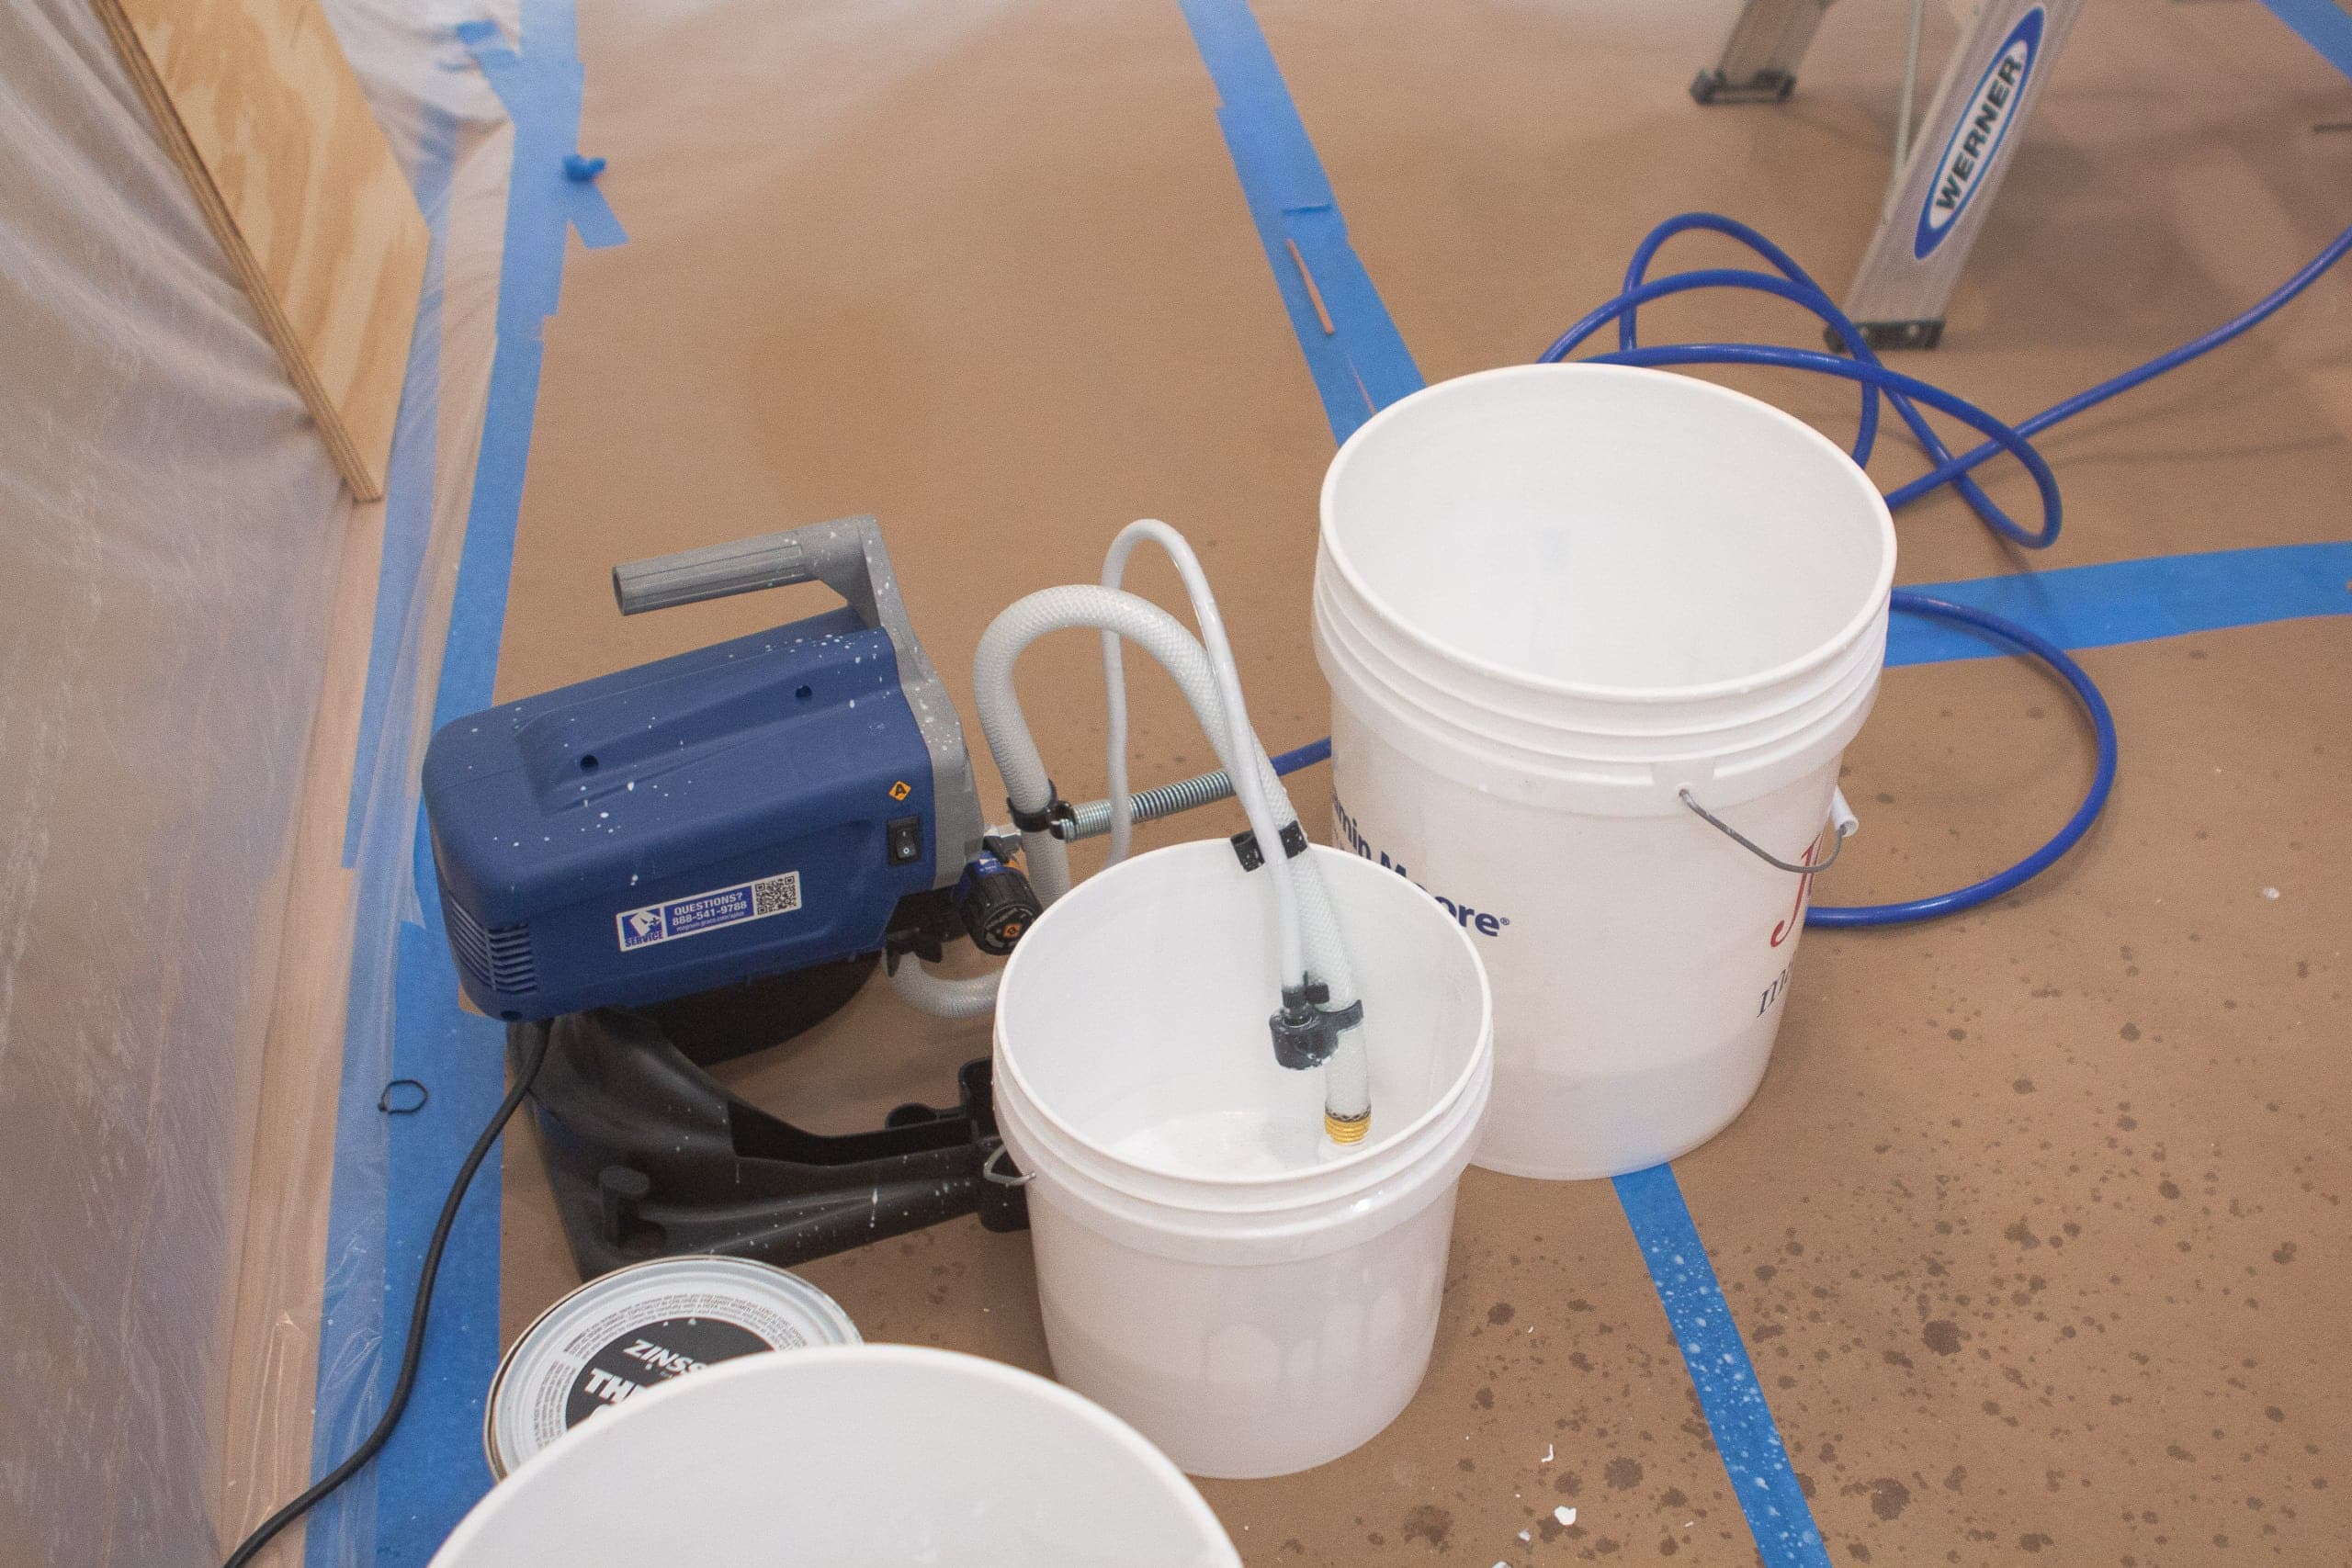
It took a few hours to prep the entire room, but once it was done, we could finally paint. A few people asked me why we used a paint sprayer instead of painting by hand. Two reasons. First, a paint sprayer is so much faster than painting by hand. Yes, you have to prep the space (and that does take time), but once it’s prepped you can paint quickly. For example, priming only took about 20 minutes. If we did it by hand (all those nooks and crannies!), it would have taken 3-4 hours (at least). Second, a paint sprayer leaves a really nice smooth finish. And I’m not gonna lie, it’s pretty fun to use the sprayer!
Priming the DIY Built-Ins
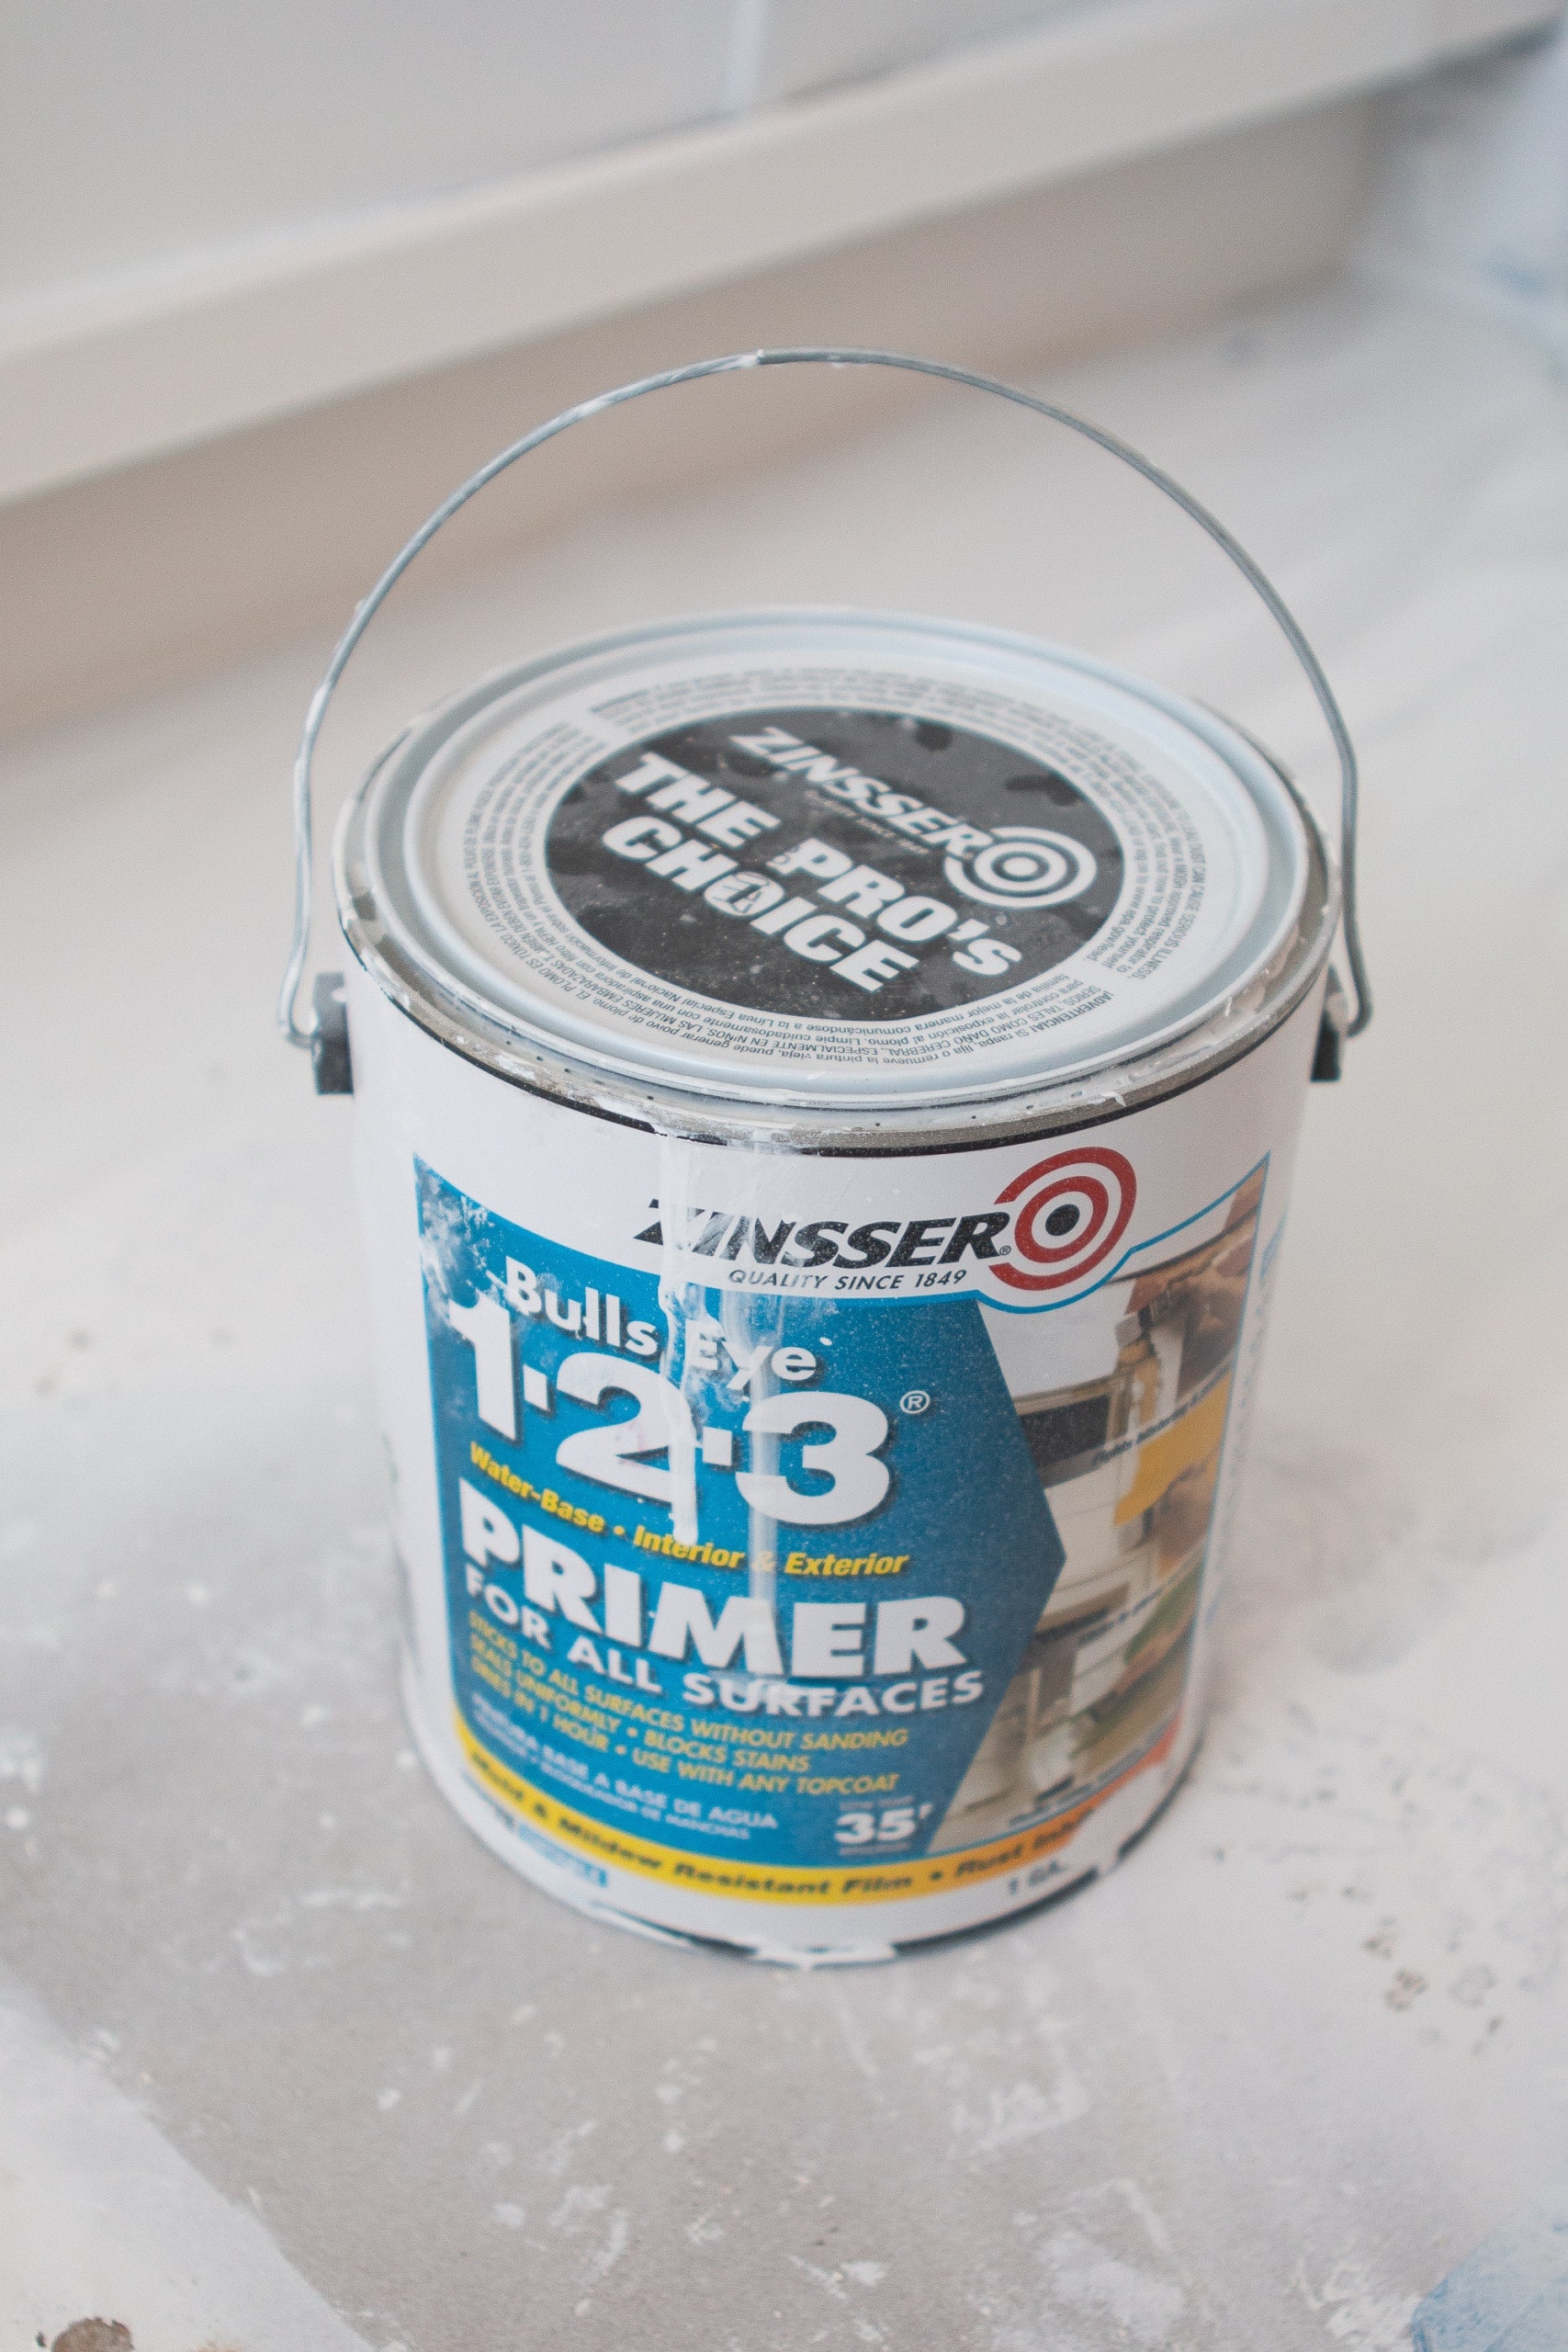
This is the paint sprayer we bought for this project. You can always rent one from your local paint store (I think the Benjamin Moore by me rents them for $75 a day), but we figured we will use this again and again for projects around here so it was a worthwhile investment. Follow the directions to get it set up properly and make sure you test on some scrap pieces of wood before you start spraying your project. 
Spray about 12 inches away from the surface to make sure you don’t have any drips. And keep your hand moving. The sprayer was wonderful to get into all of the nooks and crannies of the bookshelves. I only bought one gallon of primer for this step, but ended up having to run to the store for another gallon. I think we wasted a lot prepping the paint sprayer and learning how to use it. So, one gallon may have been fine if we knew what we were doing. 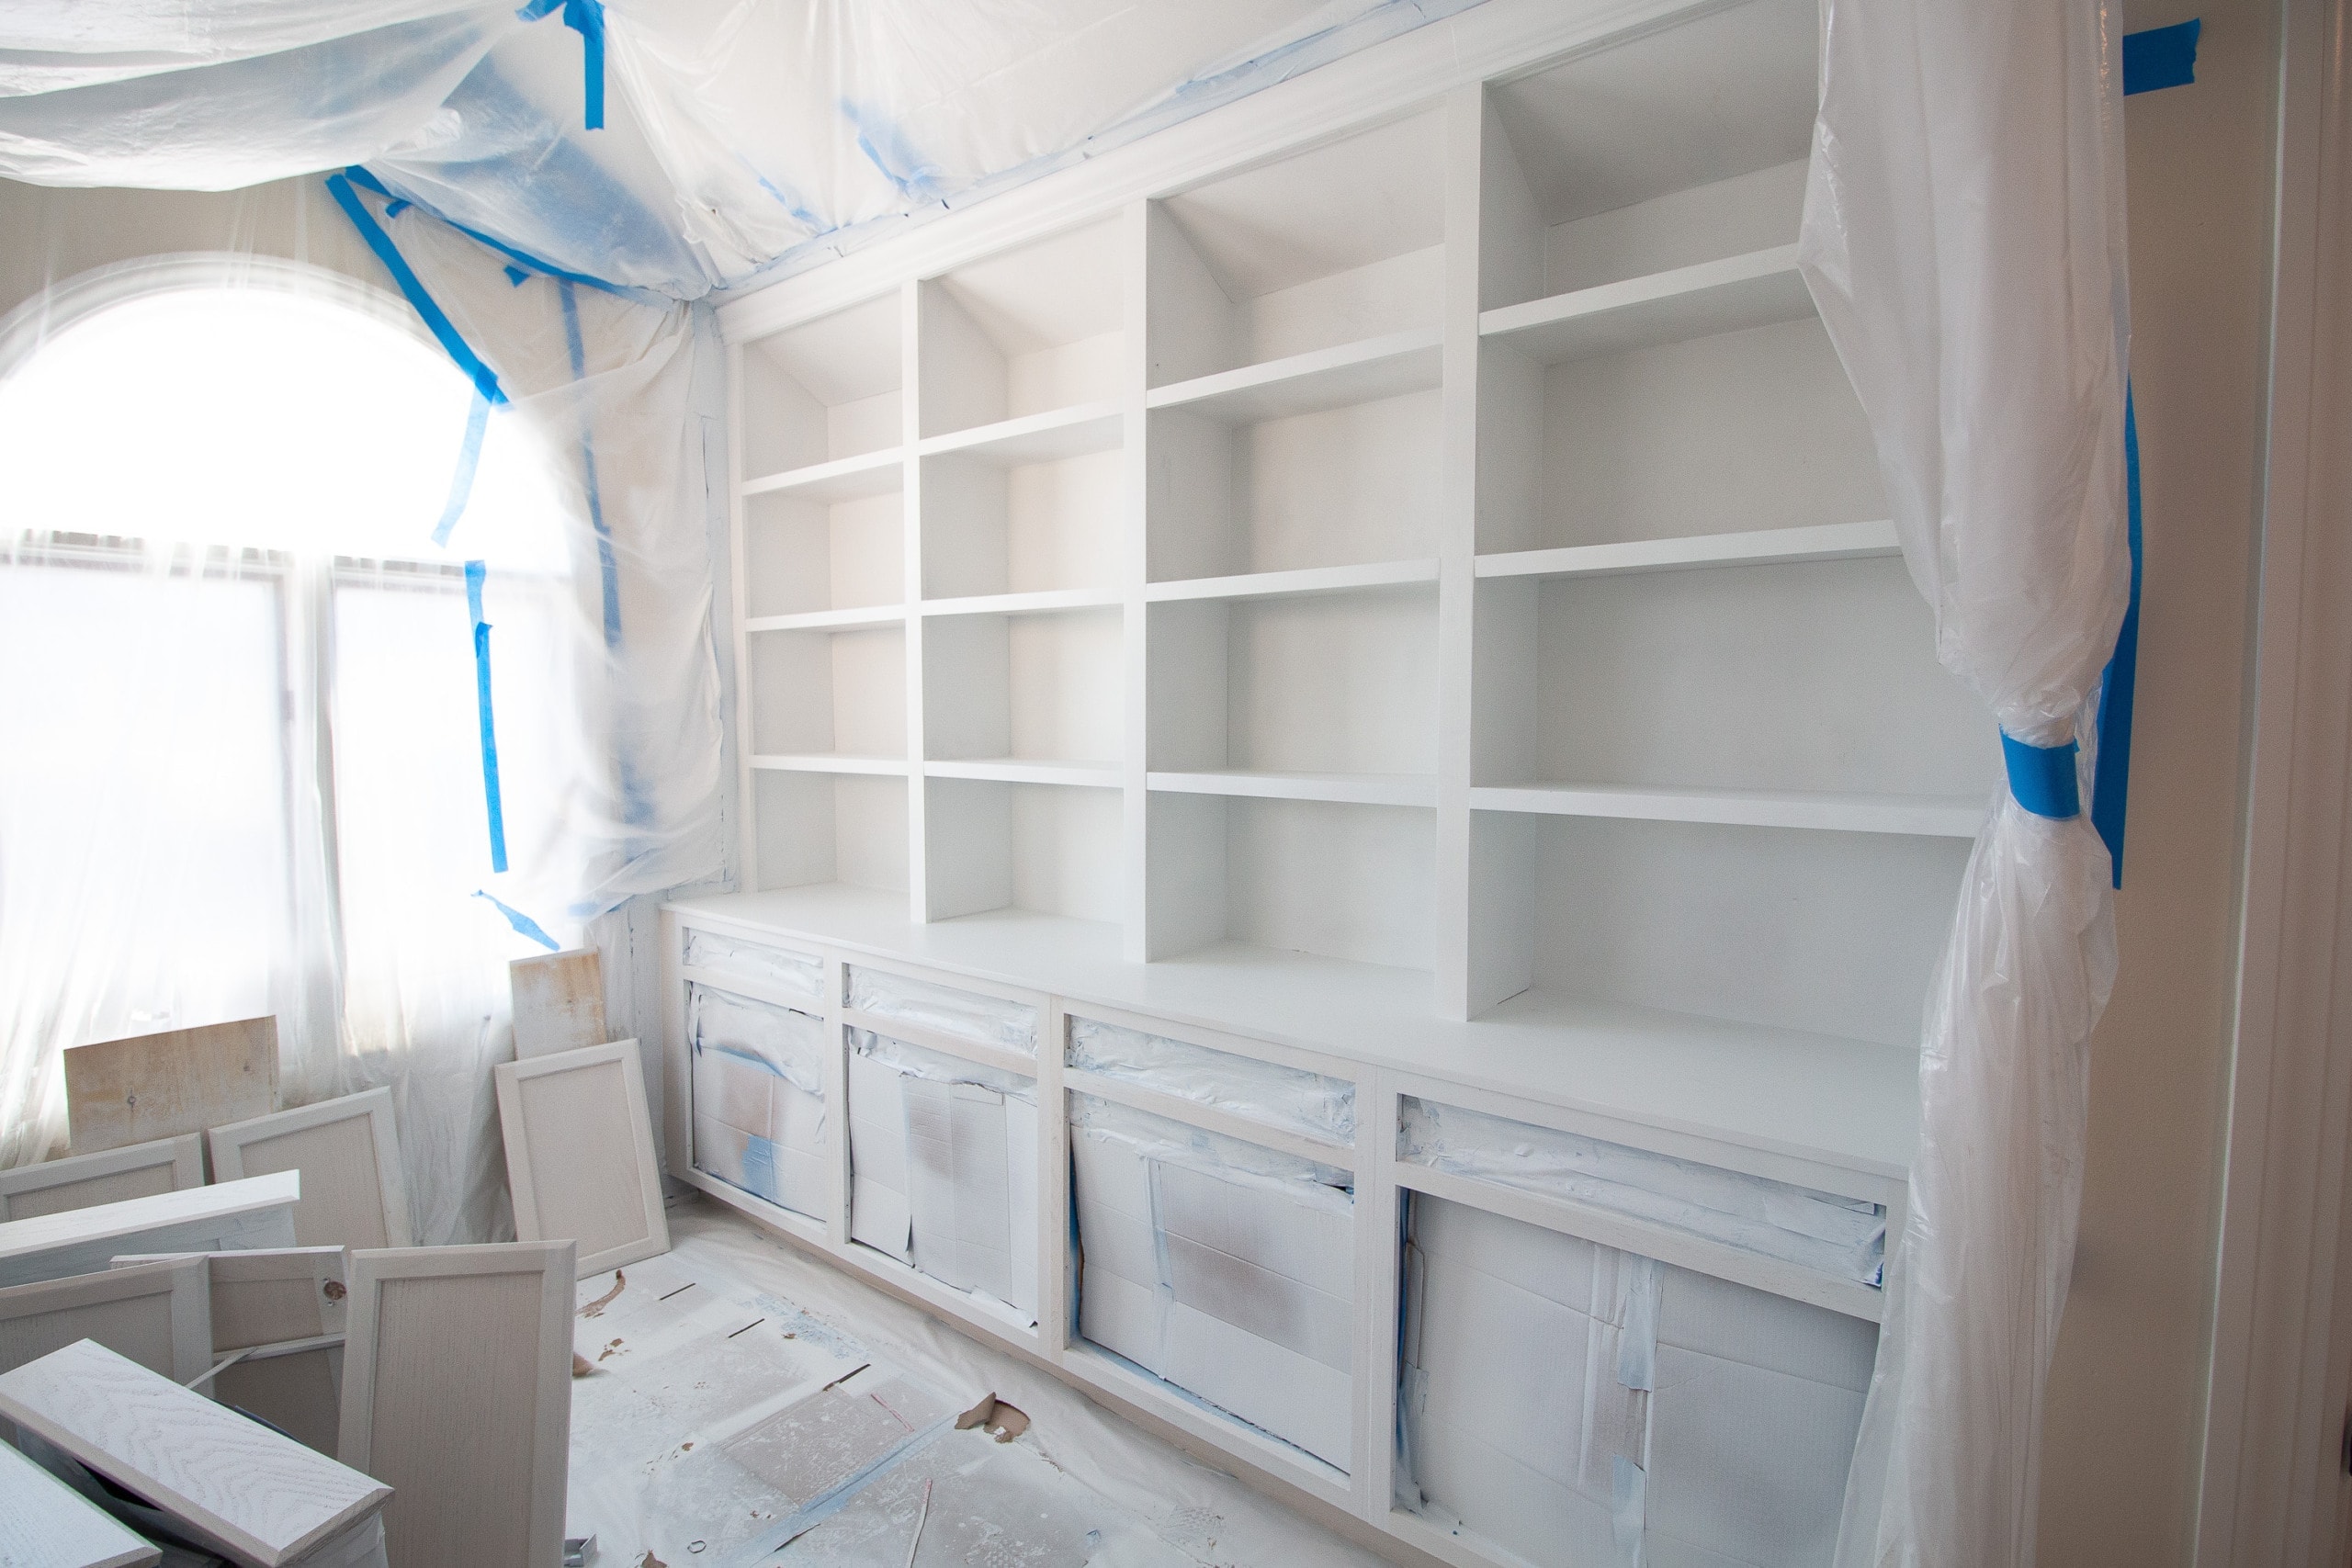
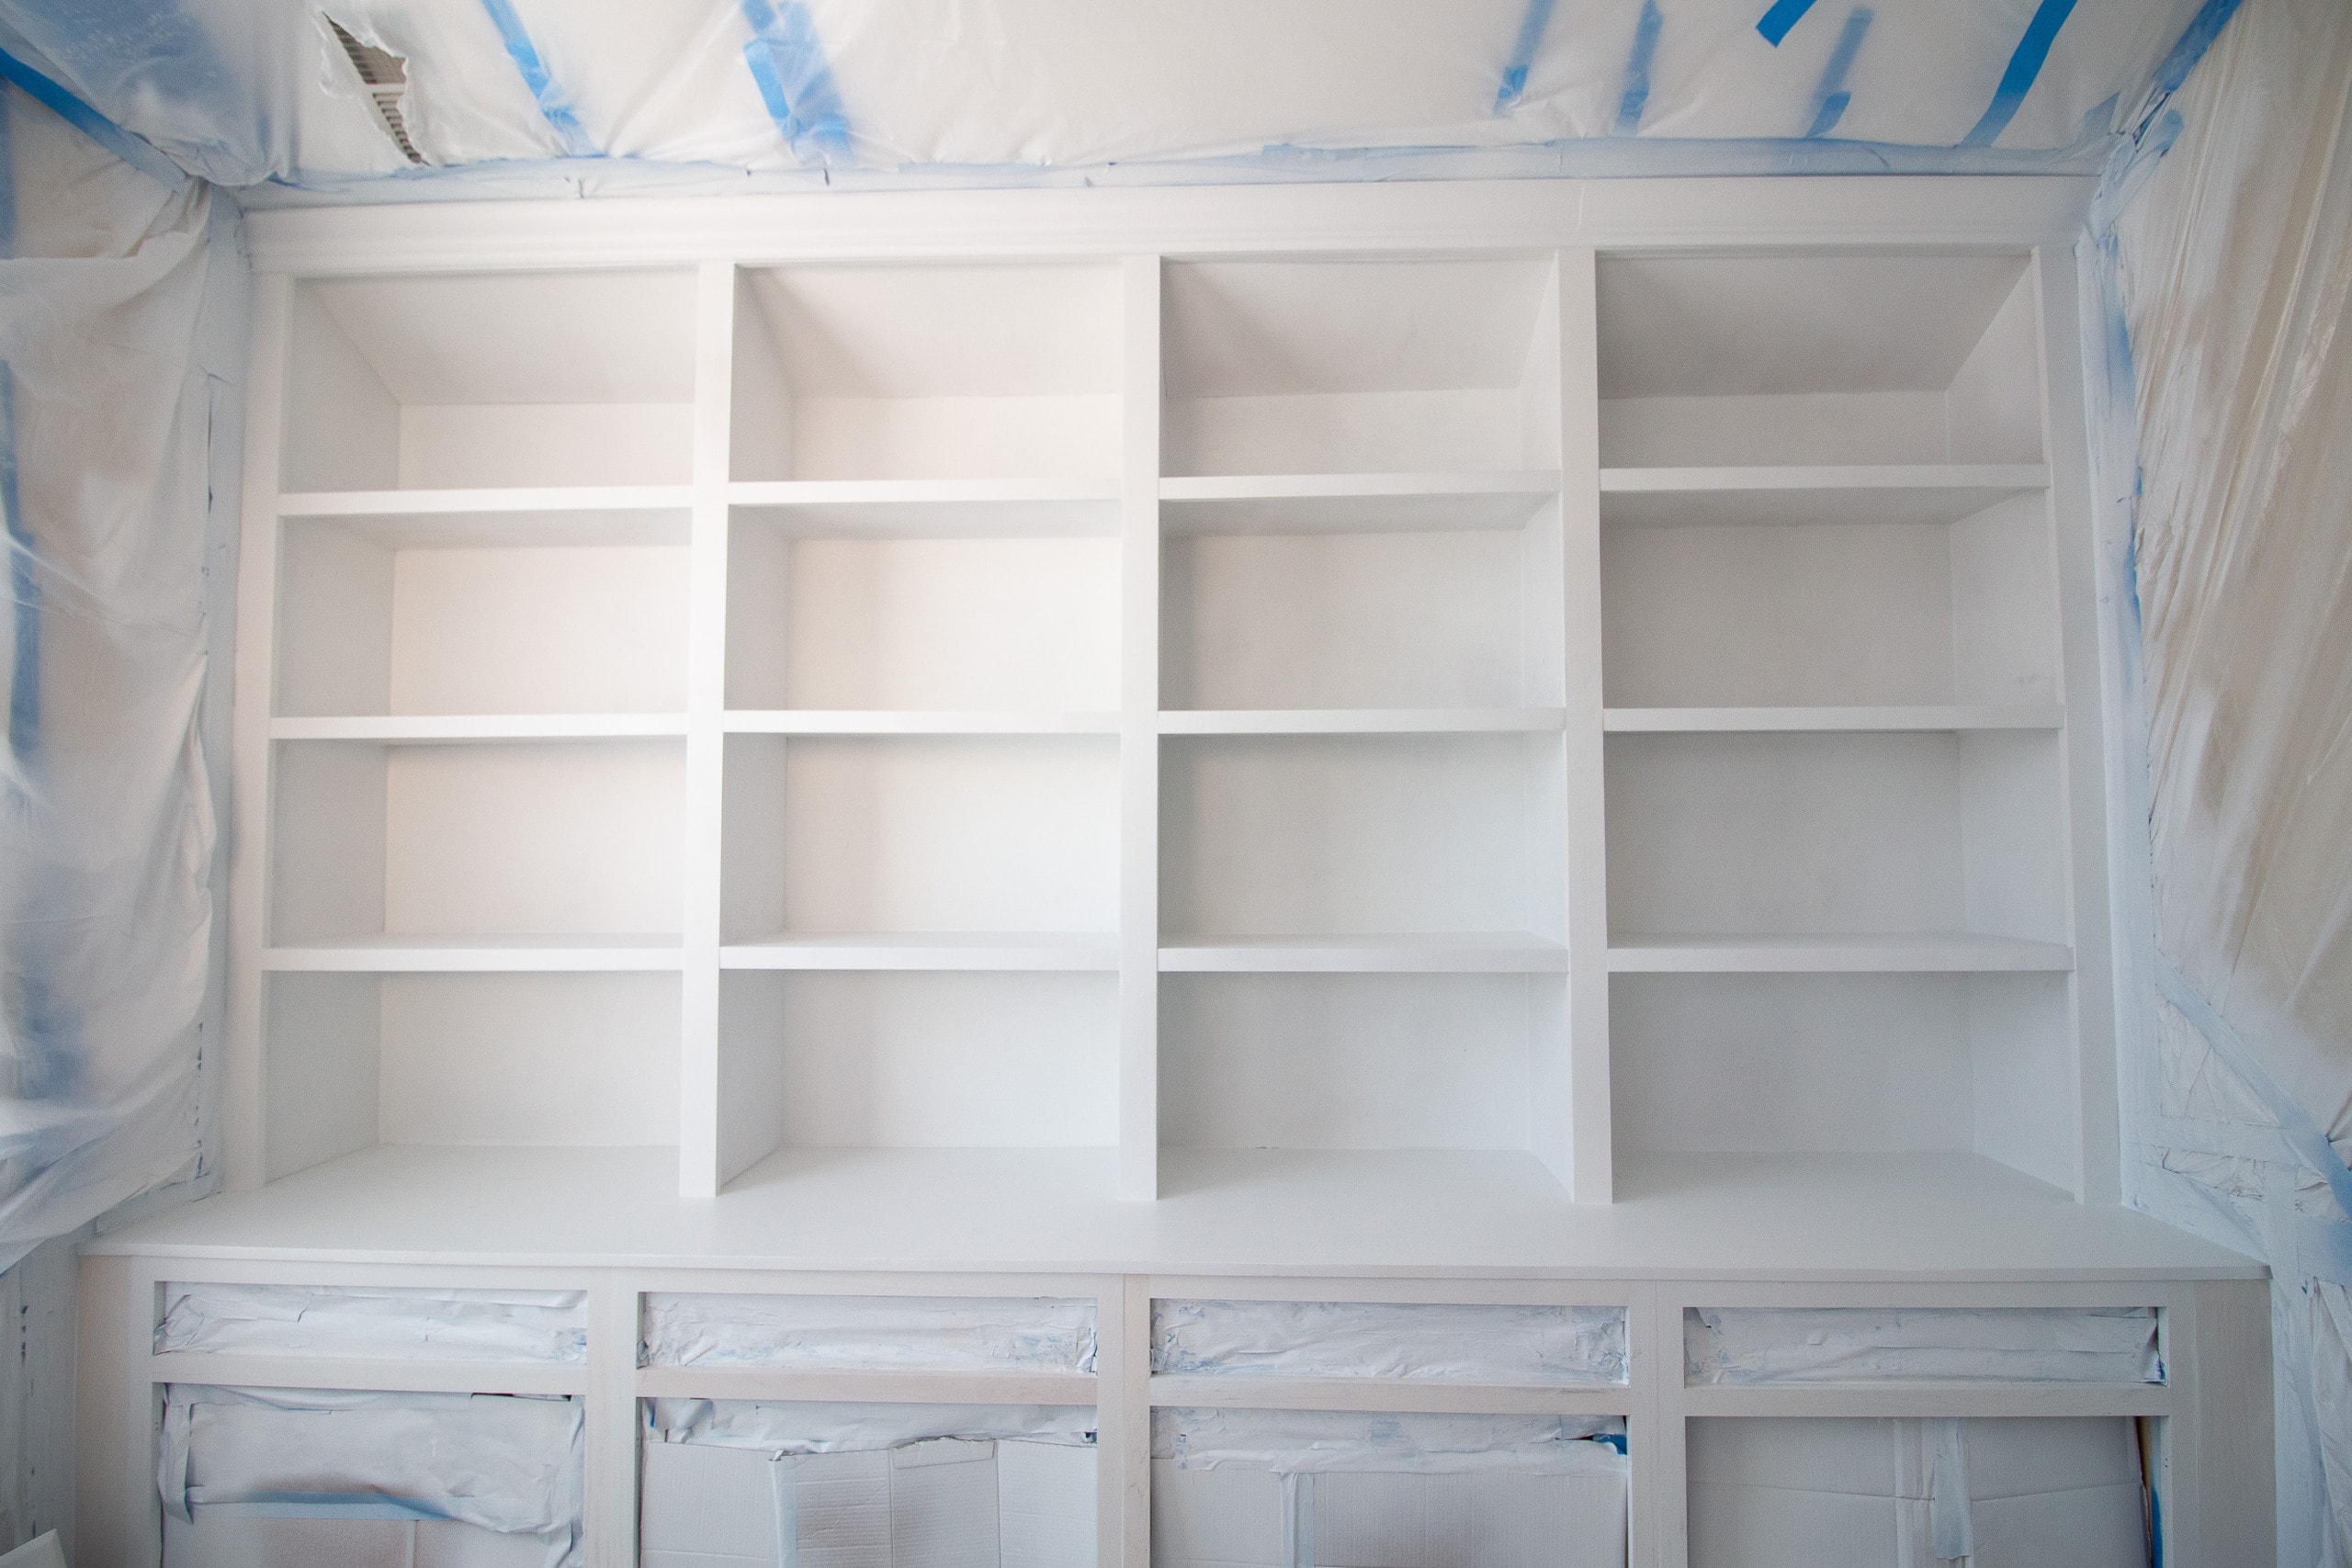

In about 20 minutes, everything was primed (including the drawers and cabinets). As you can see, it makes a huge mess! That’s why it’s so important to do good prep work and tape everything off in the room.
Note: I learned after the fact, that you can get your primer tinted a dark color if you’re painting a dark color over it. This can lead to less coats of paint. Next time, we’ll definitely do that.
Painting the DIY Built-Ins
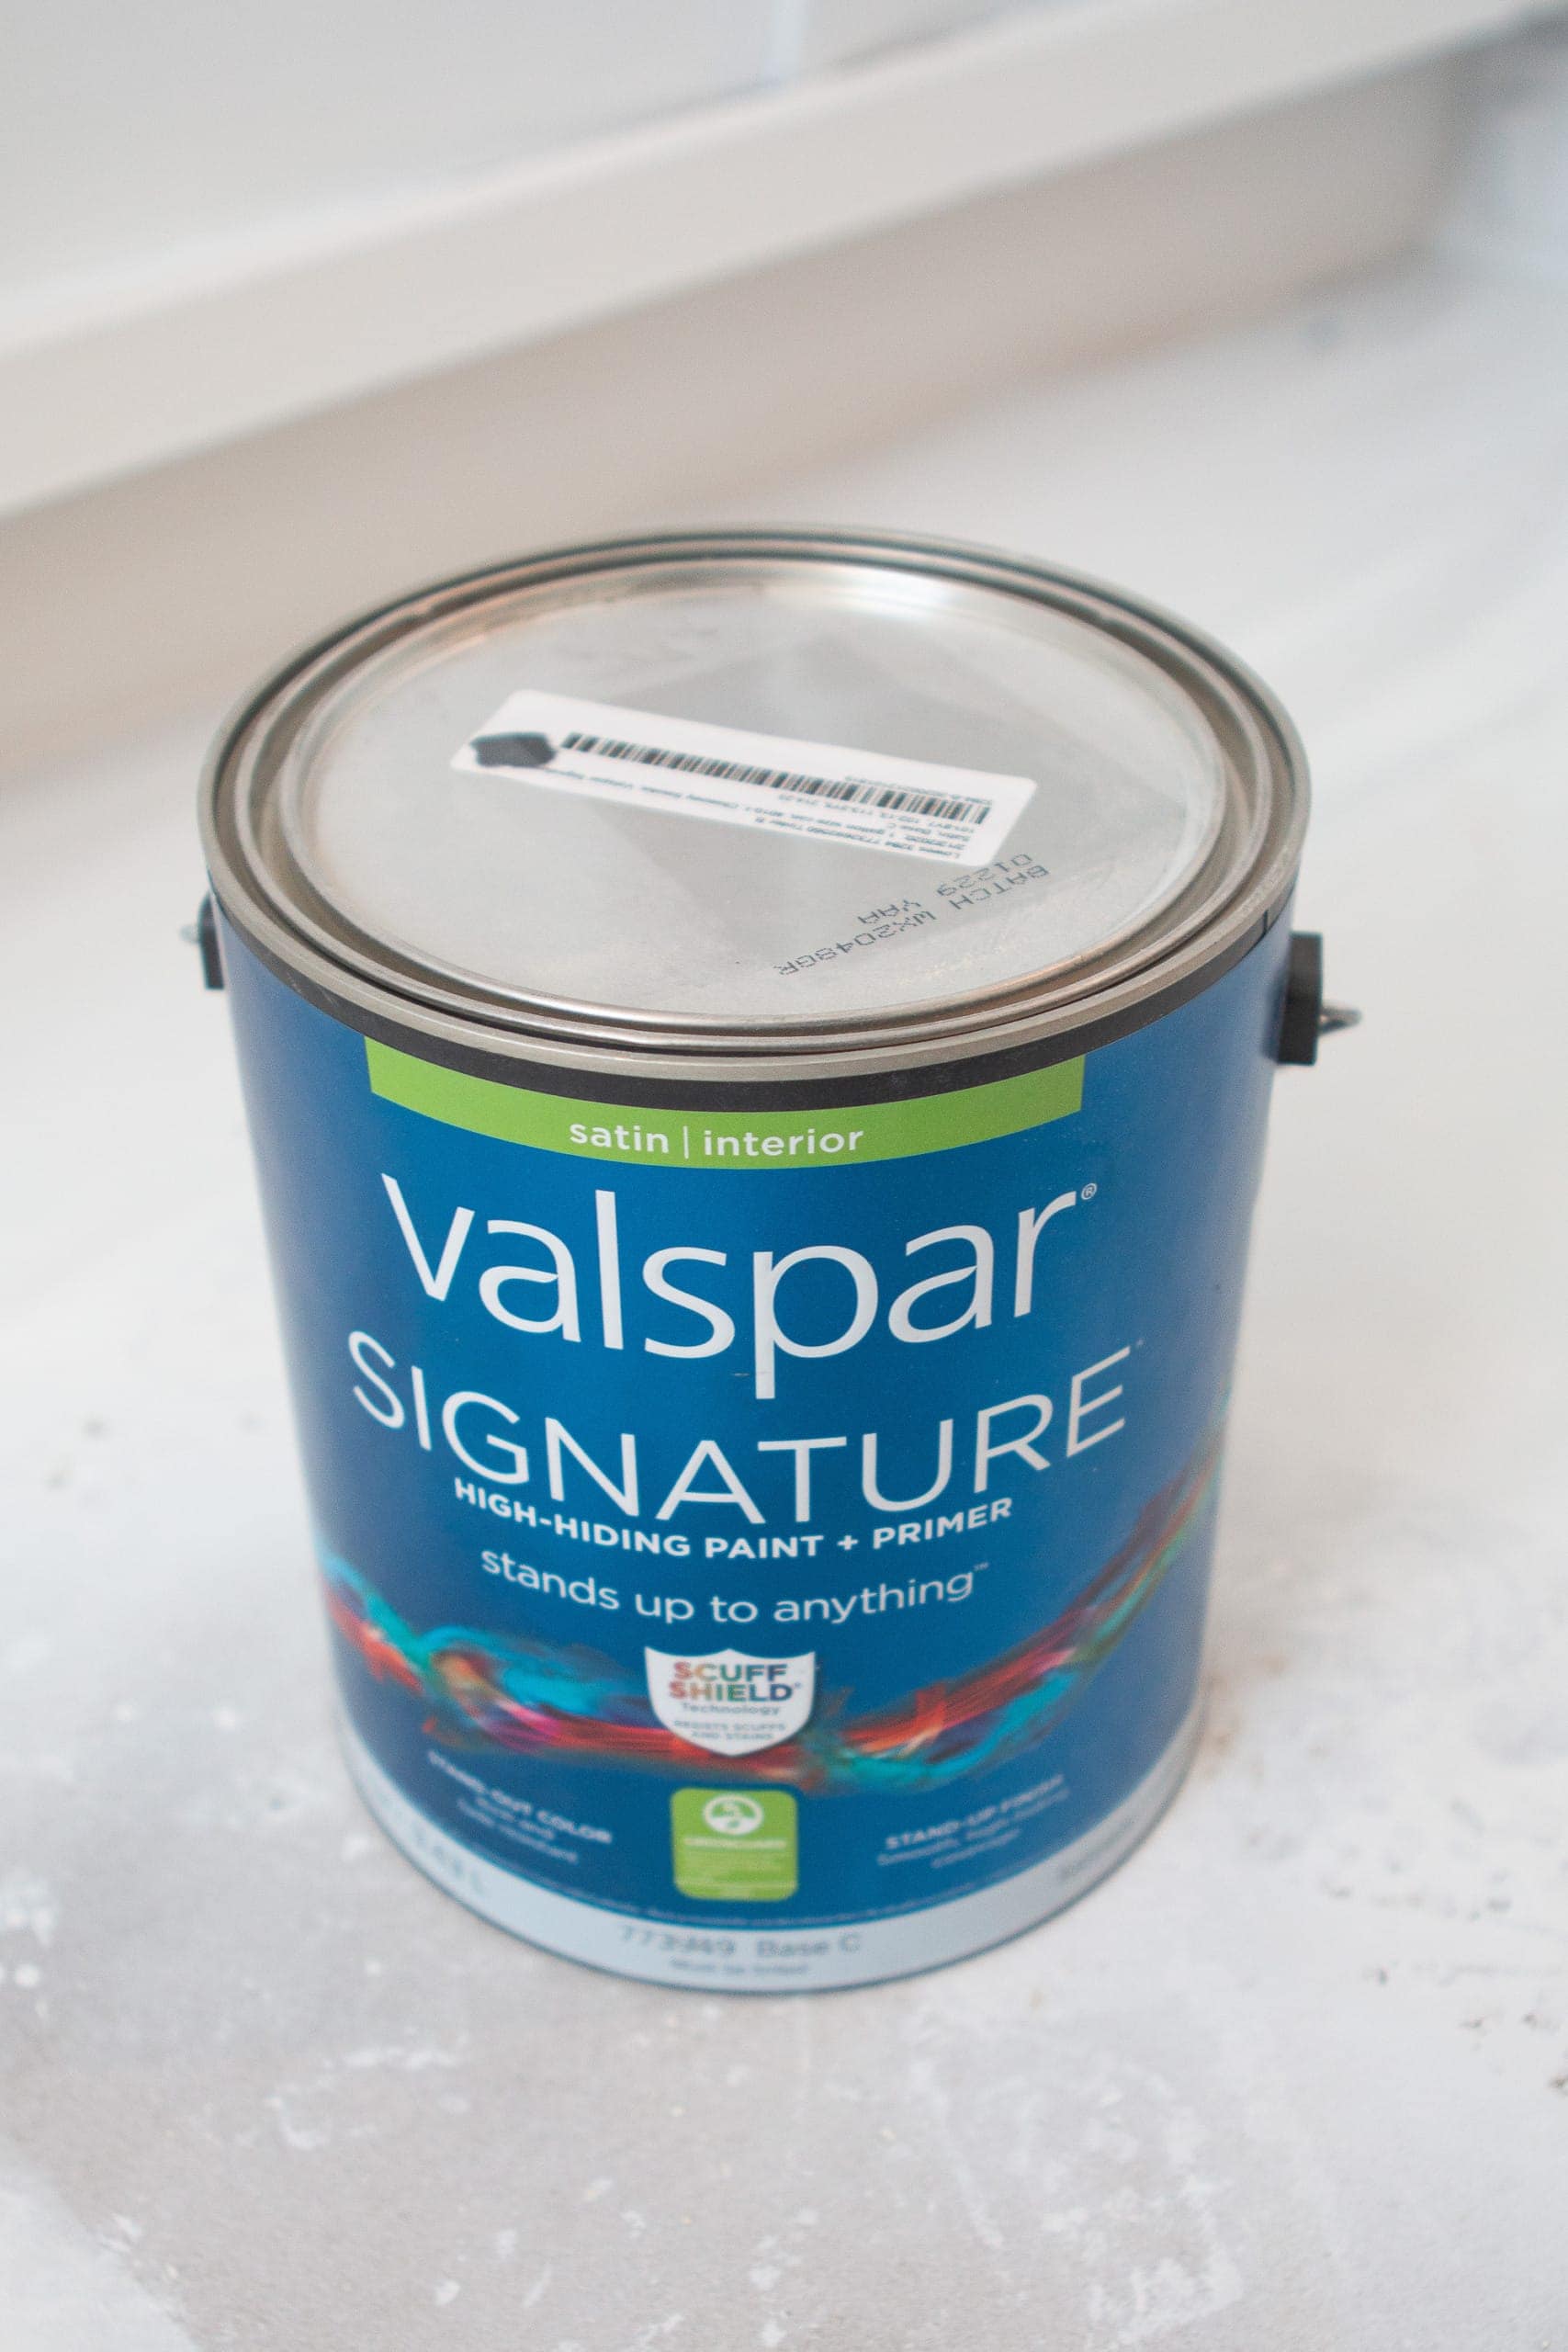
We let the primed built-ins dry overnight and we were ready to paint them the next day. I decided to go with a satin finish and used this exact paint in the color Chimney Smoke. Finn got really good using the paint sprayer during the priming stage, so he was all ready to go with the paint. 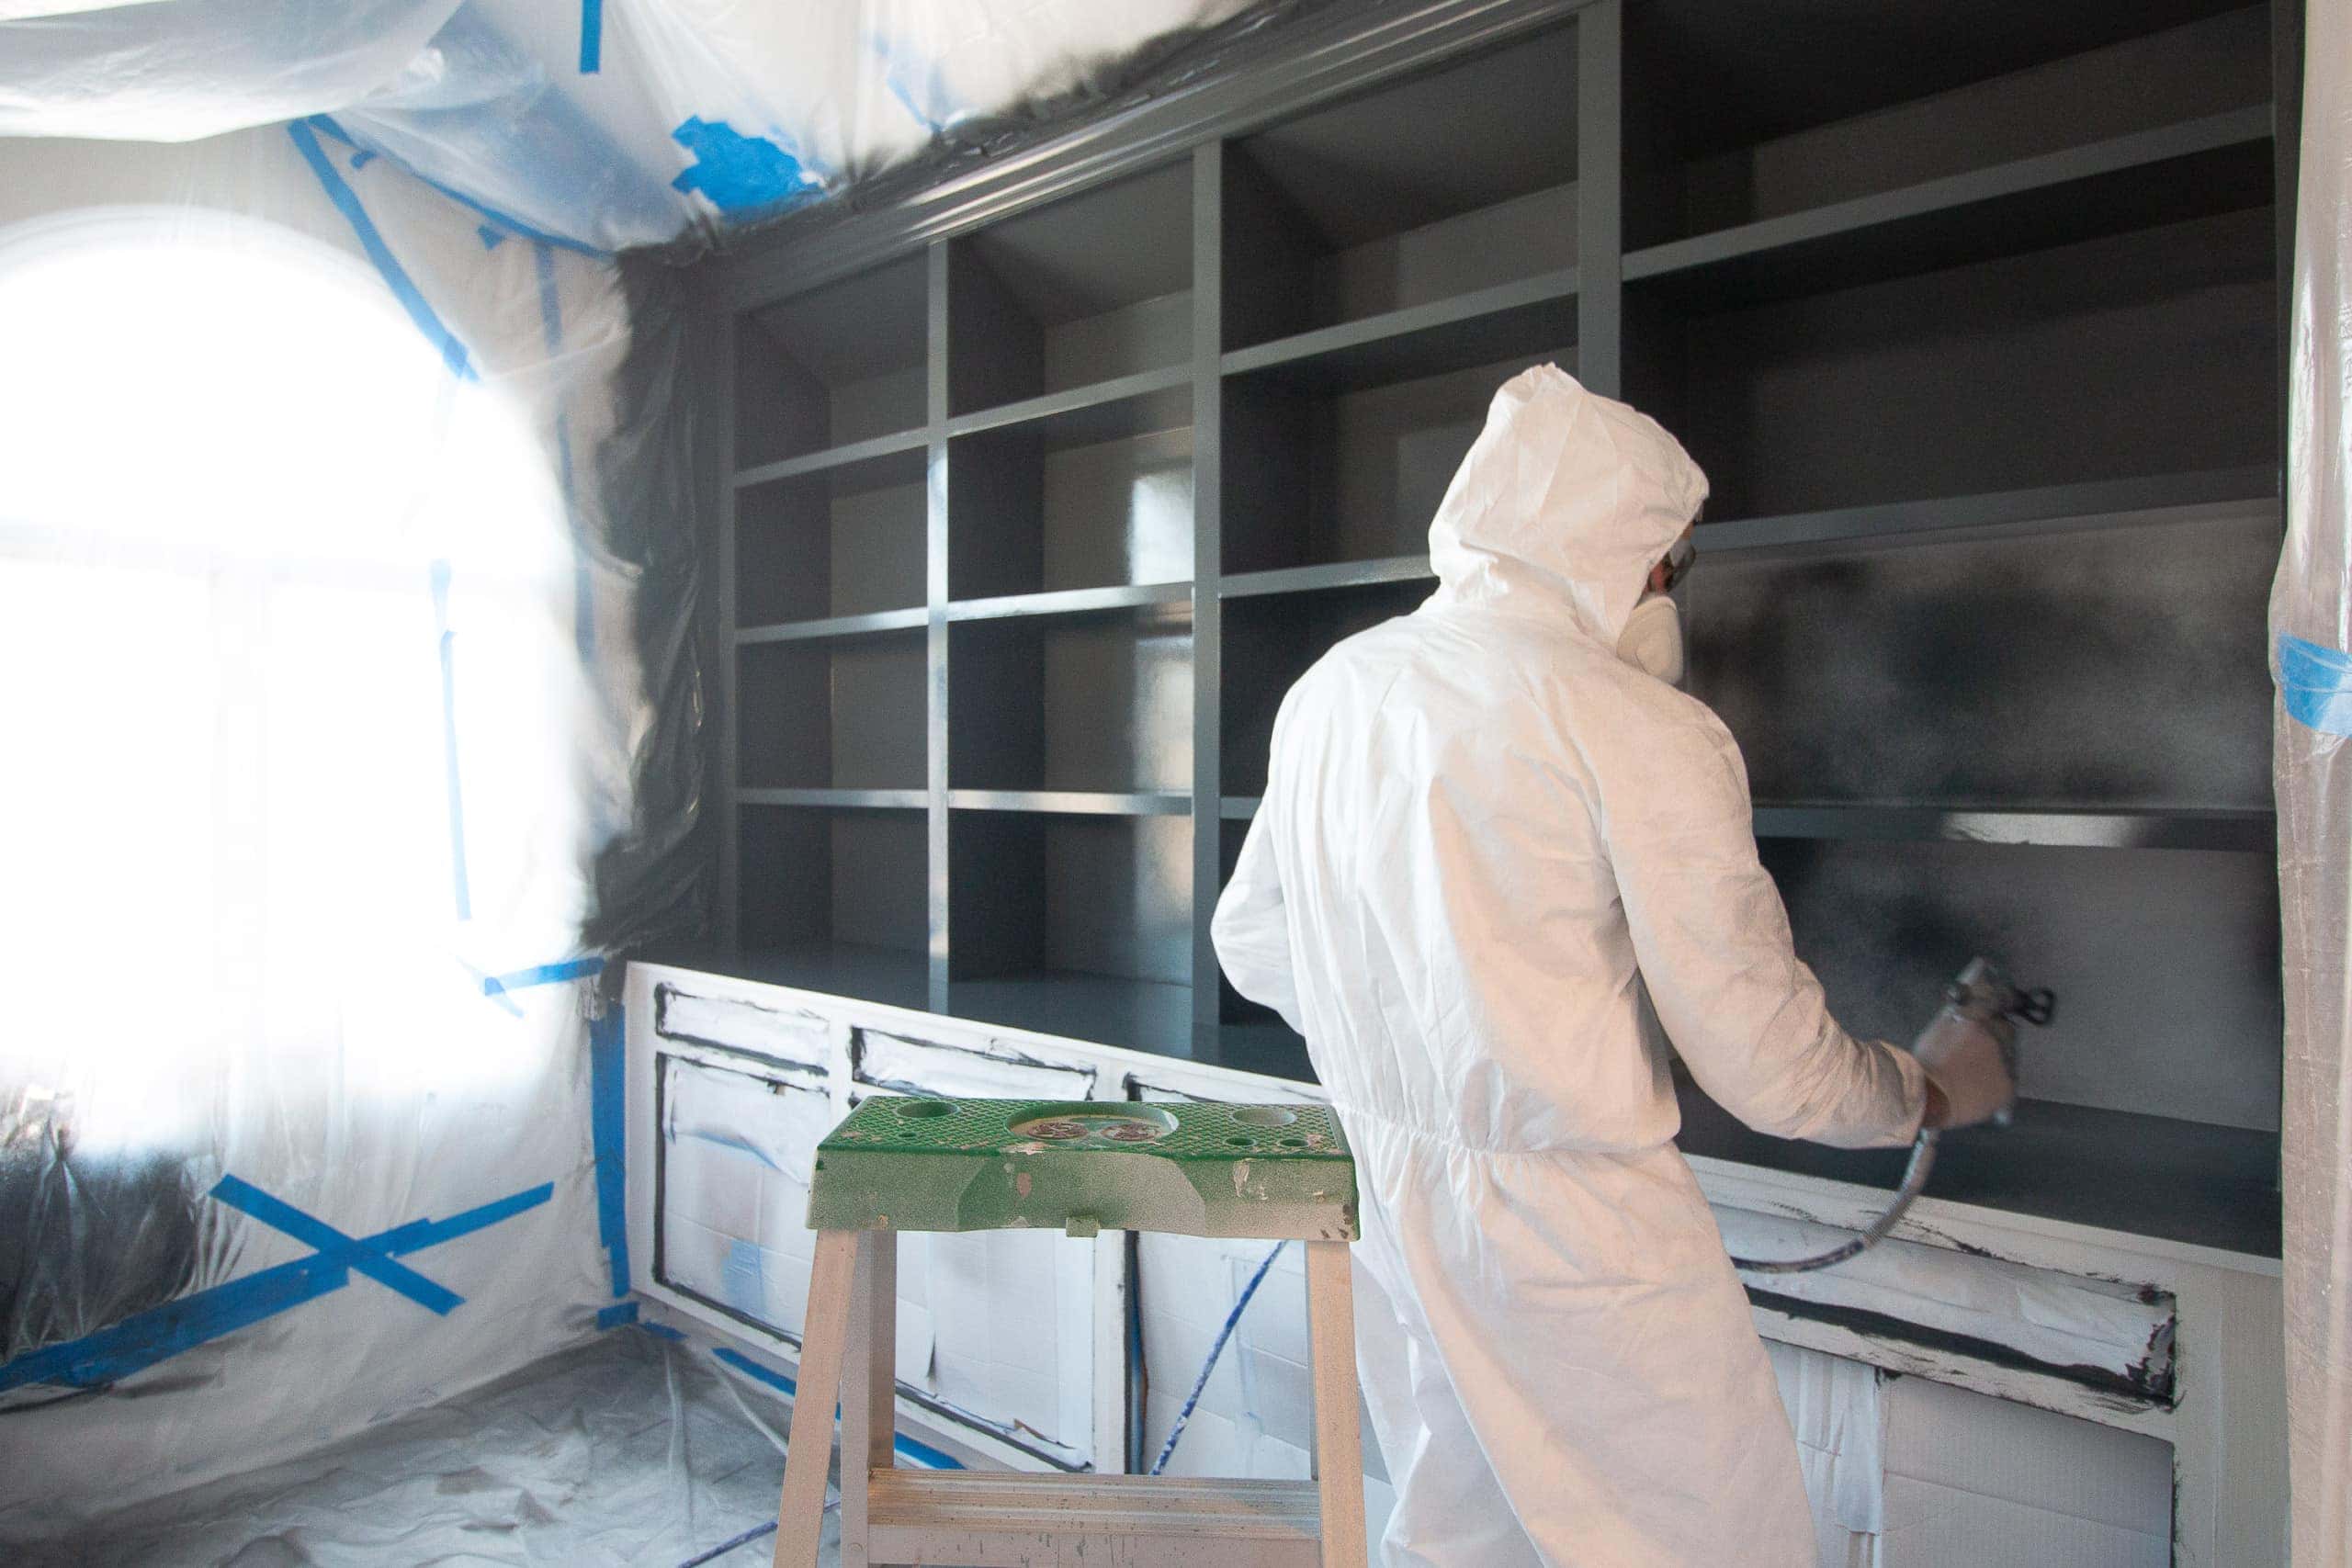
He got the first coat done in ten minutes! I kid you not! That’s how fast you can go with this thing. Make sure you keep the sprayer at least 12 inches away from the surface so you don’t get drips. A few light coats are much better than heavier ones, so if you have any spots that don’t get fully covered, don’t fret!
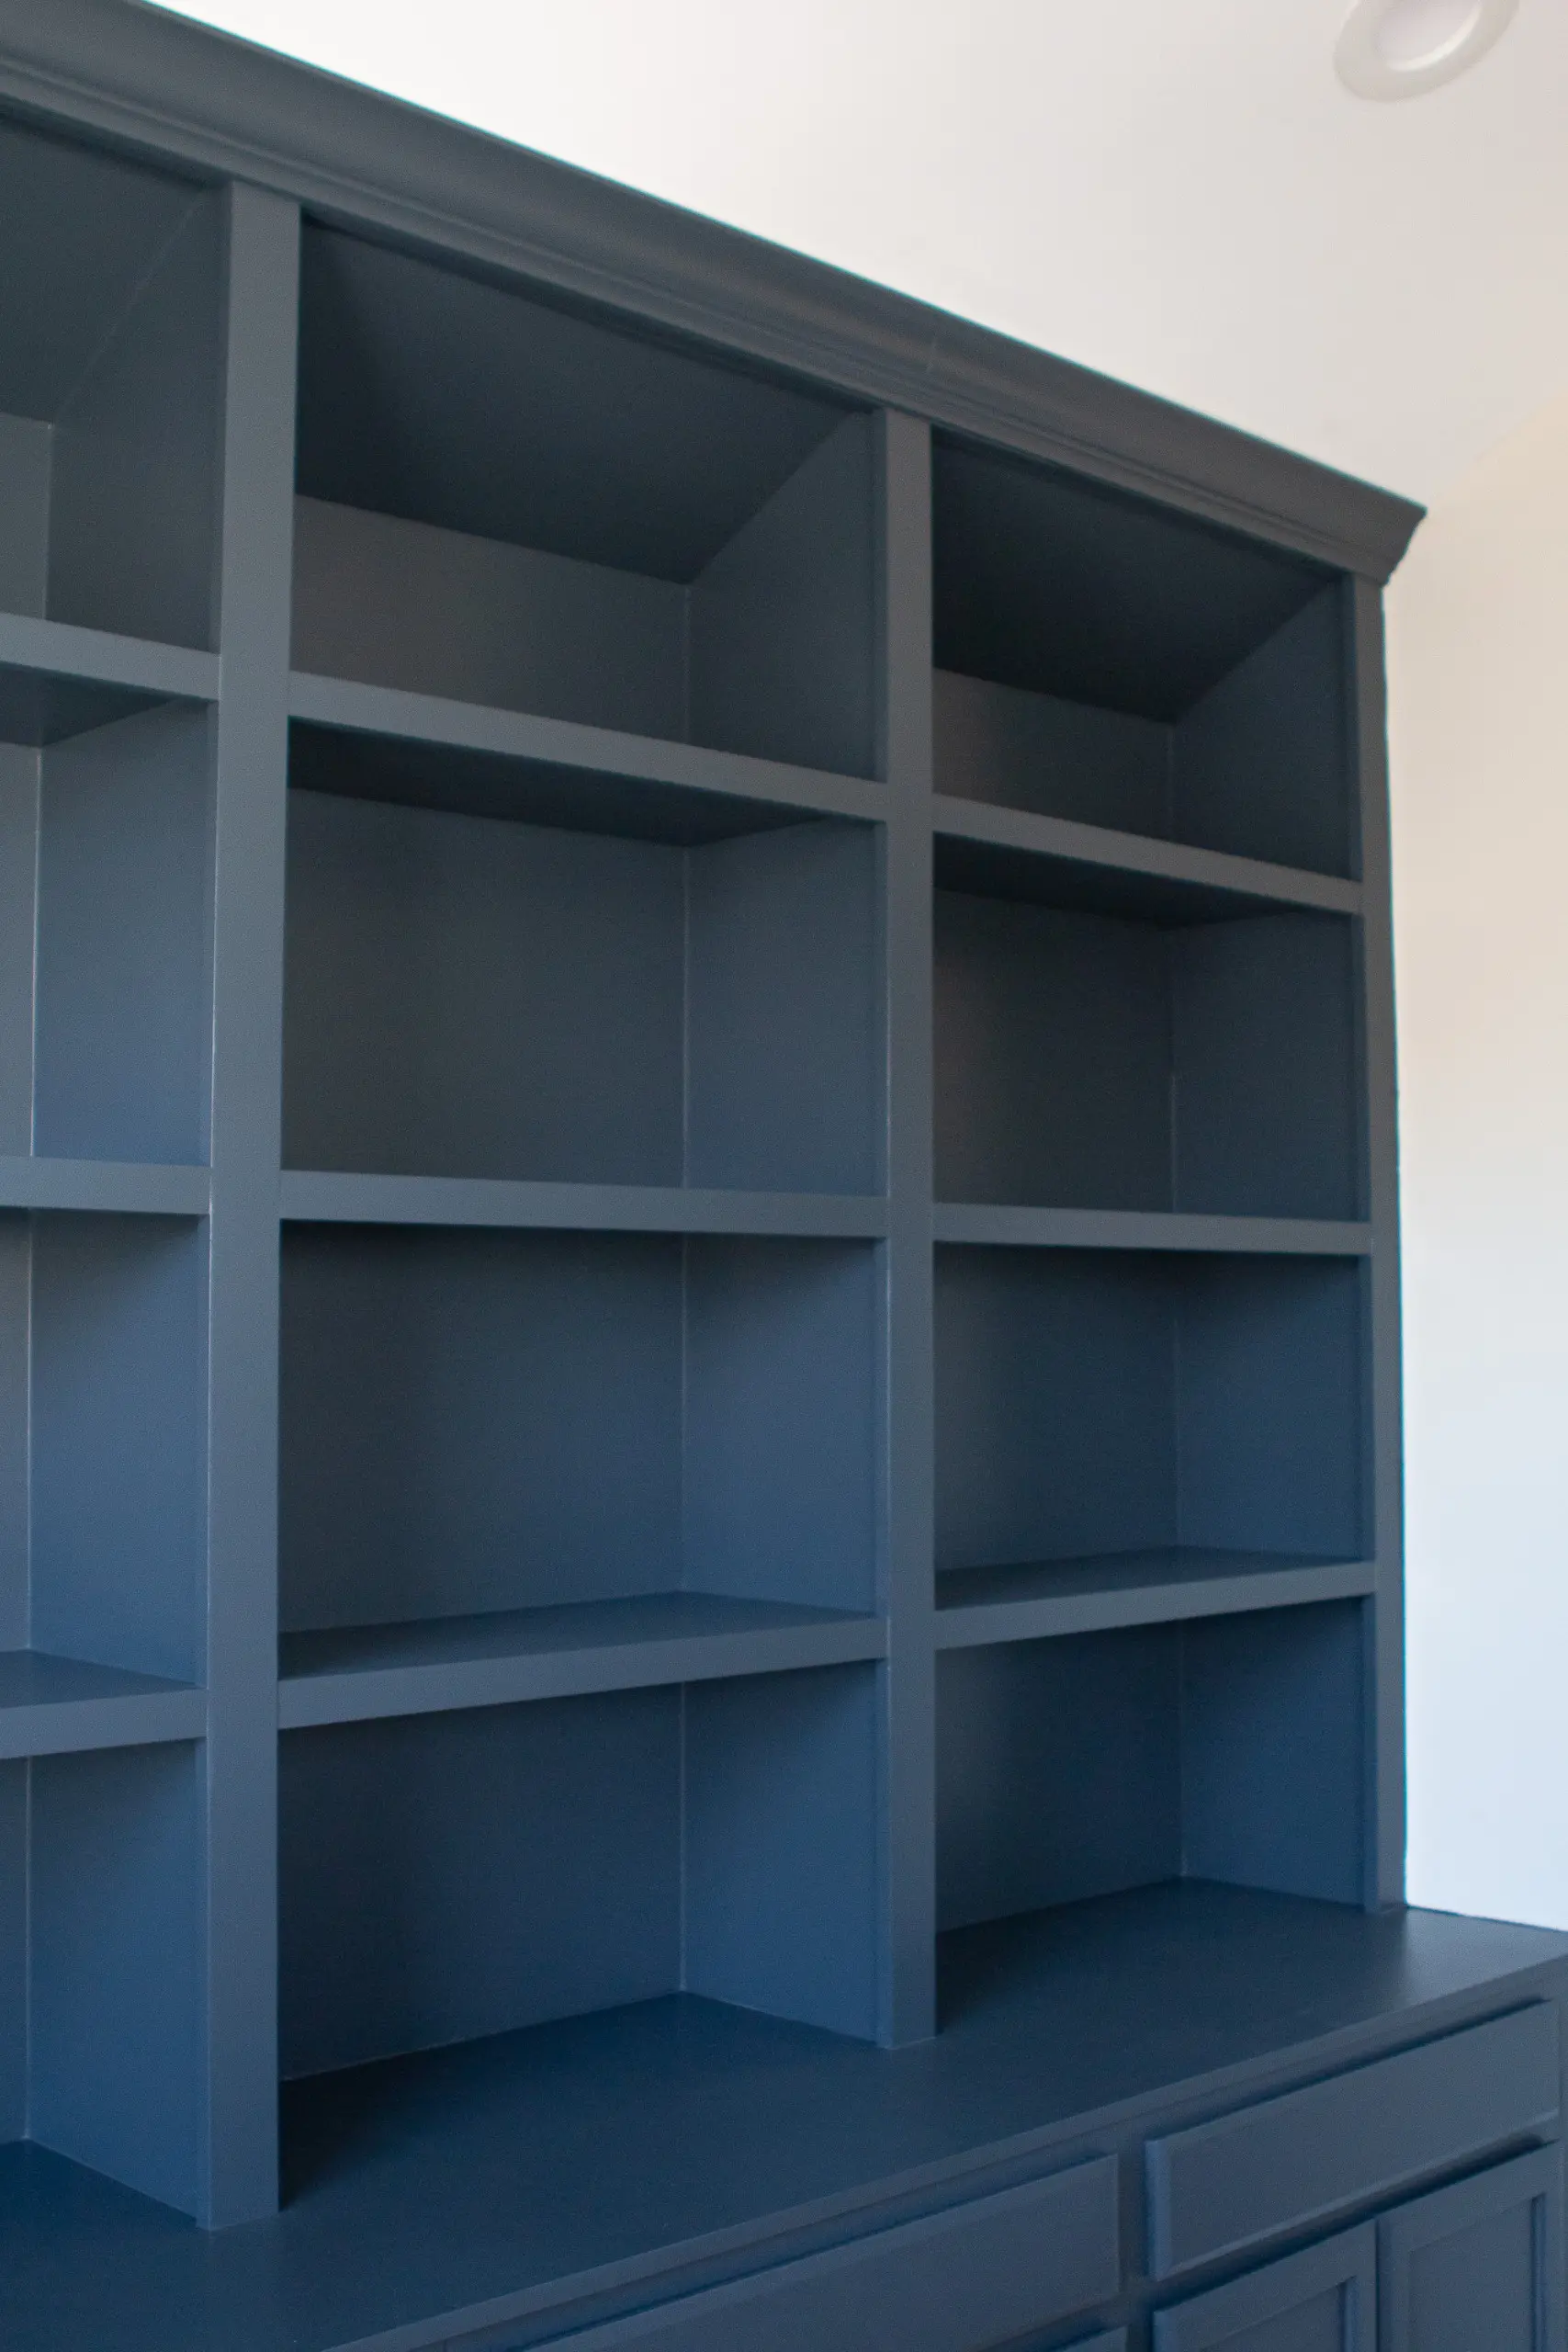
In the end, we did two light coats and it covered beautifully. This used about two gallons of paint. The paint was dry to the touch in about 24 hours, but I didn’t end up putting the doors on and drawers in for about a week. You want the paint to cure (fully harden) so you don’t get any dents or dings in it. Latex paint can take up to one month to fully cure, so I’m holding off as long as I can before styling the shelves (which is torture for me!).
Before & After


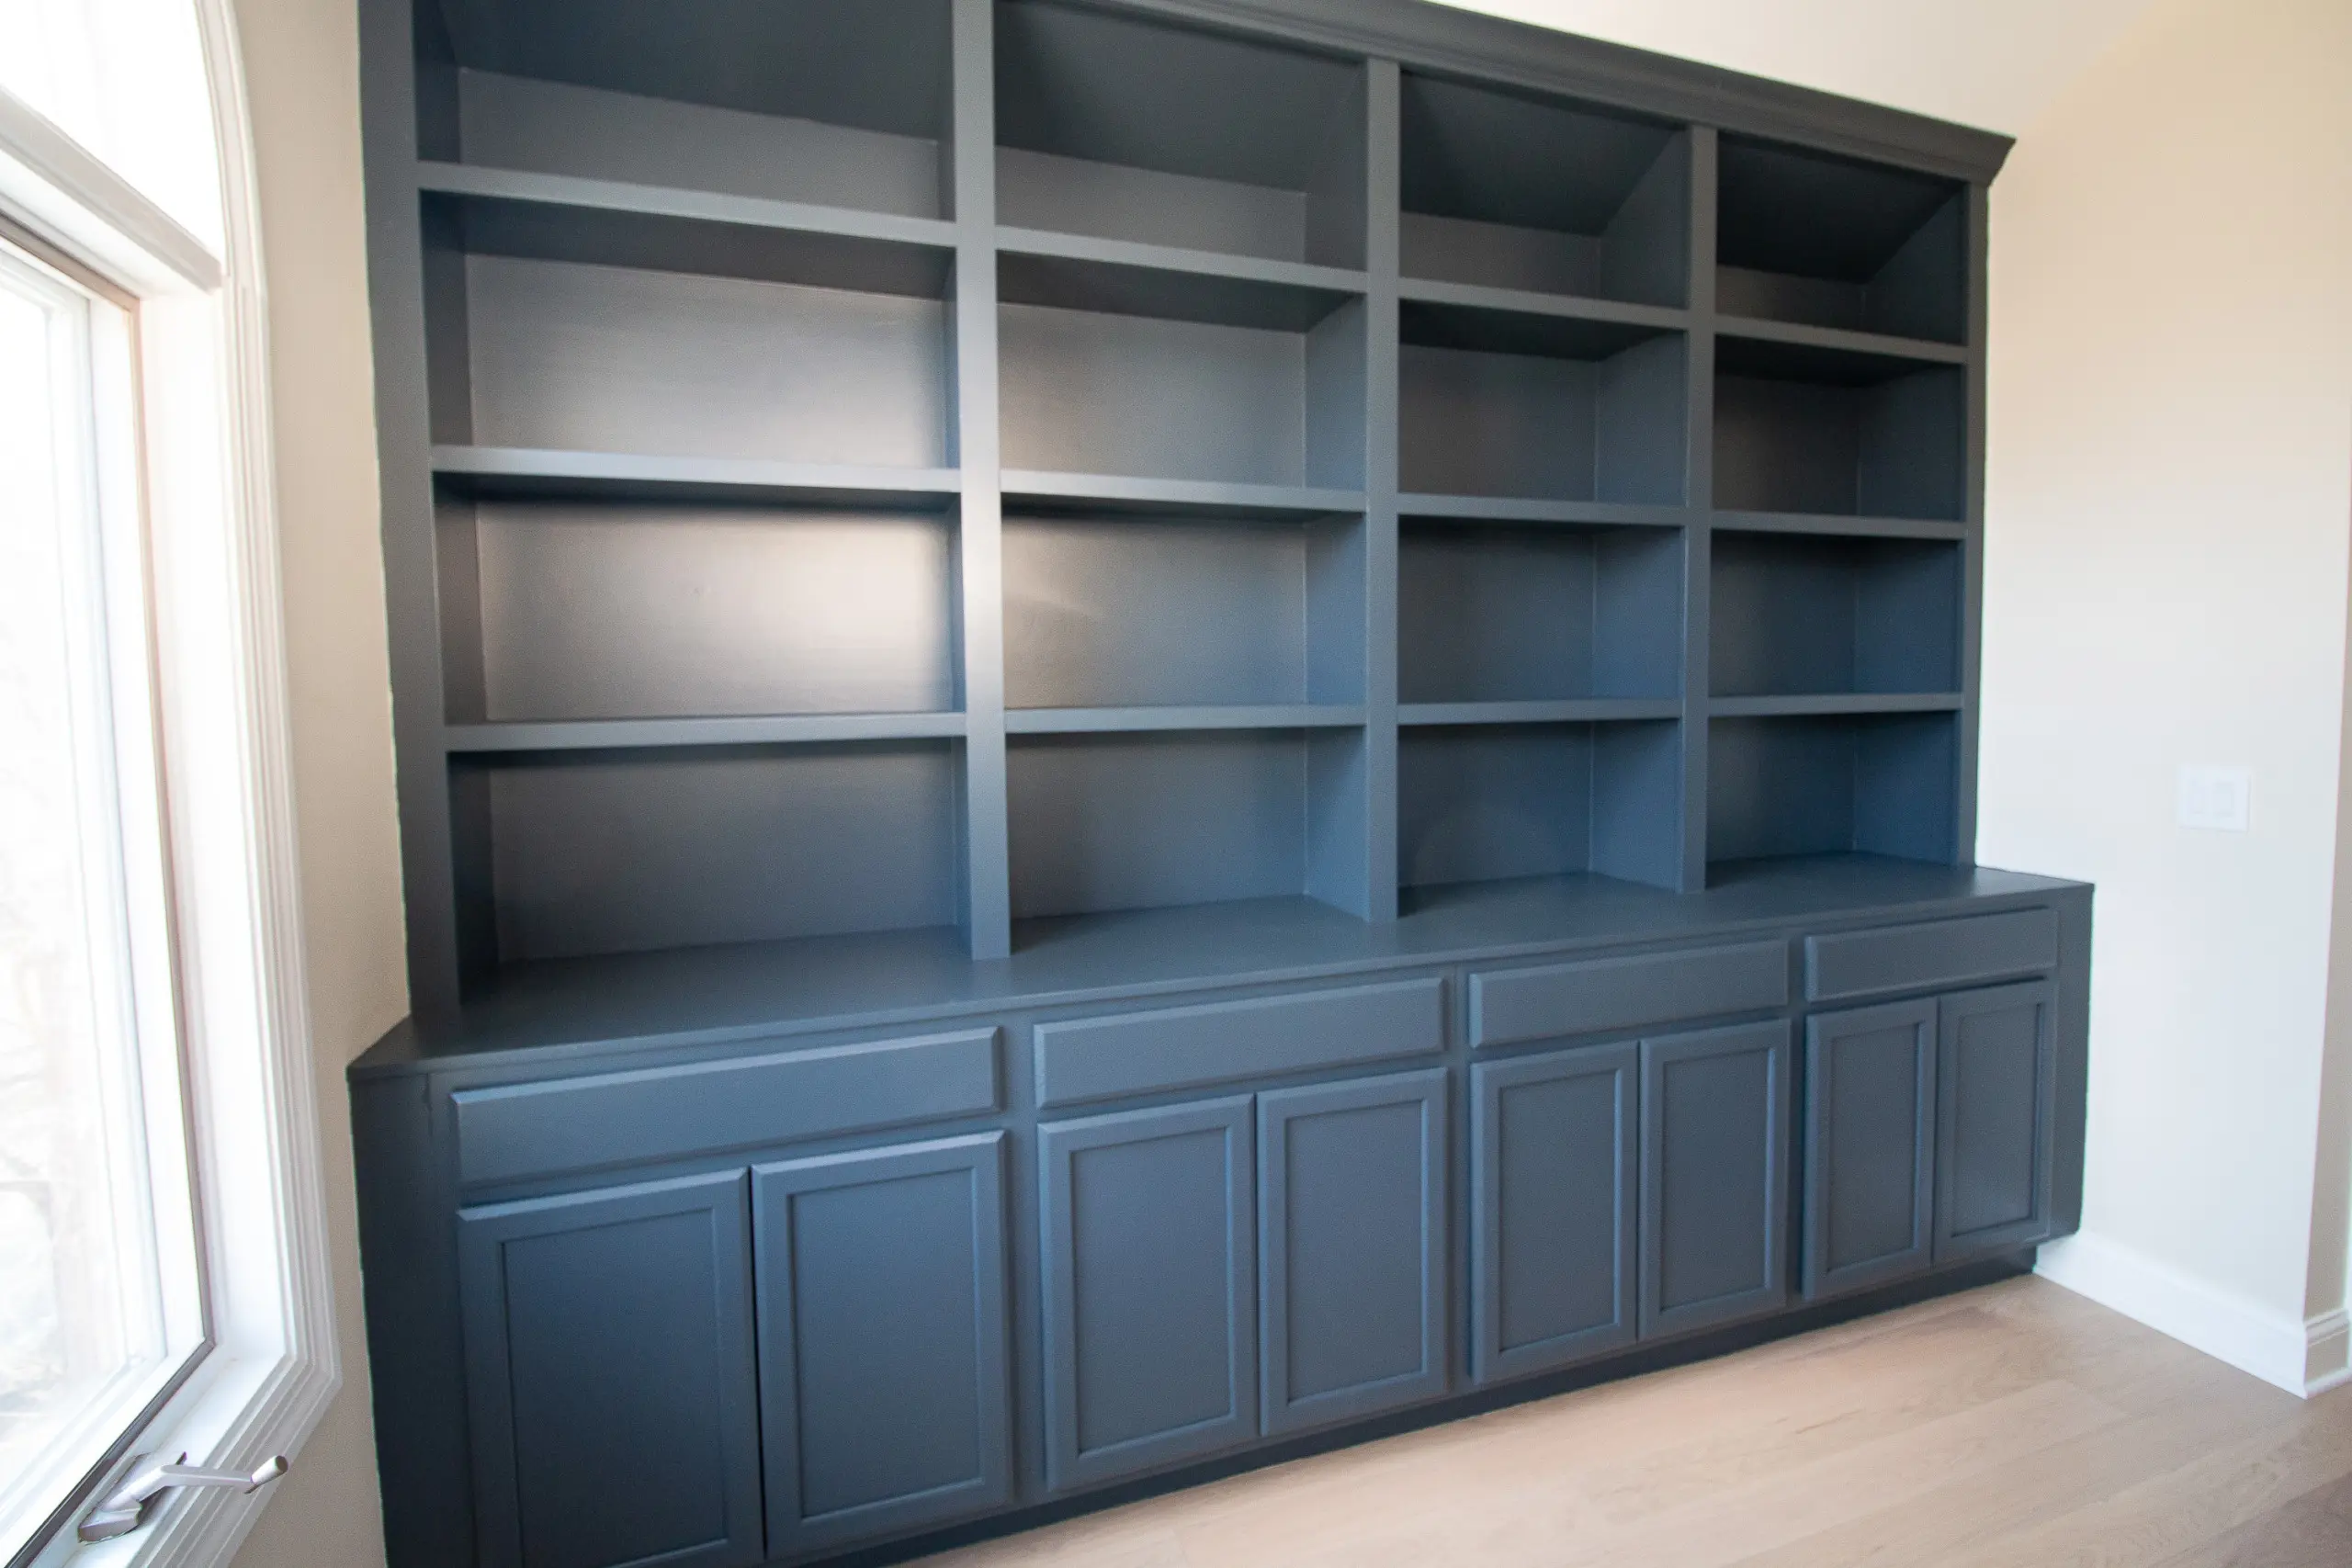
I’m in love with the color we chose for these. It’s a dark blue with slightly gray undertones. 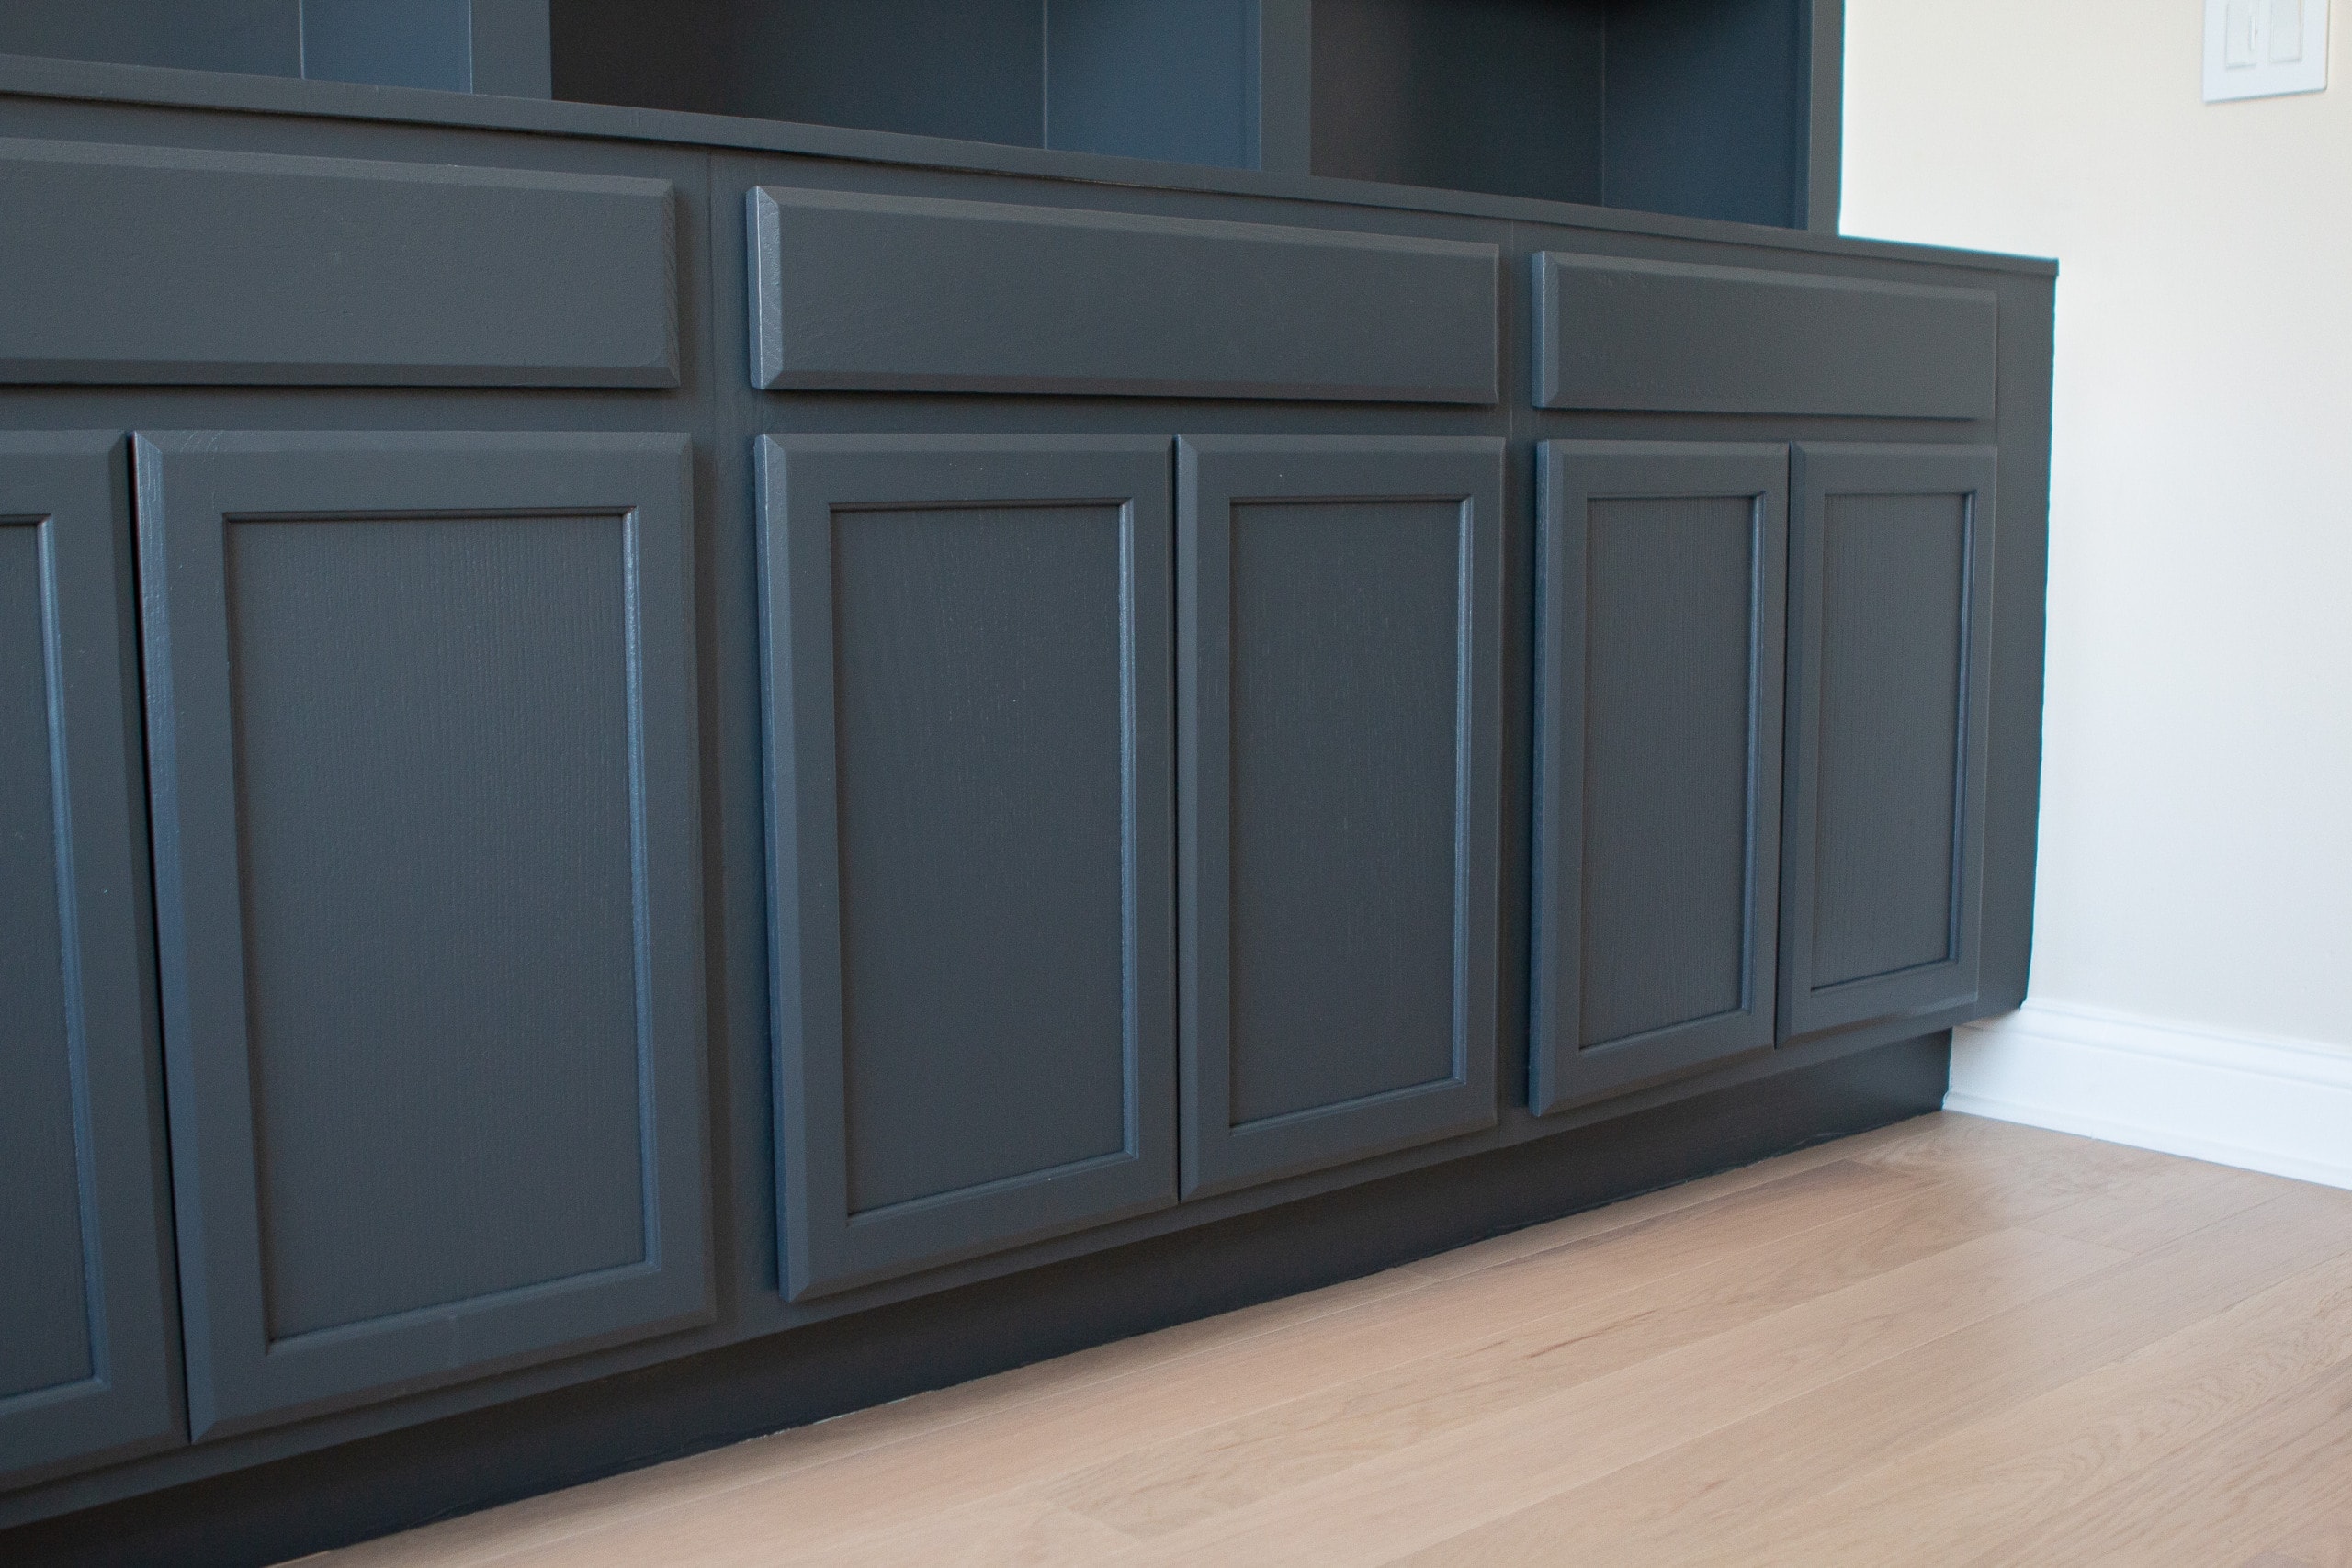
I’m planning to add brass hardware to the cabinets and drawers, but I’m trying to hold off a few more days so I don’t dent the paint job at all. I think the brass is really going to pop off this dark color. 
Overall, I’m thrilled with how these turned out and I can hardly believe that we’re about 99% done with these!!
What’s Next?
As I mentioned, I still have to add the brass hardware and then it’s time to style these! I have been looking forward to this day forever and I can’t wait to dig up all my books and accessories and go to town. Oh, and organizing the cabinets and drawers will be such fun too. 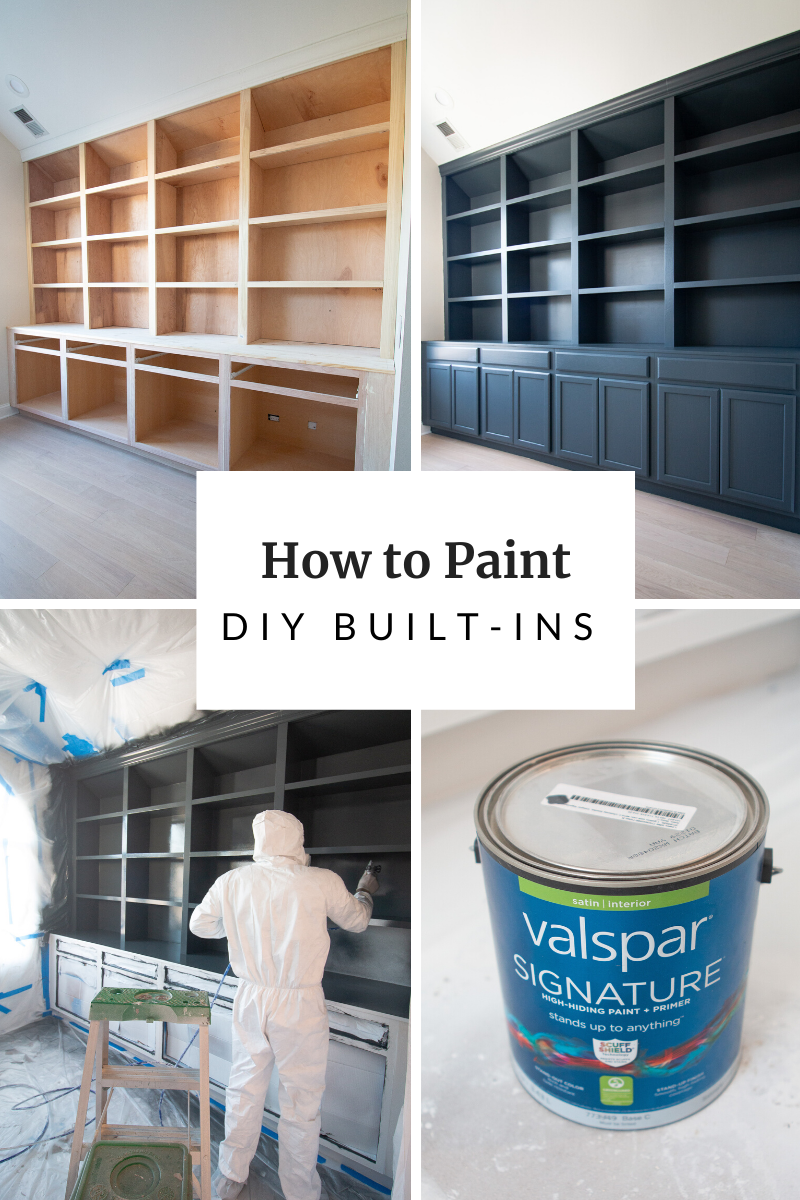
Next week, I will have the final built-in reveal for you with them all finished and styled. Plus, I will include a budget breakdown for the entire project. Time to start adding up all those receipts…
Catch Up On the Home Office Makeover
- Office Design Plan
- Built-Ins Part 1: Installing the Base Cabinets
- Office Furniture
- Built-Ins Part 2: Building DIY Bookshelves
- Priming & Painting Built-Ins
- Built-In Reveal & Budget Breakdown
- Installing a Wall Mural
- Home Office Makeover Reveal
- DIY Acrylic Dry Erase Board
Casey


