Organizing Greetings Cards
It may be February, but we’re still chugging along on that organizing train. With the big ticket Hallmark holiday on its way and a whole year of celebrations in store over the next 11 months…. let’s get those greeting cards organized!

Everyone can appreciate a cute card every once in awhile, but if you’re anything like me, you canNOT appreciate the price tag that comes inside that envelope. Rookie budgets do not support $4+ greeting cards, regardless of how fabulous the celebration is. My solution? Stocking up on greeting cards on sale so when the time comes to celebrate- I’m ready (and don’t have to break the bank)!! You’d be surprised, I have come across quite the selection of cards at going-out-of-business sales, estate sales and even the occasional garage sale. Plus, there’s a local card shop where I check out post holiday sales.

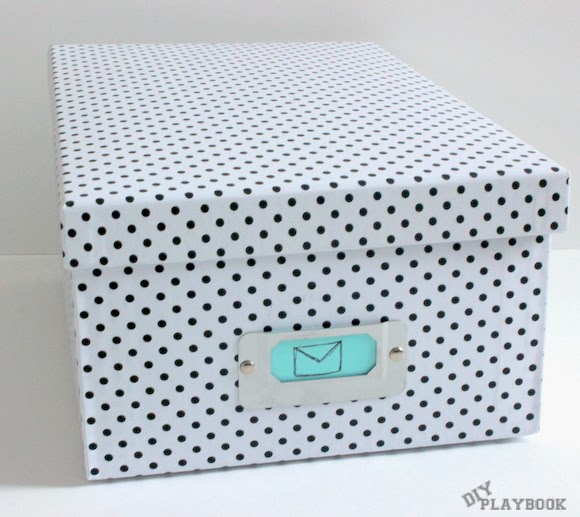
Now that you know my secrets, let’s get down to business. To kick off this project, I bought this polka dot box for $3 at JoAnn’s (bring your coupon!) and picked up a few pieces of HEAVY card stock. If you want more than 8 categories of cards, I’d advise buying MORE paper.

I used some grid scrapbook paper (note: the stains are part of the design) to create a template for my dividers. I measured the size of the box to make sure the dividers would fit and I made three tabs on top so I could use this same template for each of the dividers.

I traced the template and simply cut along the lines.

Before long, my dividers were ready to greet their counterparts.

Cards… lots & lots of cards. Holiday cards, birthday cards, valentine’s cards, cards just because, blank cards, animal cards– you name it, I got it.

Before you jump right into adding your cards to the box, I have one tip for you. Rather than wrapping the envelope around the card, tuck the envelope INSIDE of the card instead. This will help you see each card in the box more clearly and will help reduce paper distraction while flipping through your cards.

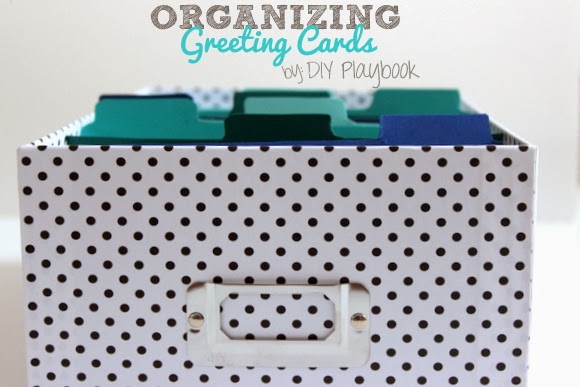
Categorize the cards and label your tabs. My labels were:
Birthday
Holiday
New Baby
For Him
Congratulations
Just for Fun
Blank Cards
Thank you
(Rookie Tip: I know a label maker would make this project far more attractive, but I’m keeping it real here. As much as I’m all about a pretty label, I know that when I see pretty labels on the blogosphere, I often feel intimidated and don’t complete the project because I don’t have the tools/machines to create the pretty label. Anyone else guilty? You have no excuses here! Just a plain pen and paper is all you need to get this done. You can do this!!)

In the back of the box, I put some random stationary and tiny cards that wouldn’t quite fit like the others. I used the bottom of one of the old stationary boxes to hold the notecards and tiny thank you notes. I also added stamps to the box to make sure I had all of my snail mail essentials in one place.


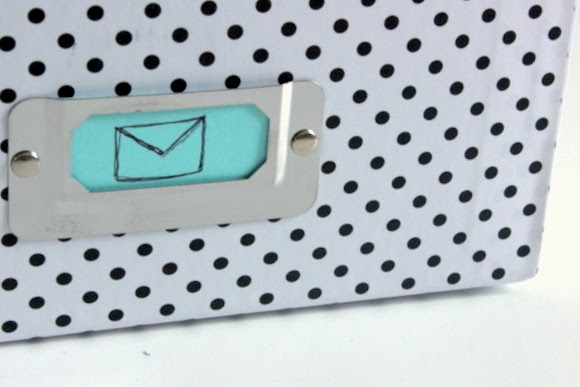
Last but very not least, a tiny little label. Like I said before, a label maker would make this far more attractive. But for the sake of keeping it real (and not having the equipment to make those professional labels) my 5th grade art skills will have to do. So, I slapped on an envelope (a rectangle plus a triangle… I know you can draw that too) to complete the box o’ snail mail.
See, organizing isn’t so bad is it? Paper, scissors, and a pen can really do some damage around these parts. No label maker, professional glitter machine, or high end slicer necessary. #inmydreams
Bridget