Budget Bathroom Makeover Reveal
I am so incredibly excited to share our budget bathroom makeover today. This was such a fun project for me and I can’t believe how much better the space looks with the small DIY projects I did in here. I’m hopeful that you’ll see the transformation and it will motivate you to give an outdated bathroom in your home some TLC.
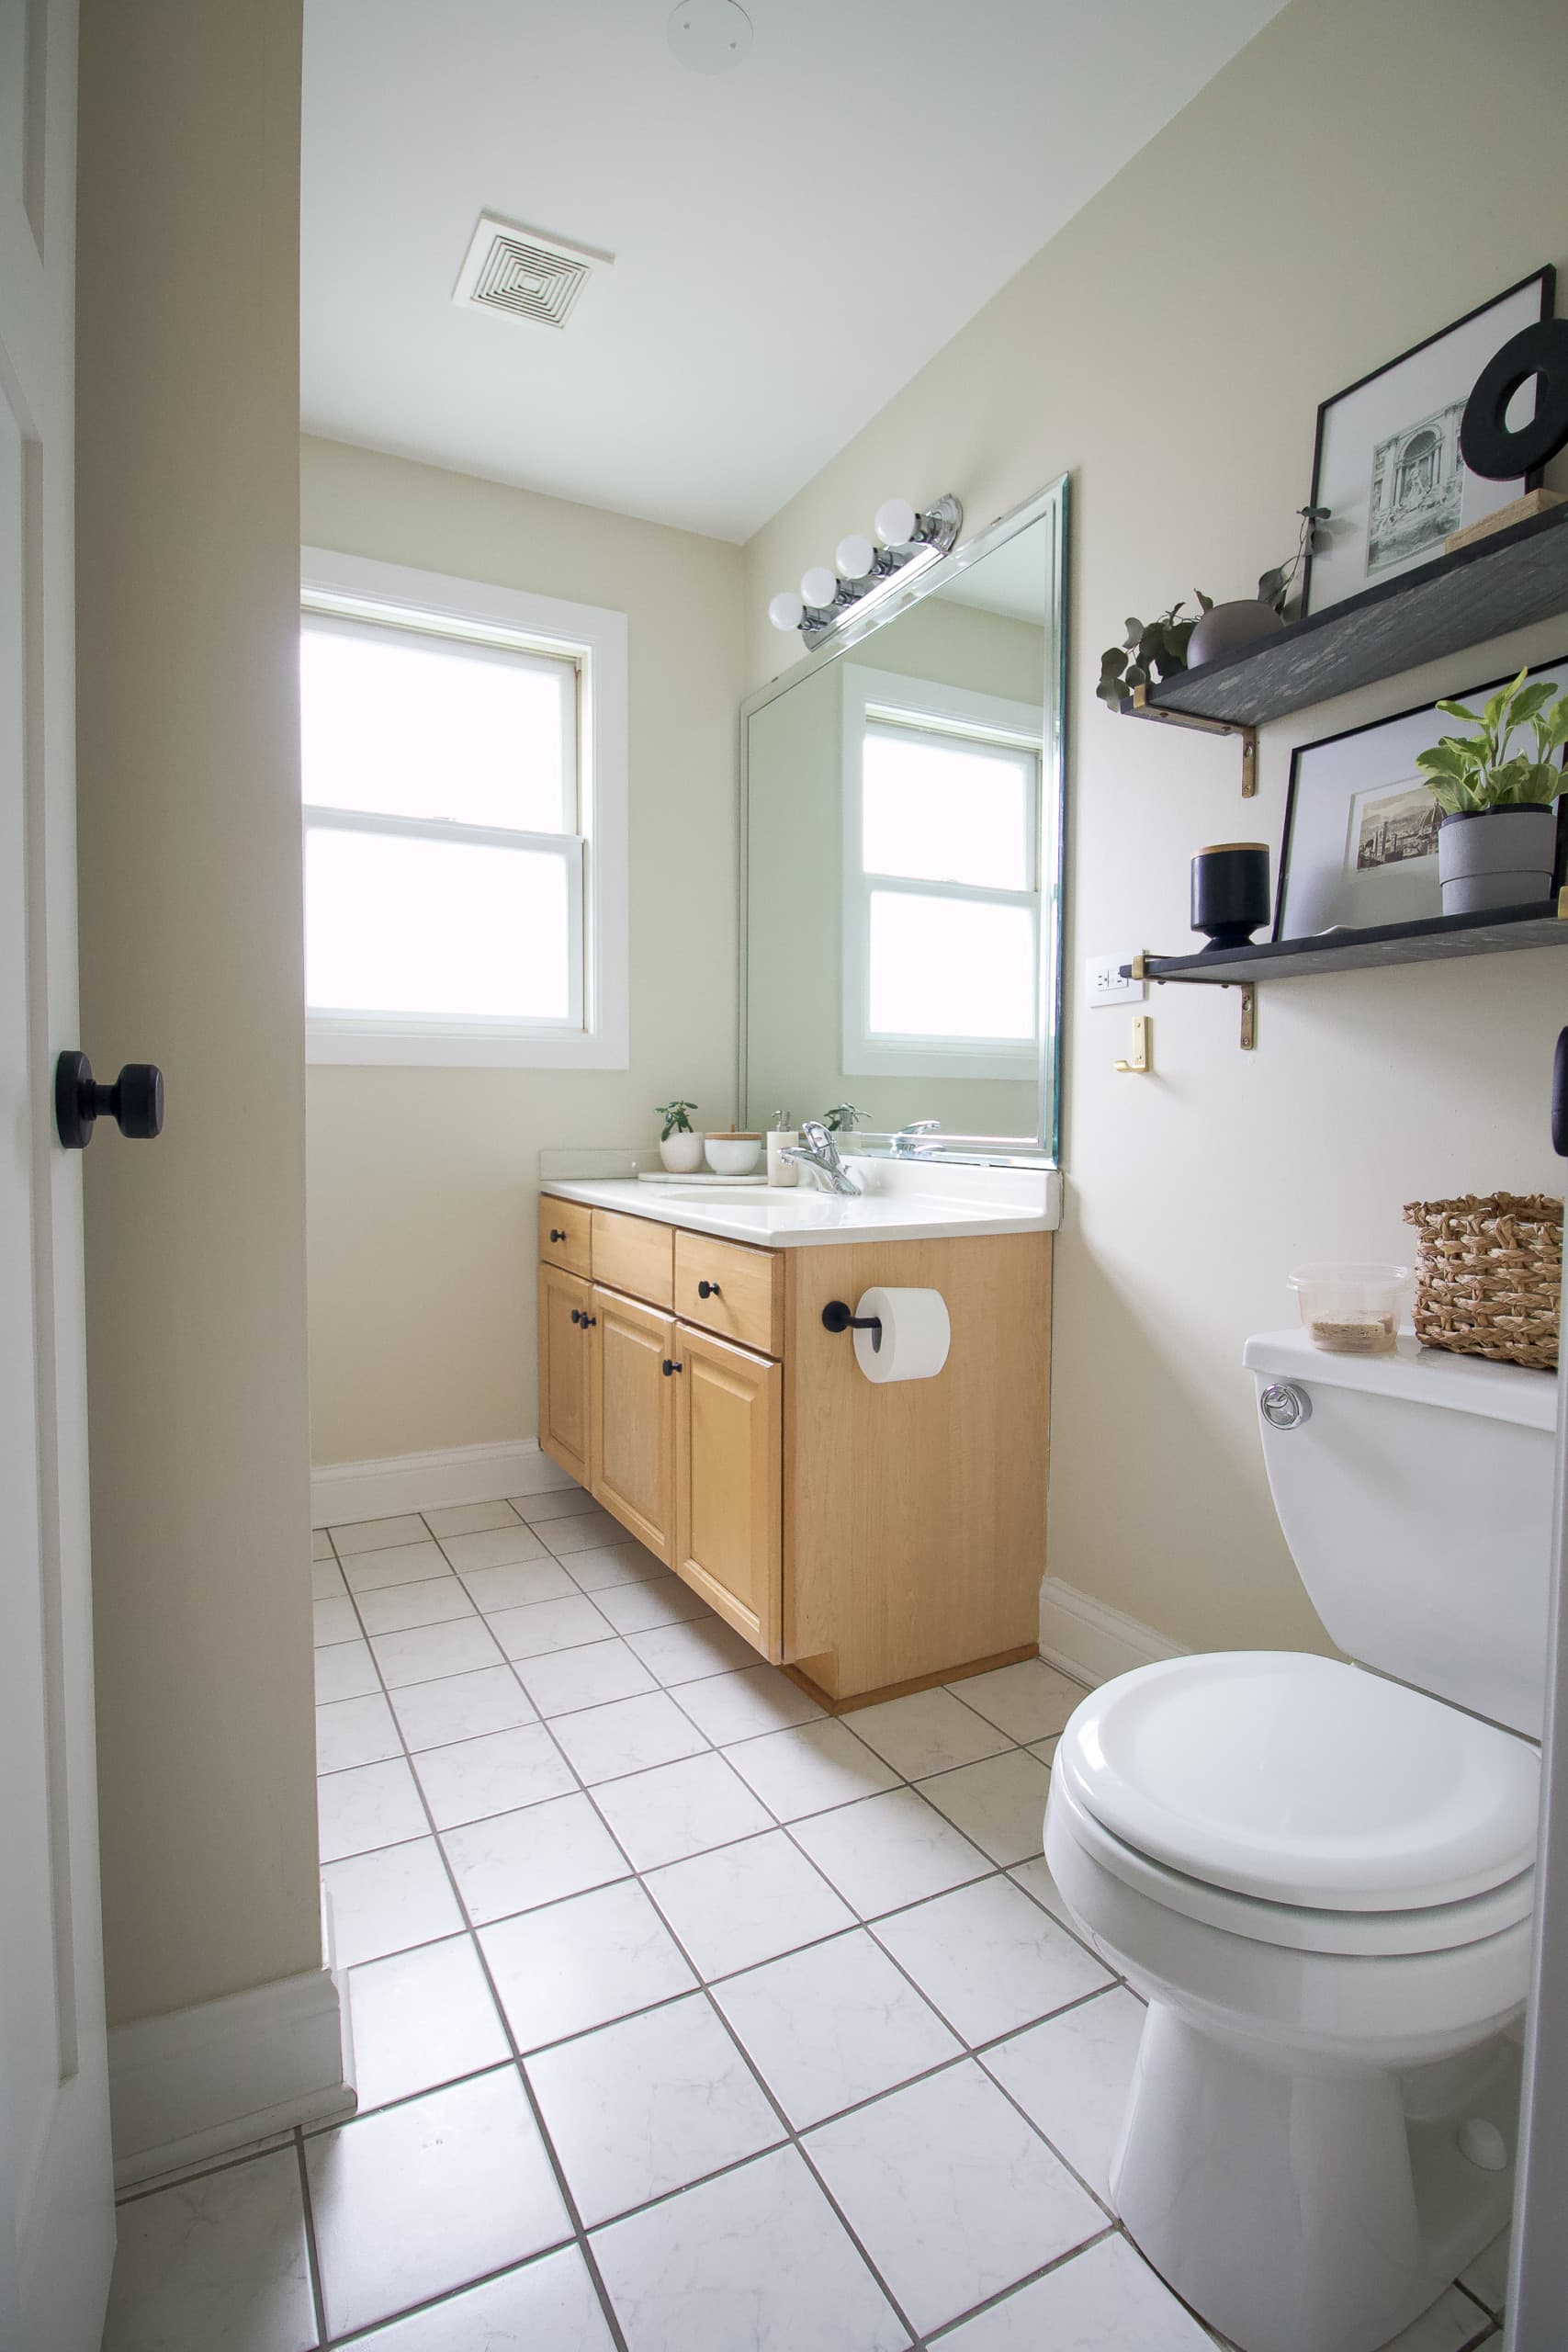
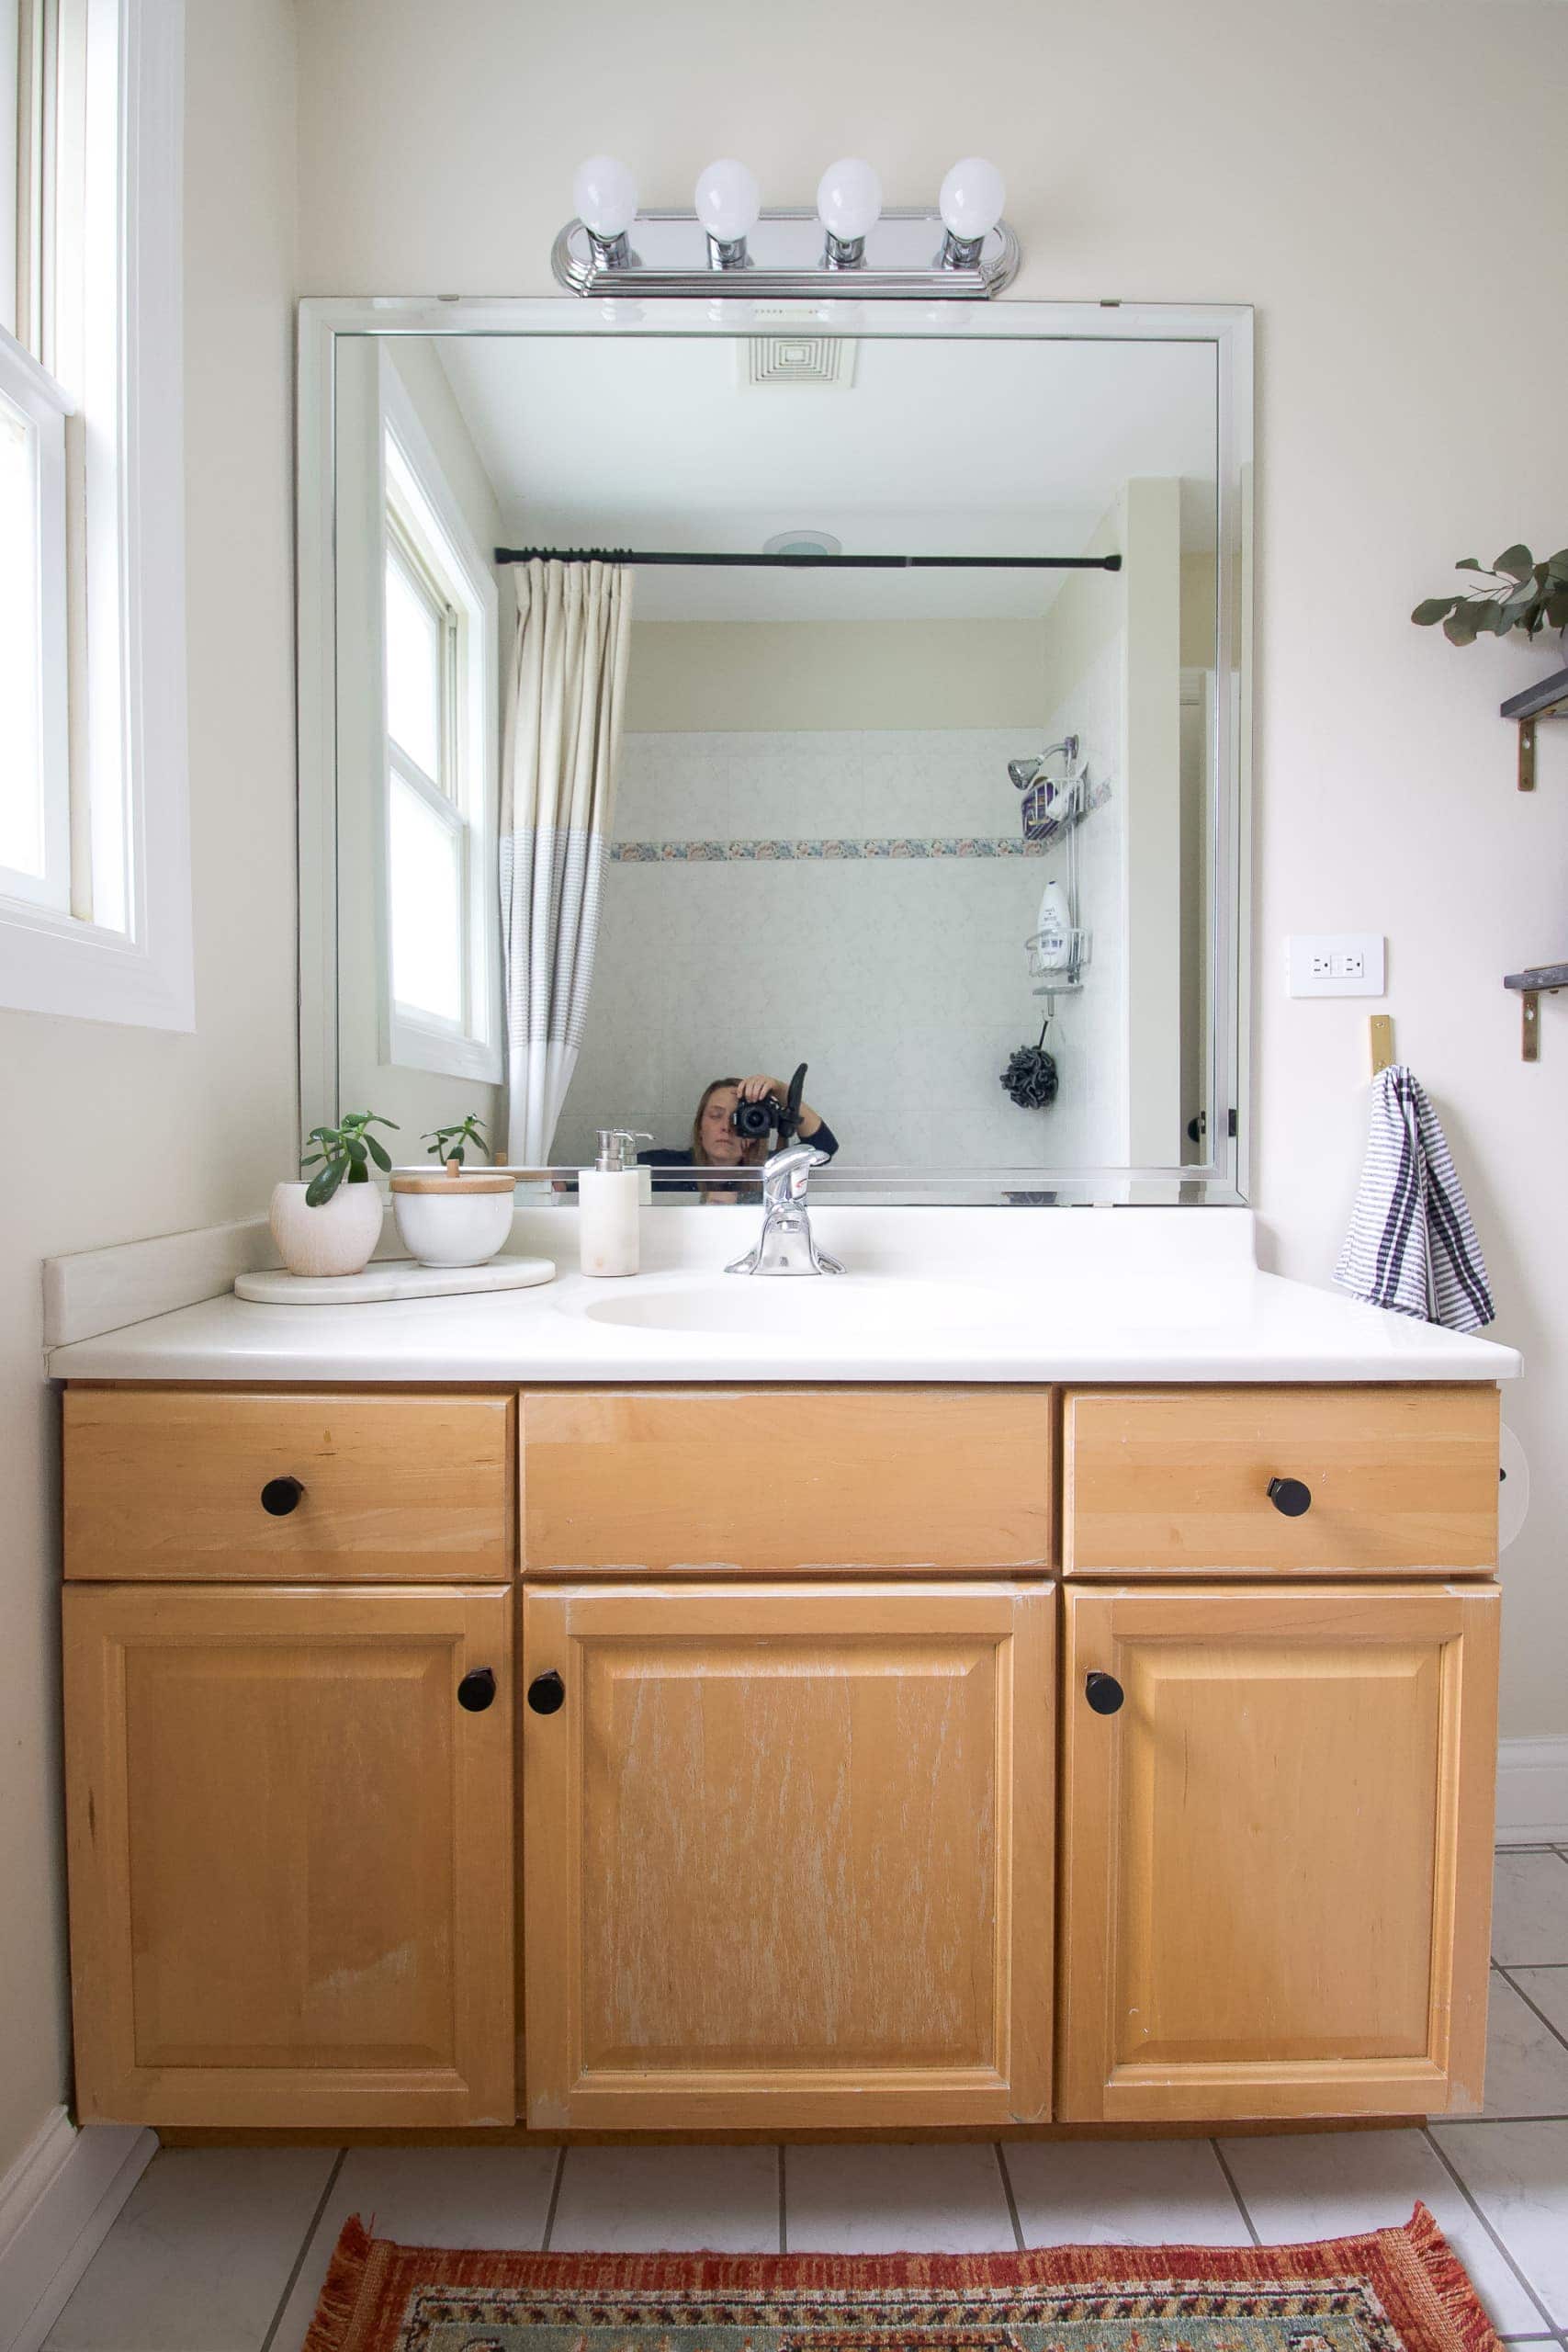
To remind you, here’s where we started…

The guest bathroom was very 90’s with outdated tile, a weathered vanity, and a builder basic mirror and light fixture. I shared my design plans for this space over in this blog post and here was my original vision for our budget bathroom makeover.
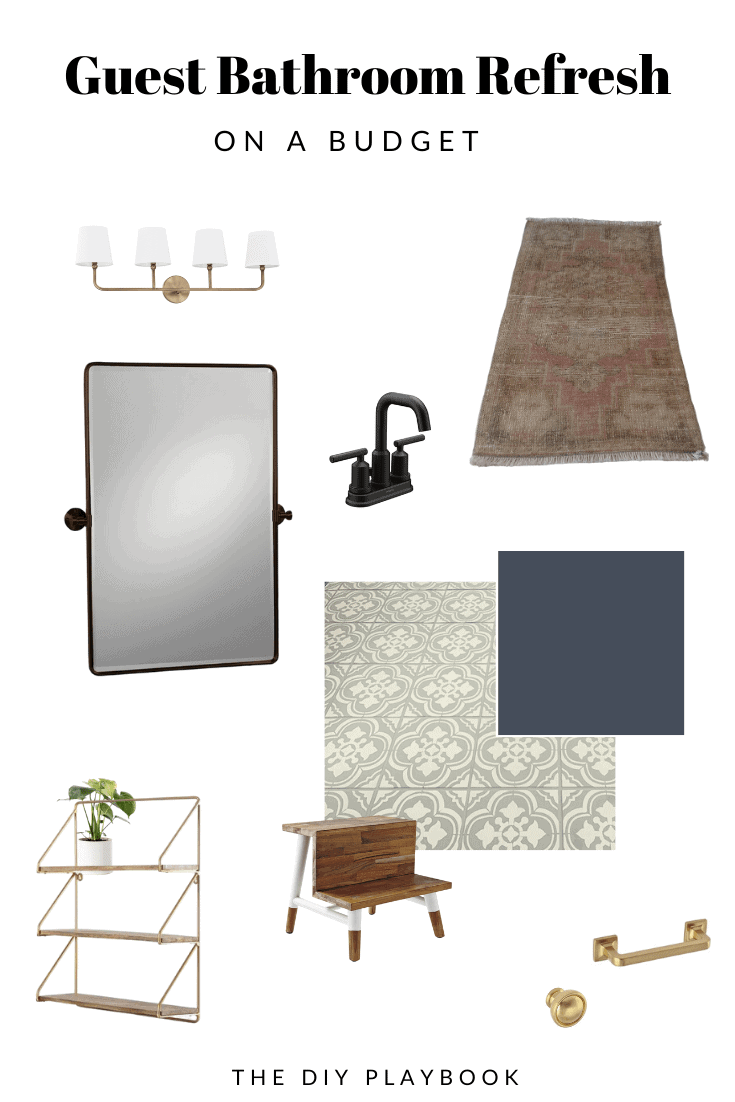
Step Stool // Light Fixture // Mirror // Stencil // Rug // Faucet // Shelf // Knob // Handle
I ended up veering from this original mood board a bit, but it still has the same overall vibes.
Budget DIY Projects
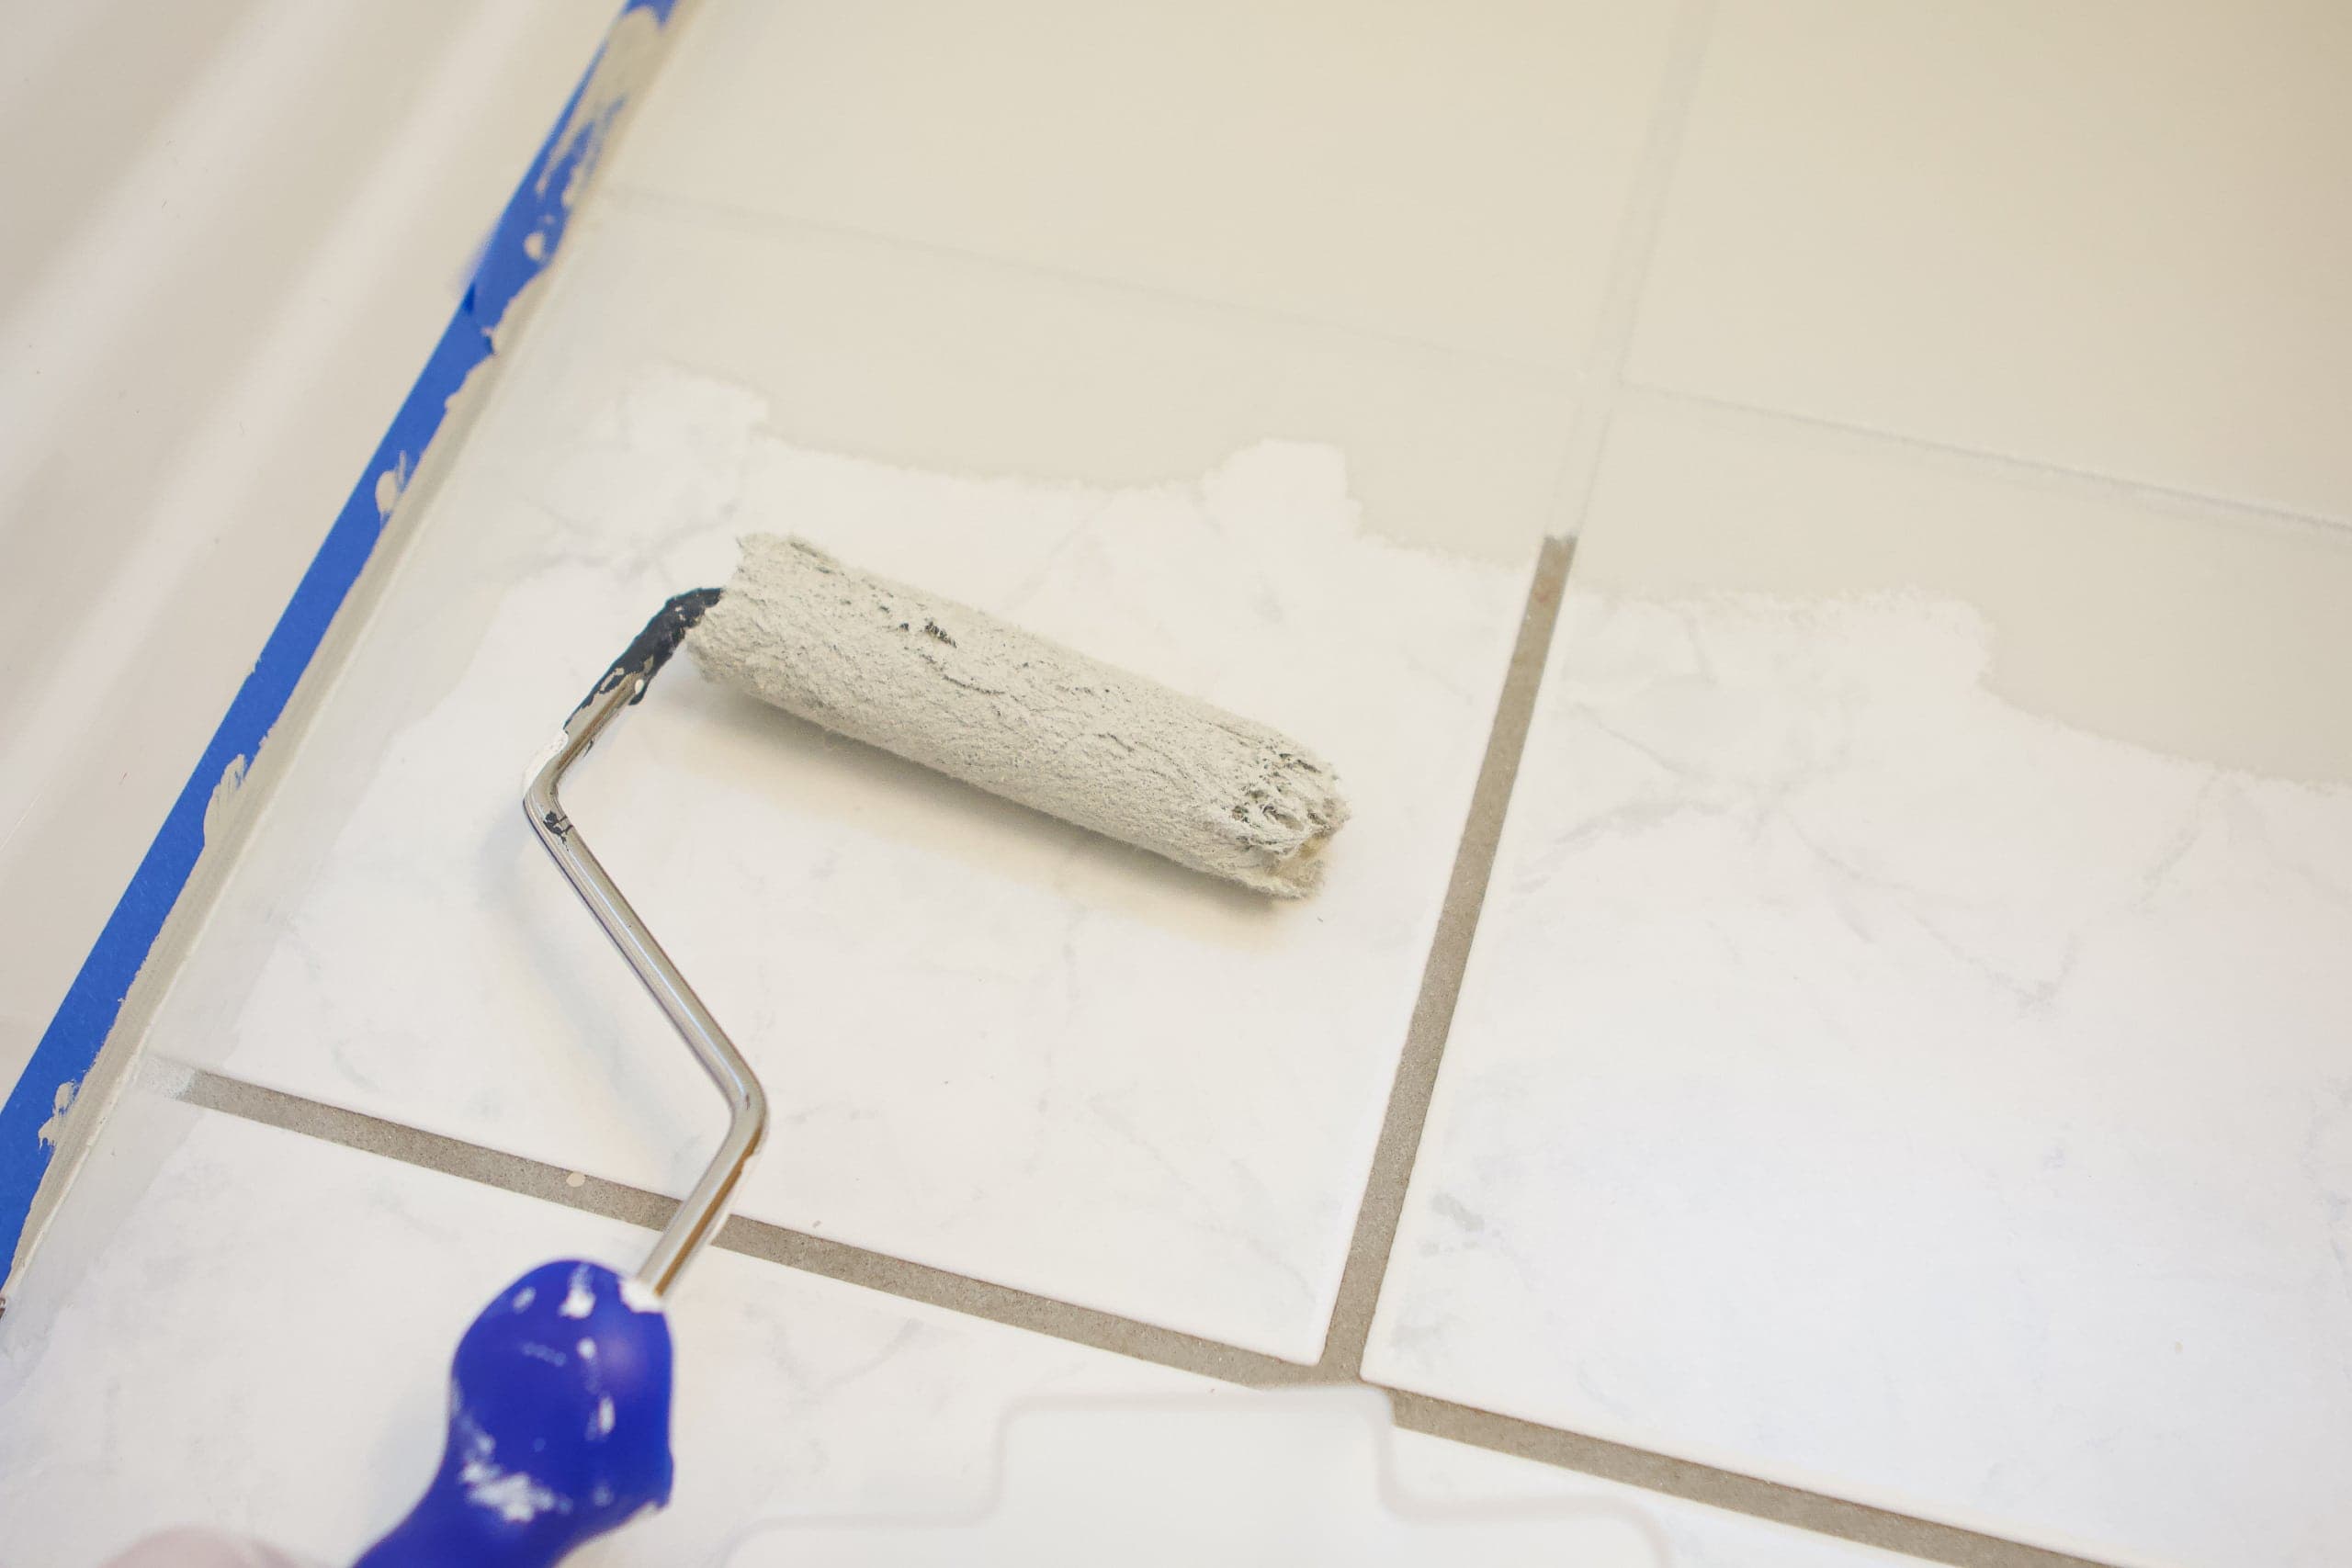
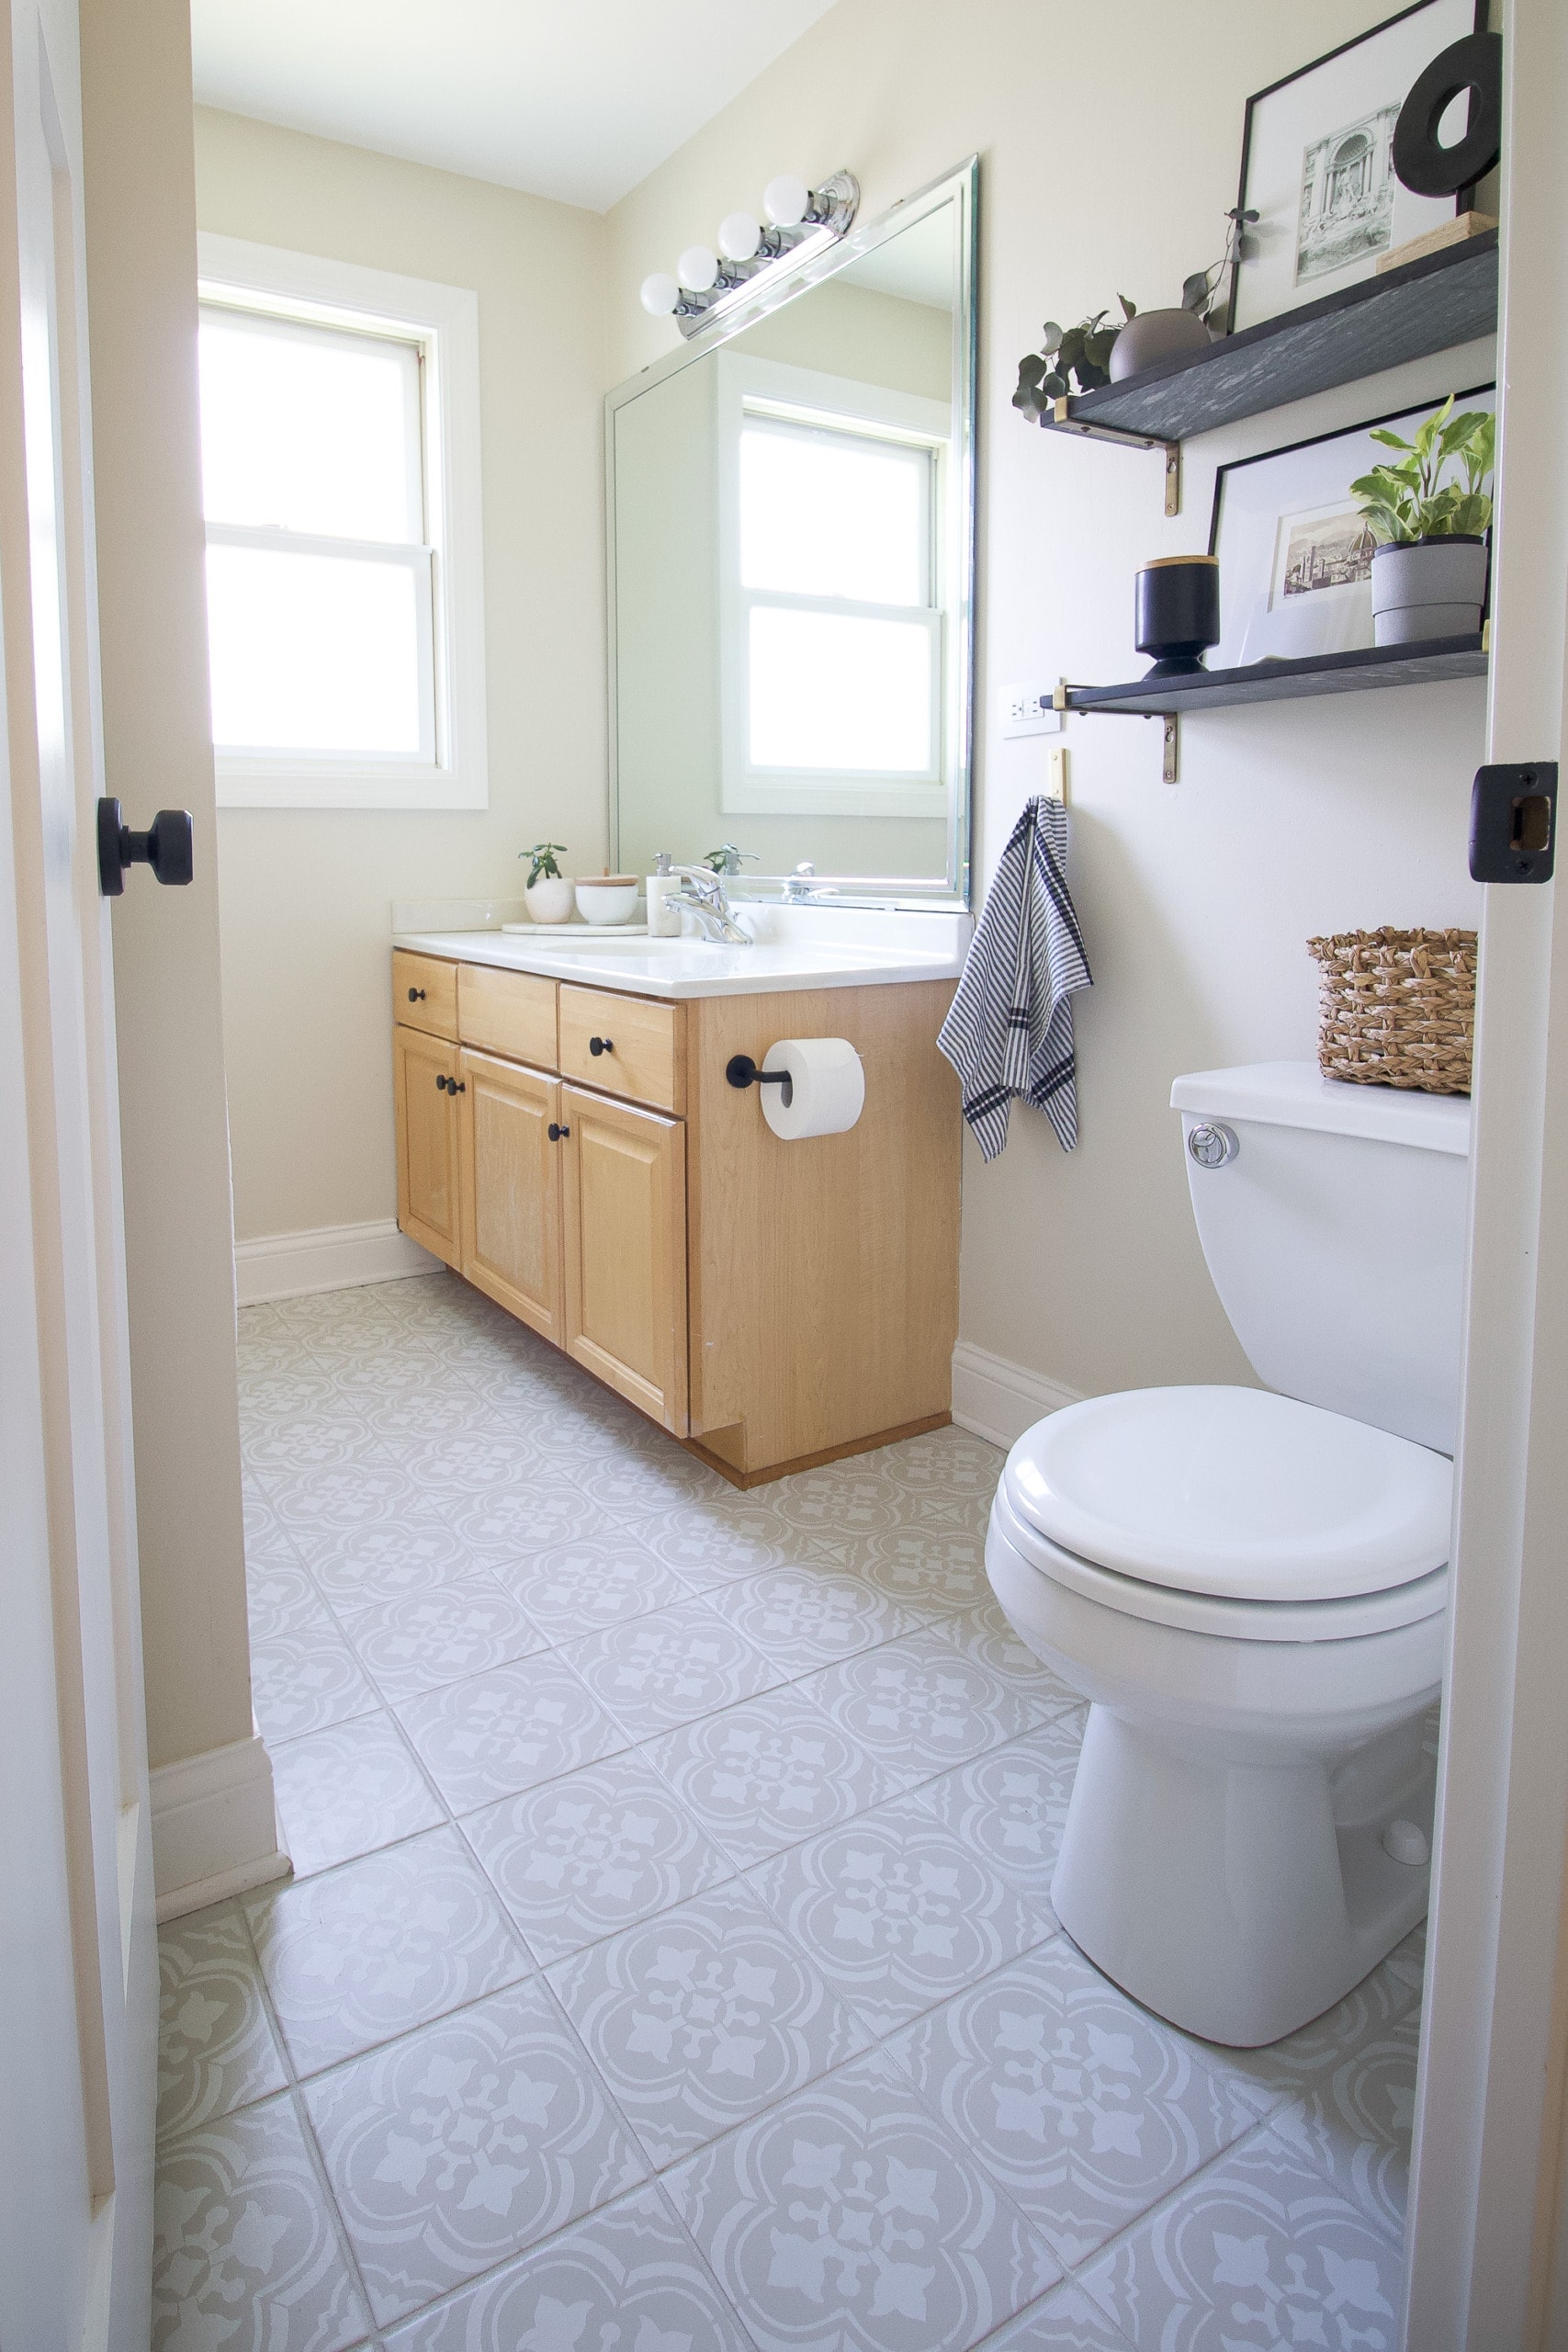
The first project I tackled was painting the tile floor. This was so incredibly fun (although a tad back-breaking on the ground there). I wasn’t sure how it would work and how durable it would end up being…but wow, it really looks amazing.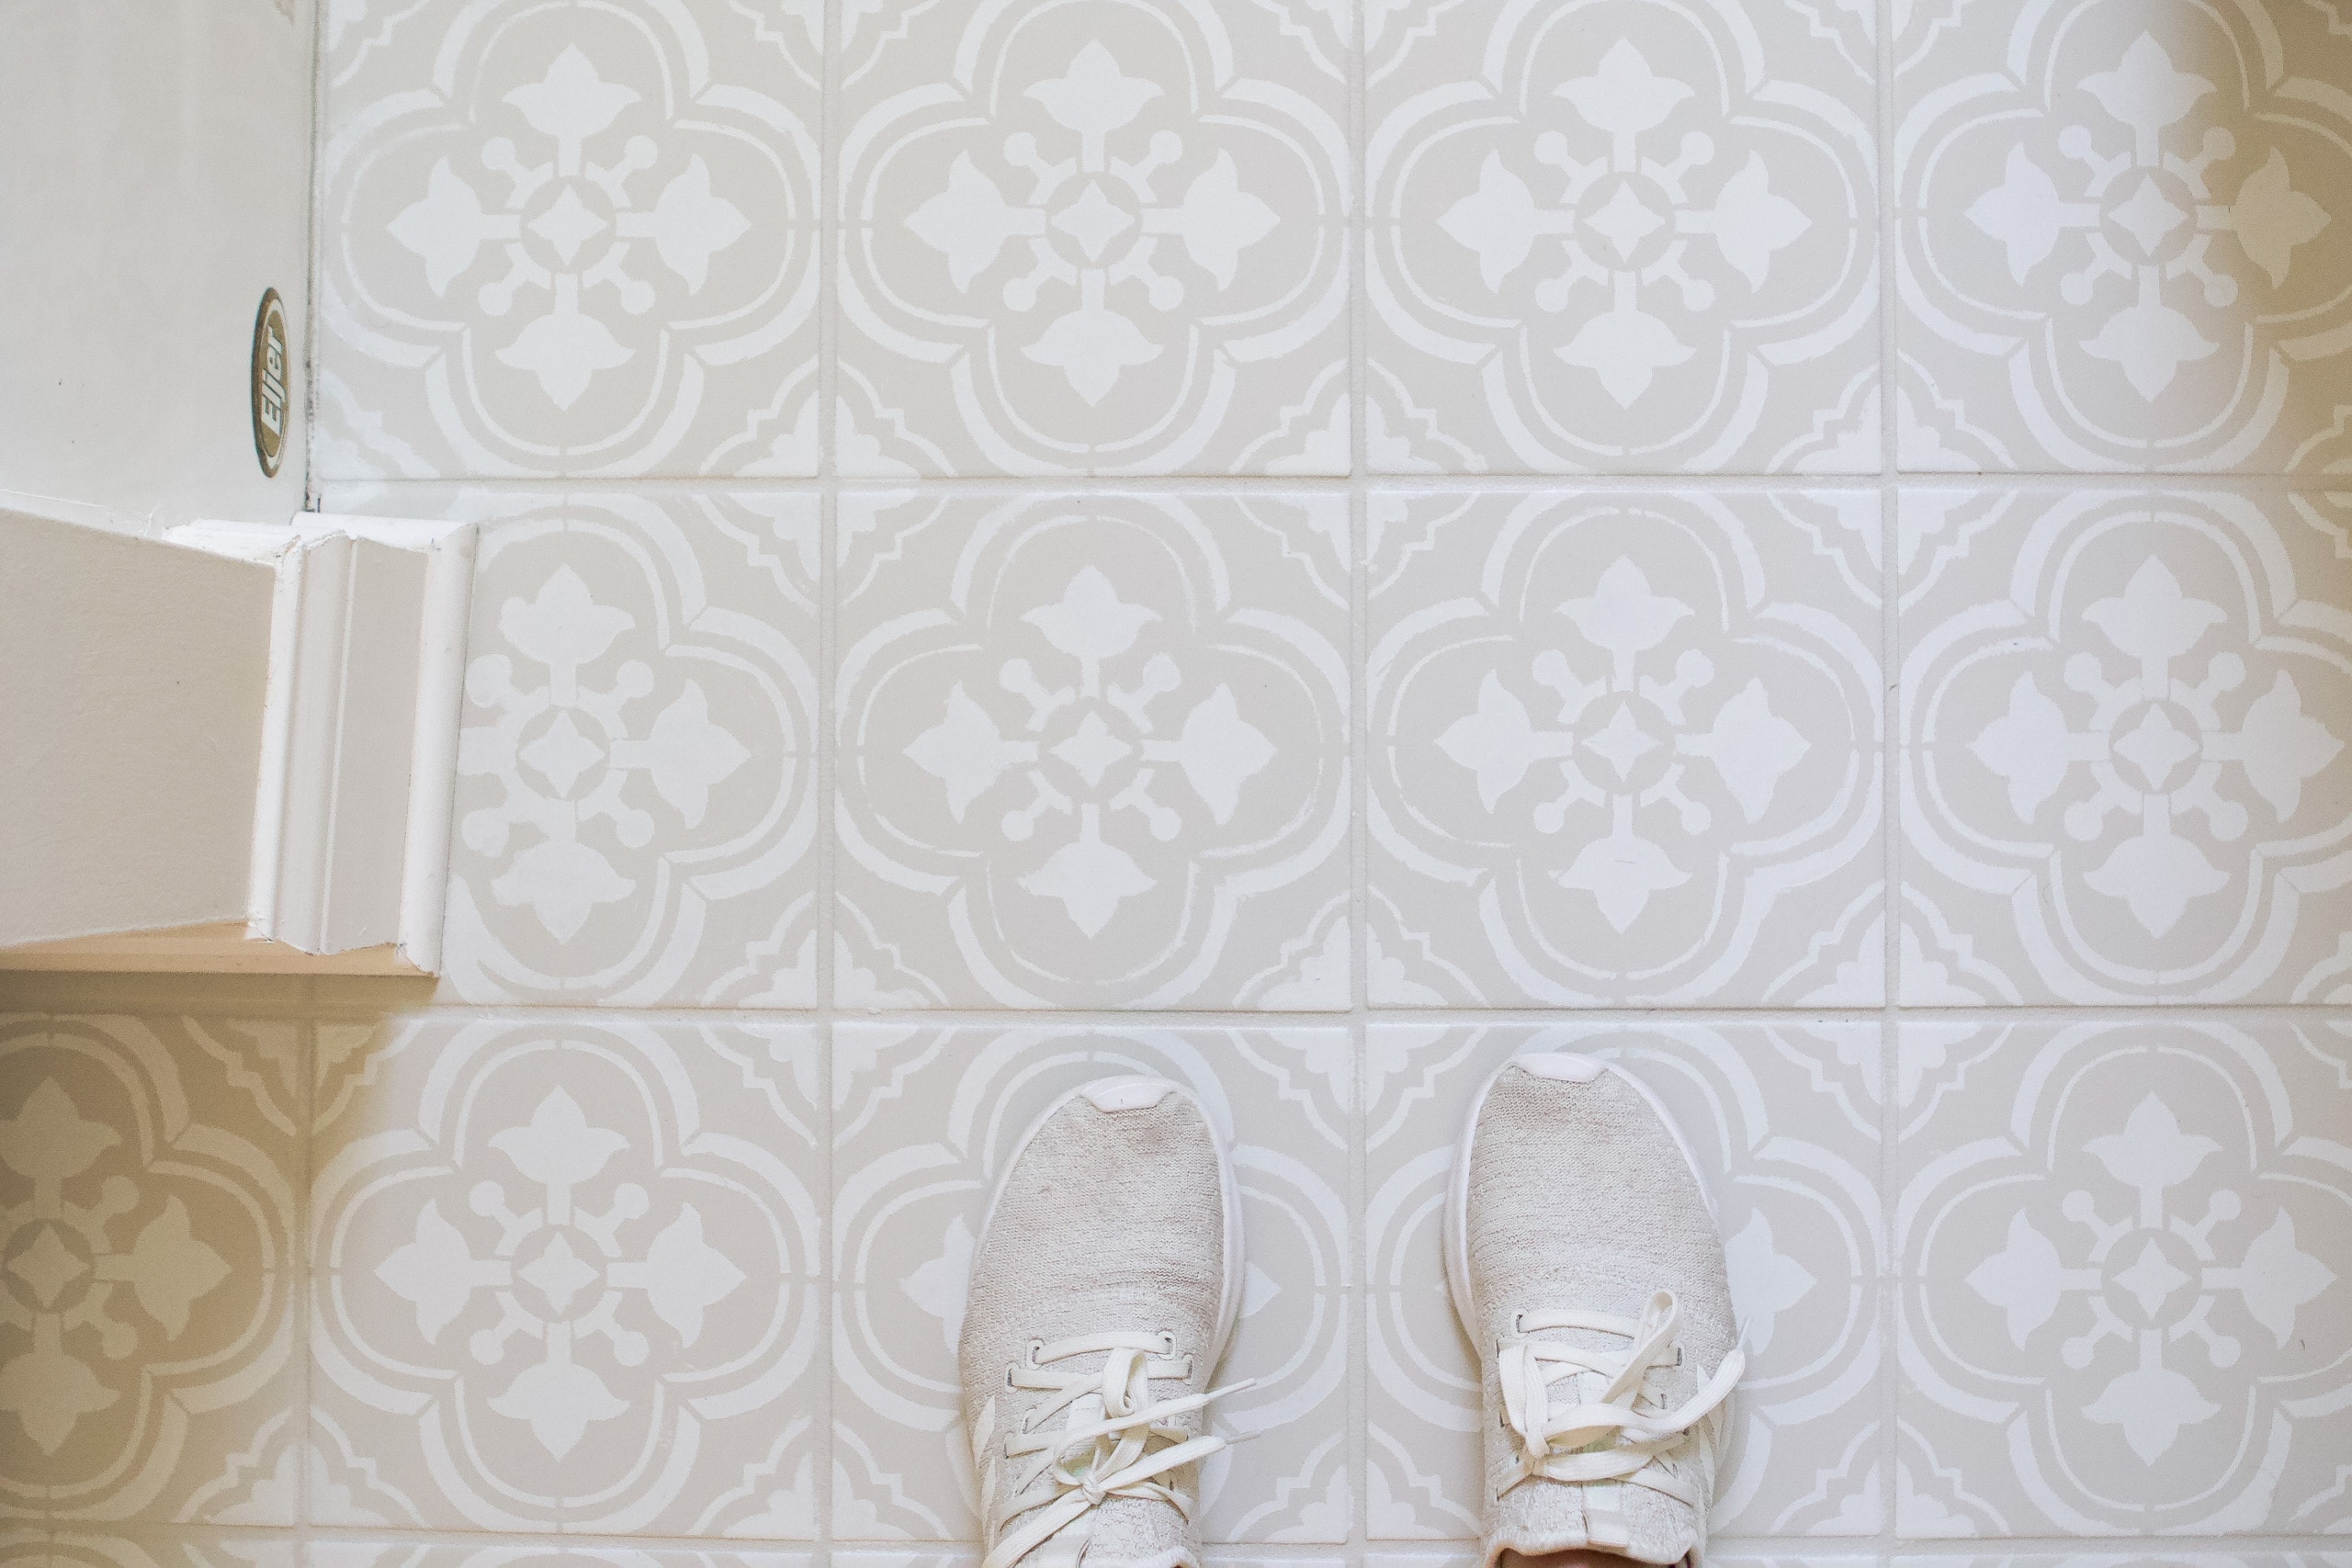
The tile colors ended up being warm and neutral and I love the soft curves of the stencil design. Overall, it was one of my favorite DIY projects ever. You can read the full tutorial here. 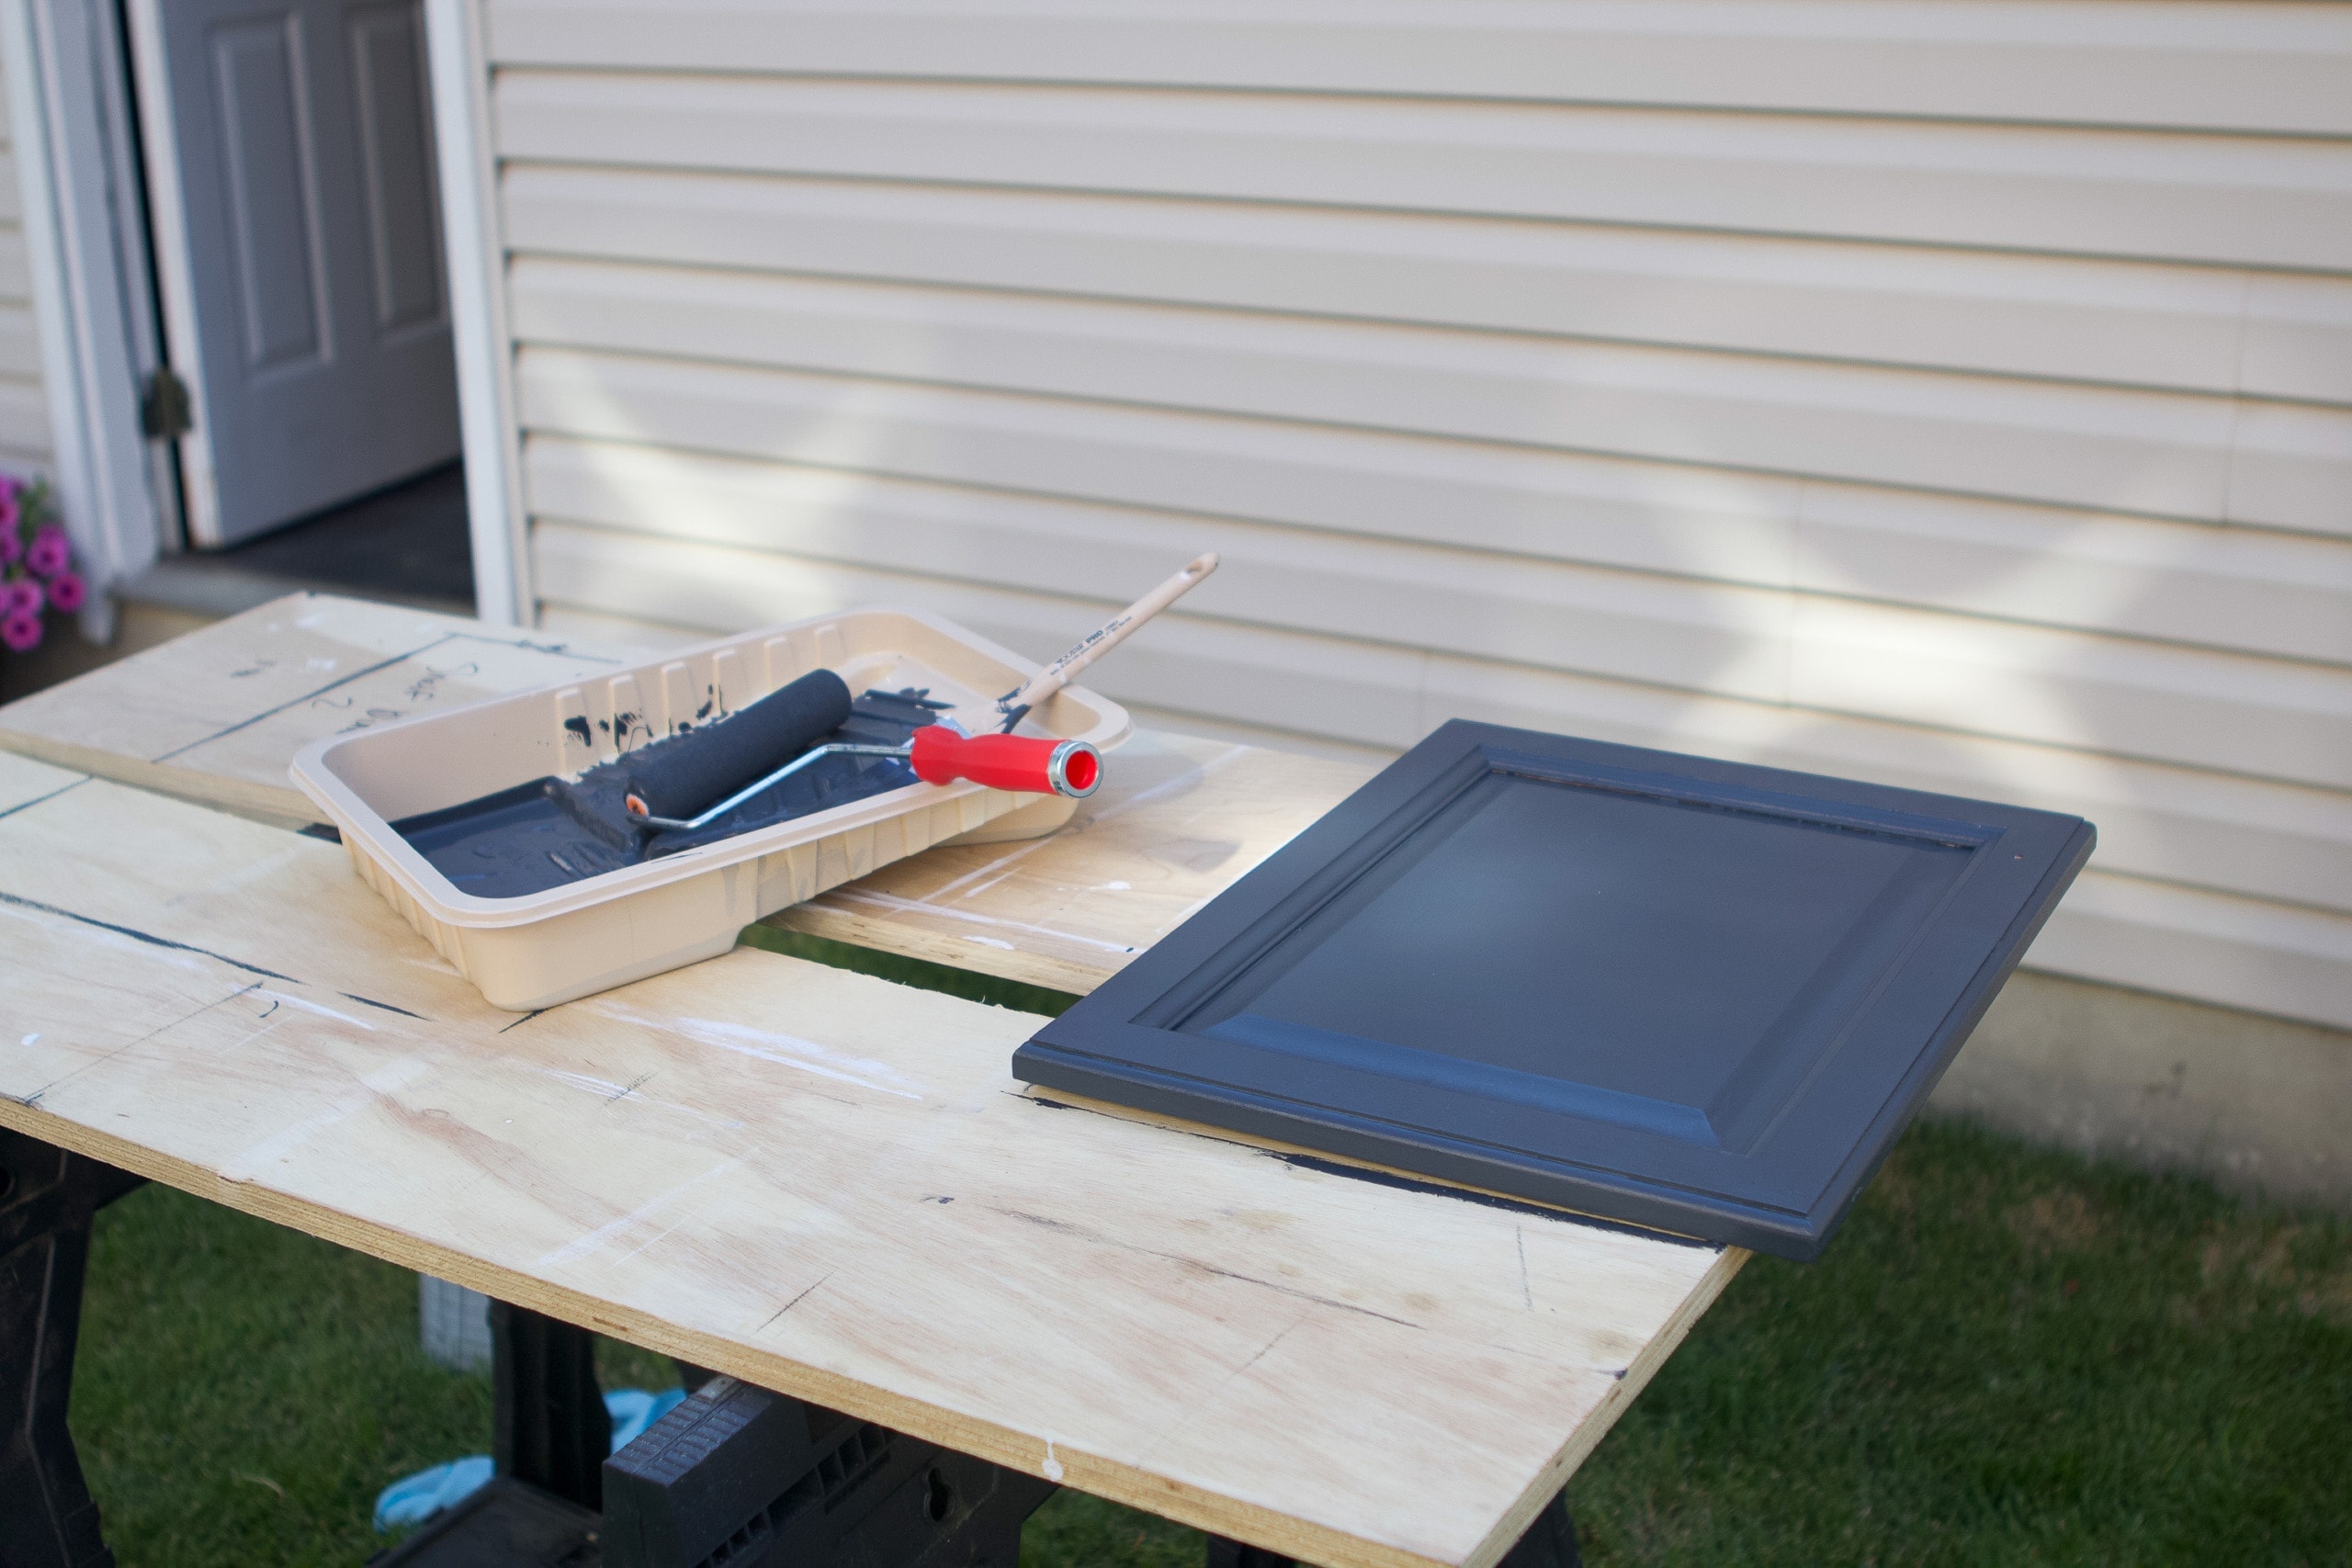
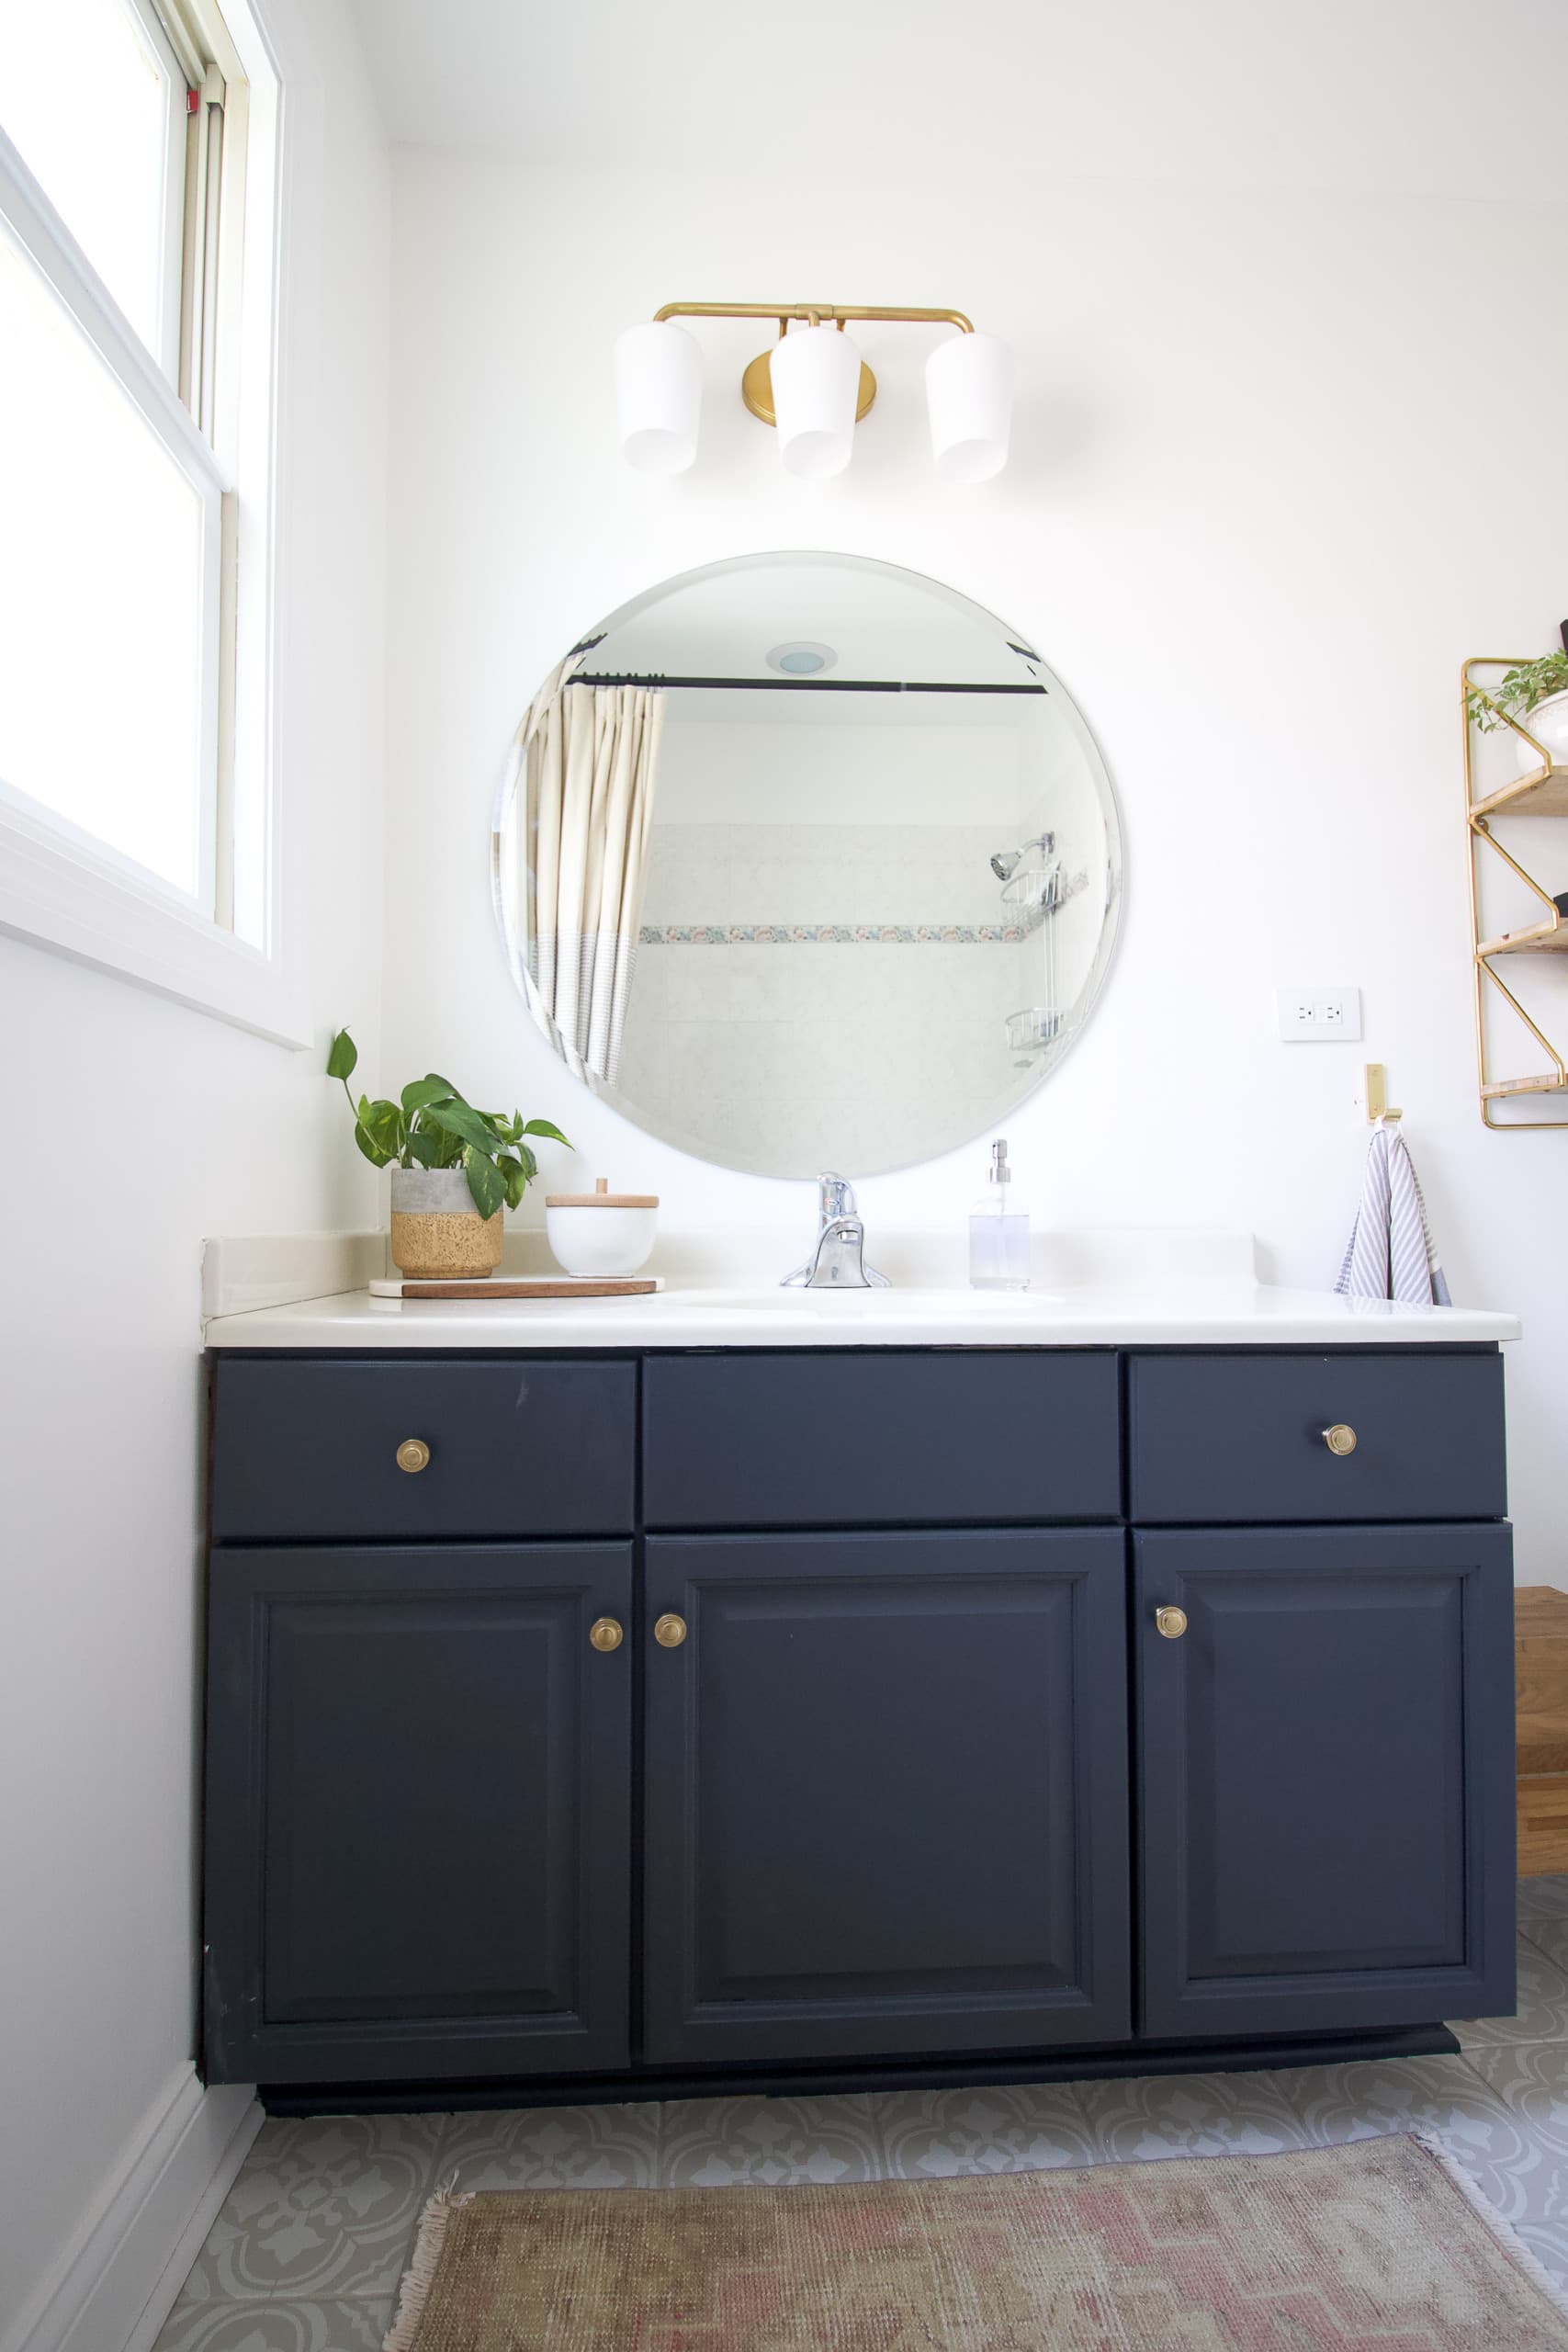
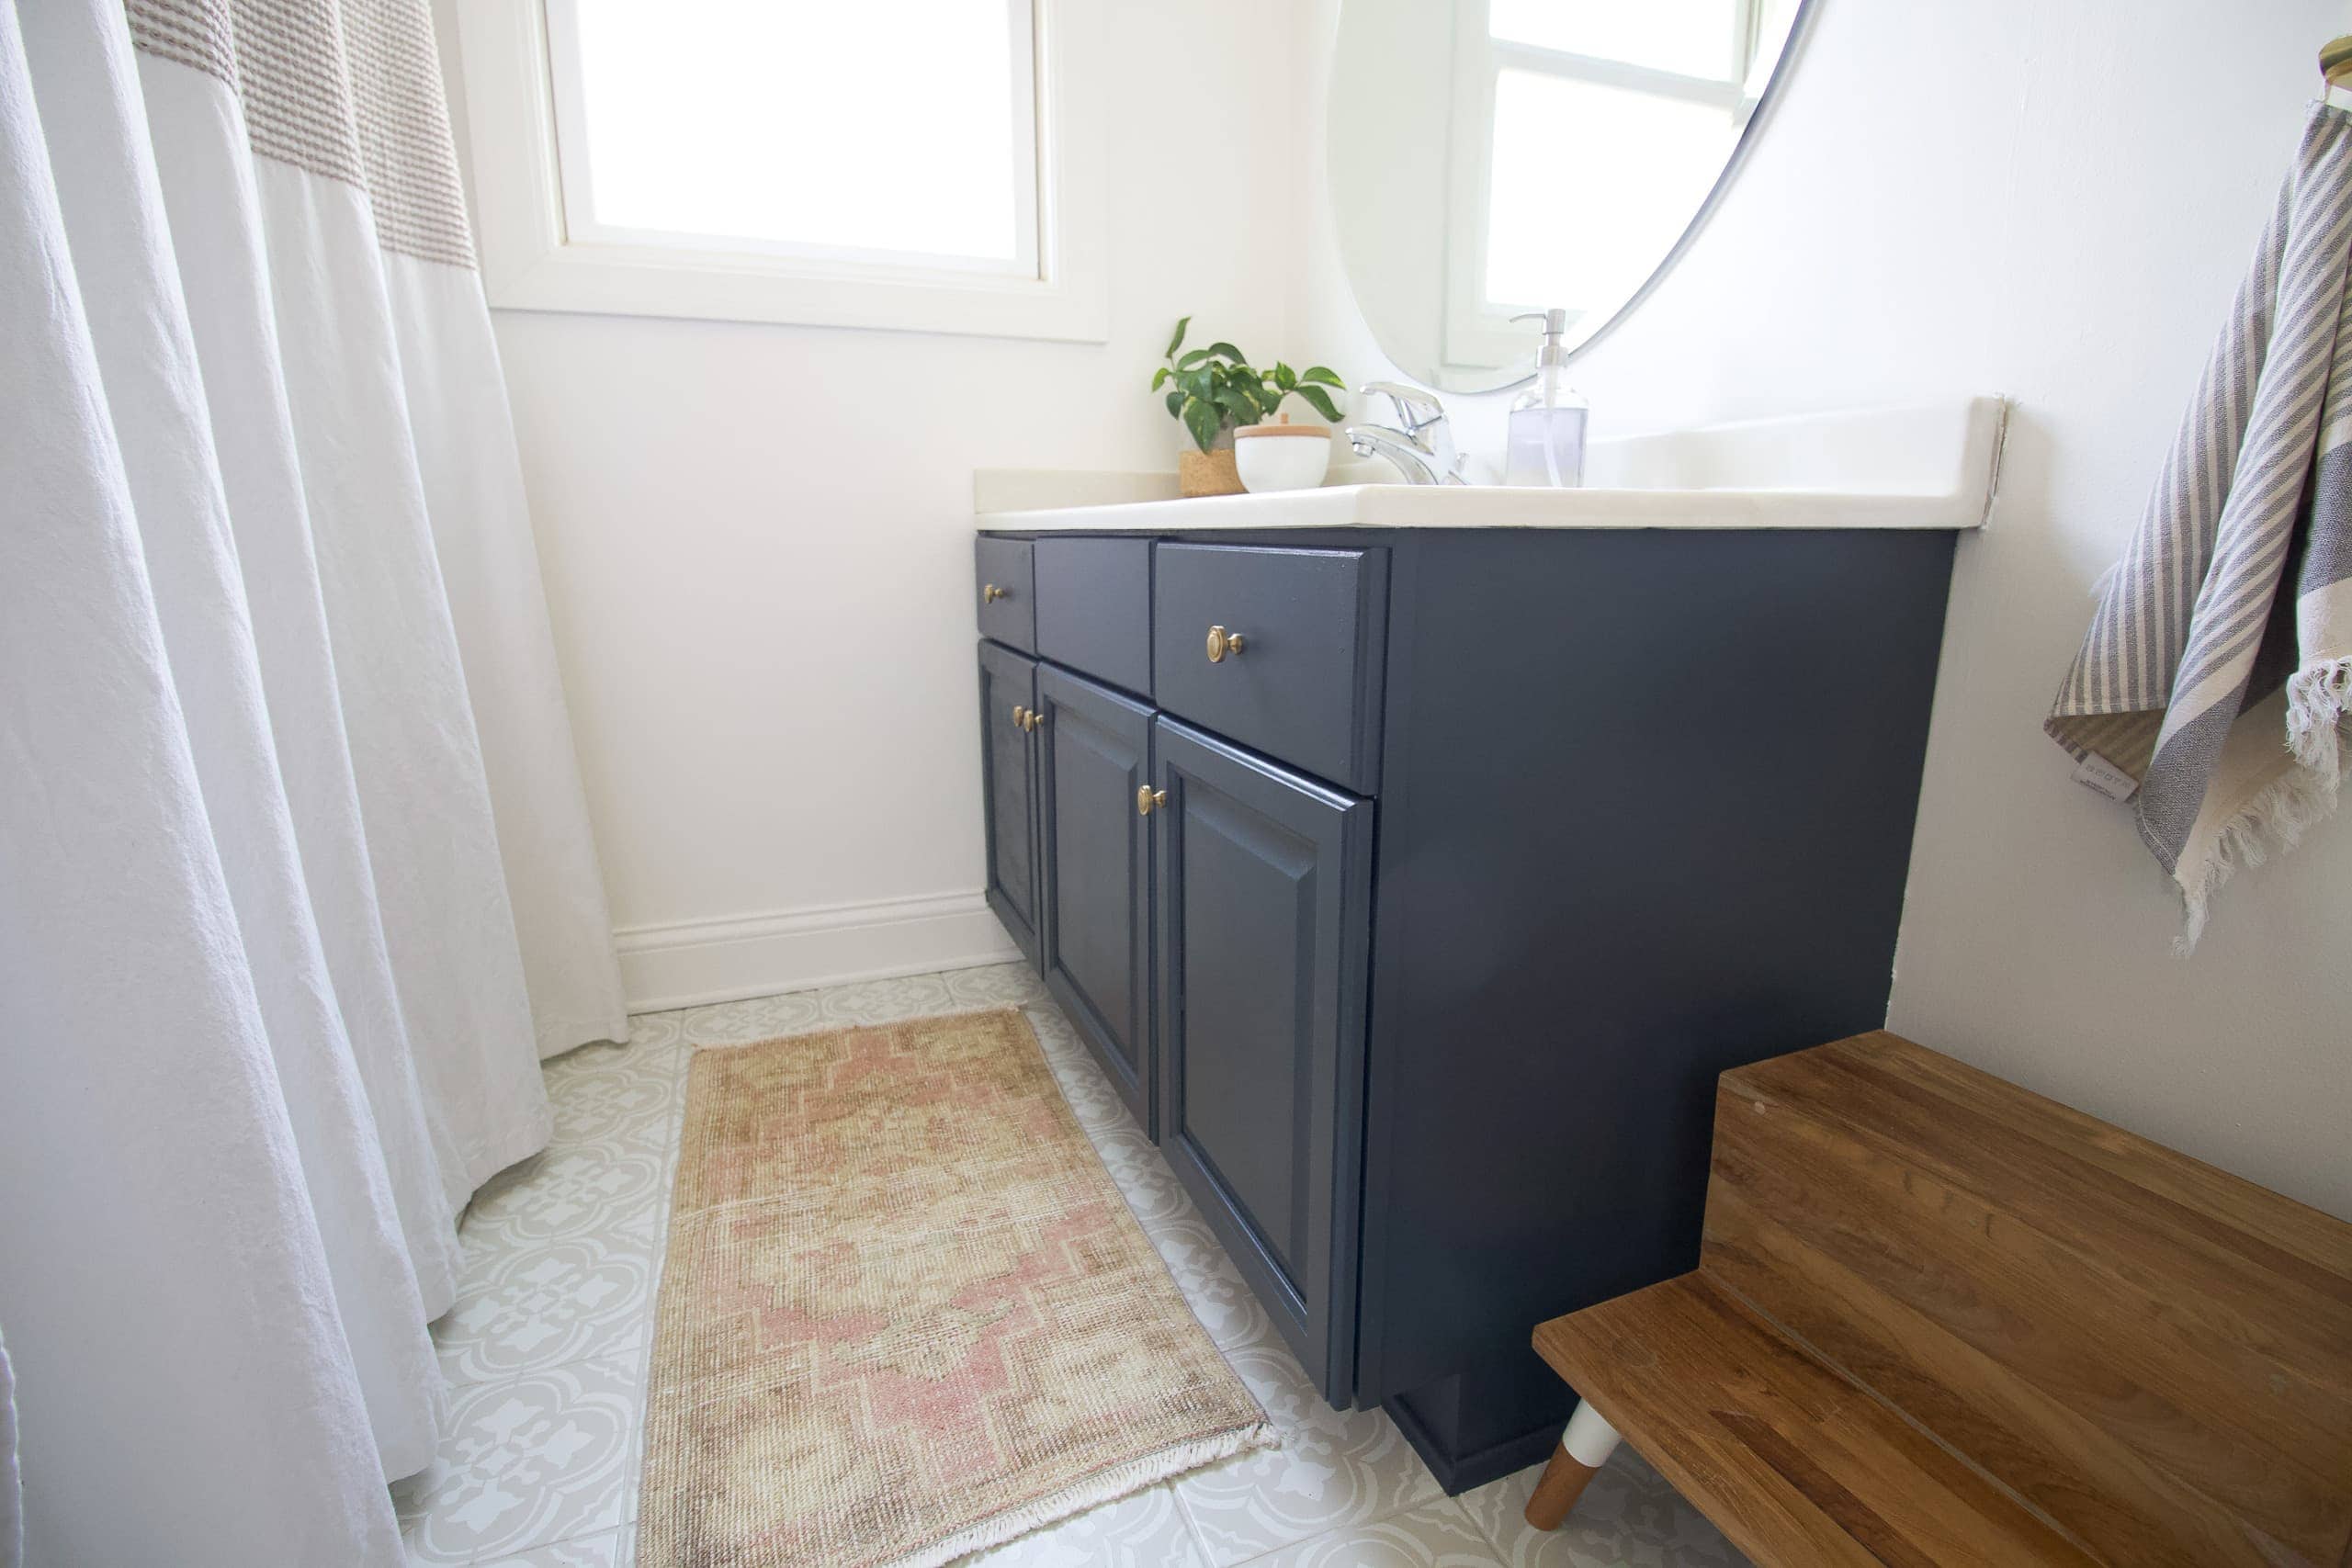
With the floor done, the vanity stuck out like a sore thumb! I ended up using KILZ MOLD & MILDEW primer on it, followed by a coat of Behr “Starless Night.” 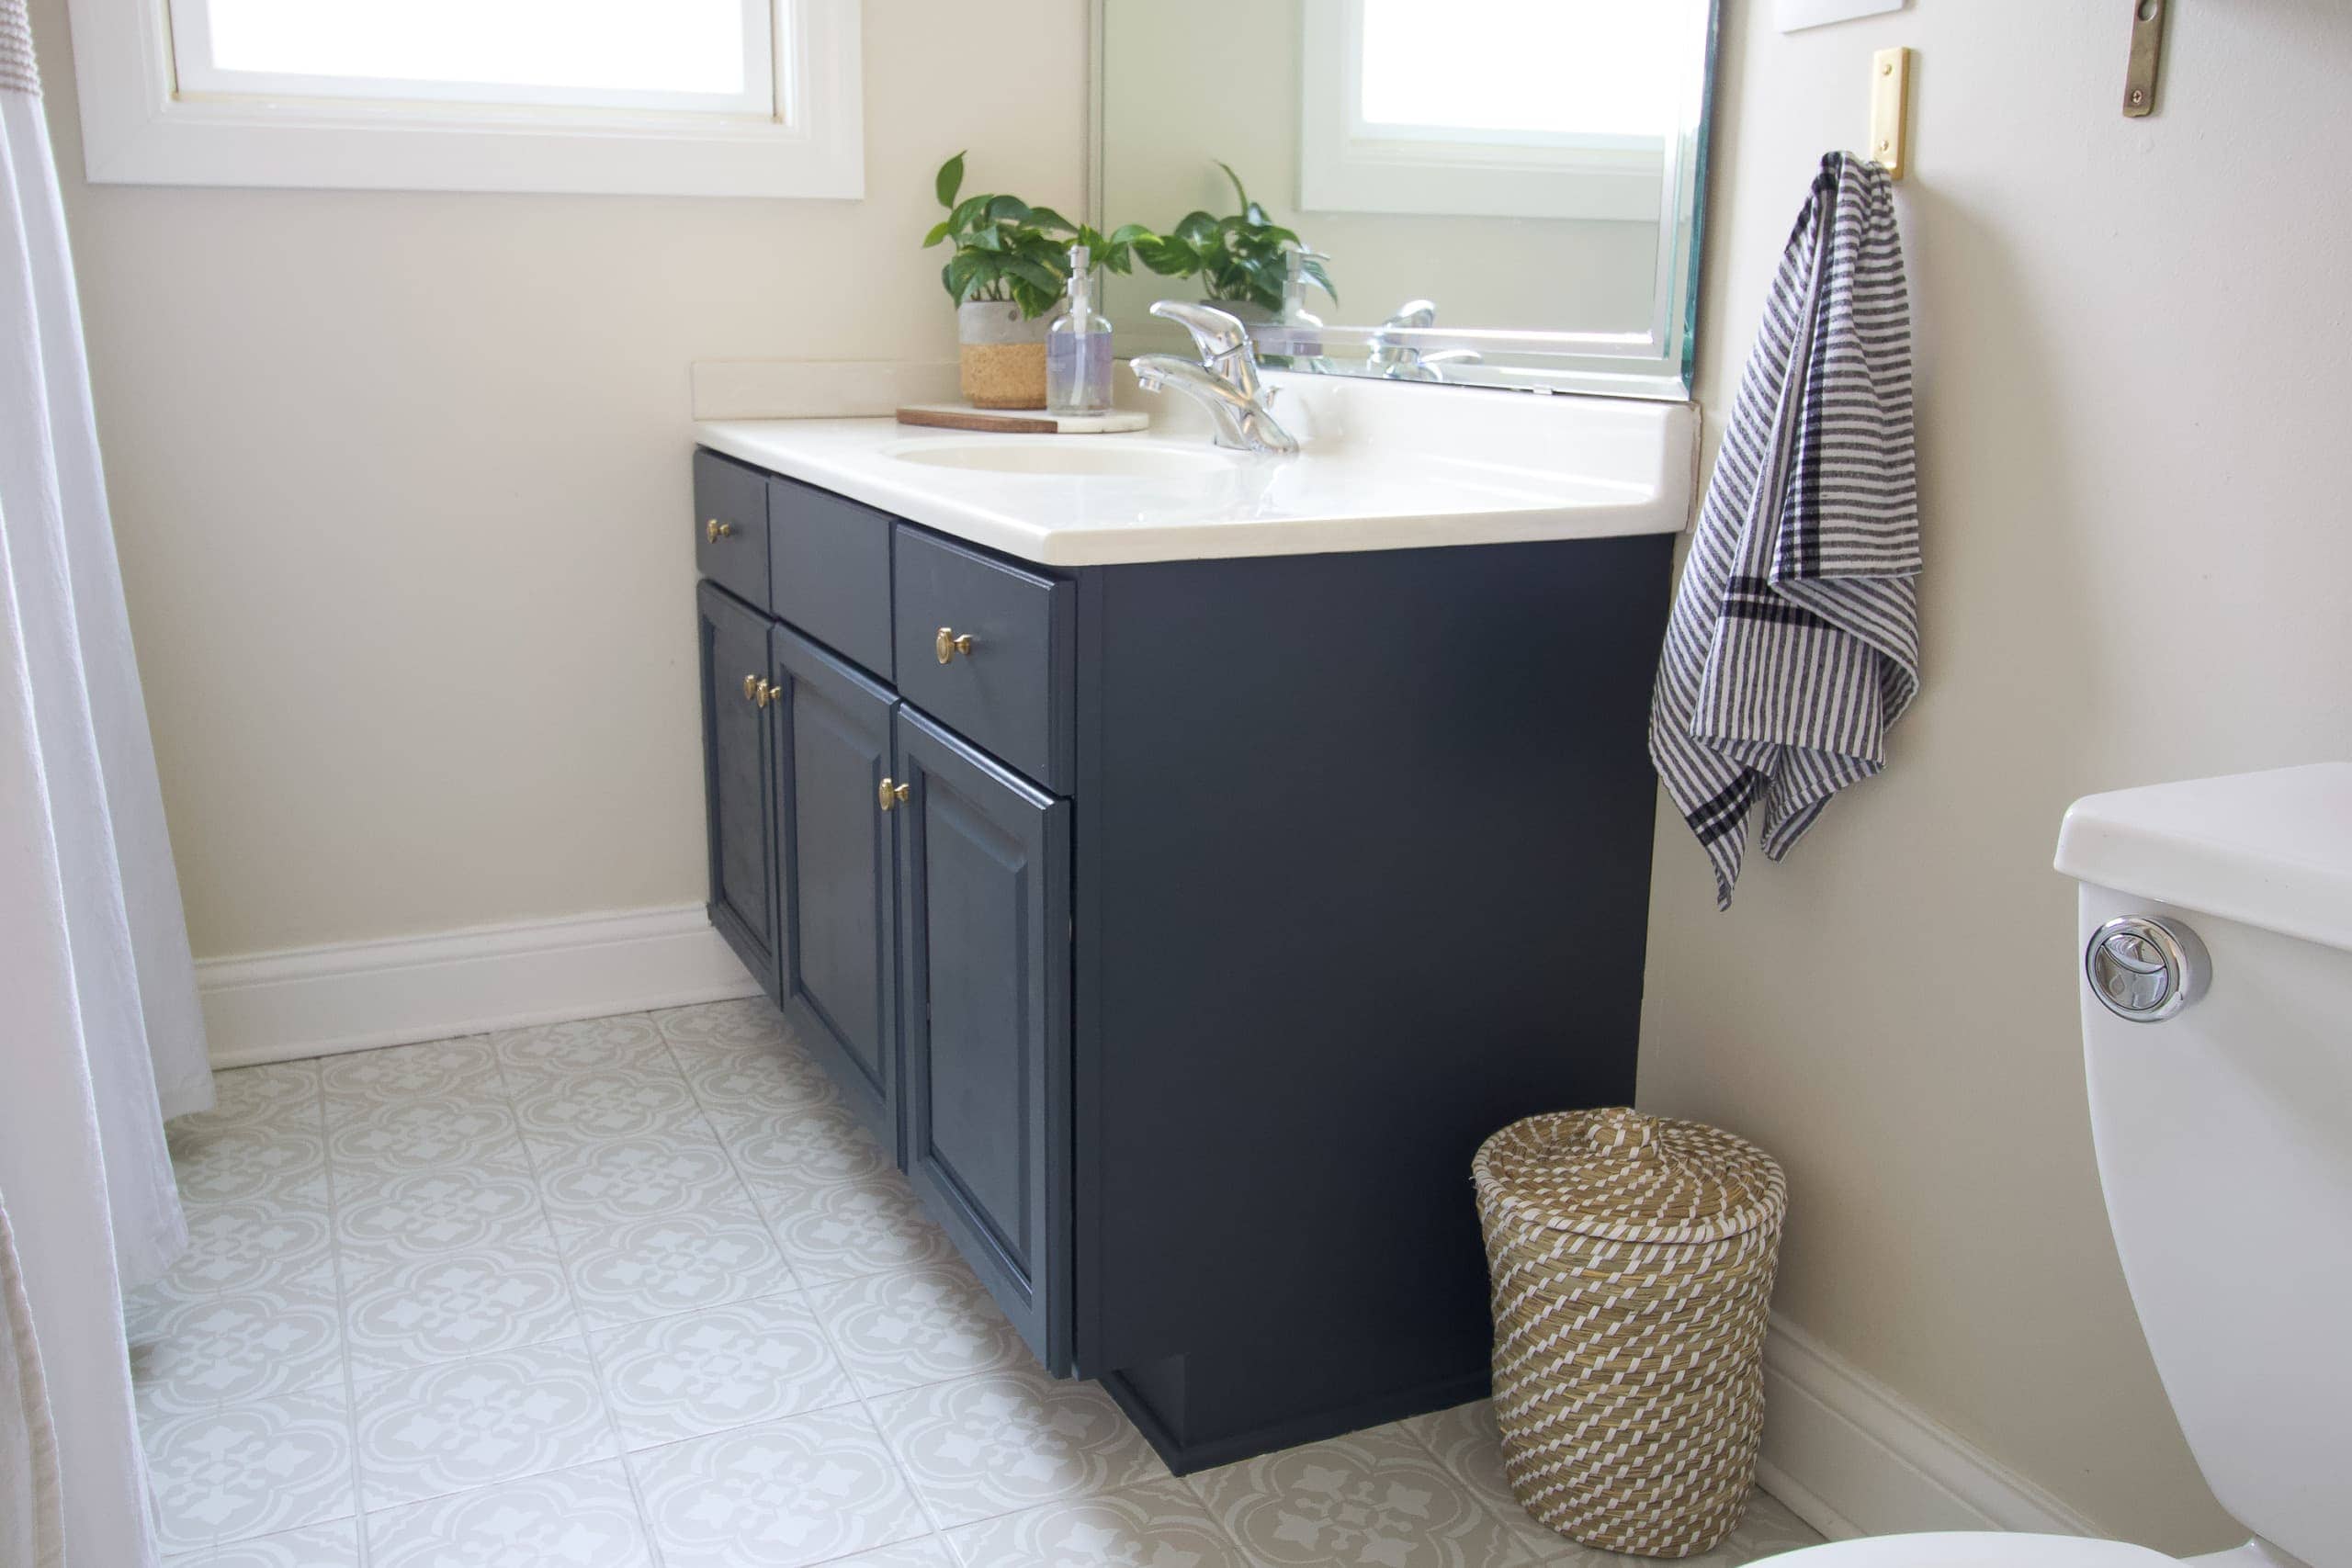
That dark color next to the patterned tile looks fantastic (you can read the full tutorial here). And I love the inexpensive brass hardware I added (same ones I have in the nursery!).
Painting the Room
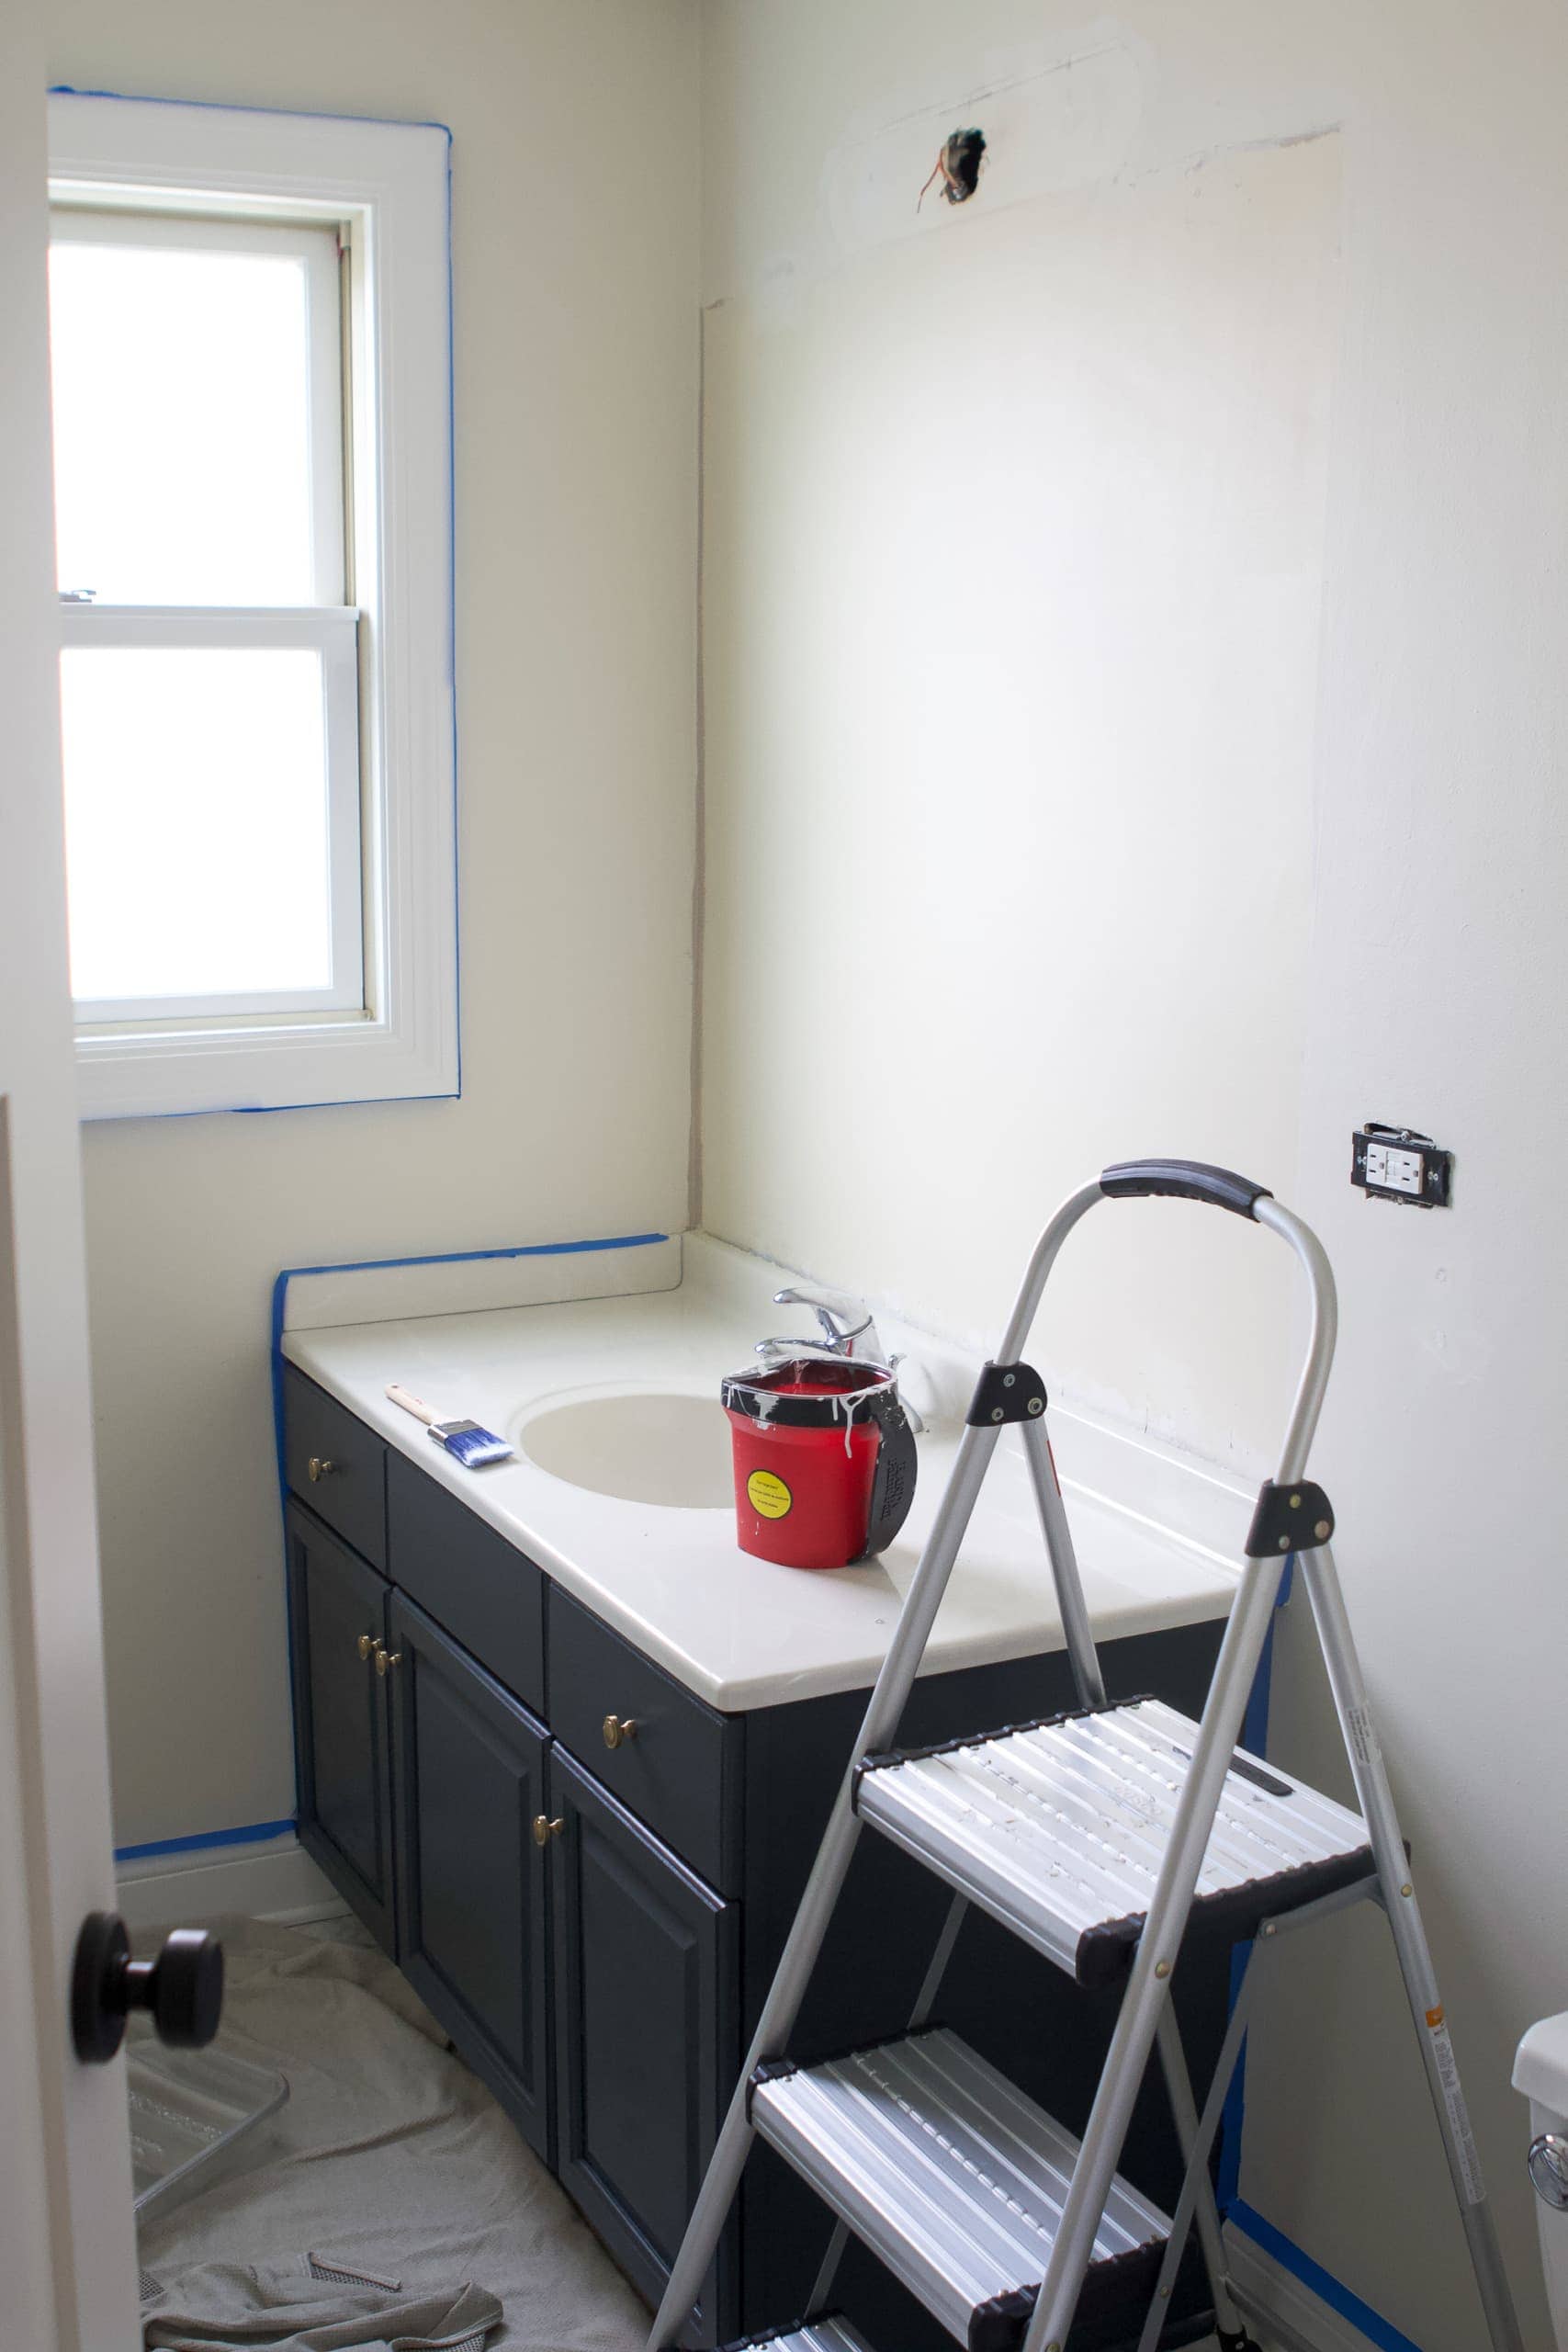
With those two big projects done, it was time to get a fresh coat of paint on the walls. To begin, I took everything off the walls including the mirror and light fixture. I was worried that the old builder-basic mirror might be glued on there, but luckily it was just clipped on. Finn and I got it off in about thirty seconds. Phew.
I then patched all of the holes in the wall, gave the walls a coat of KILZ MOLD & MILDEW primer, and painted two coats of the color Behr, “Snowy Pine” in a satin finish. The primer should help when it gets humid in this room. Before, we had some drippy spots from the moisture from the shower. I’m hopeful that the primer will prevent that down the line. As for the color, I wanted a warm bright white to match the trim and door color (Benjamin Moore “Simply White”) and this color worked out perfectly.
New Mirror & Light Fixture

With the walls freshly painted, it was time to finish this space up. I ended up skewing from my original mood board a bit and I went with this round mirror instead. I couldn’t decide on a finish for the edges and realized that I could just do a mirror without a frame! This is the same mirror that we used in my mom’s bathroom refresh and it works perfectly here.
As for the light, I wanted something brass that was budget-friendly. This vanity light from Wayfair fits the bill! It emits the most beautiful light and the bathroom feels so fresh and clean now.
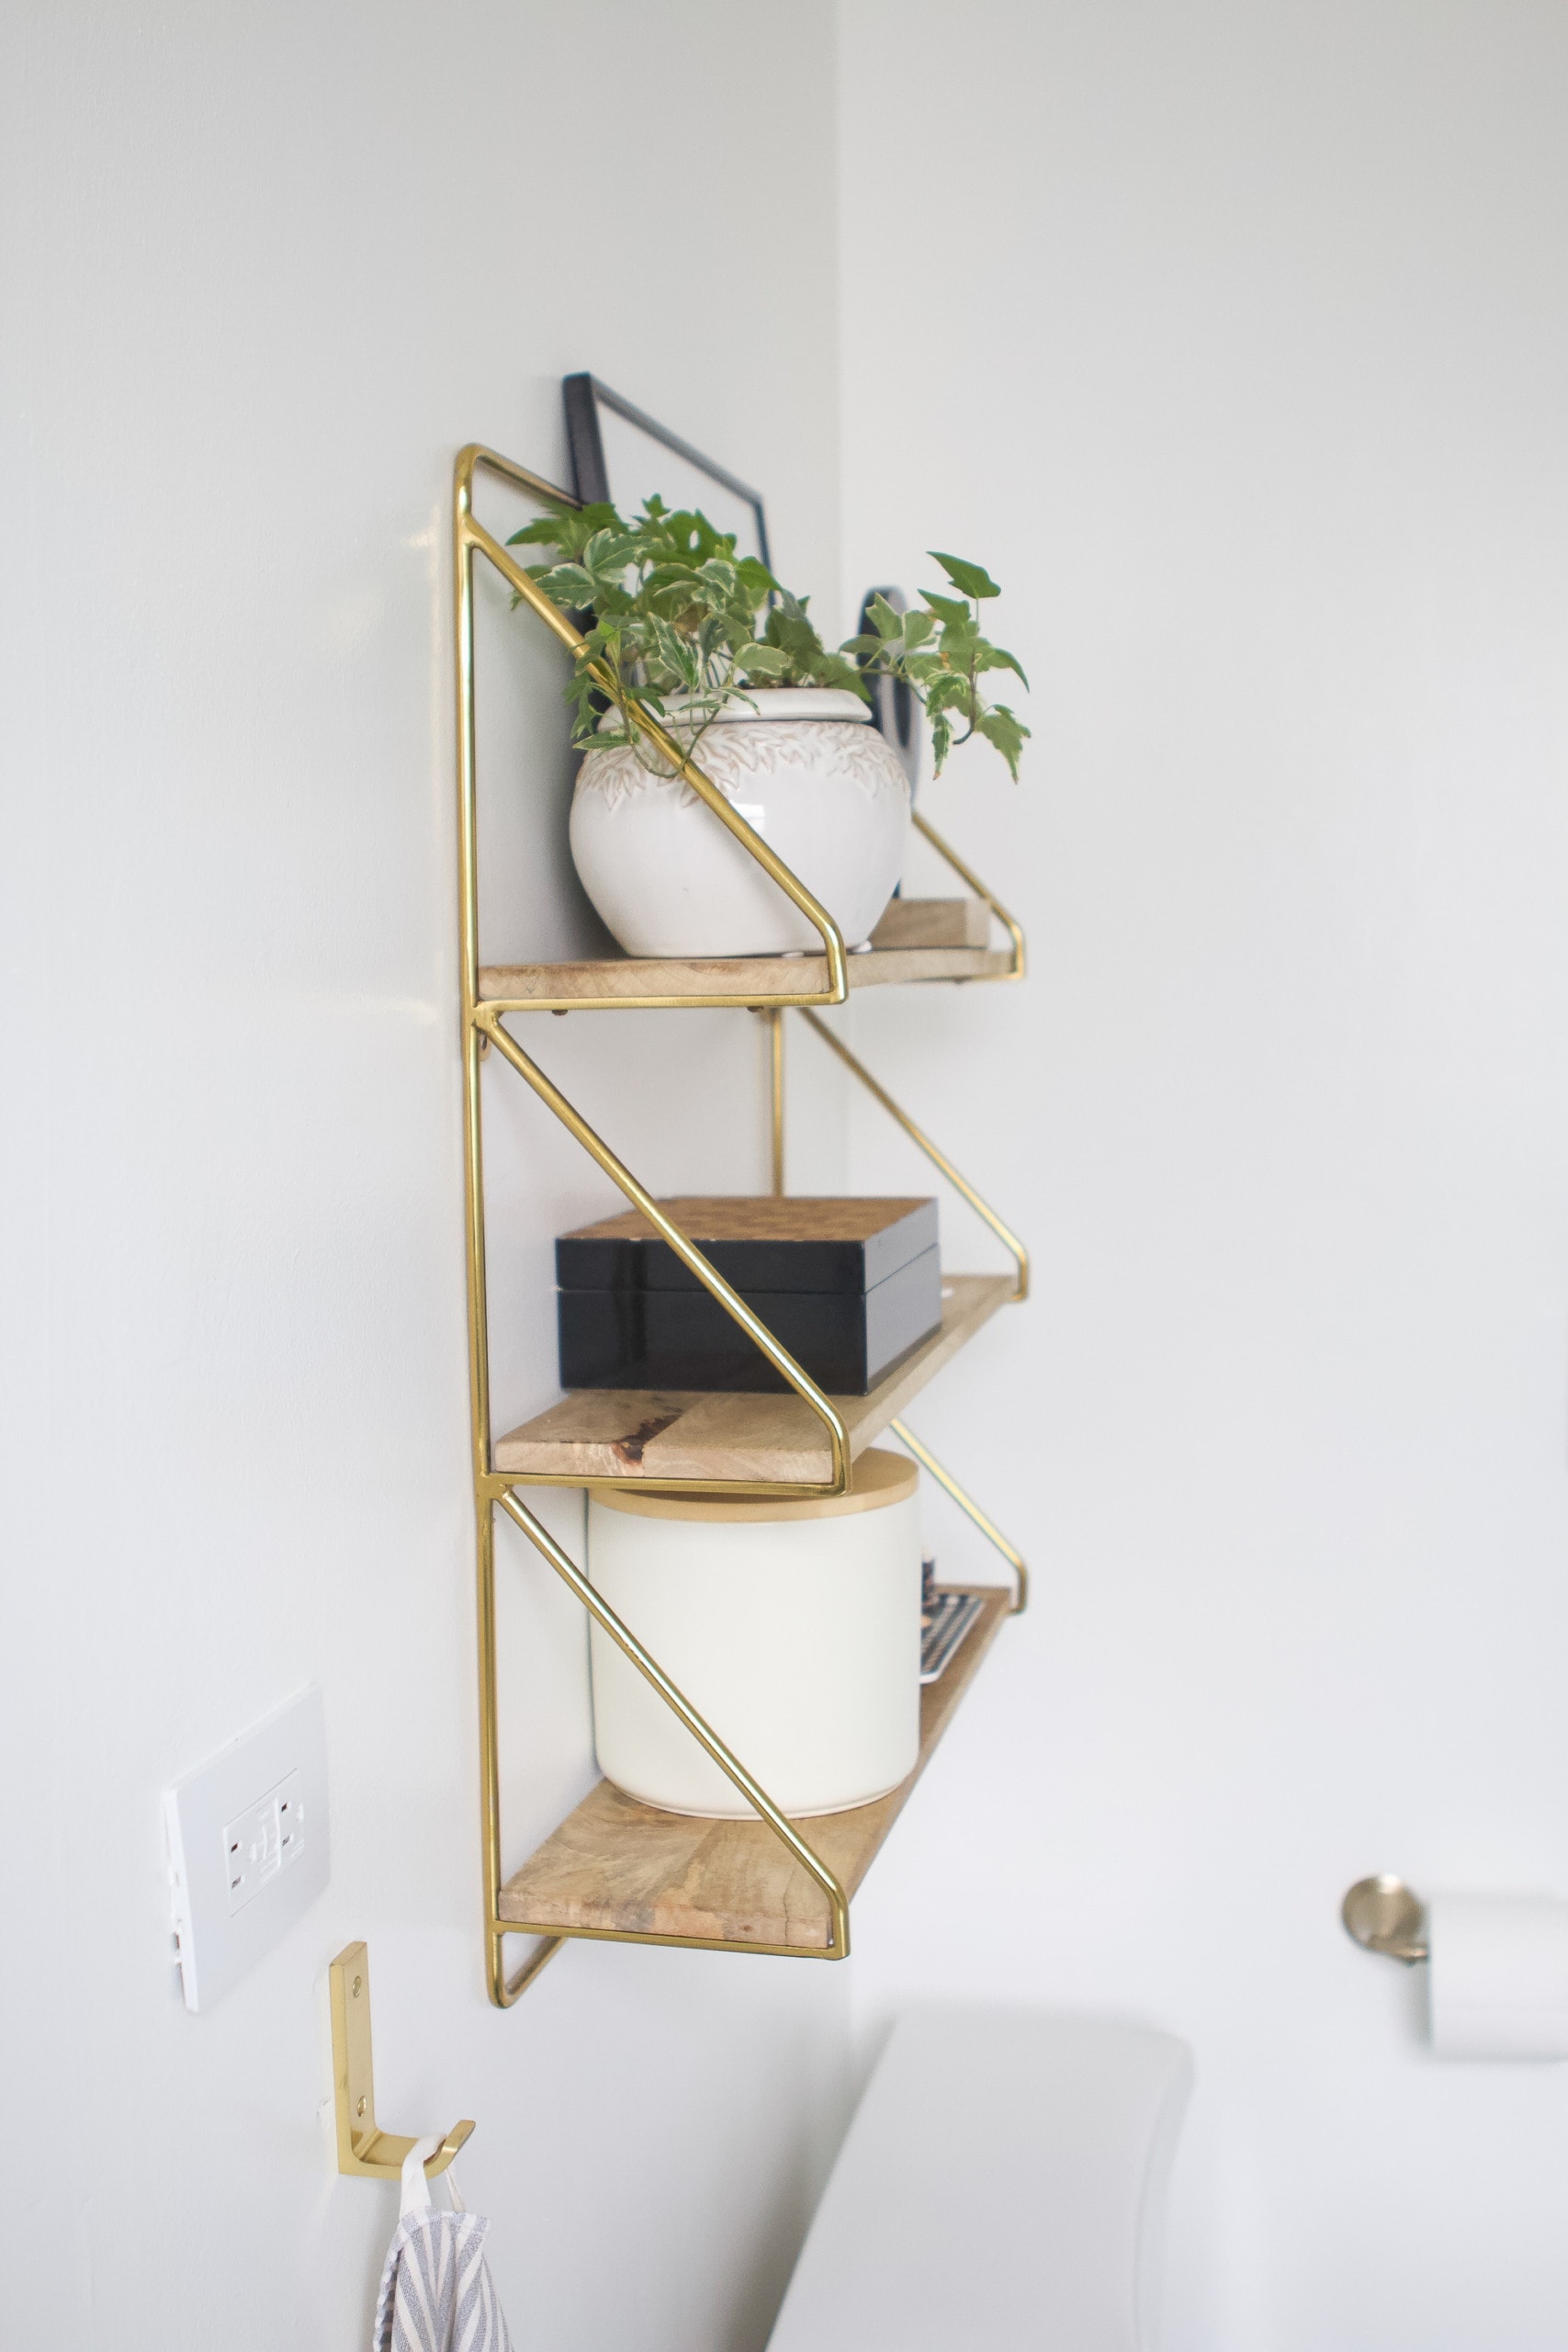
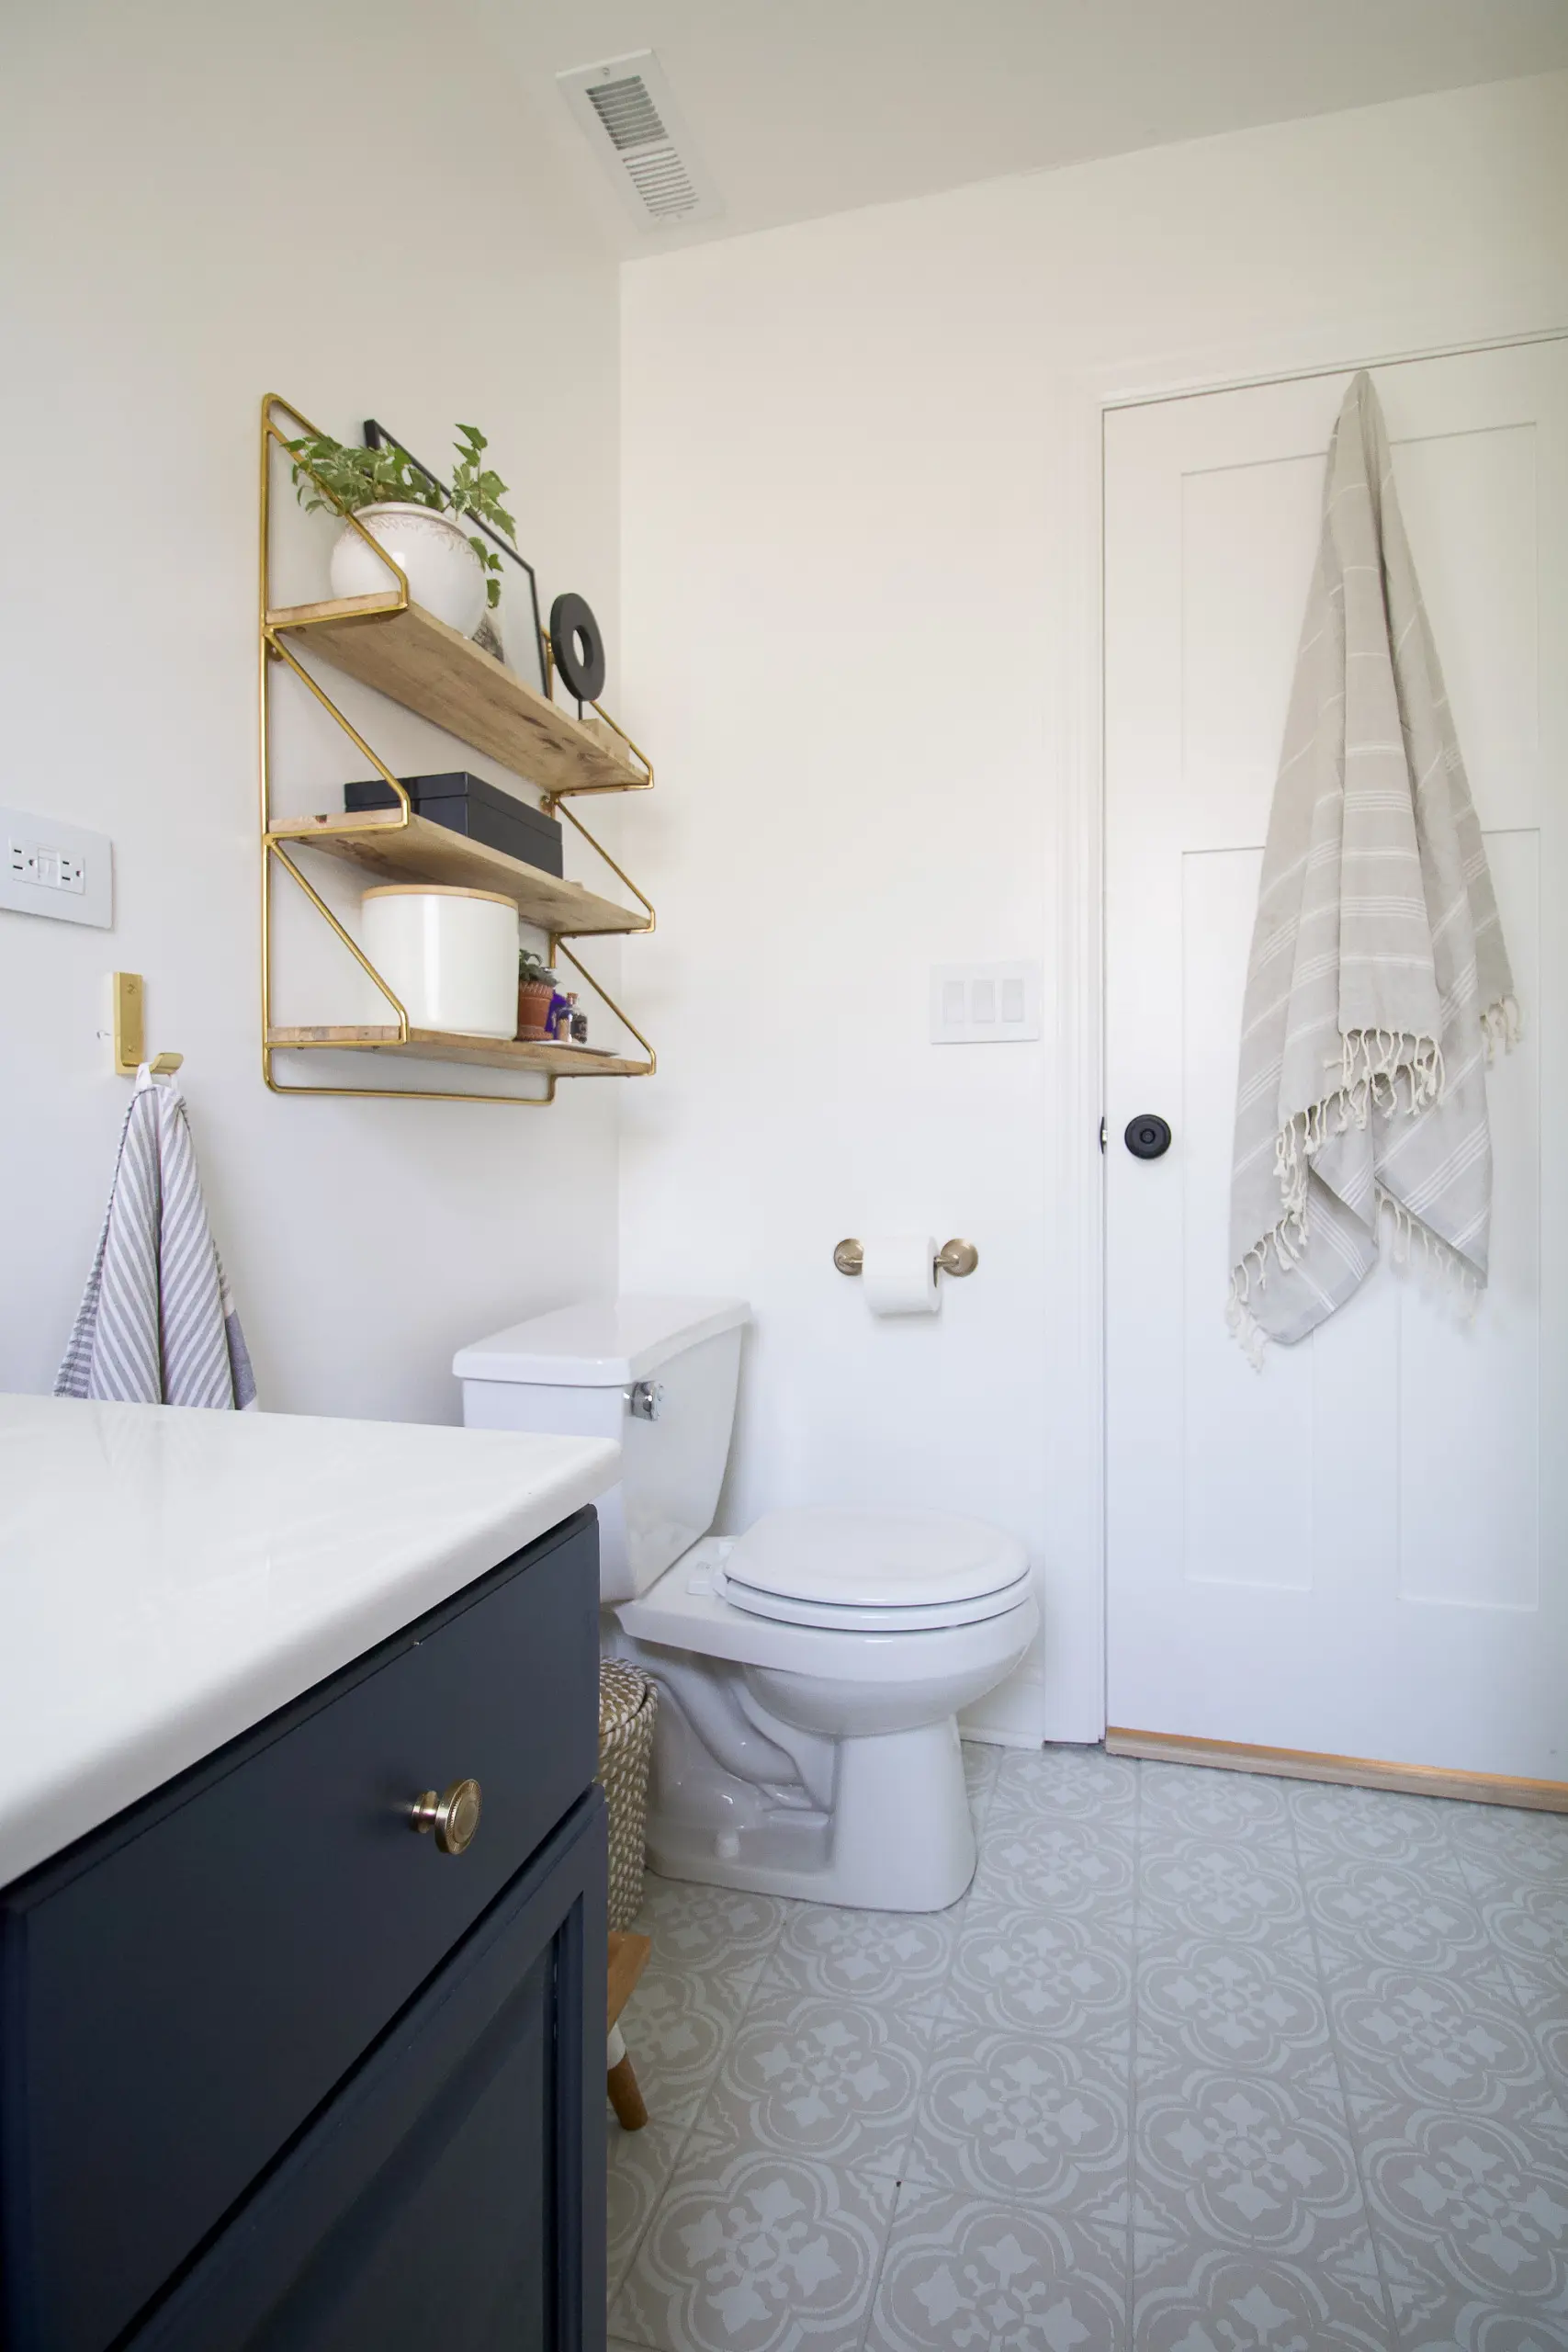
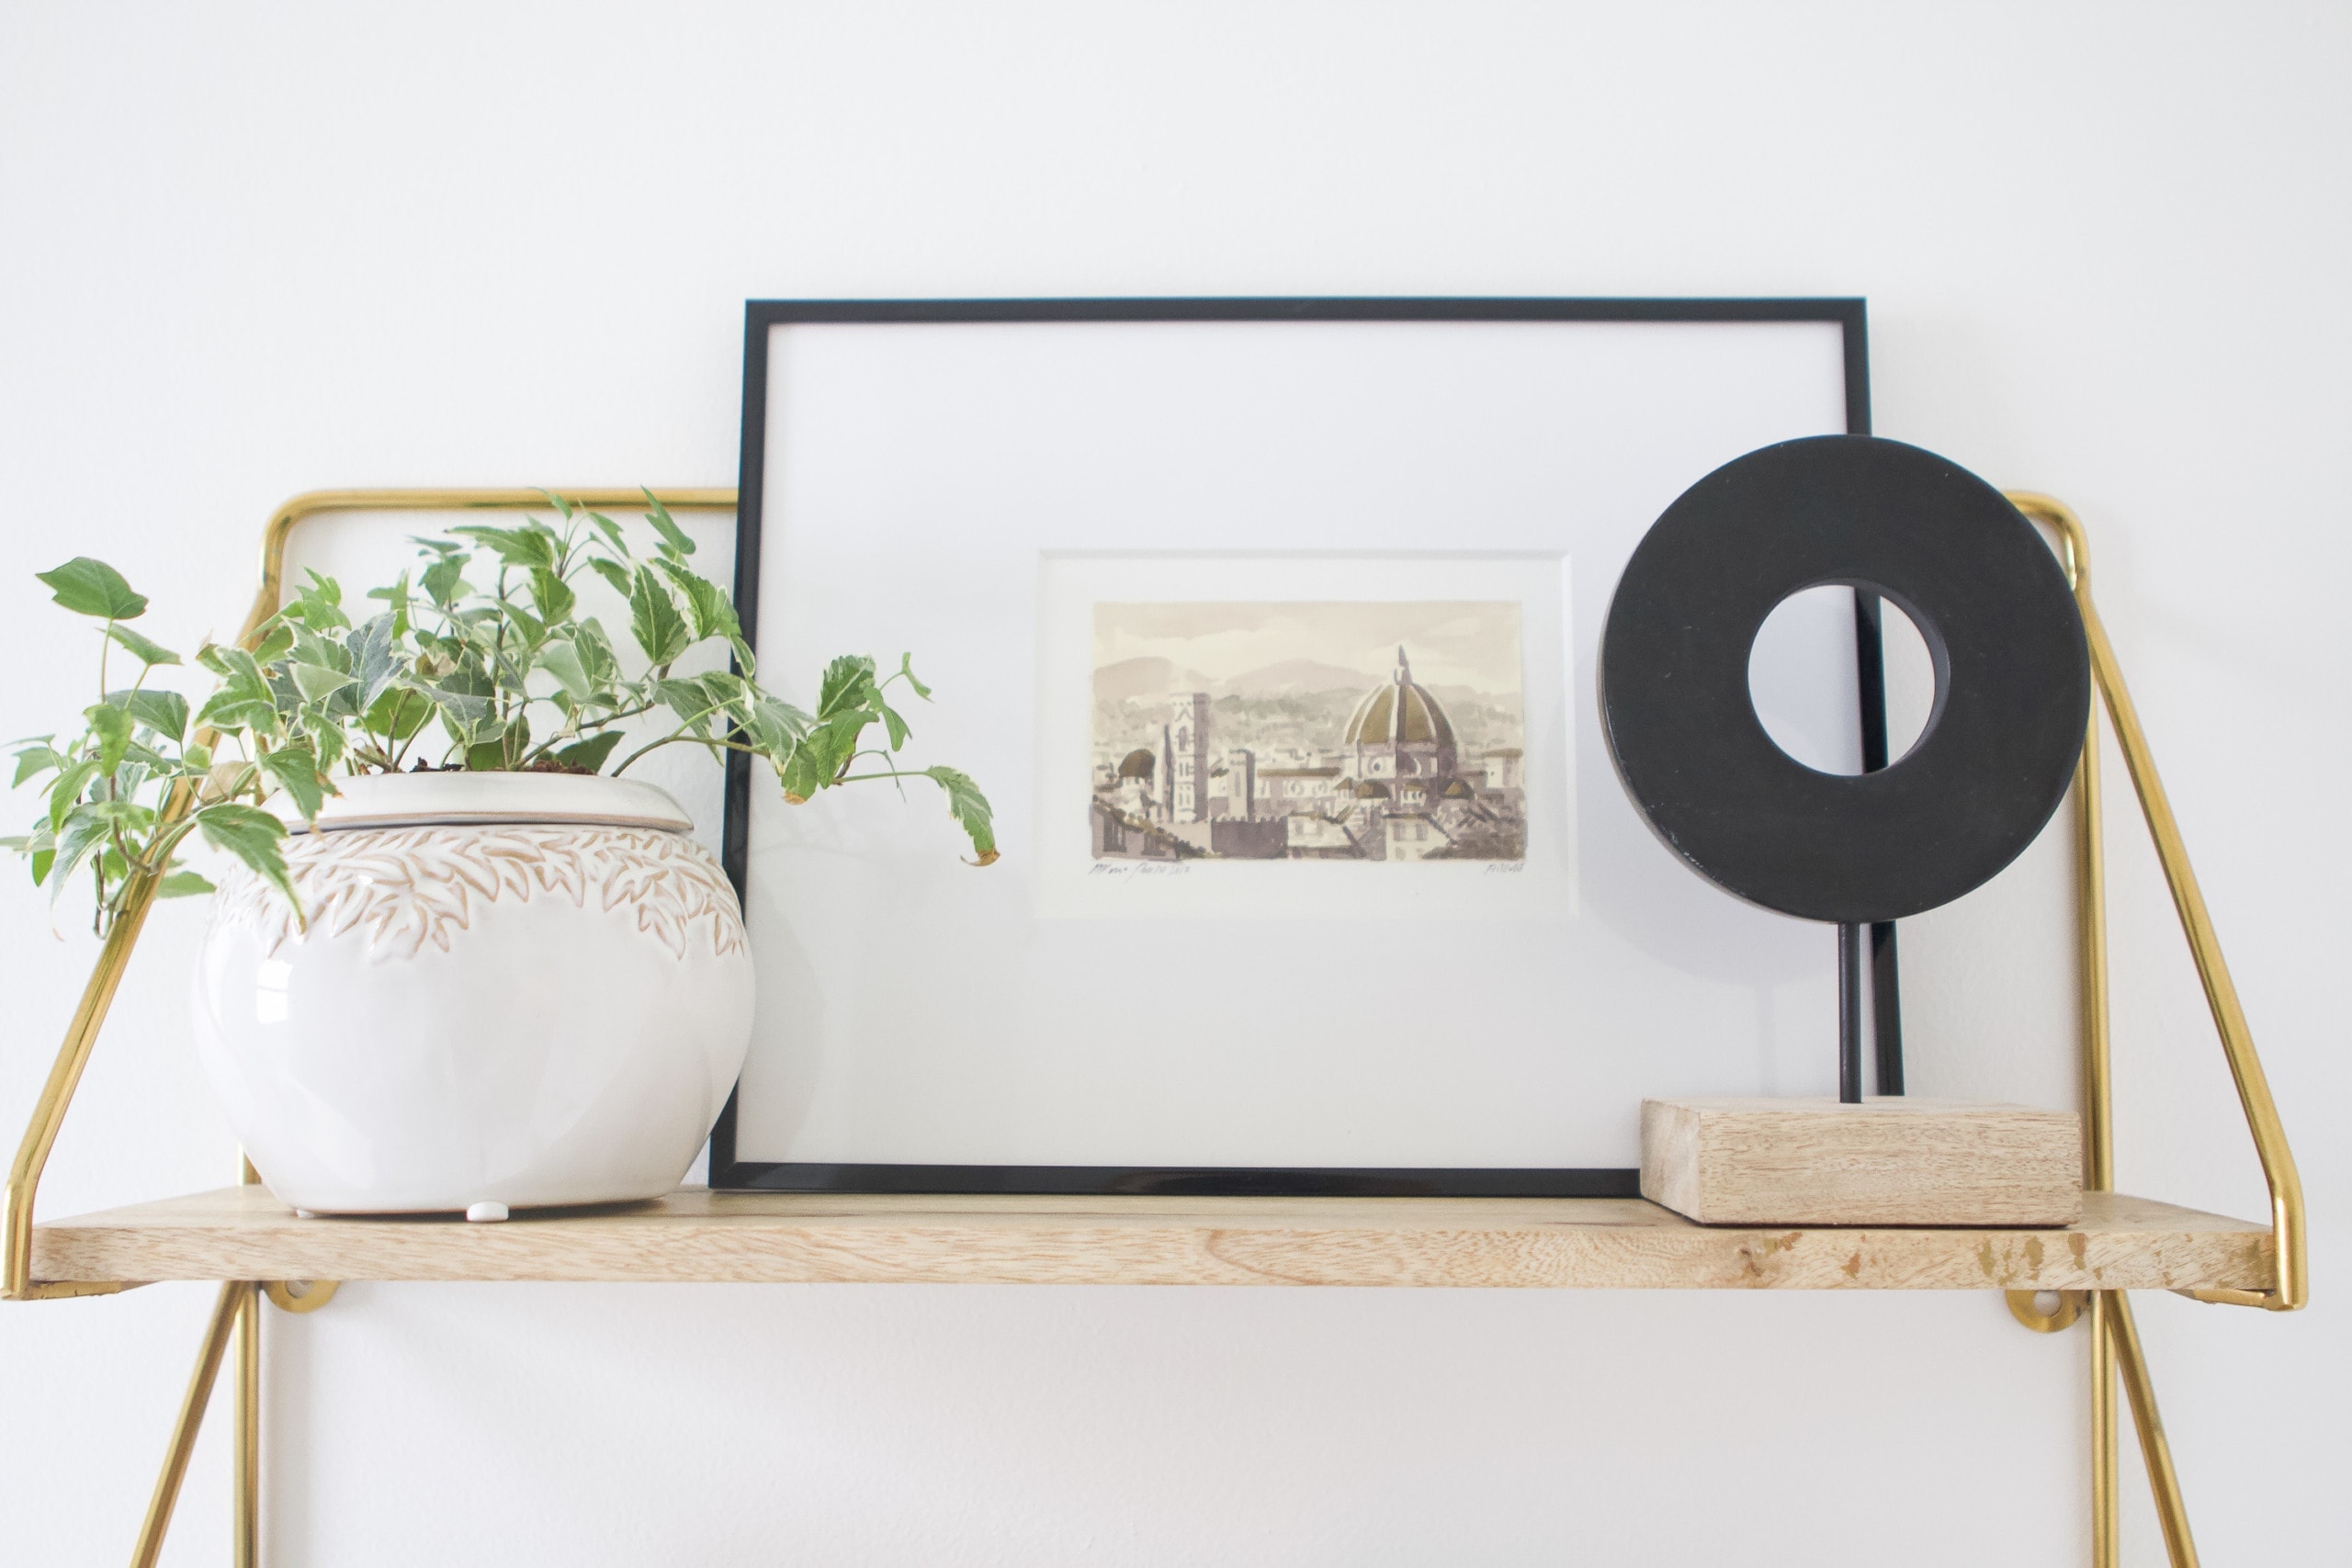
Swapping the Shelves

As for the shelves, this was a zero dollar upgrade! I actually had these wood shelves in our master bathroom and realized that the wood would look better in here. I moved the black marble shelves to the other bathroom and they look even better in there. It’s crazy how a small change can make a big impact.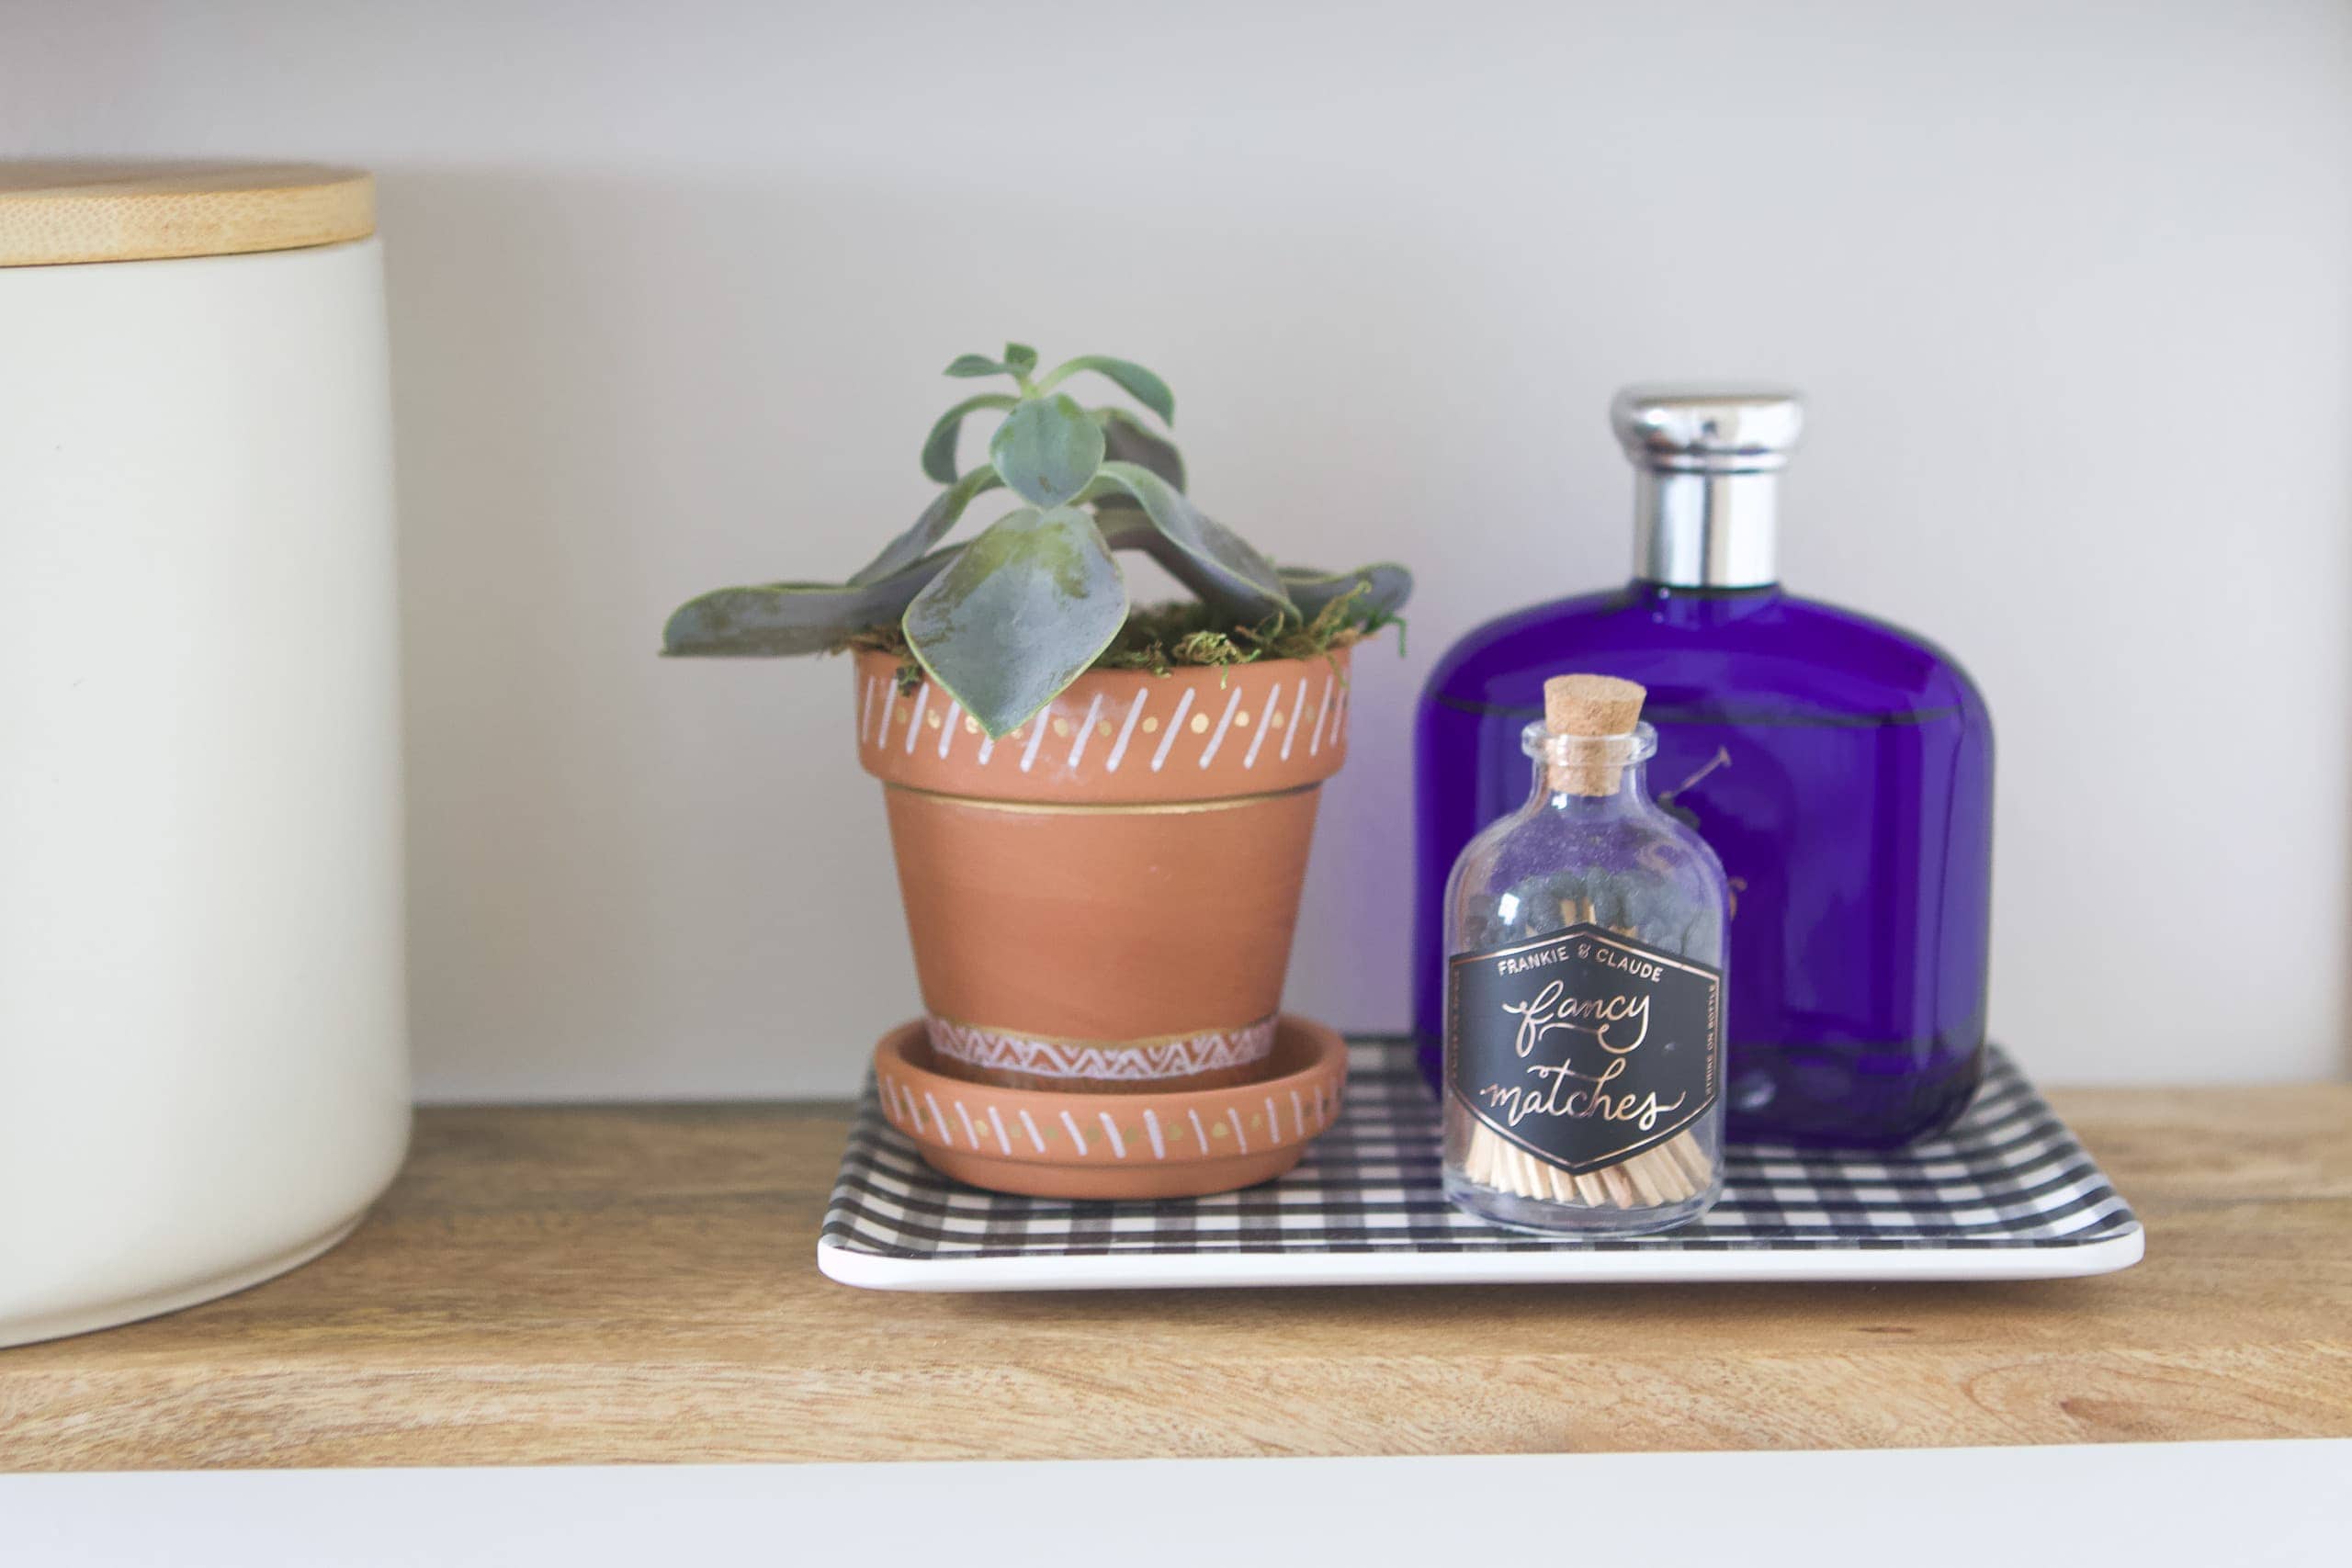
I had so much fun styling these shelves with functional and stylish items. 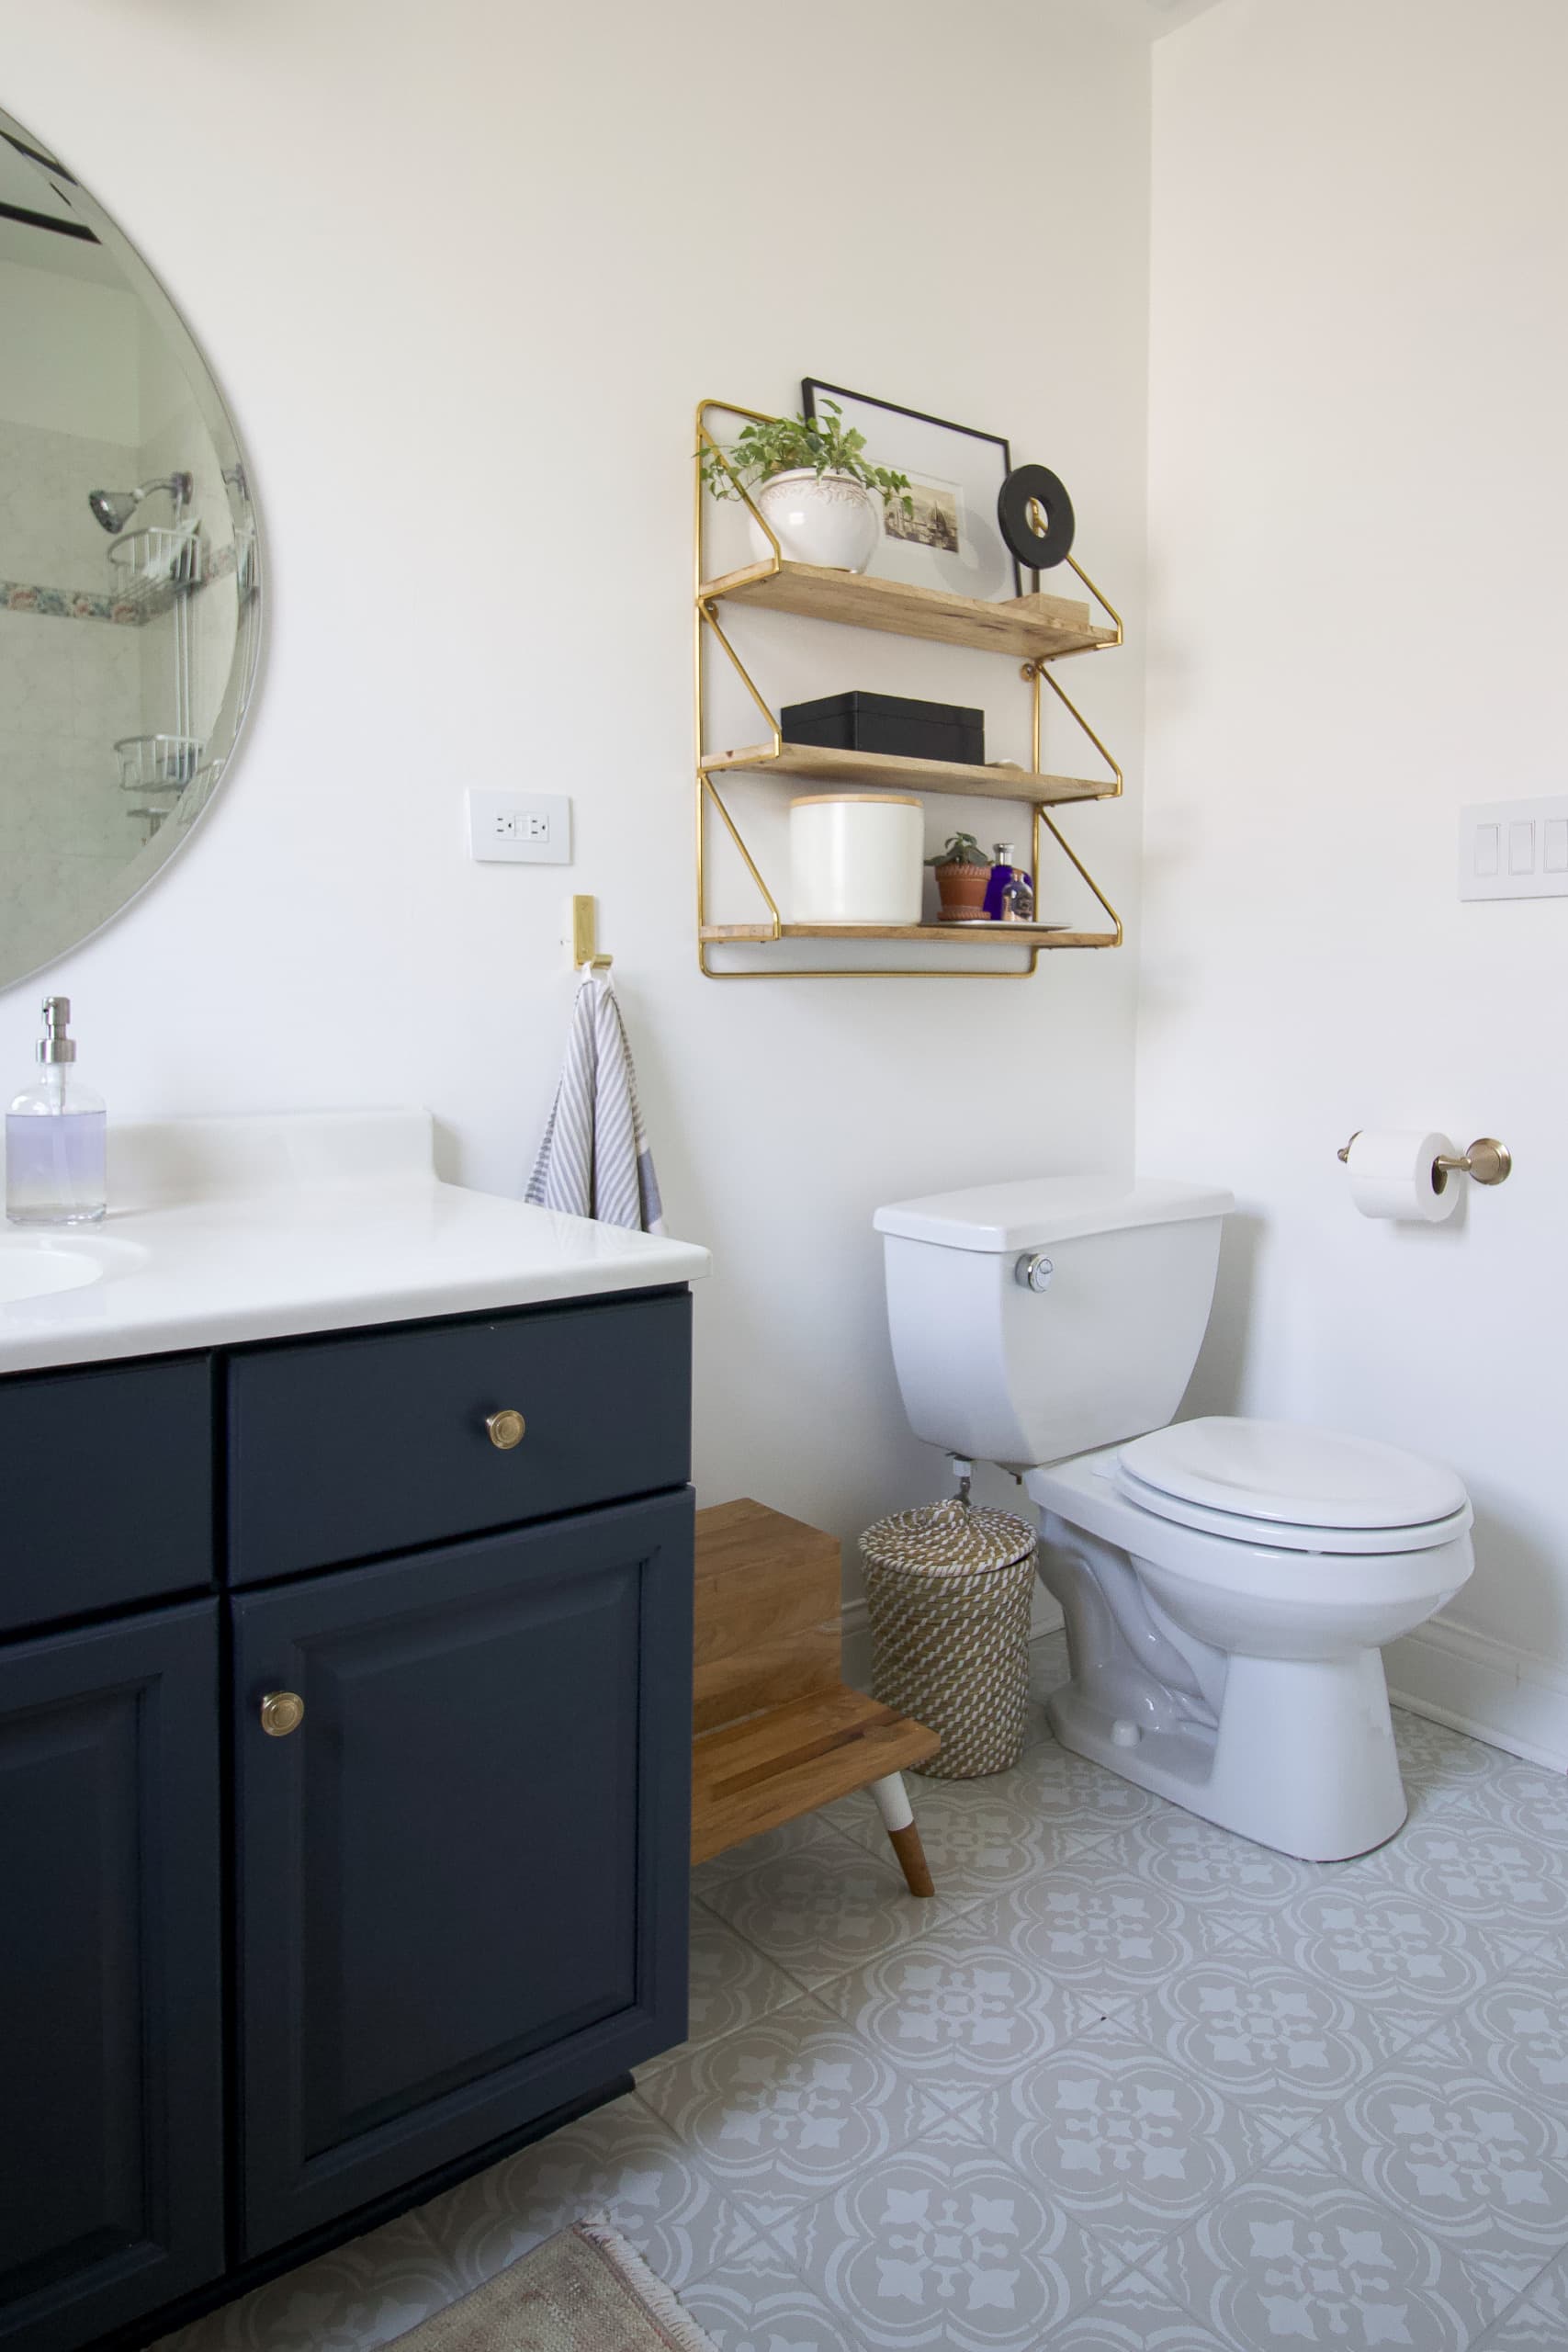 The canister hides an extra roll of toilet paper; there are matches in the cute match jar; a box is filled with feminine products, and more!
Bathroom Accessories

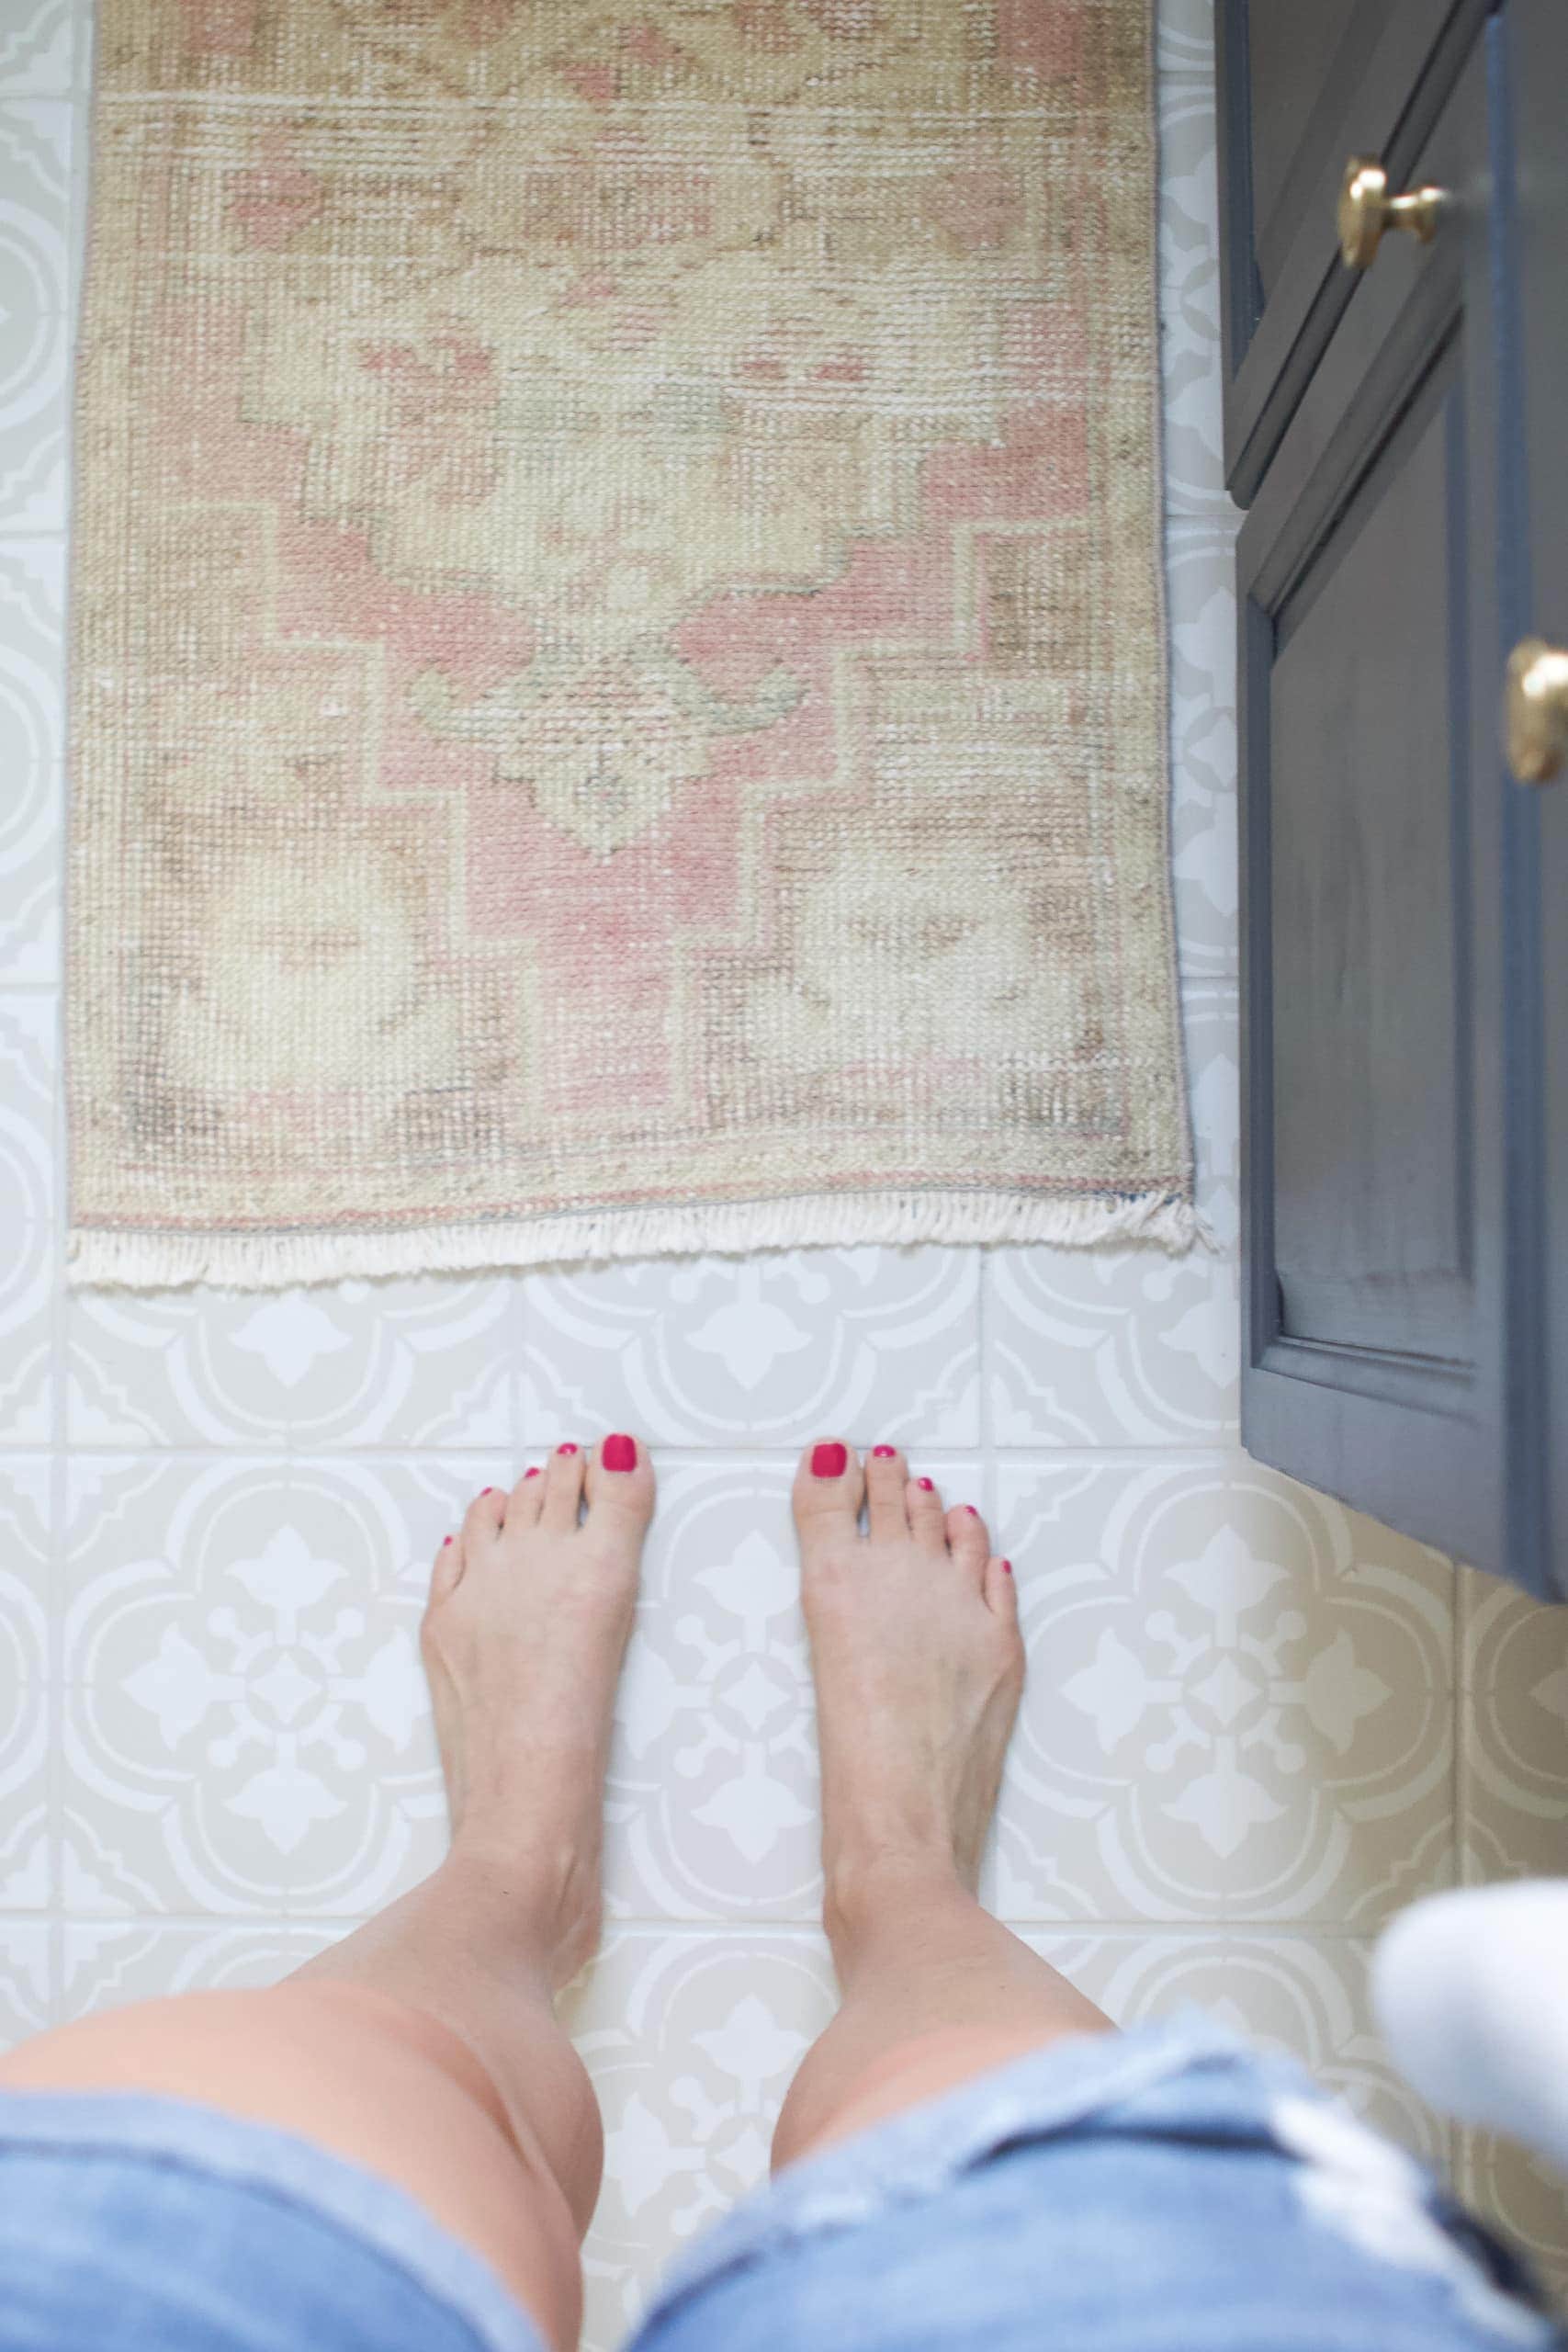
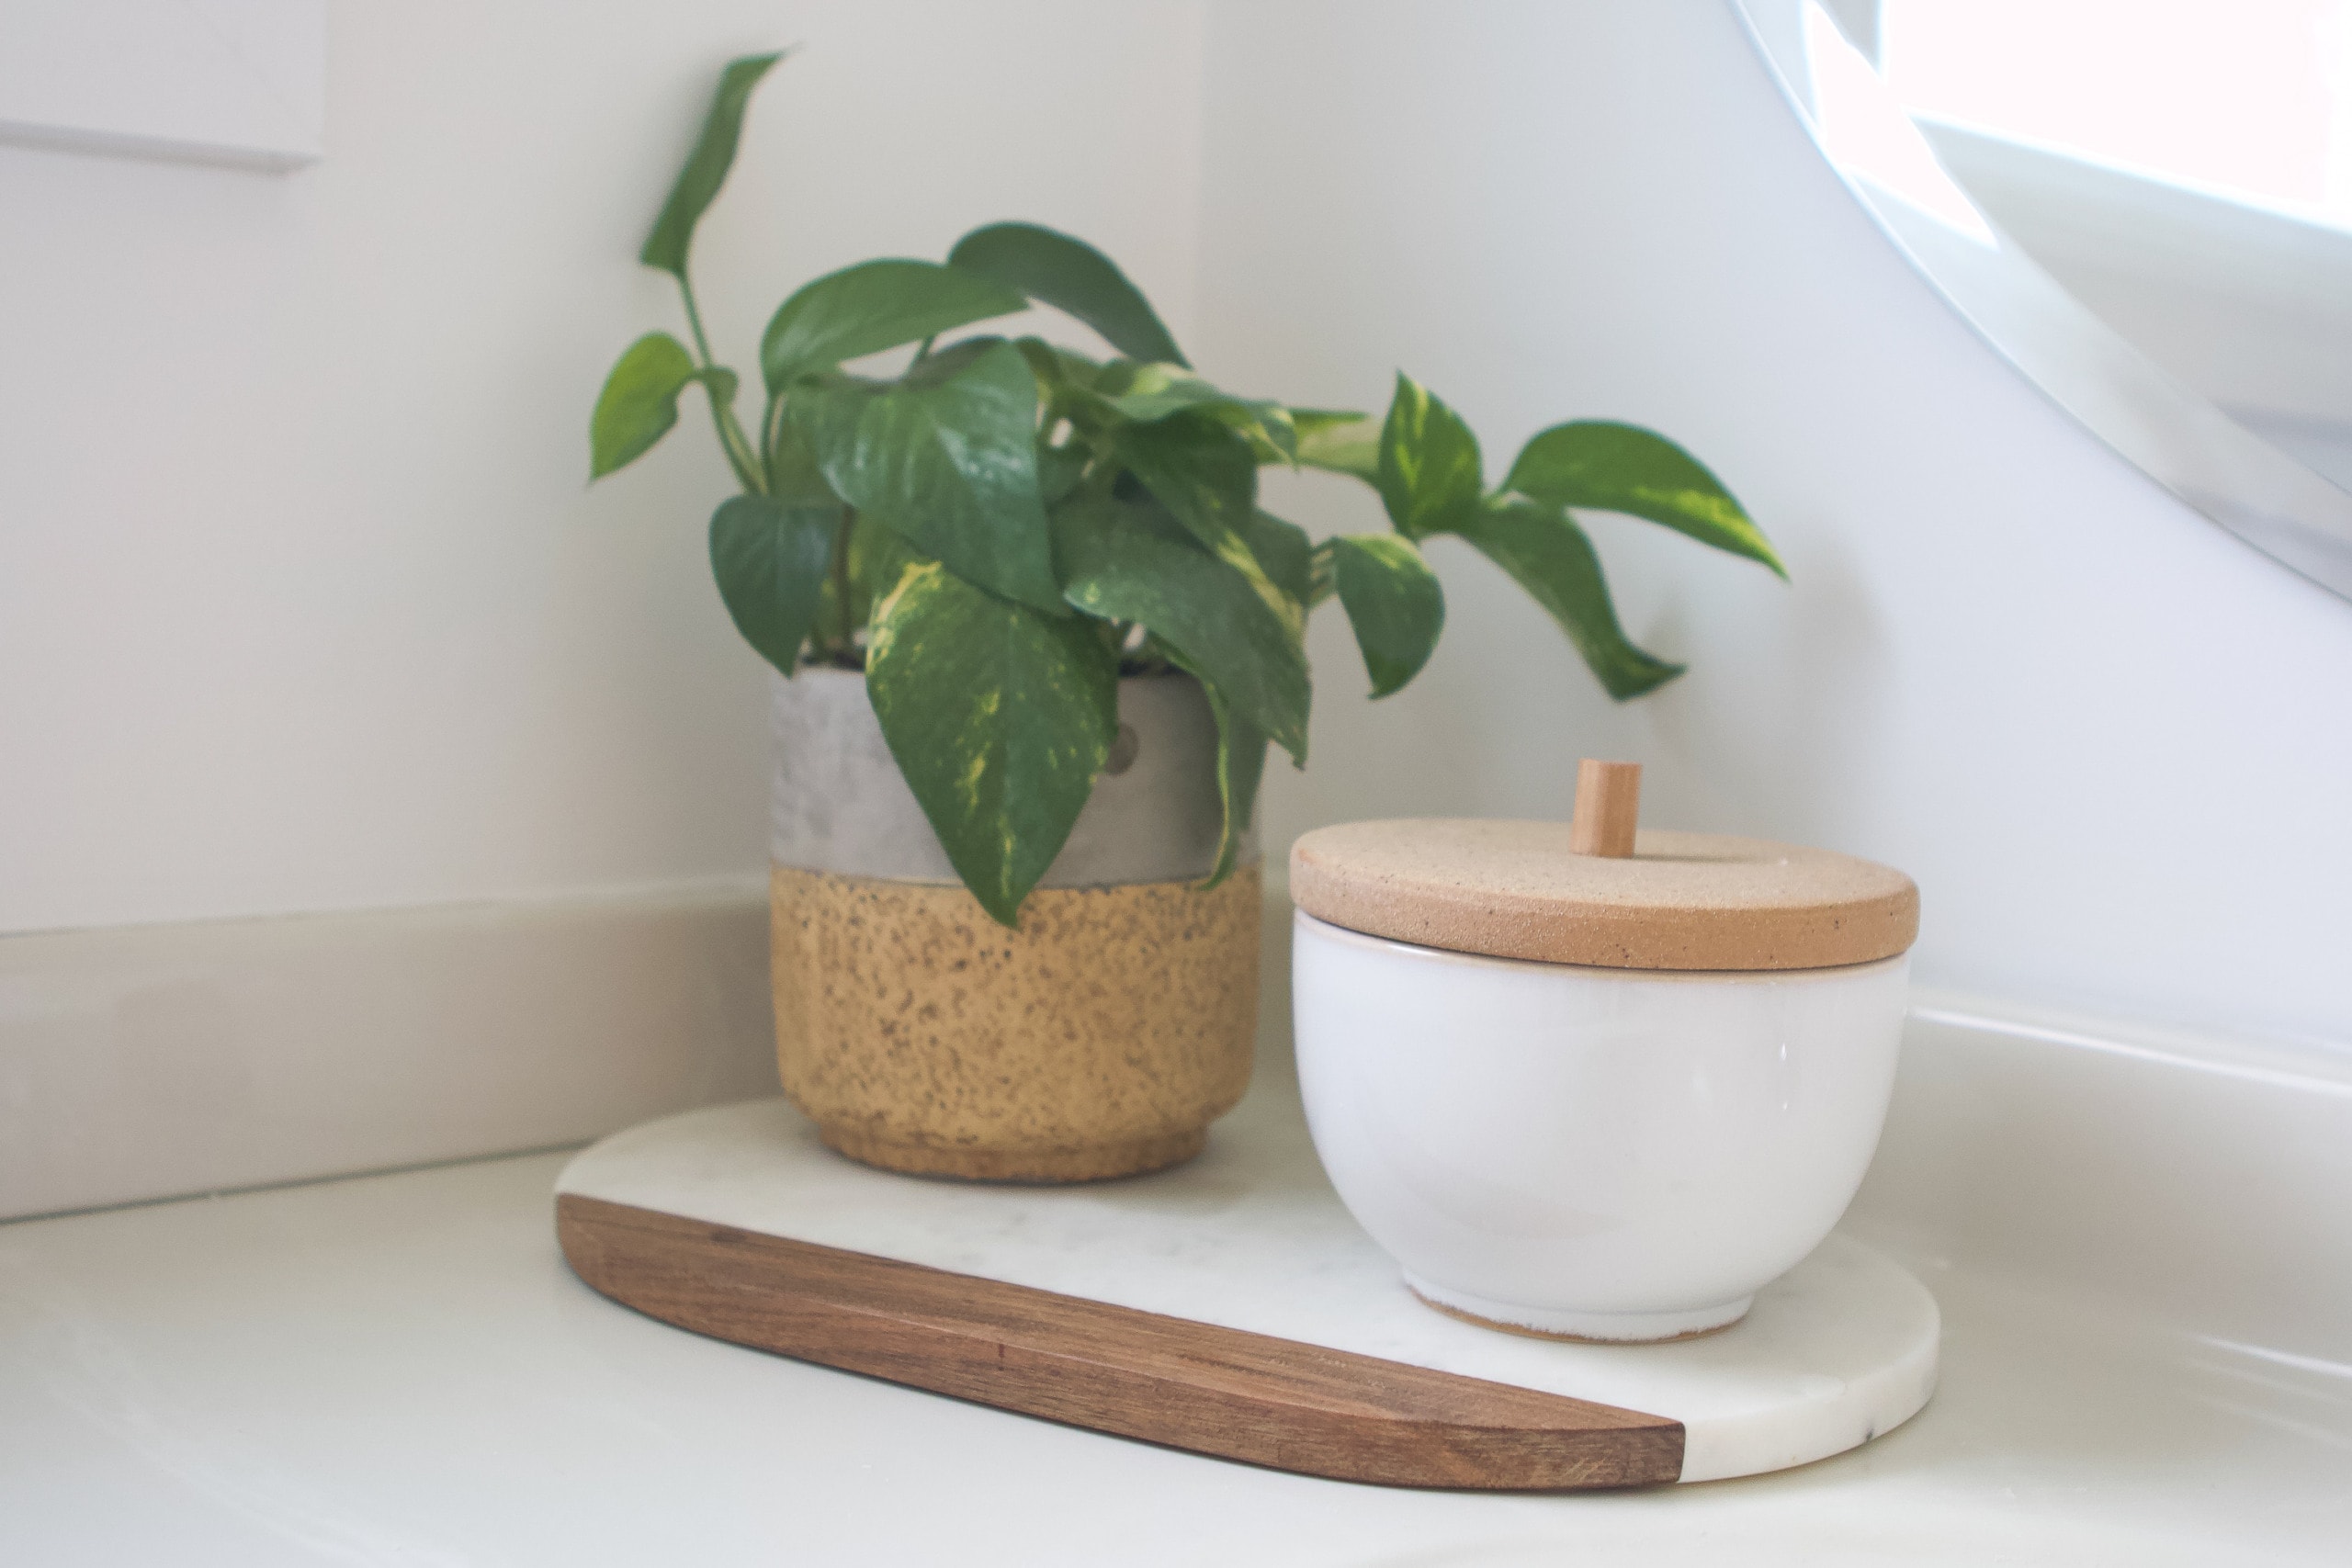

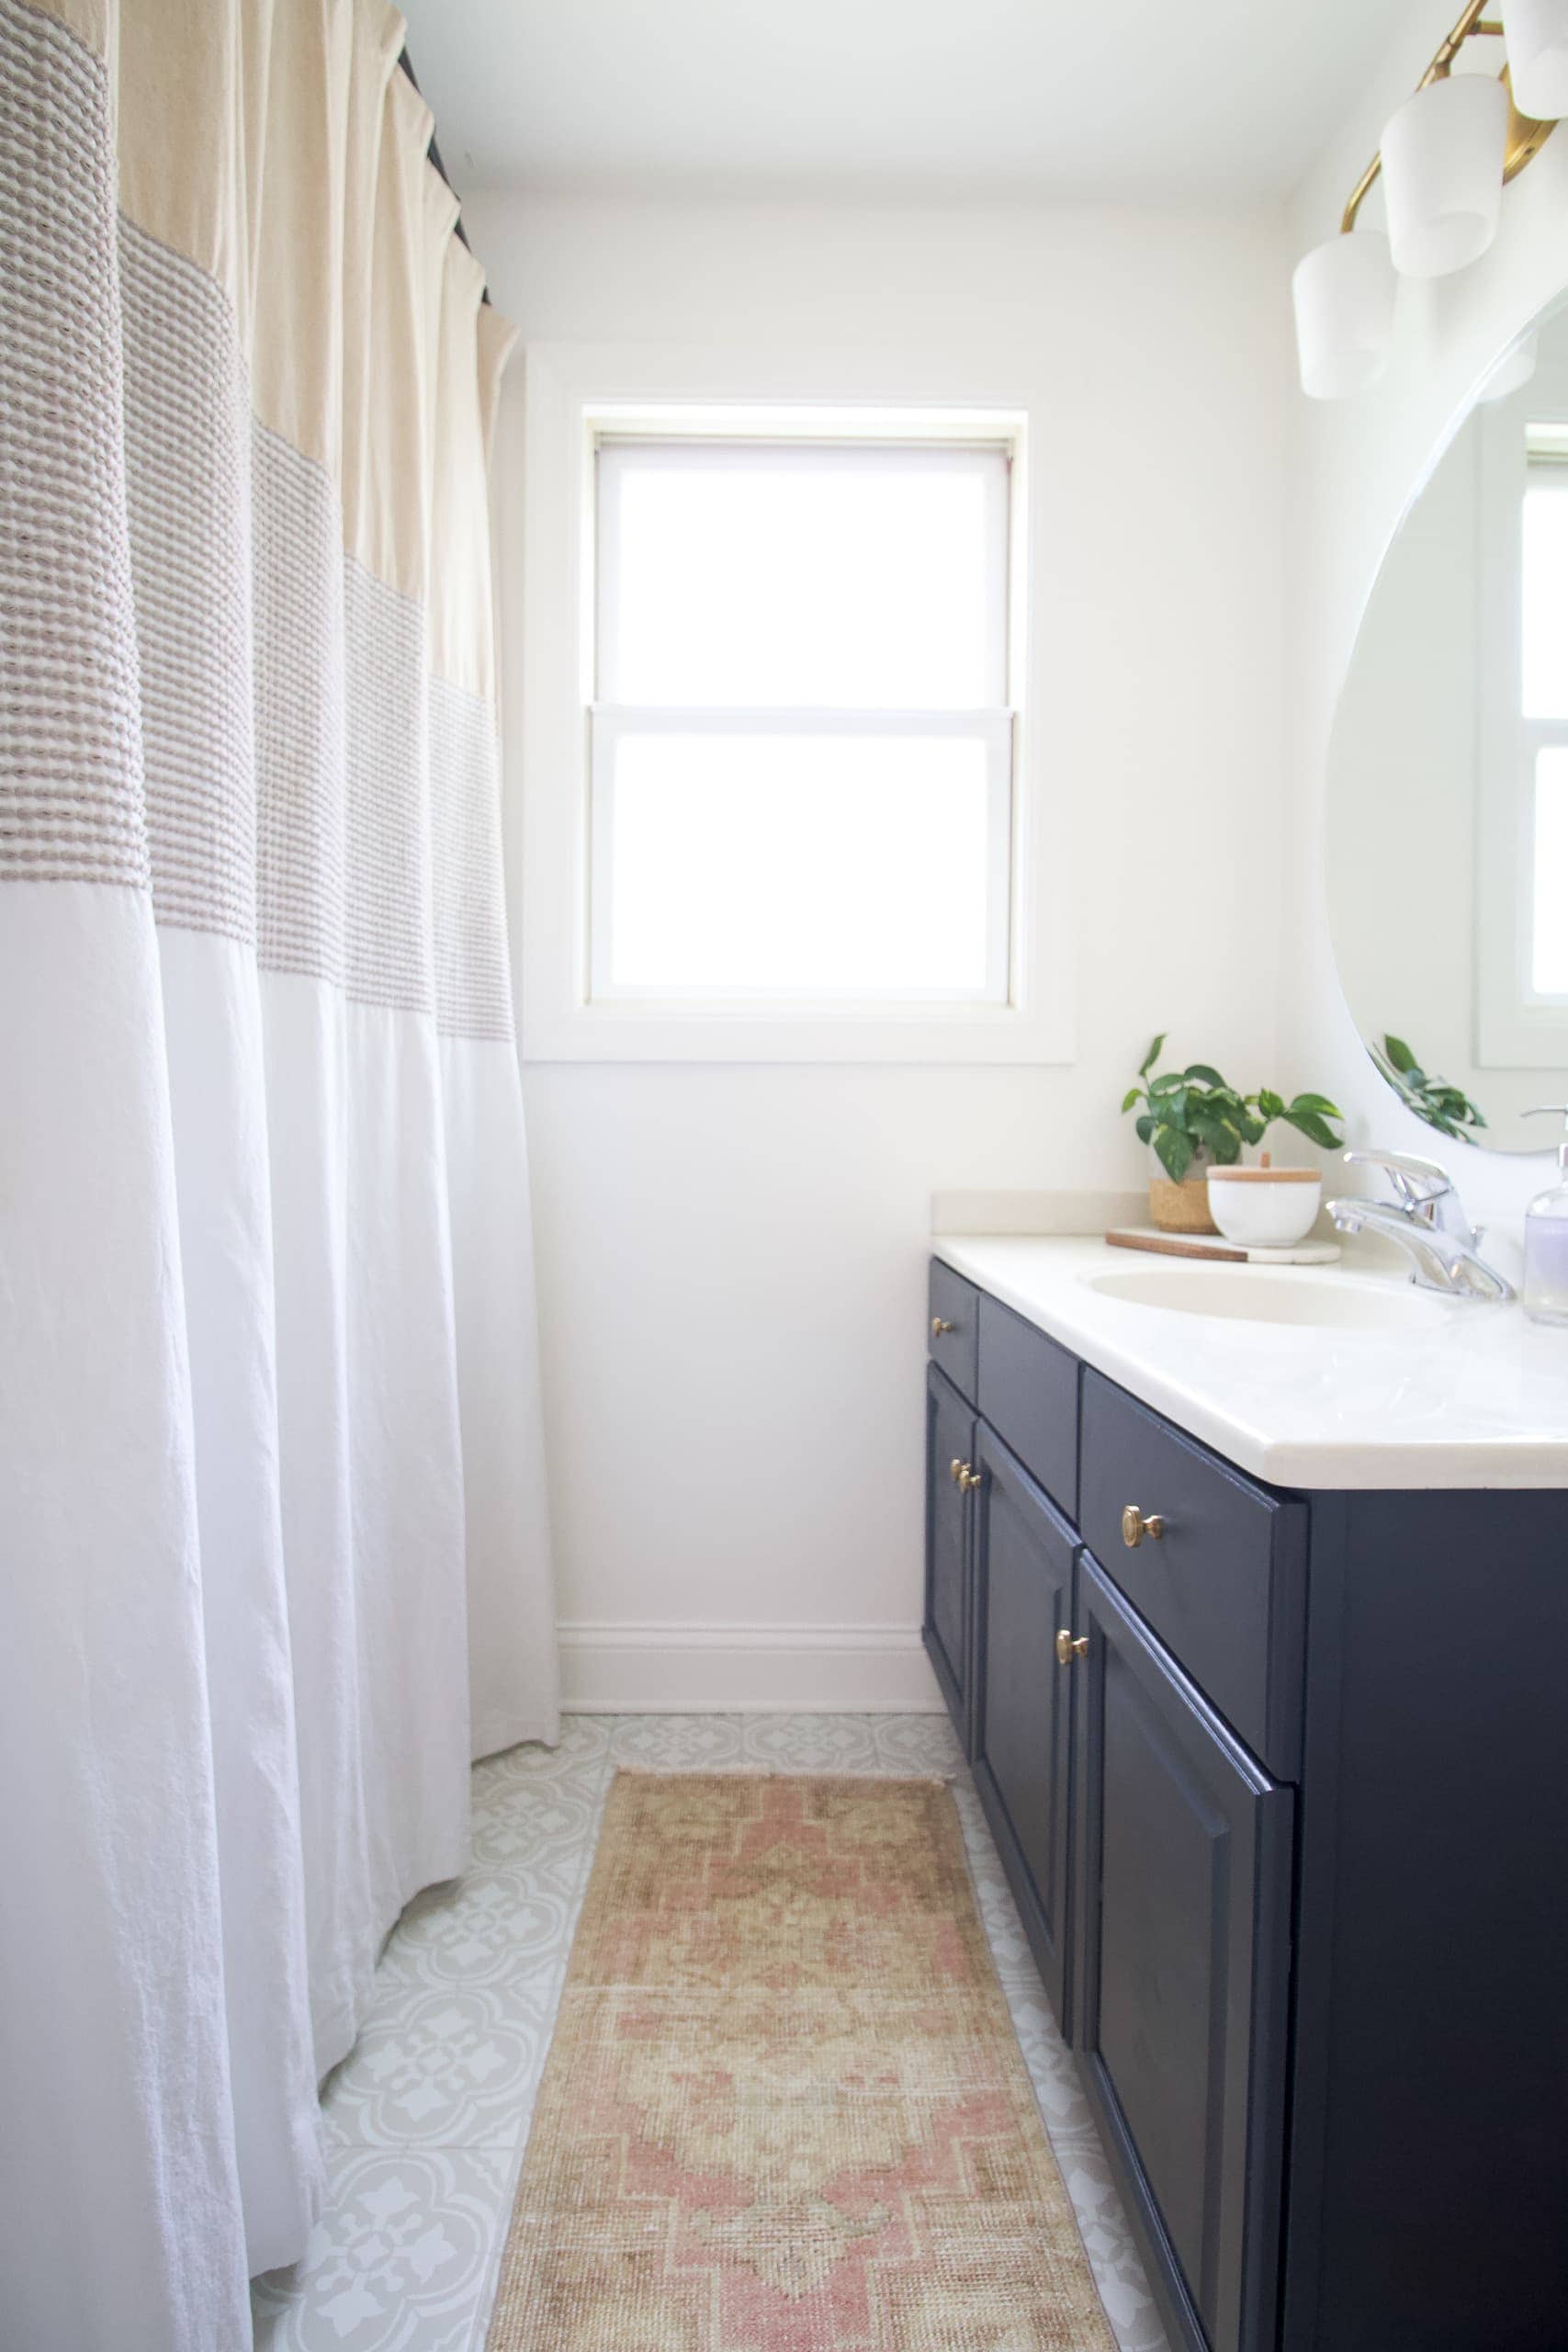
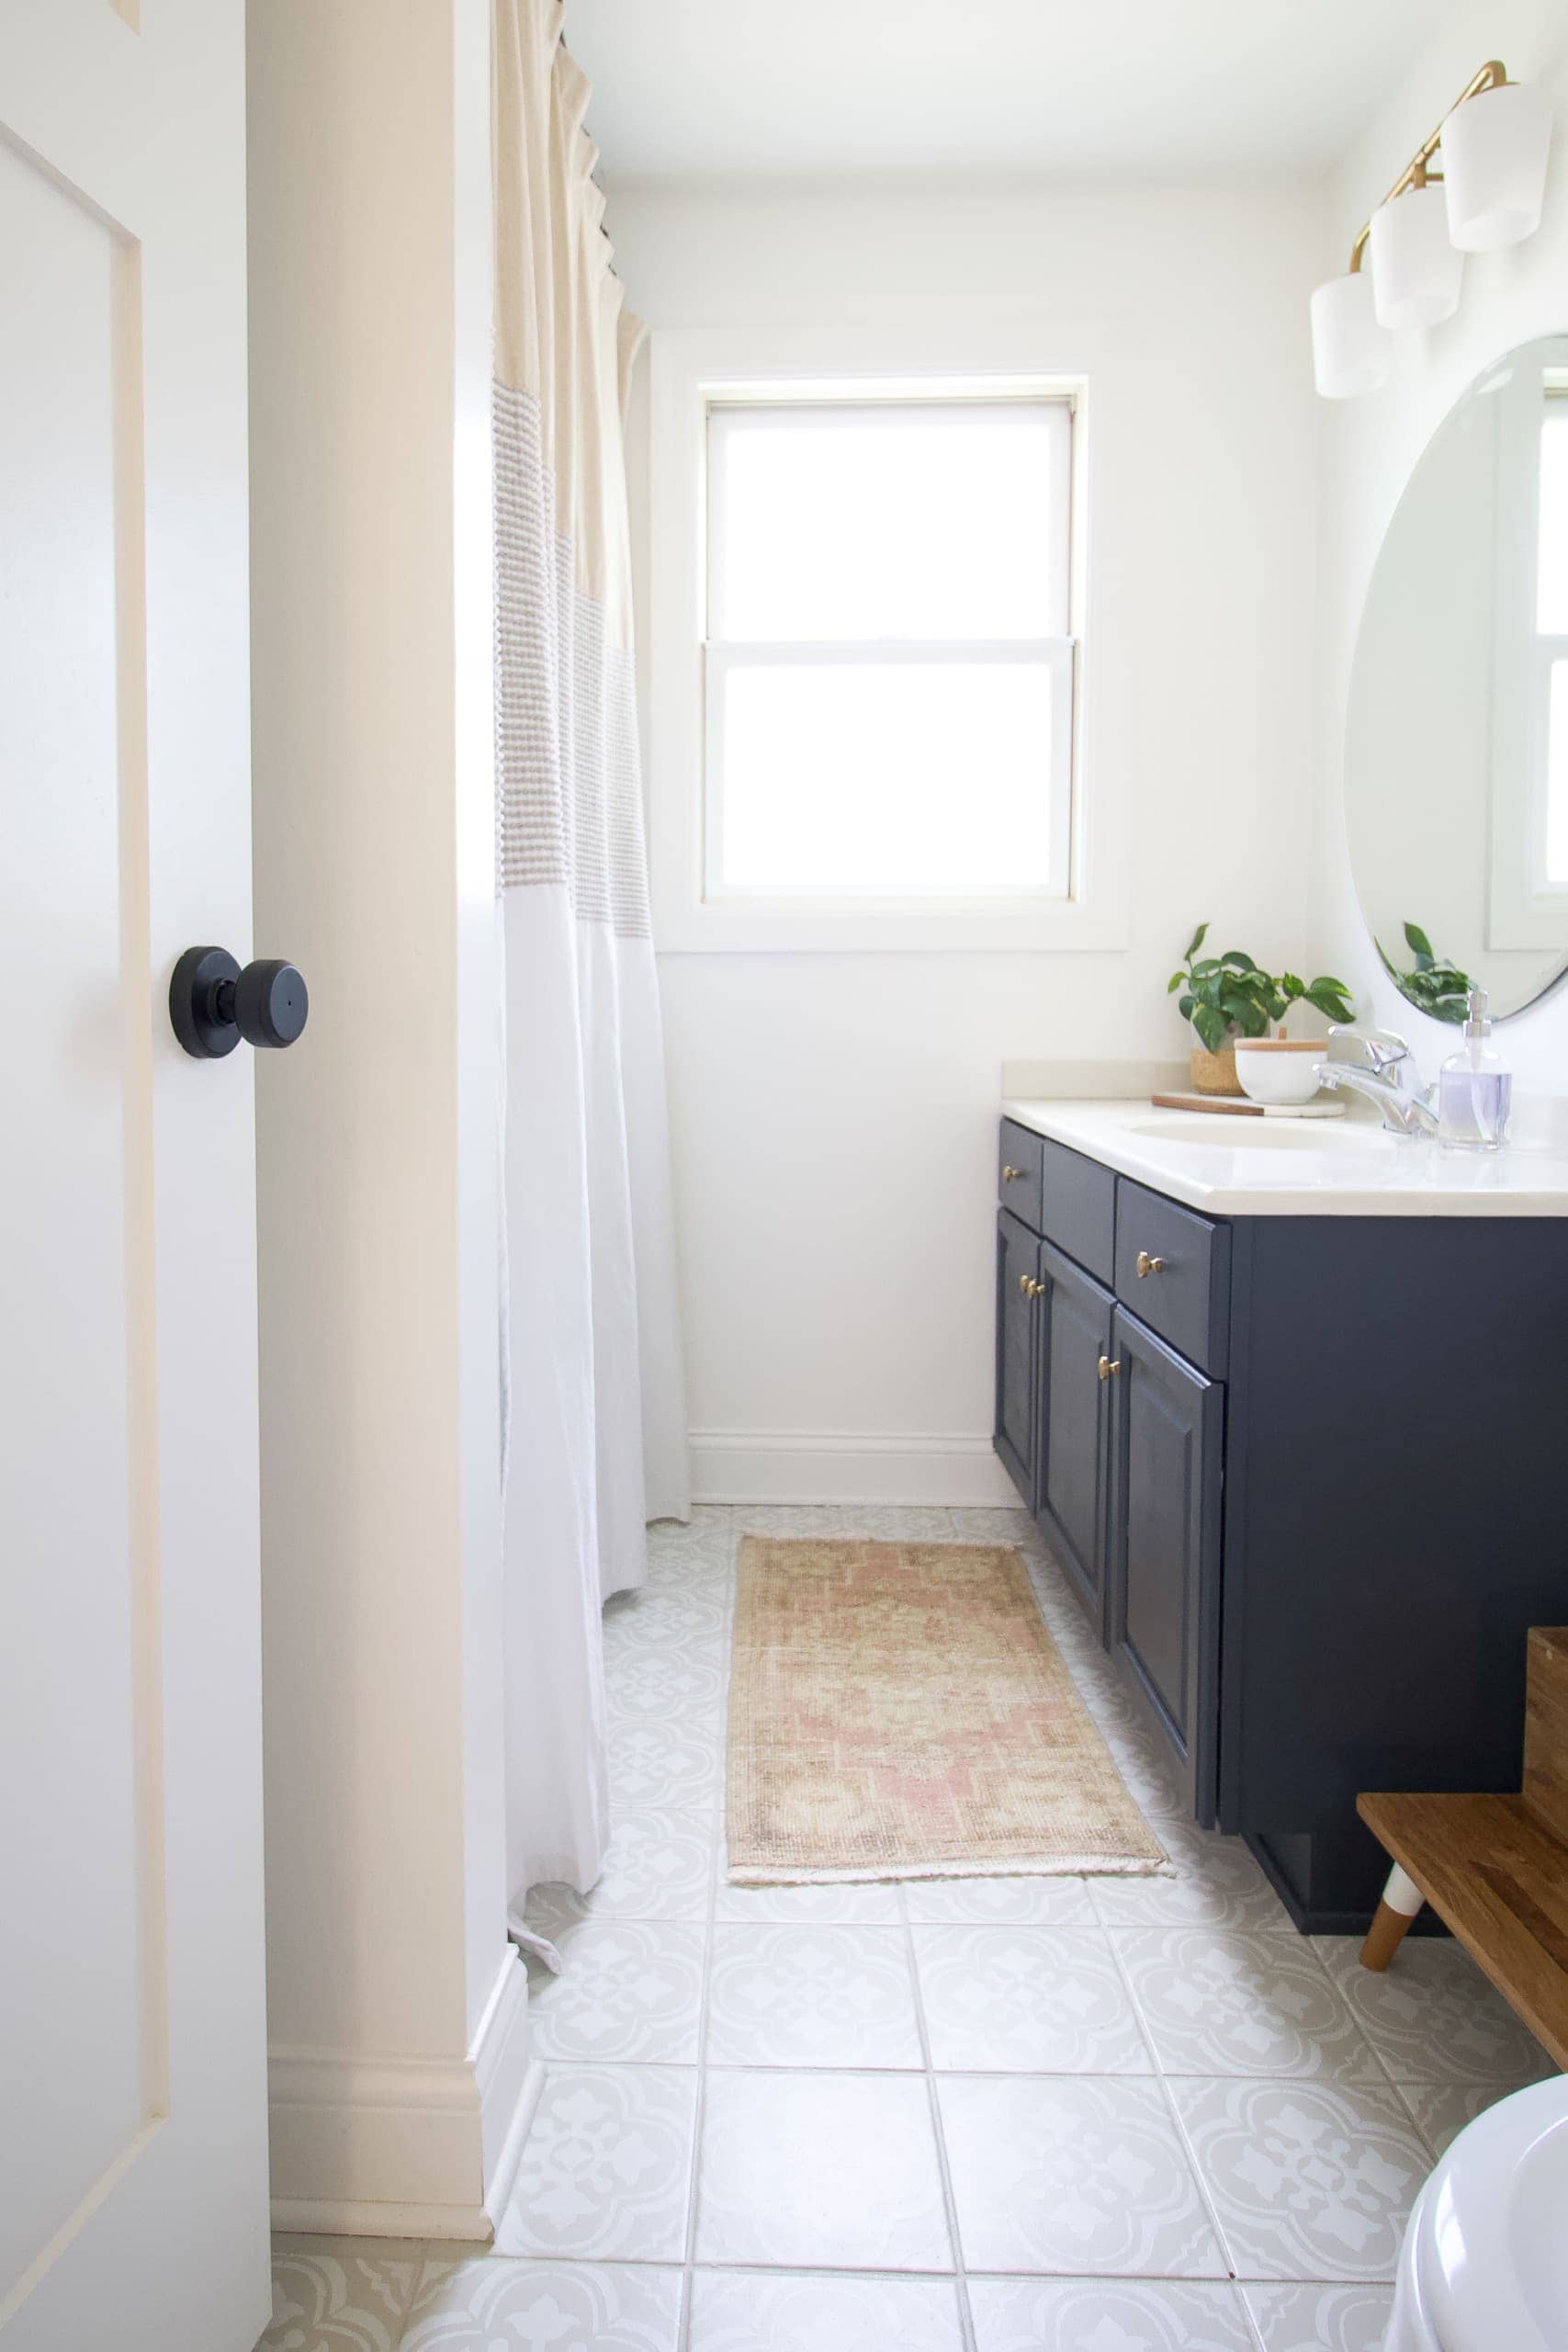
The accessories are always the best part of any room makeover. I ended up buying a vintage Turkish rug from this shop to bring some soft pink into the room. It is Rory’s bathroom, after all! I ended up keeping this towel hook as I had before along with the same trash can. To fill the strange space in between the vanity and the toilet, I added the step stool that we got as a gift for our baby shower. I can’t wait until Rory needs to use it to brush her teeth in here. So sweet.
Bathroom Evolution
Okay, let’s take a look at this wide shot step by step…

And then finally, the finished product…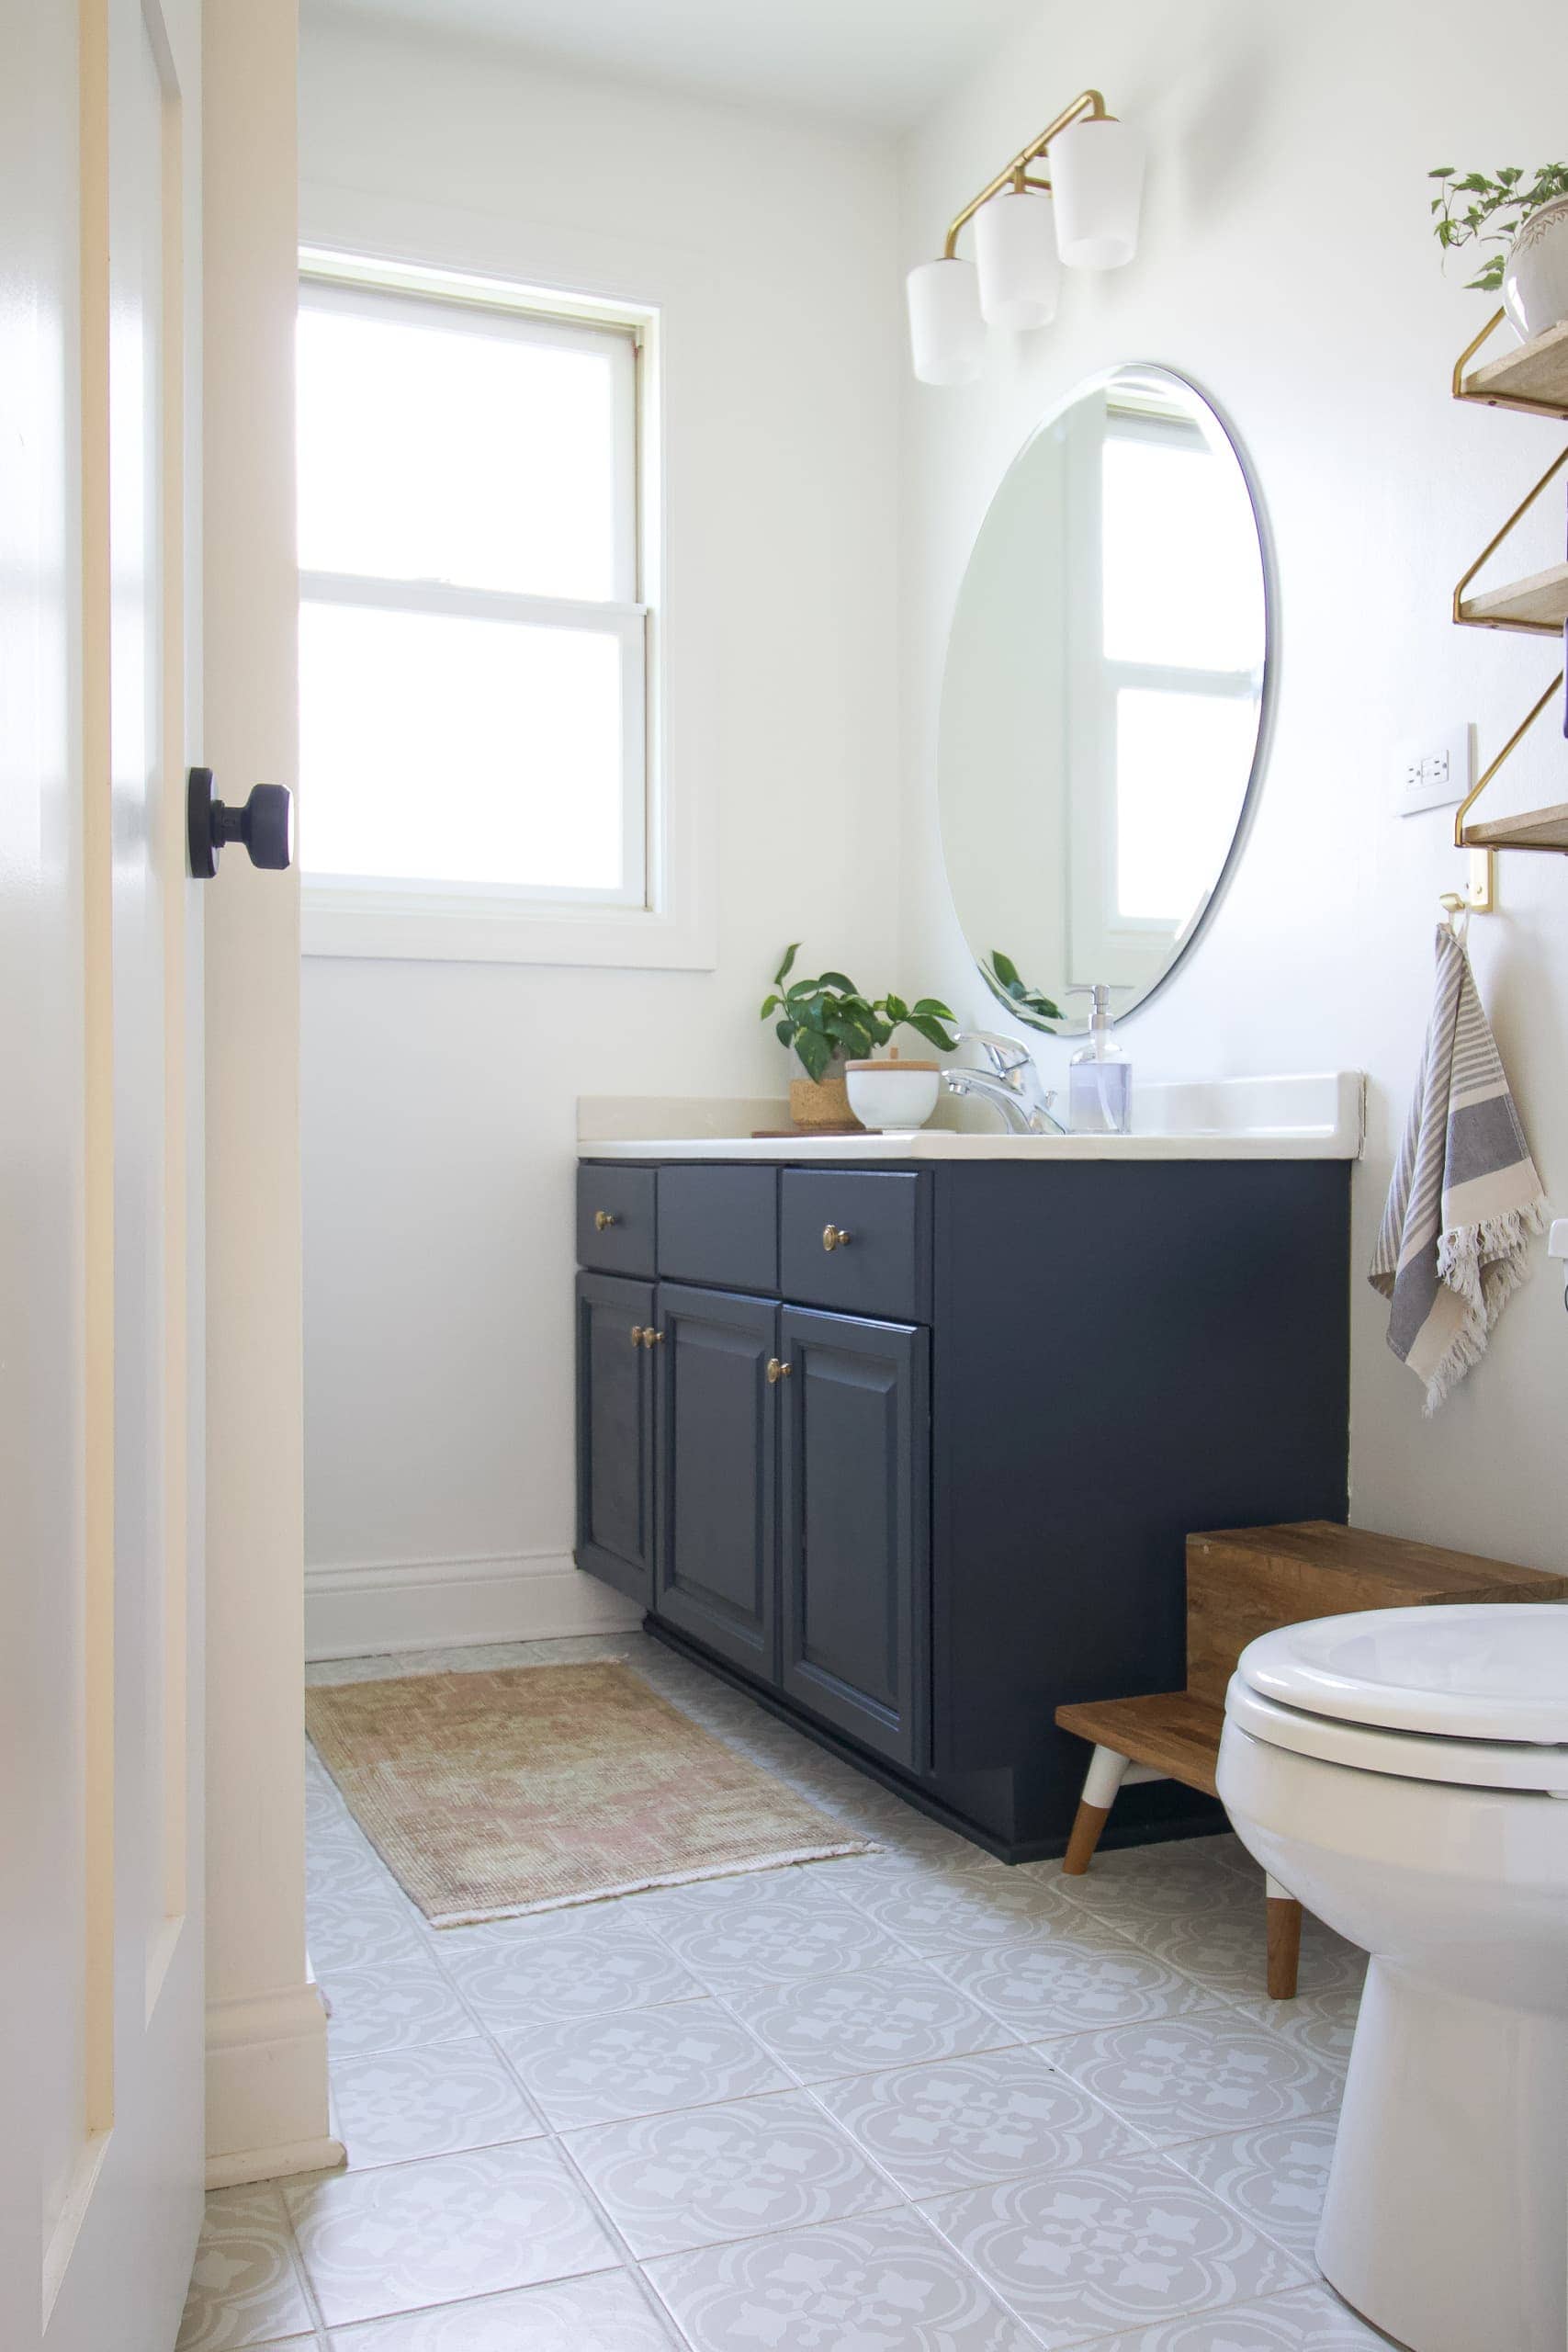
Our Budget Bathroom Makeover – Sources
 Our Budget Bathroom Makeover – Sources
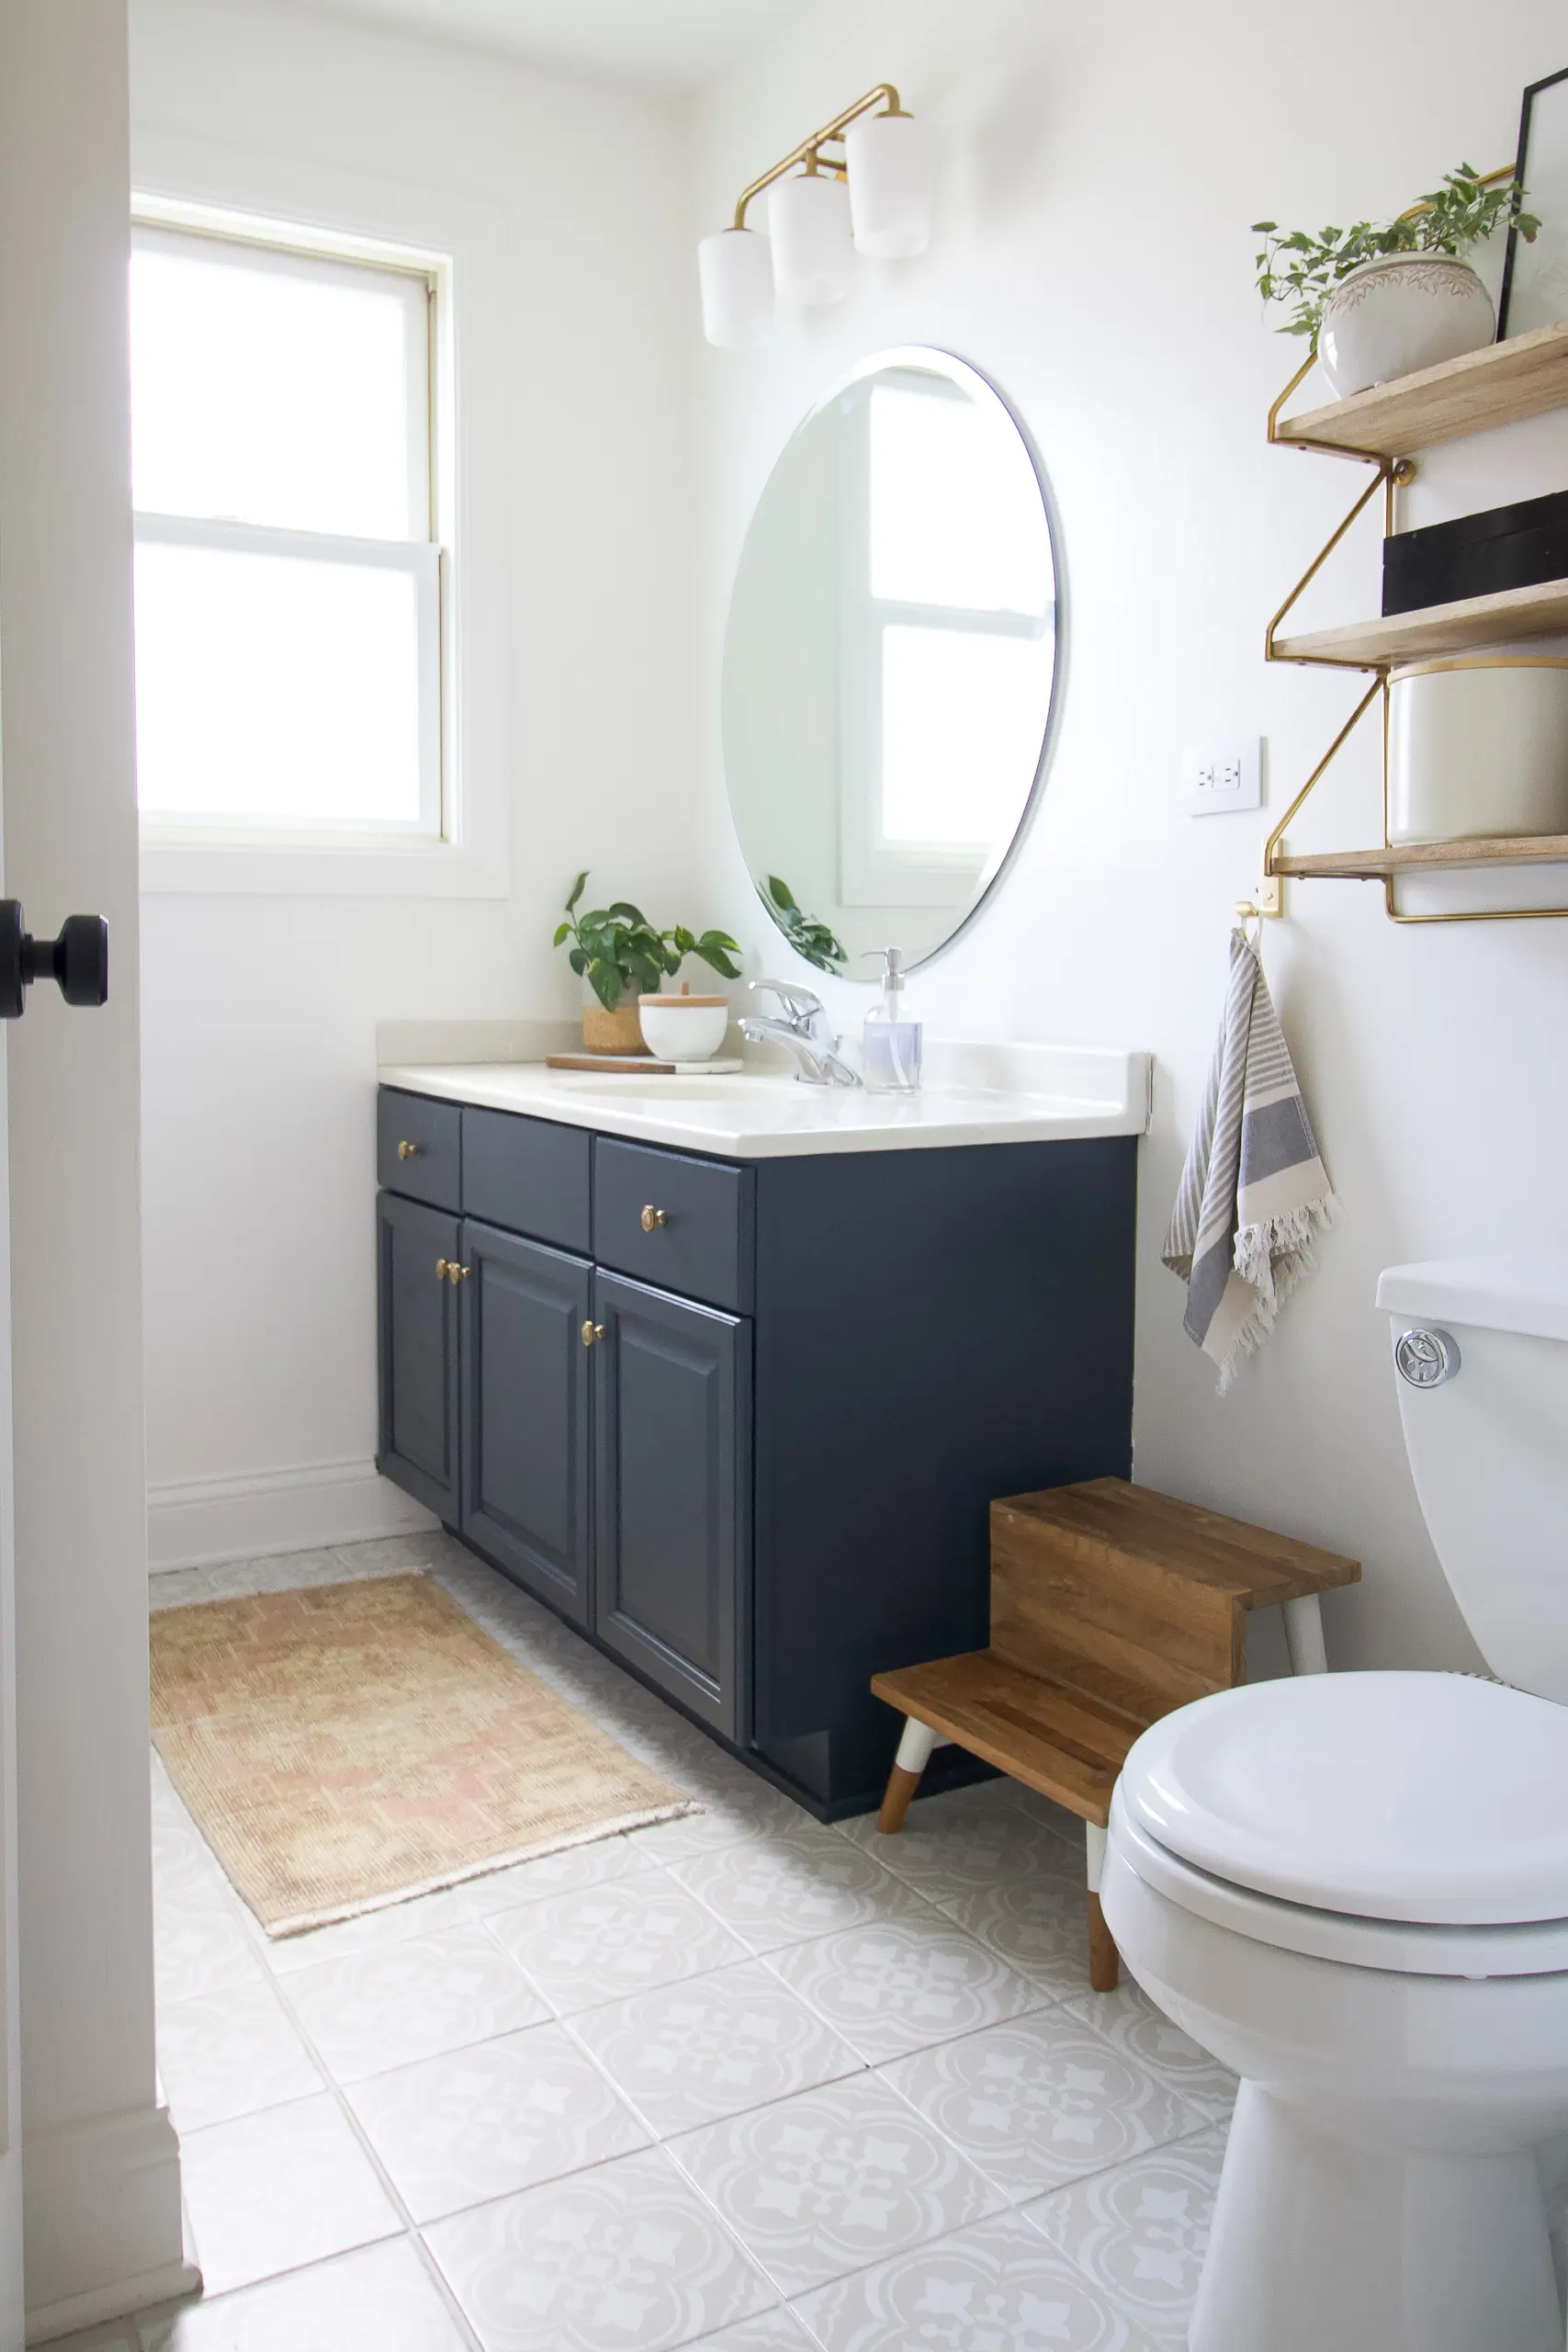
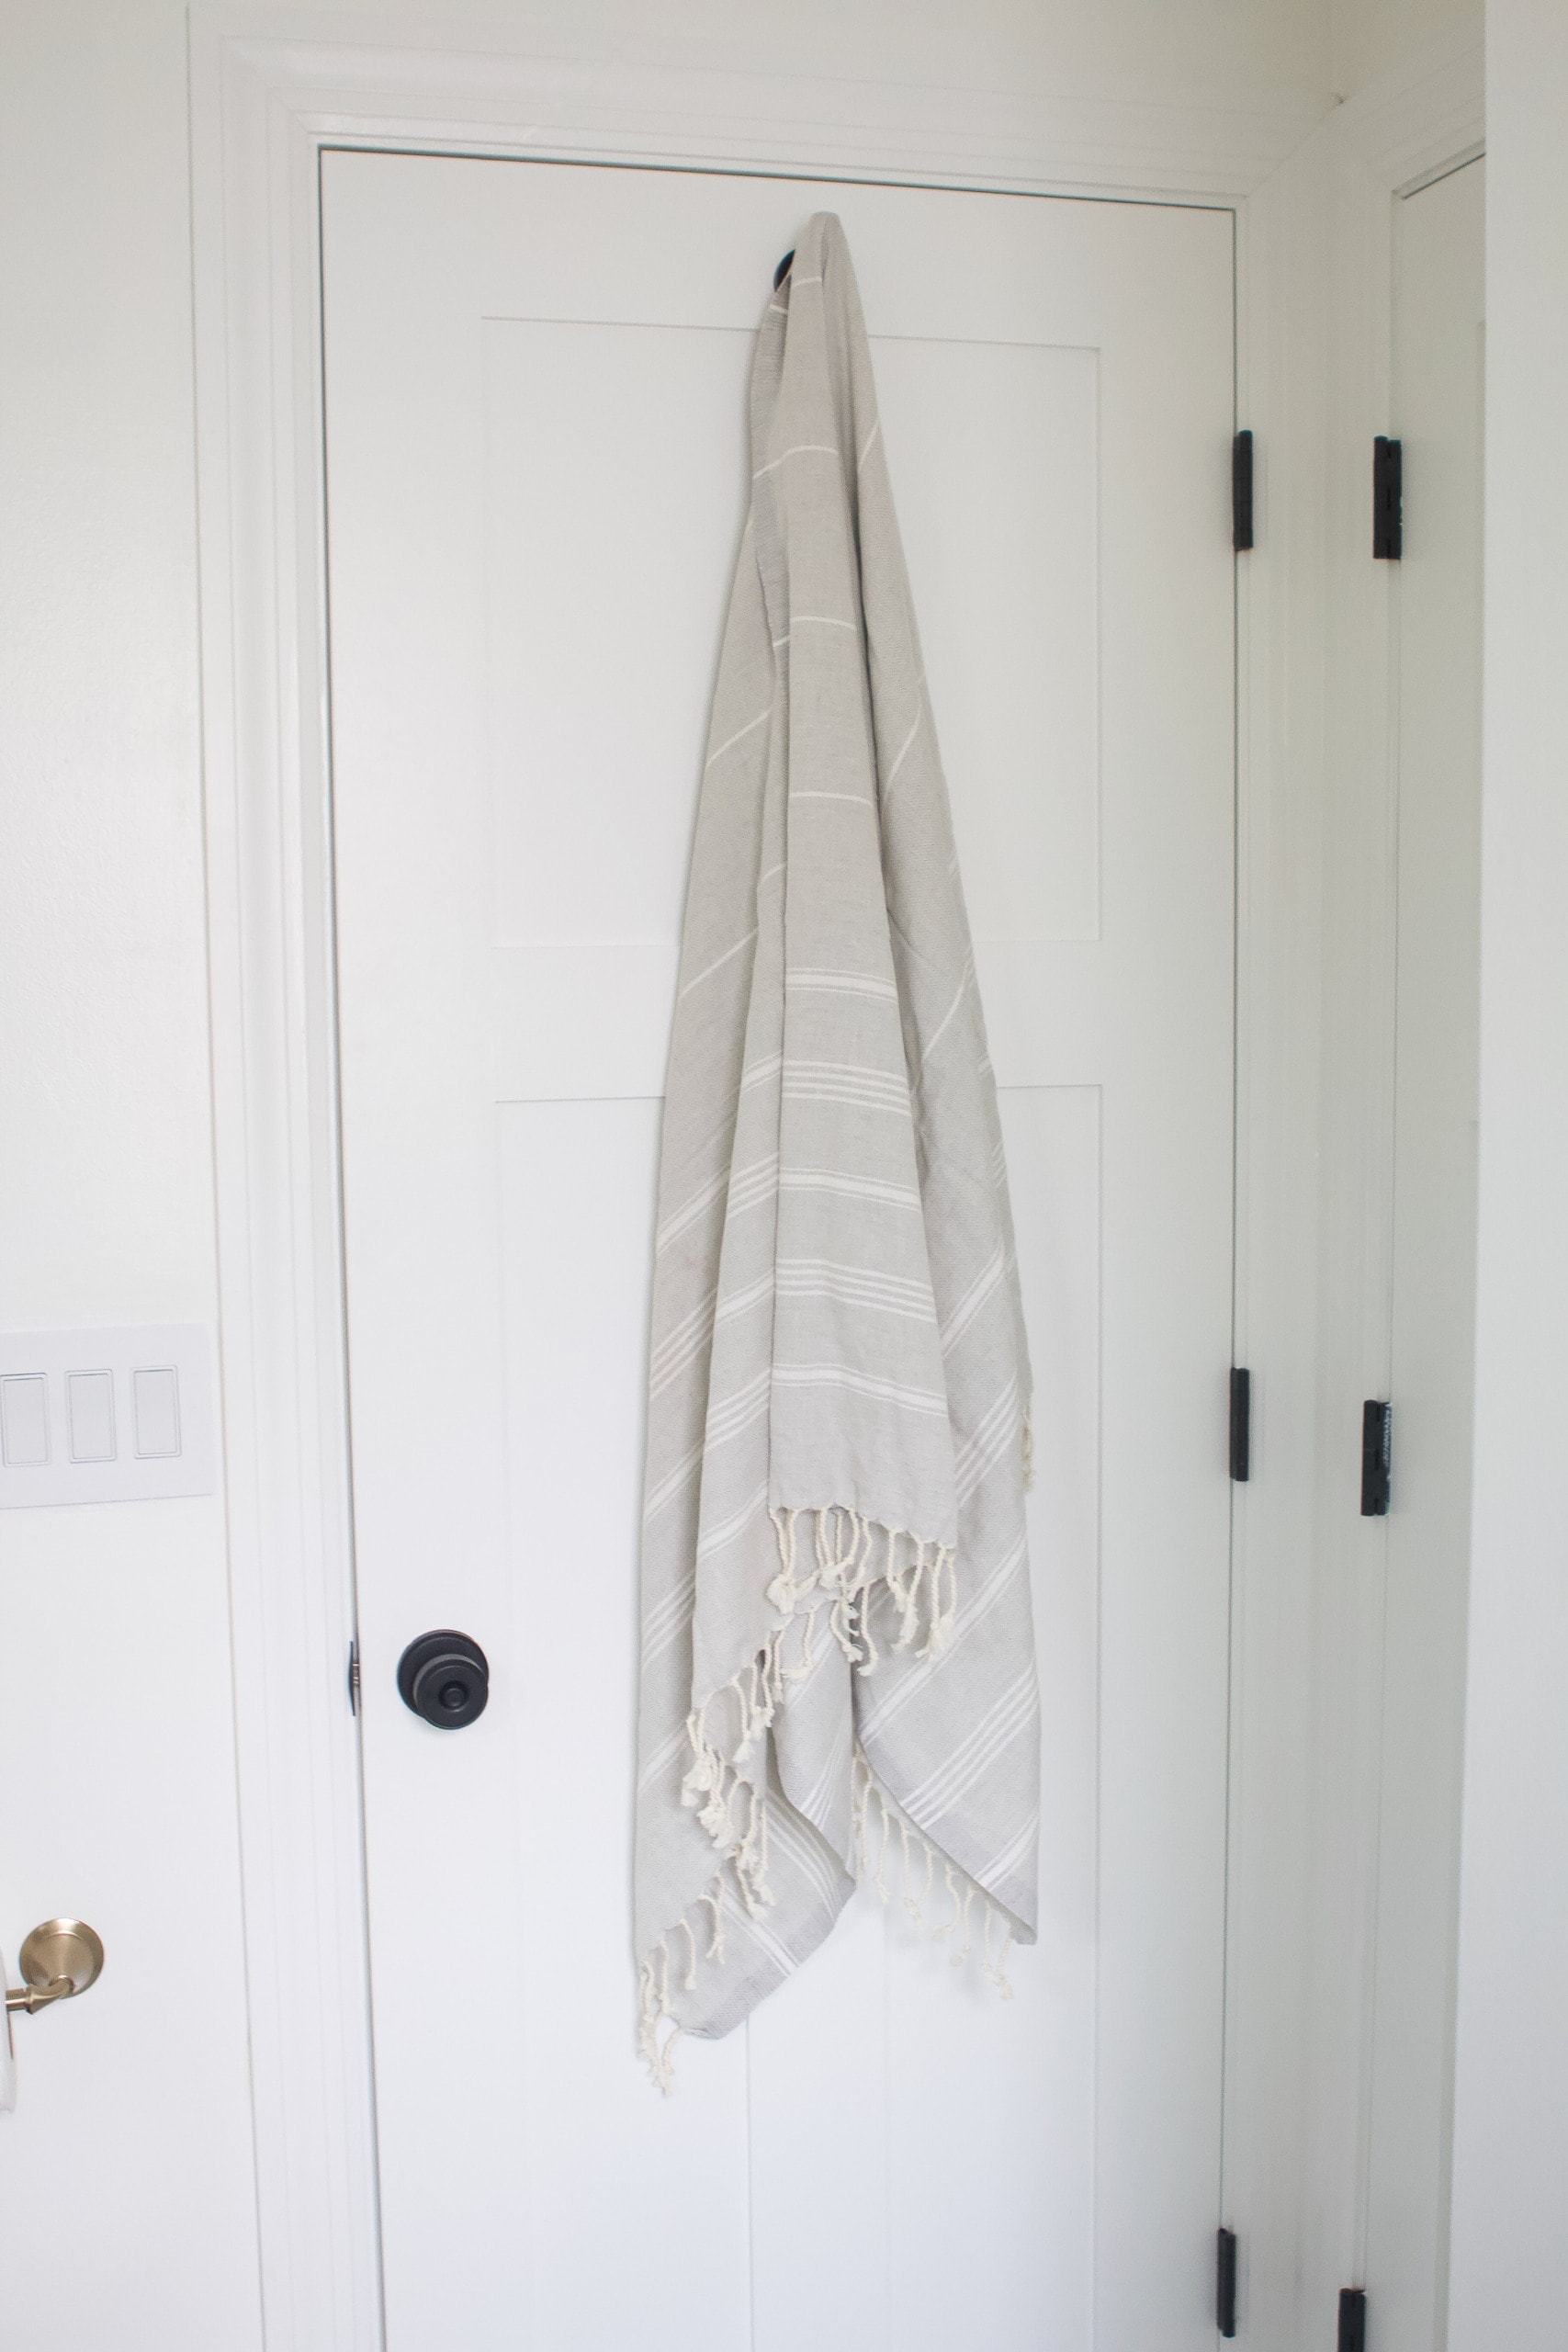
Floor Stencil Tutorial // Painted Vanity Tutorial // Wall Color, Behr “Snowy Pine” // Trim Color, Benjamin Moore “Simply White” // Vanity Color, Behr “Starless Night” // Shower Curtain // Turkish Rug // Soap Dispenser // Canister on Vanity // Planter (HomeGoods) // Mirror // Vanity Light // Hardware // Step Stool // Towel Hook // Turkish Bath Towel // Trash Can // Shelving Unit // Toilet Paper Canister // Toilet Paper Holder // Shelf Accessories (all old from Target & HomeGoods) // Hand Towel
Total Budget
I didn’t want to spend too much money on this budget bathroom makeover and I ended up repurposing a lot of items we already owned. (Plus, we had a lot of the DIY supplies already). So let’s see where we had to spend some money…
- Floor Paint = $40
- Stencil = $10
- Primer = $30
- Vanity Paint = $30
- Wall Paint = $30
- Mirror = $153
- Vanity Light = $190
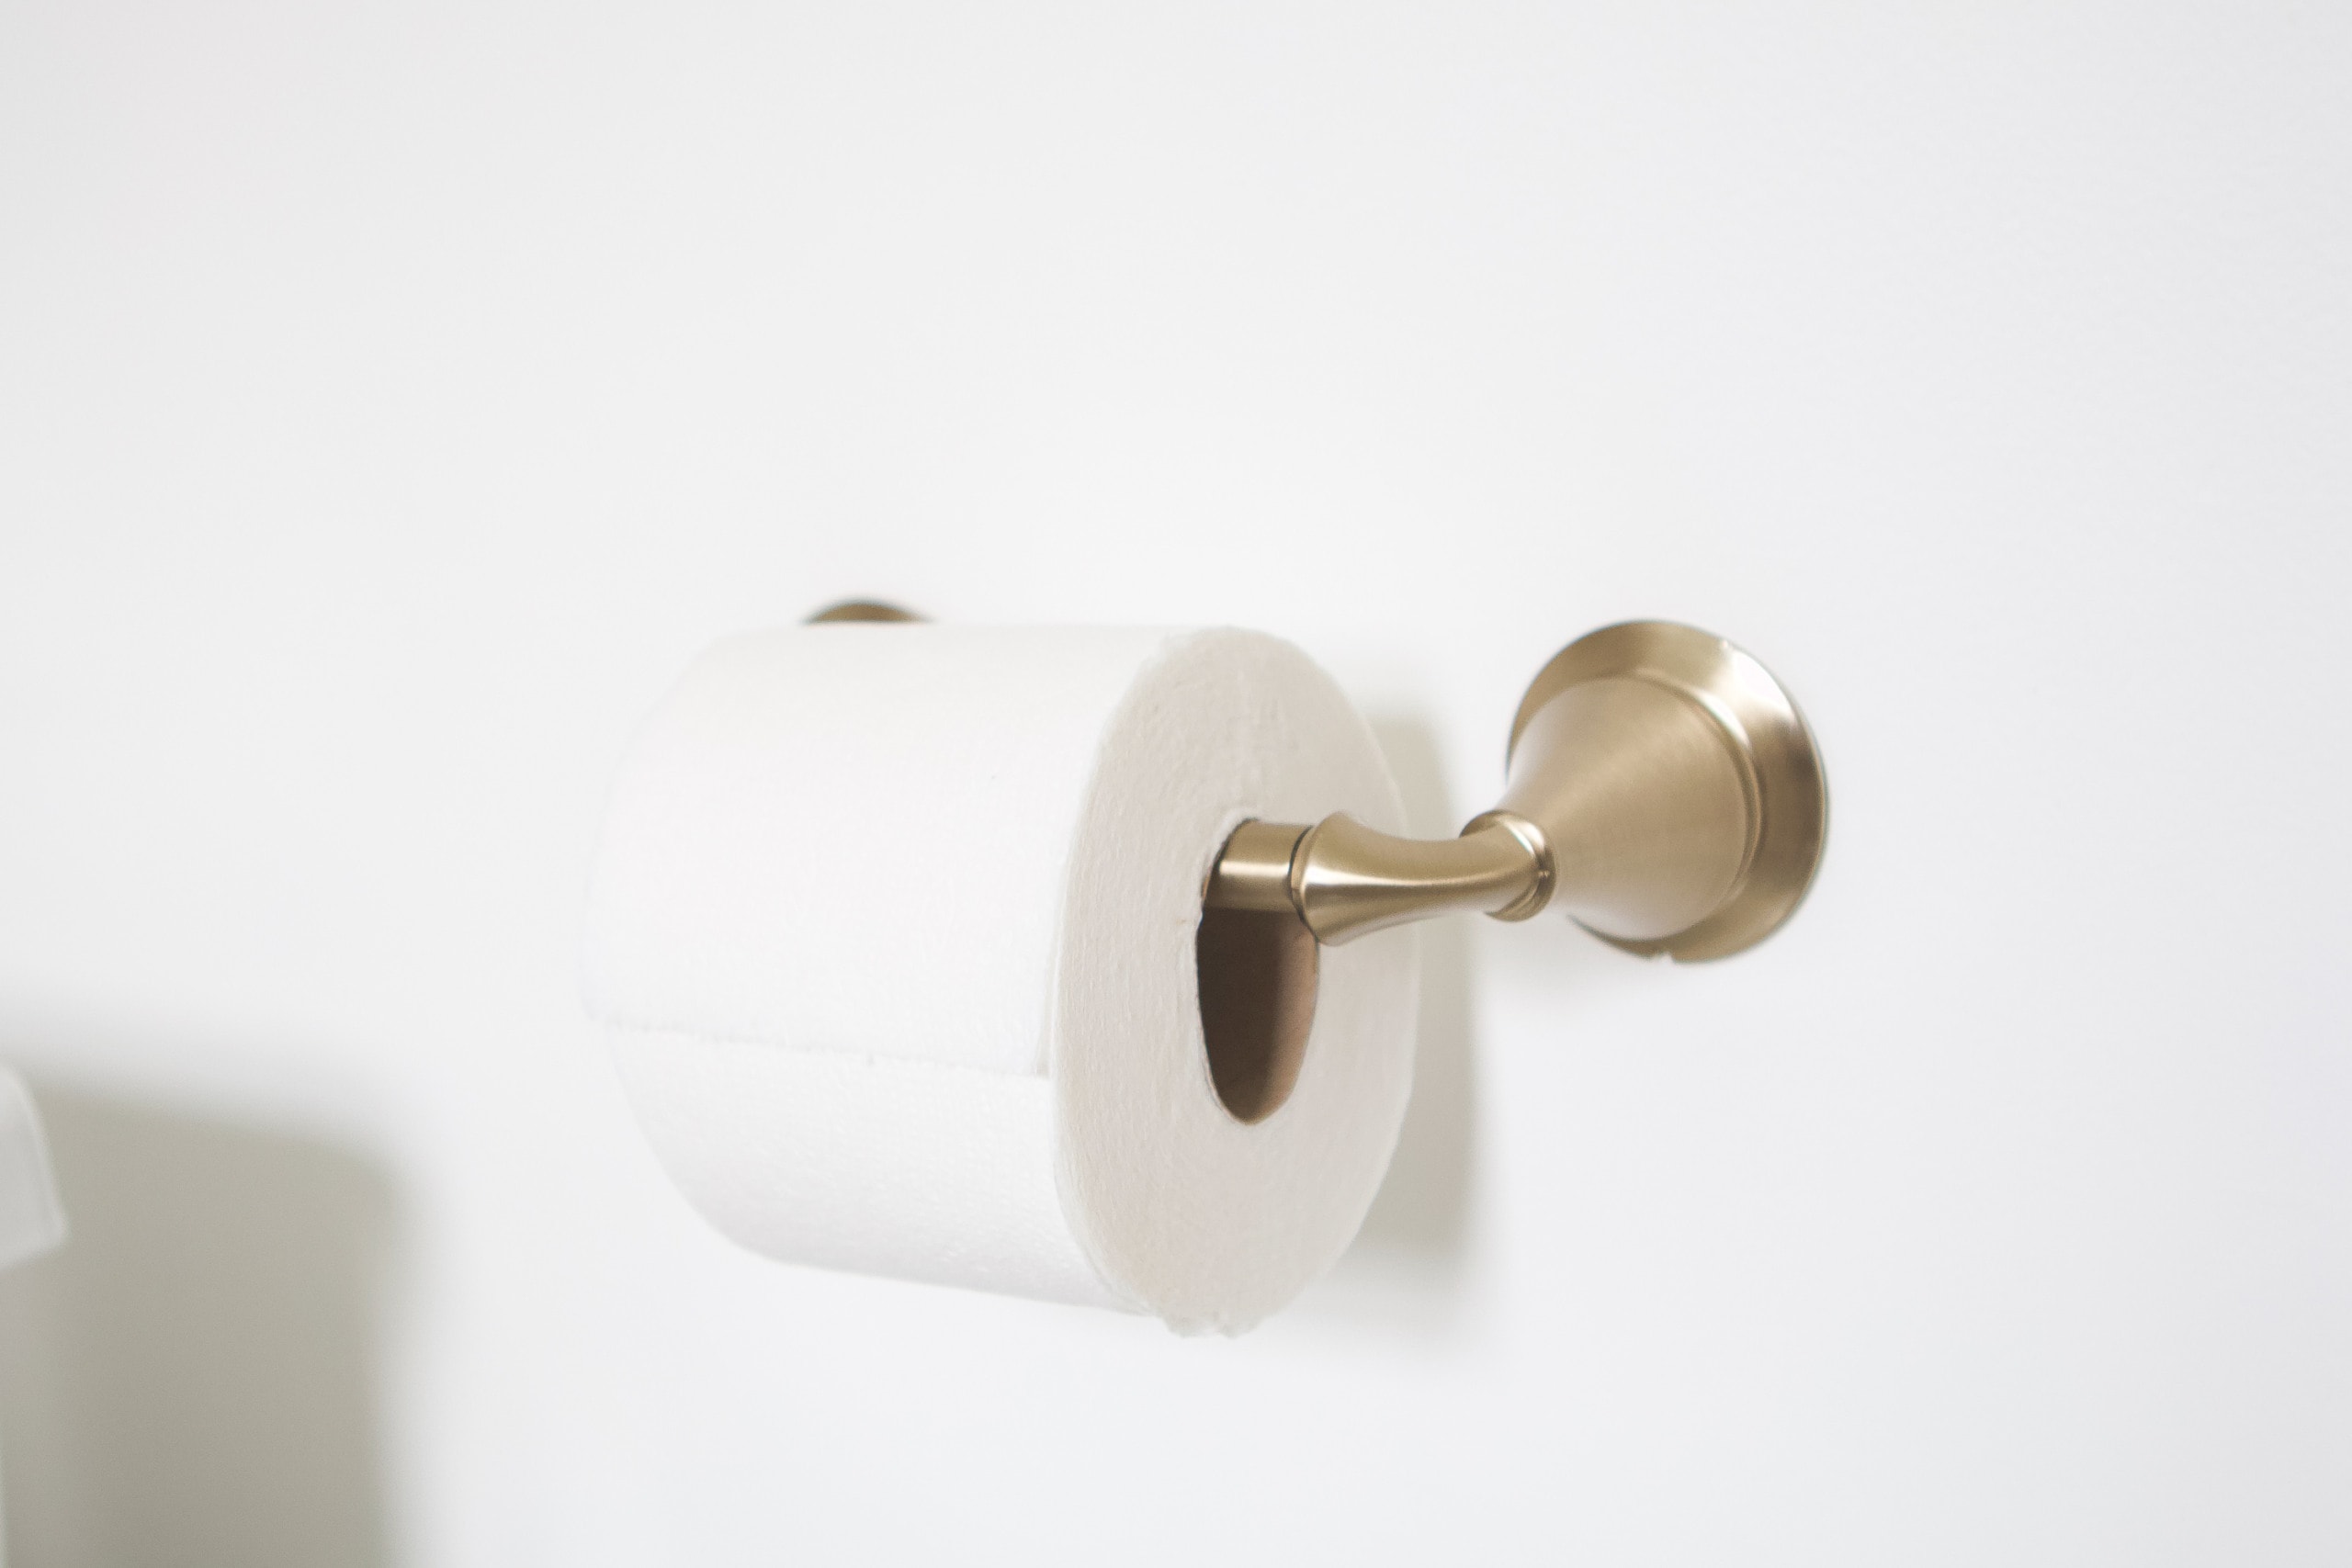
- Toilet Paper Holder = $38
- Vanity Hardware (5 knobs) = $20
- Turkish Rug = $45
Total = $586
For how much better it looks now, I can hardly believe I only had to spend $586!! It’s crazy how paint really changed the floors, vanity, and walls in here.
What’s Next?

Honestly, nothing for now! Eventually, I would love to redo the bathtub and shower with fresh tile and a new tub. But that is waaaaay down on the list of priorities. For now, we’re going to enjoy this updated space and give Rory all the baths in this sweet spot.
Casey


