Nursery Before and After + Sources
Note from Casey: Hey friends, so I had all of these posts written in advance thinking I wouldn’t have our baby for another week. But as you saw from this blog post, our daughter Rory has arrived! So know that today’s blog post was written before baby!
I’ve gotta say, it was an amazing feeling publishing yesterday’s nursery reveal post. I’m obviously in love with the room but it was wonderful to hear that you guys love it just as much as I do. Thank you for all of your sweet comments!
Today, I want to share more about the evolution of the space. When it comes to completing a room, it sometimes looks like it was no effort to get to the finish line and it happened overnight, when that’s far from the truth. This room began as a big blank box and now it’s anything but that! I’m also constantly getting source, paint color, and DIY tutorial questions, so I figured having a blog post with all of those resources would be helpful for everyone. Before we get to the nursery before and after, let’s backtrack.
Where We Began
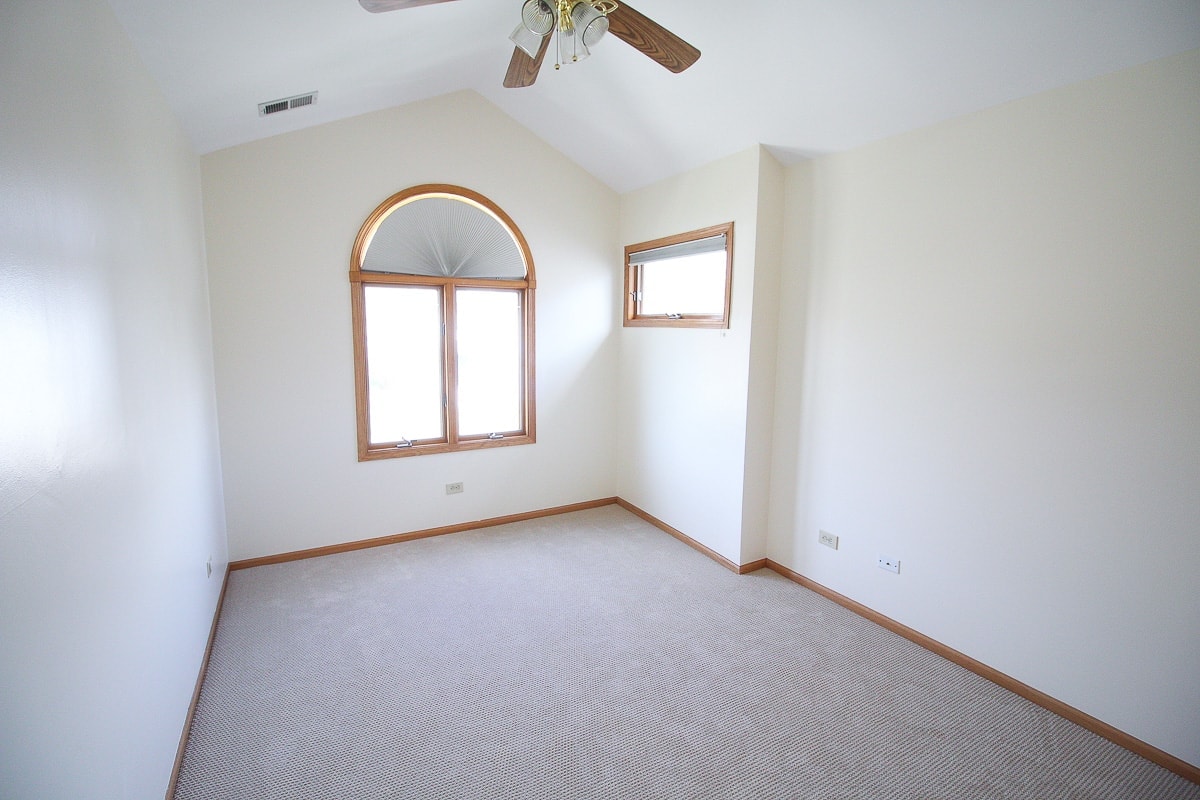
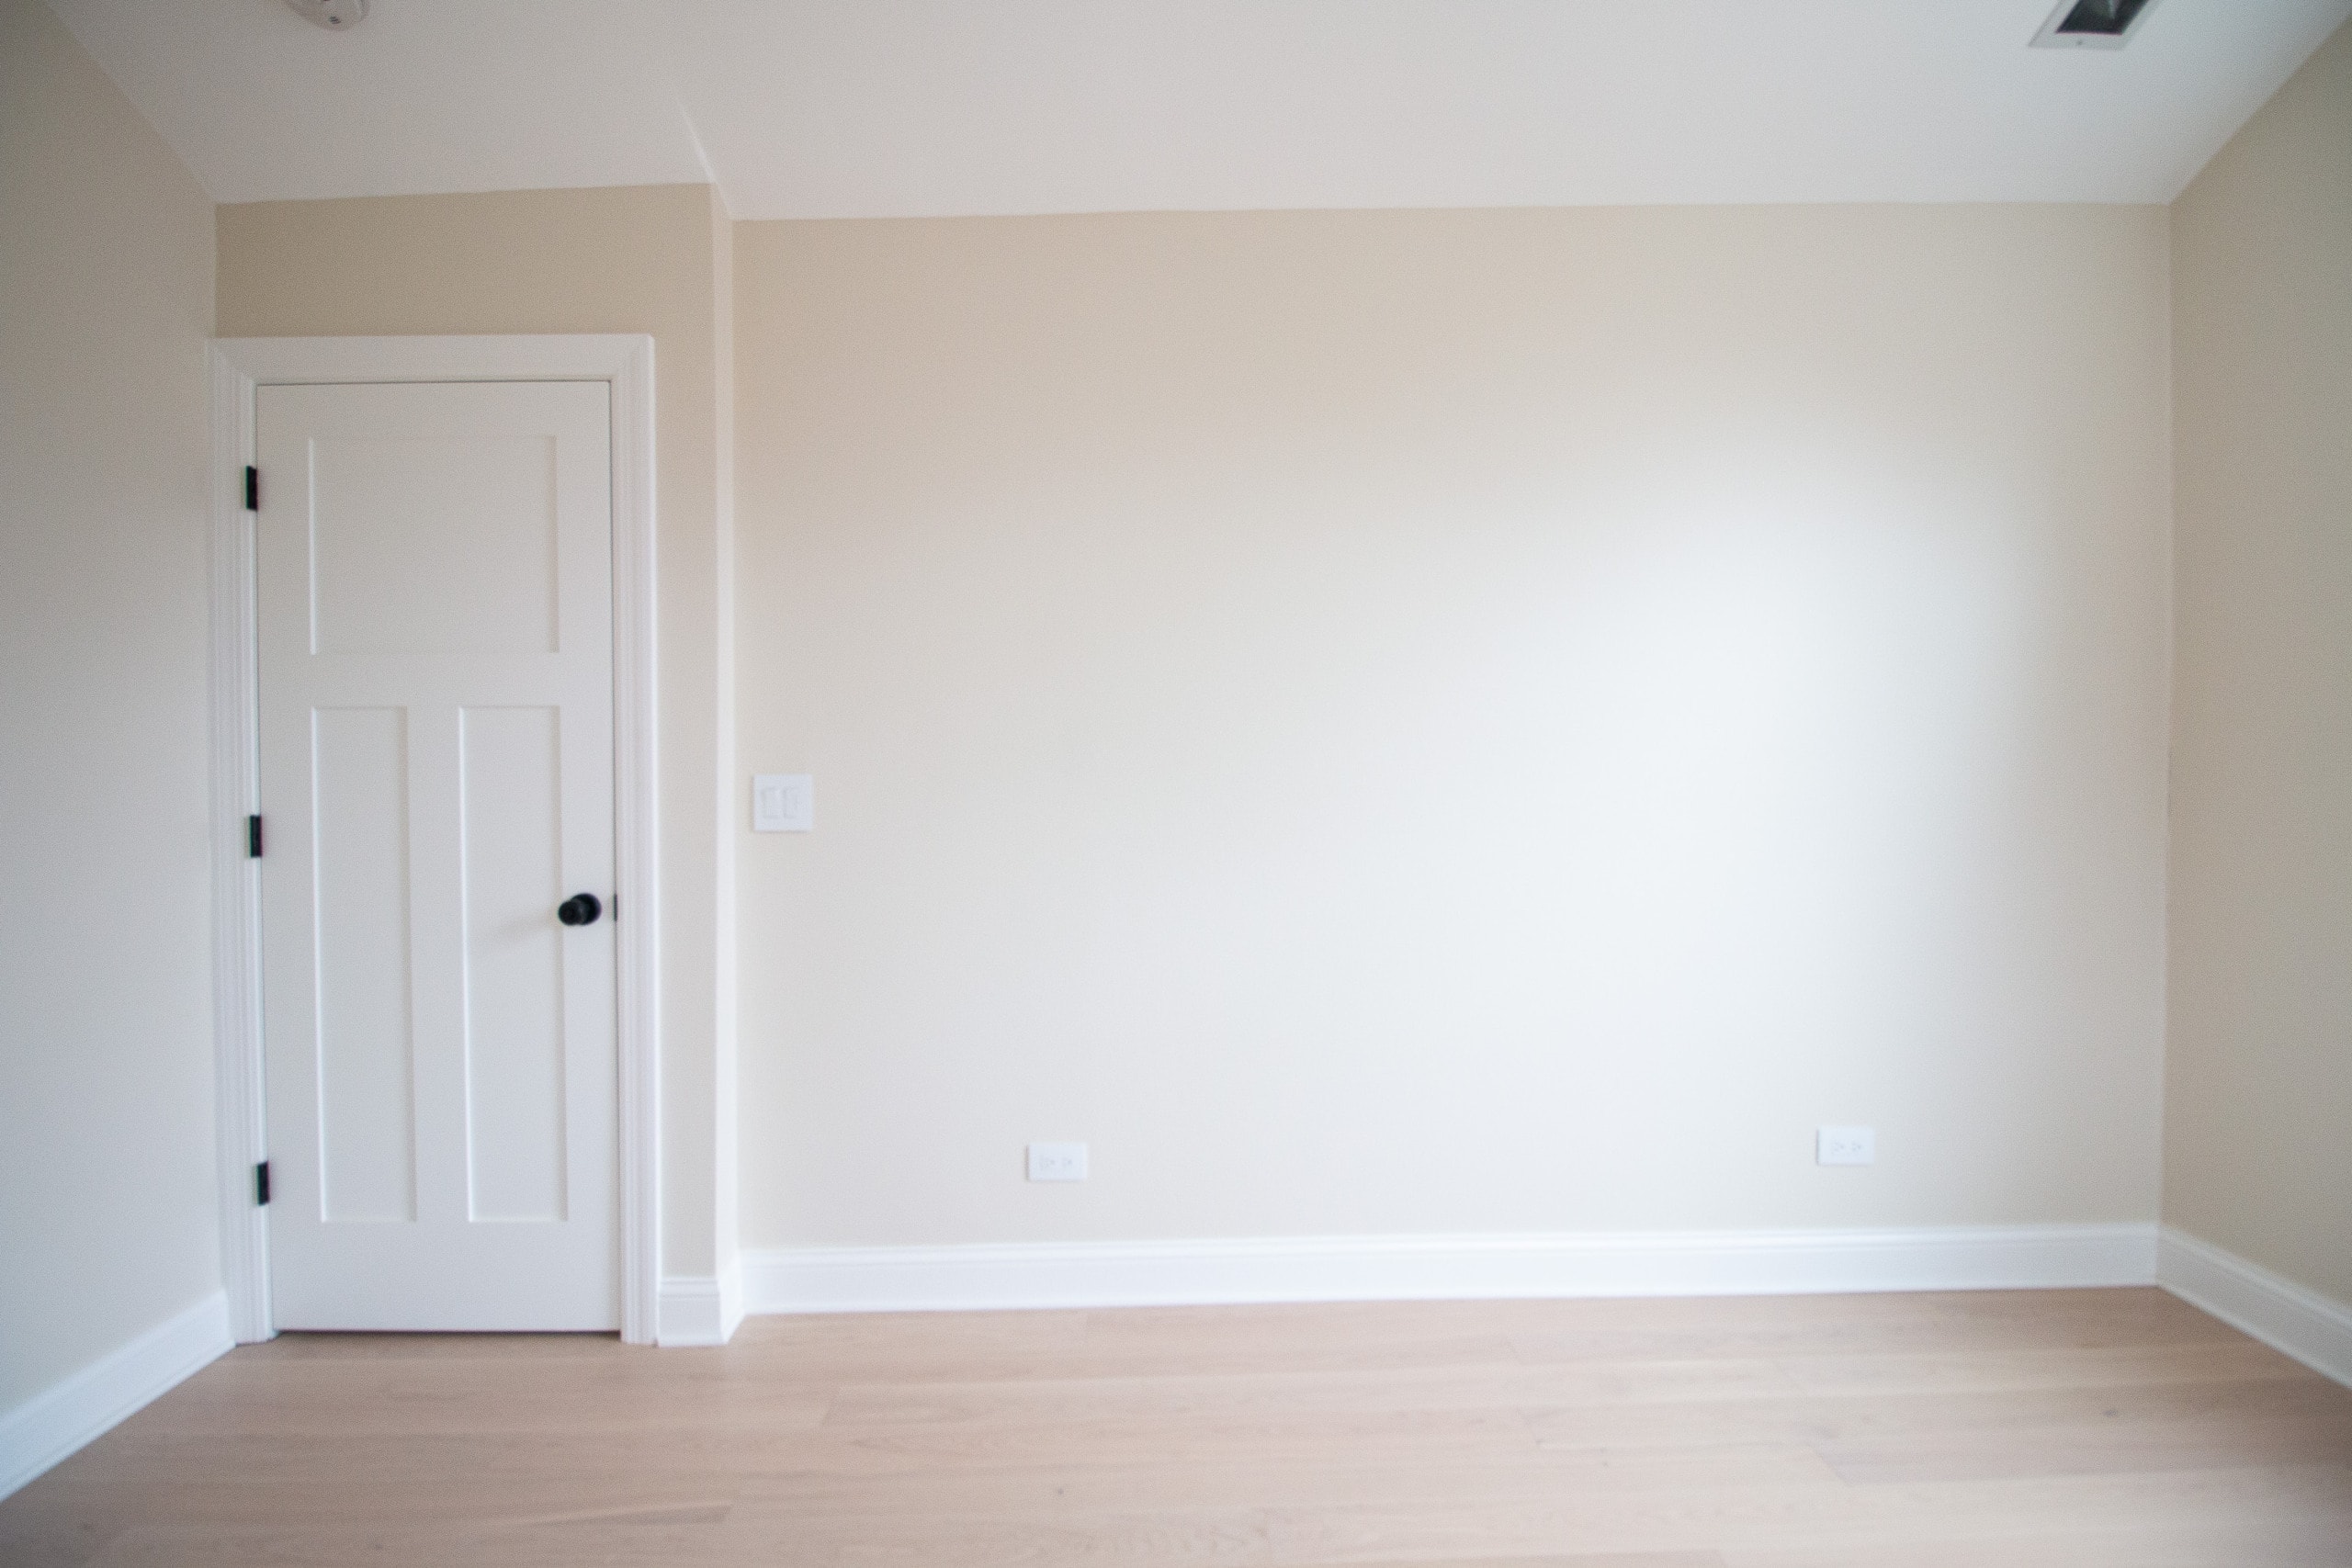
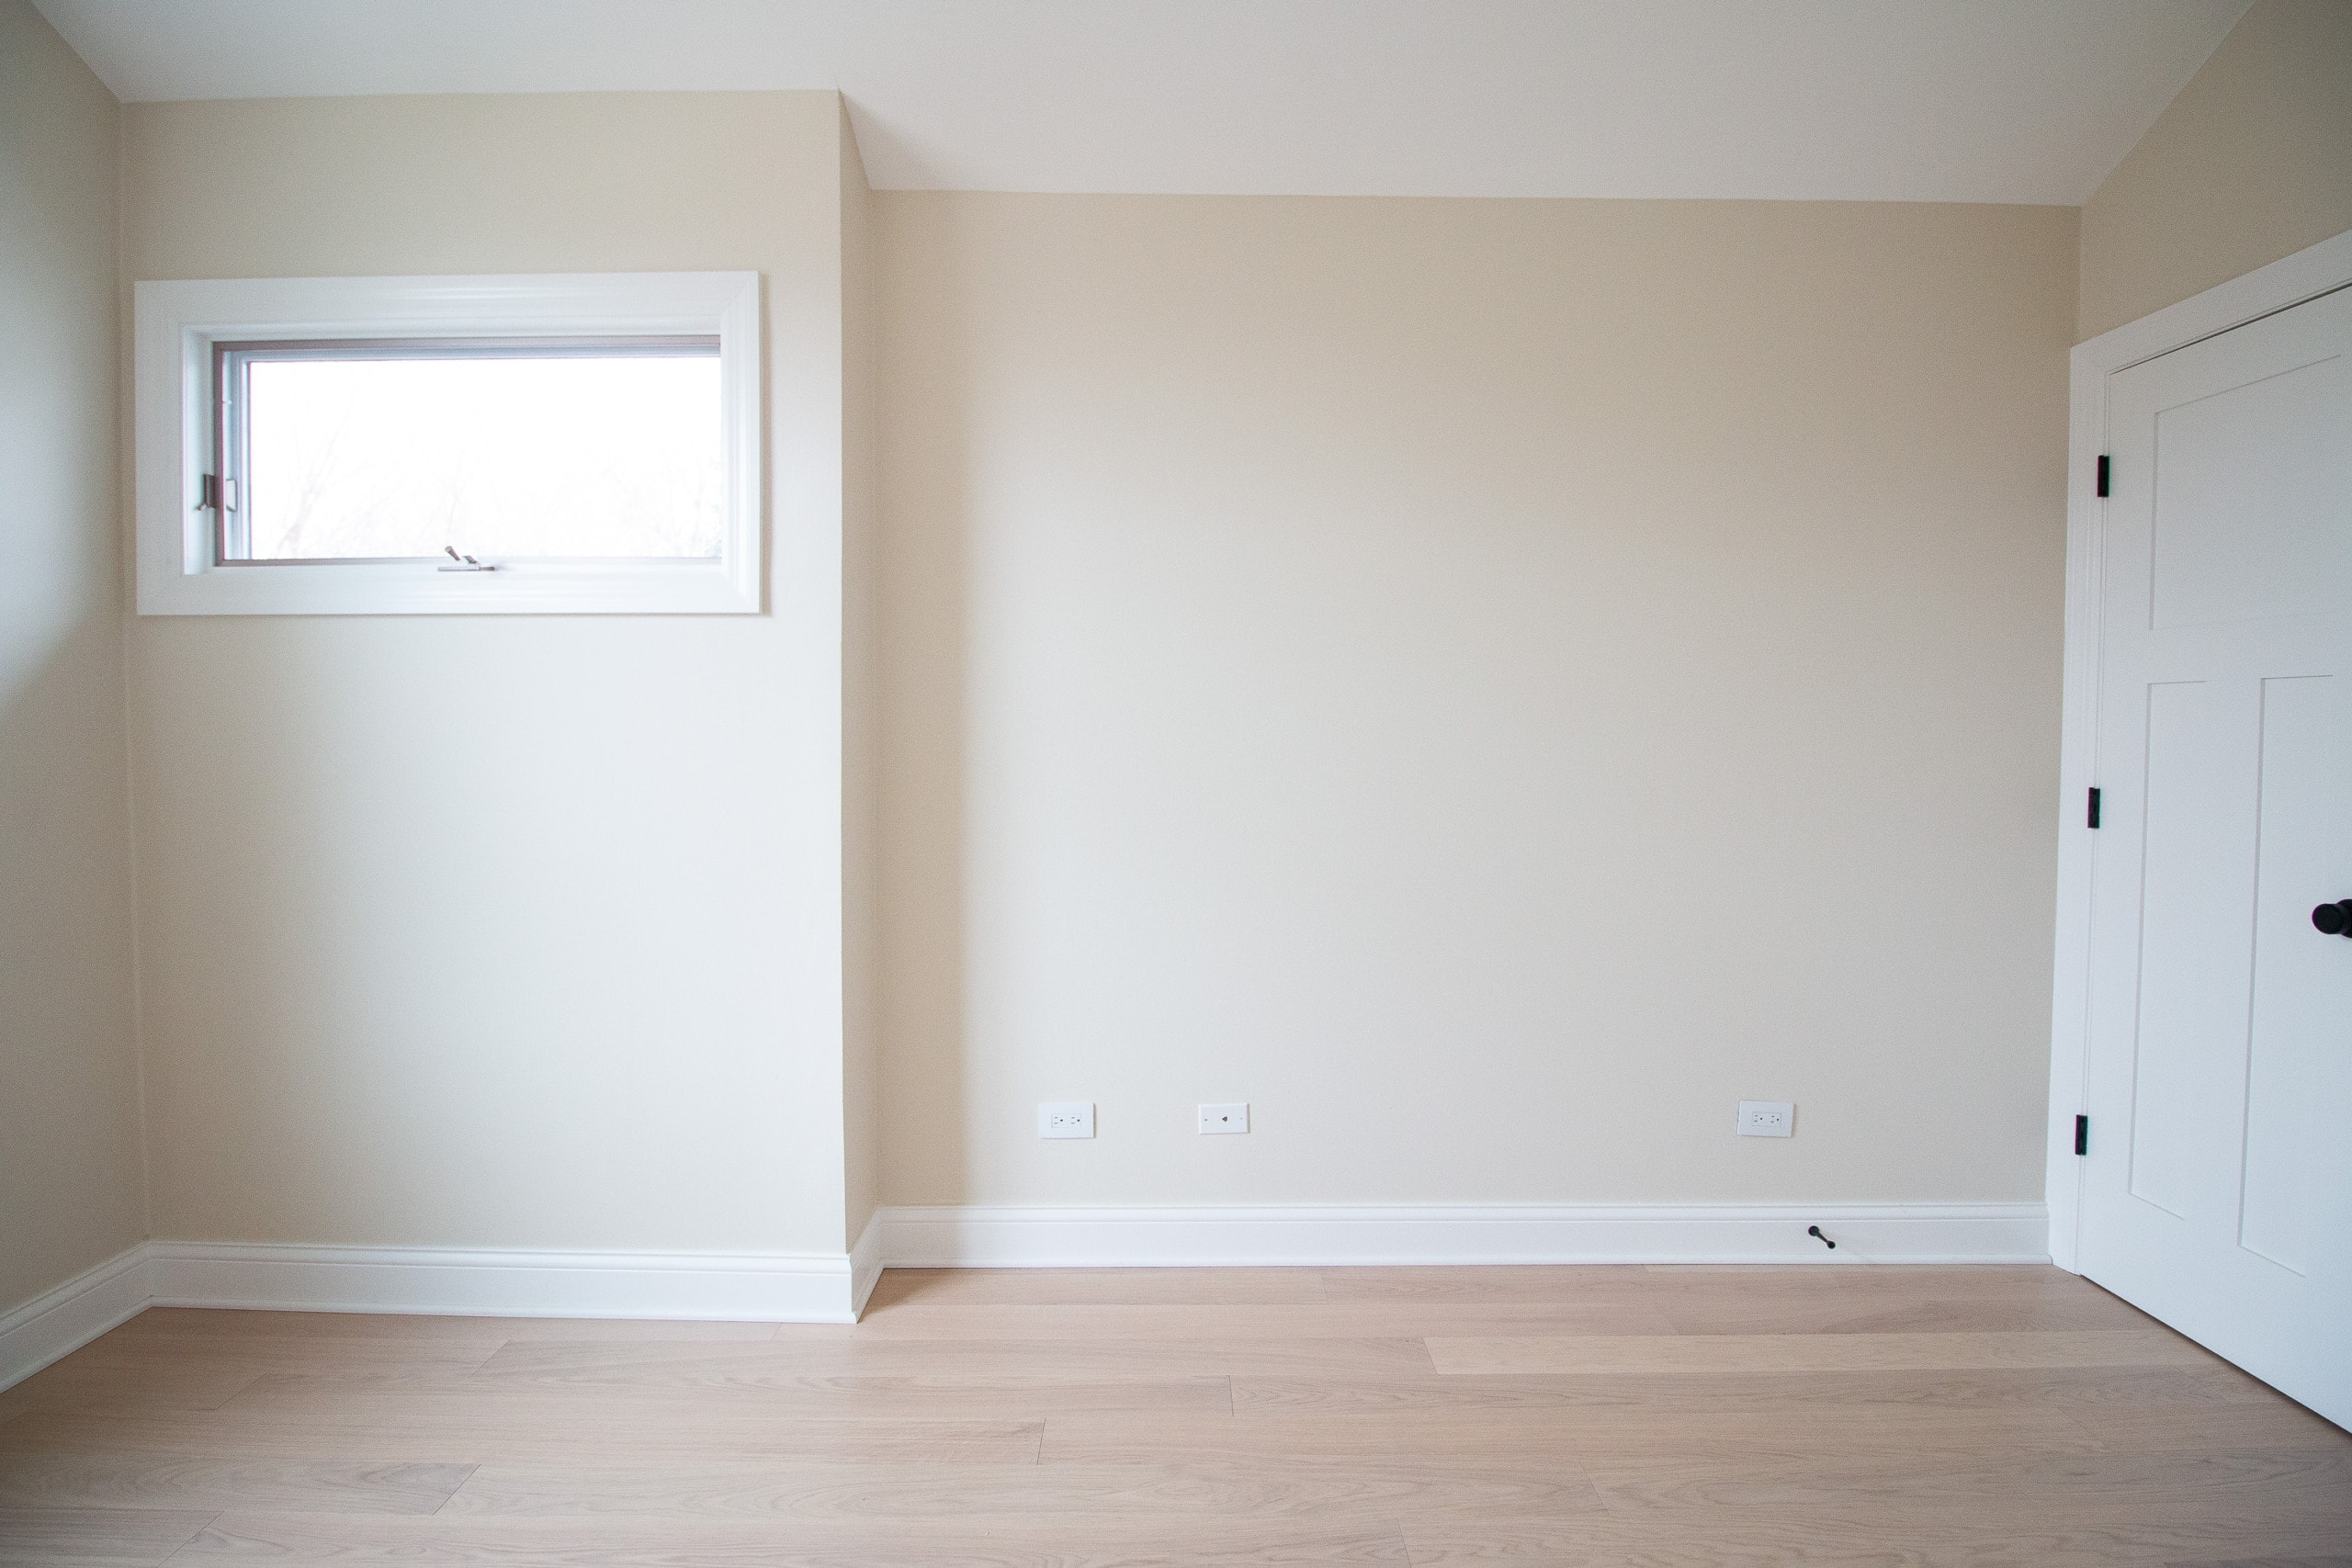
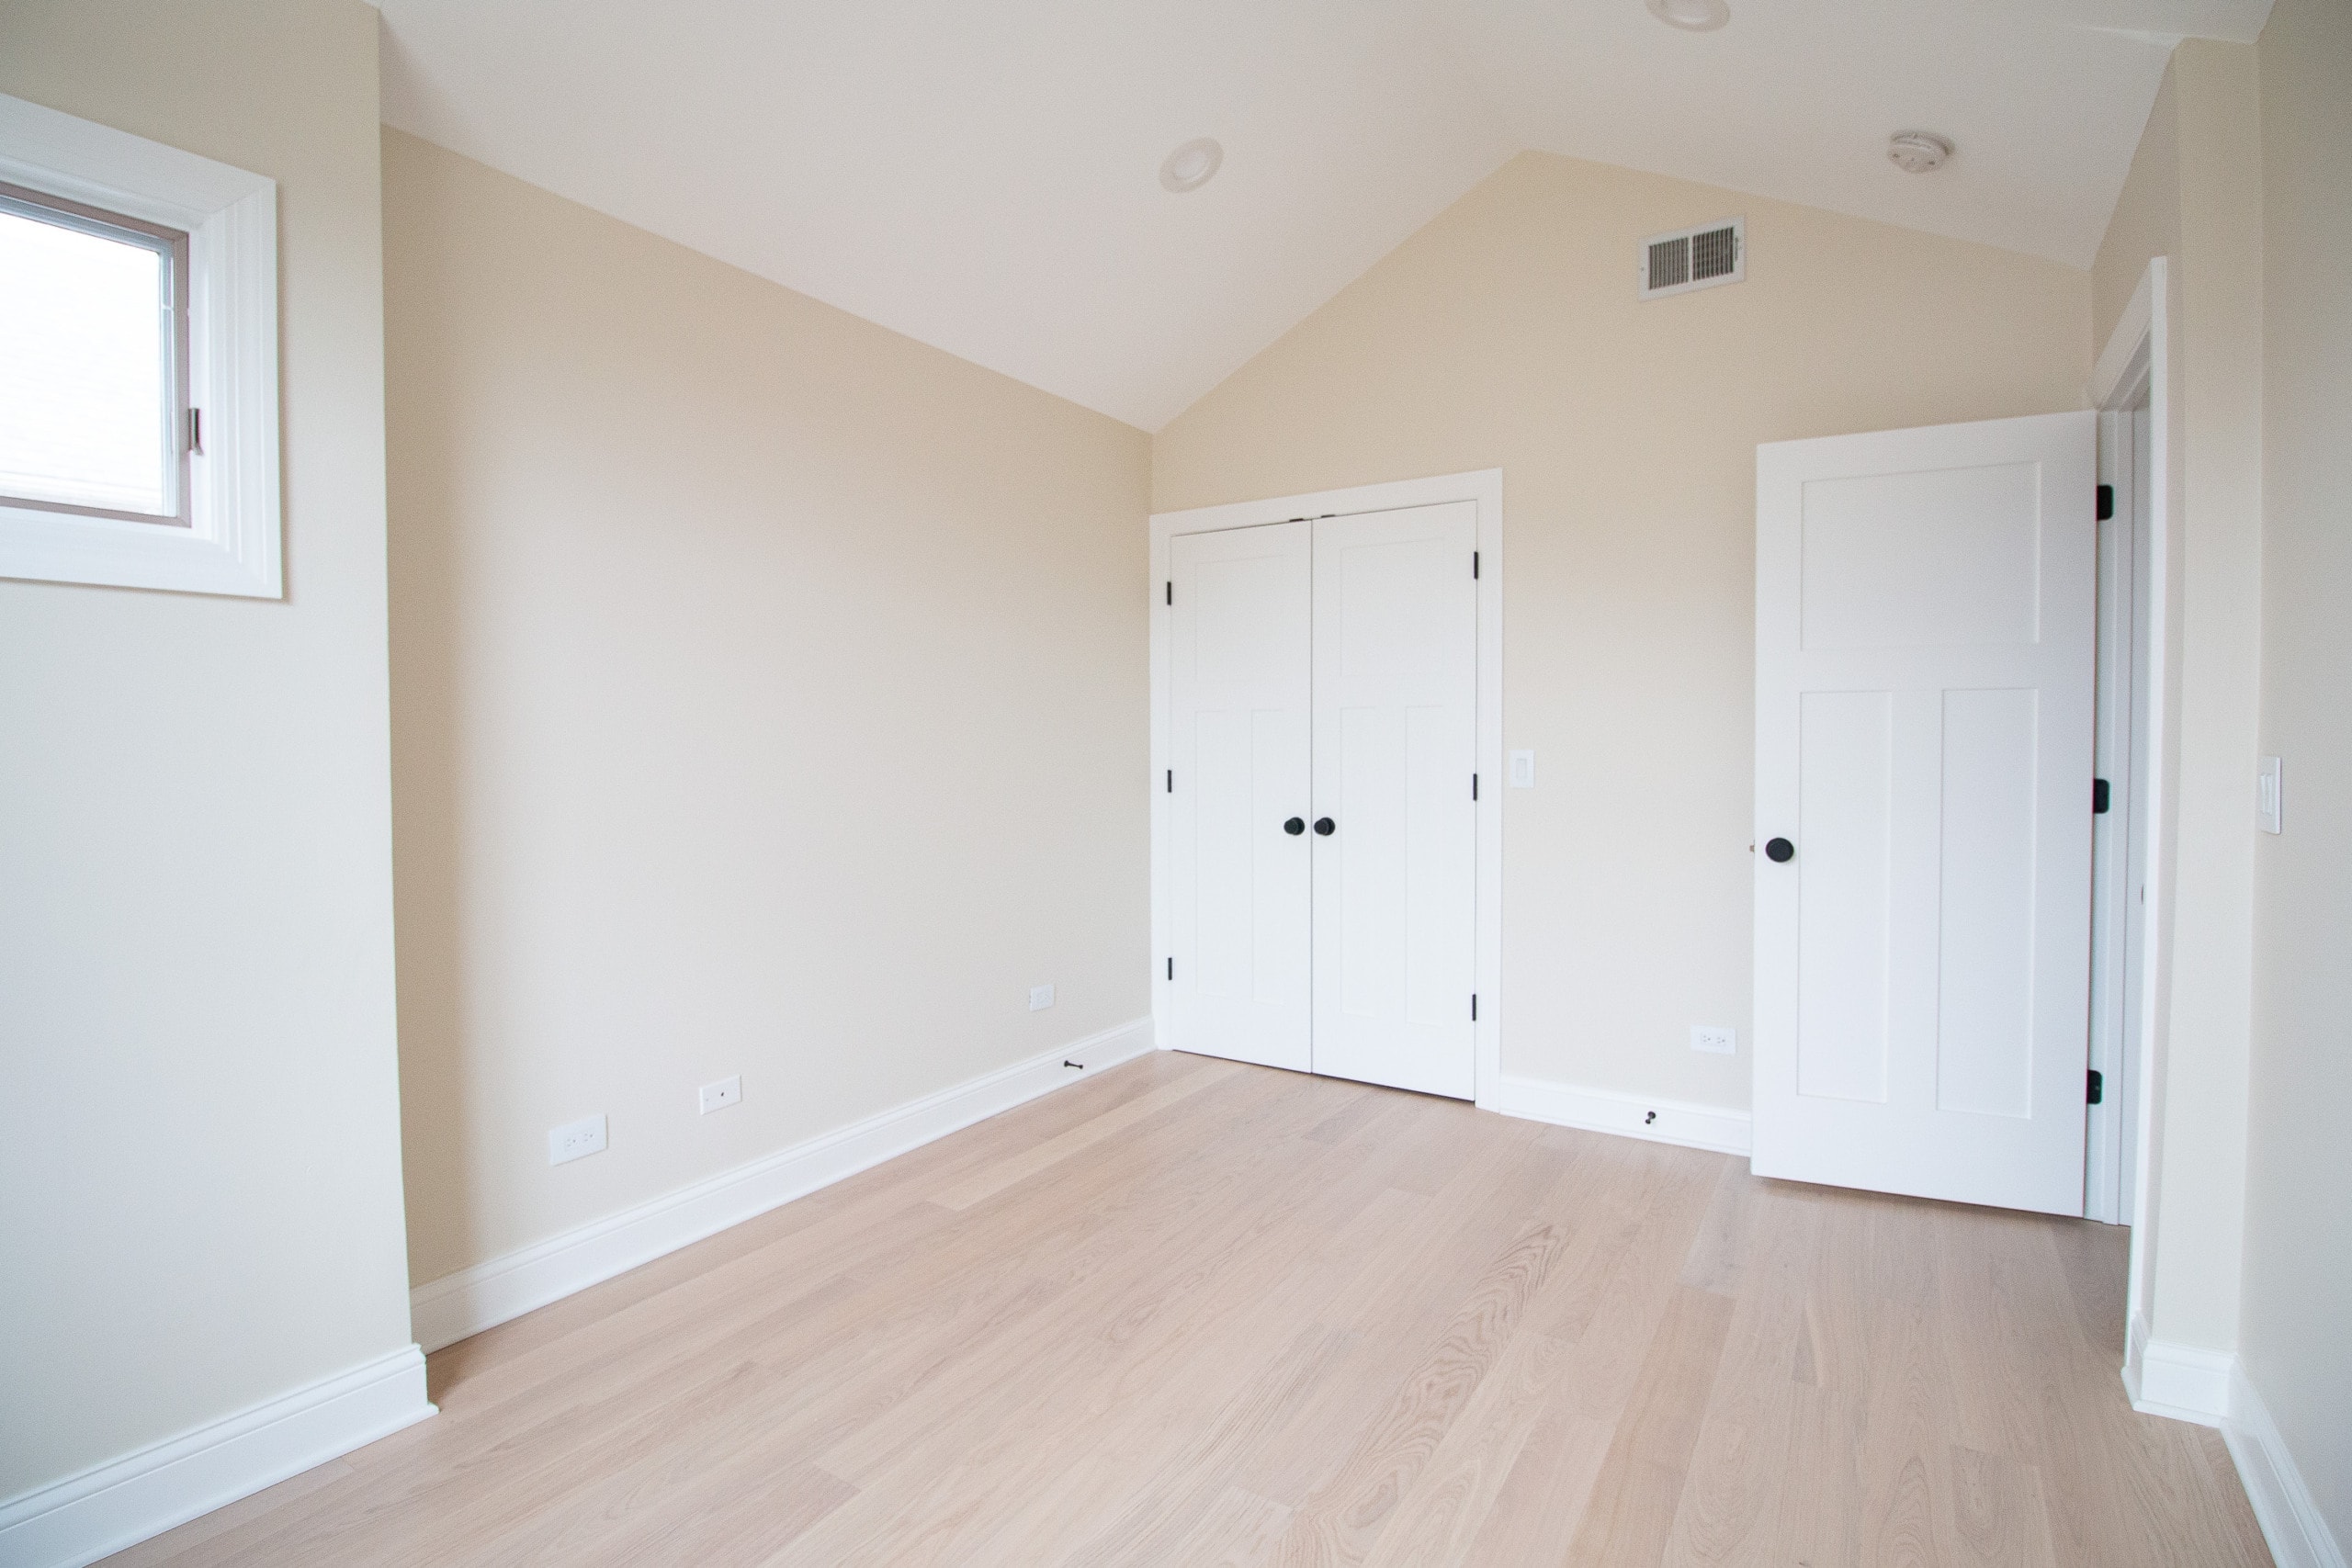
About a year ago, this is what the room looked like when we bought the house. Eek. Pretty dated, huh? During phase one of our renovation, we had the carpet taken out and added hardwood floors, replaced all of the trim and doors, we painted everything, and removed the outdated ceiling fan. 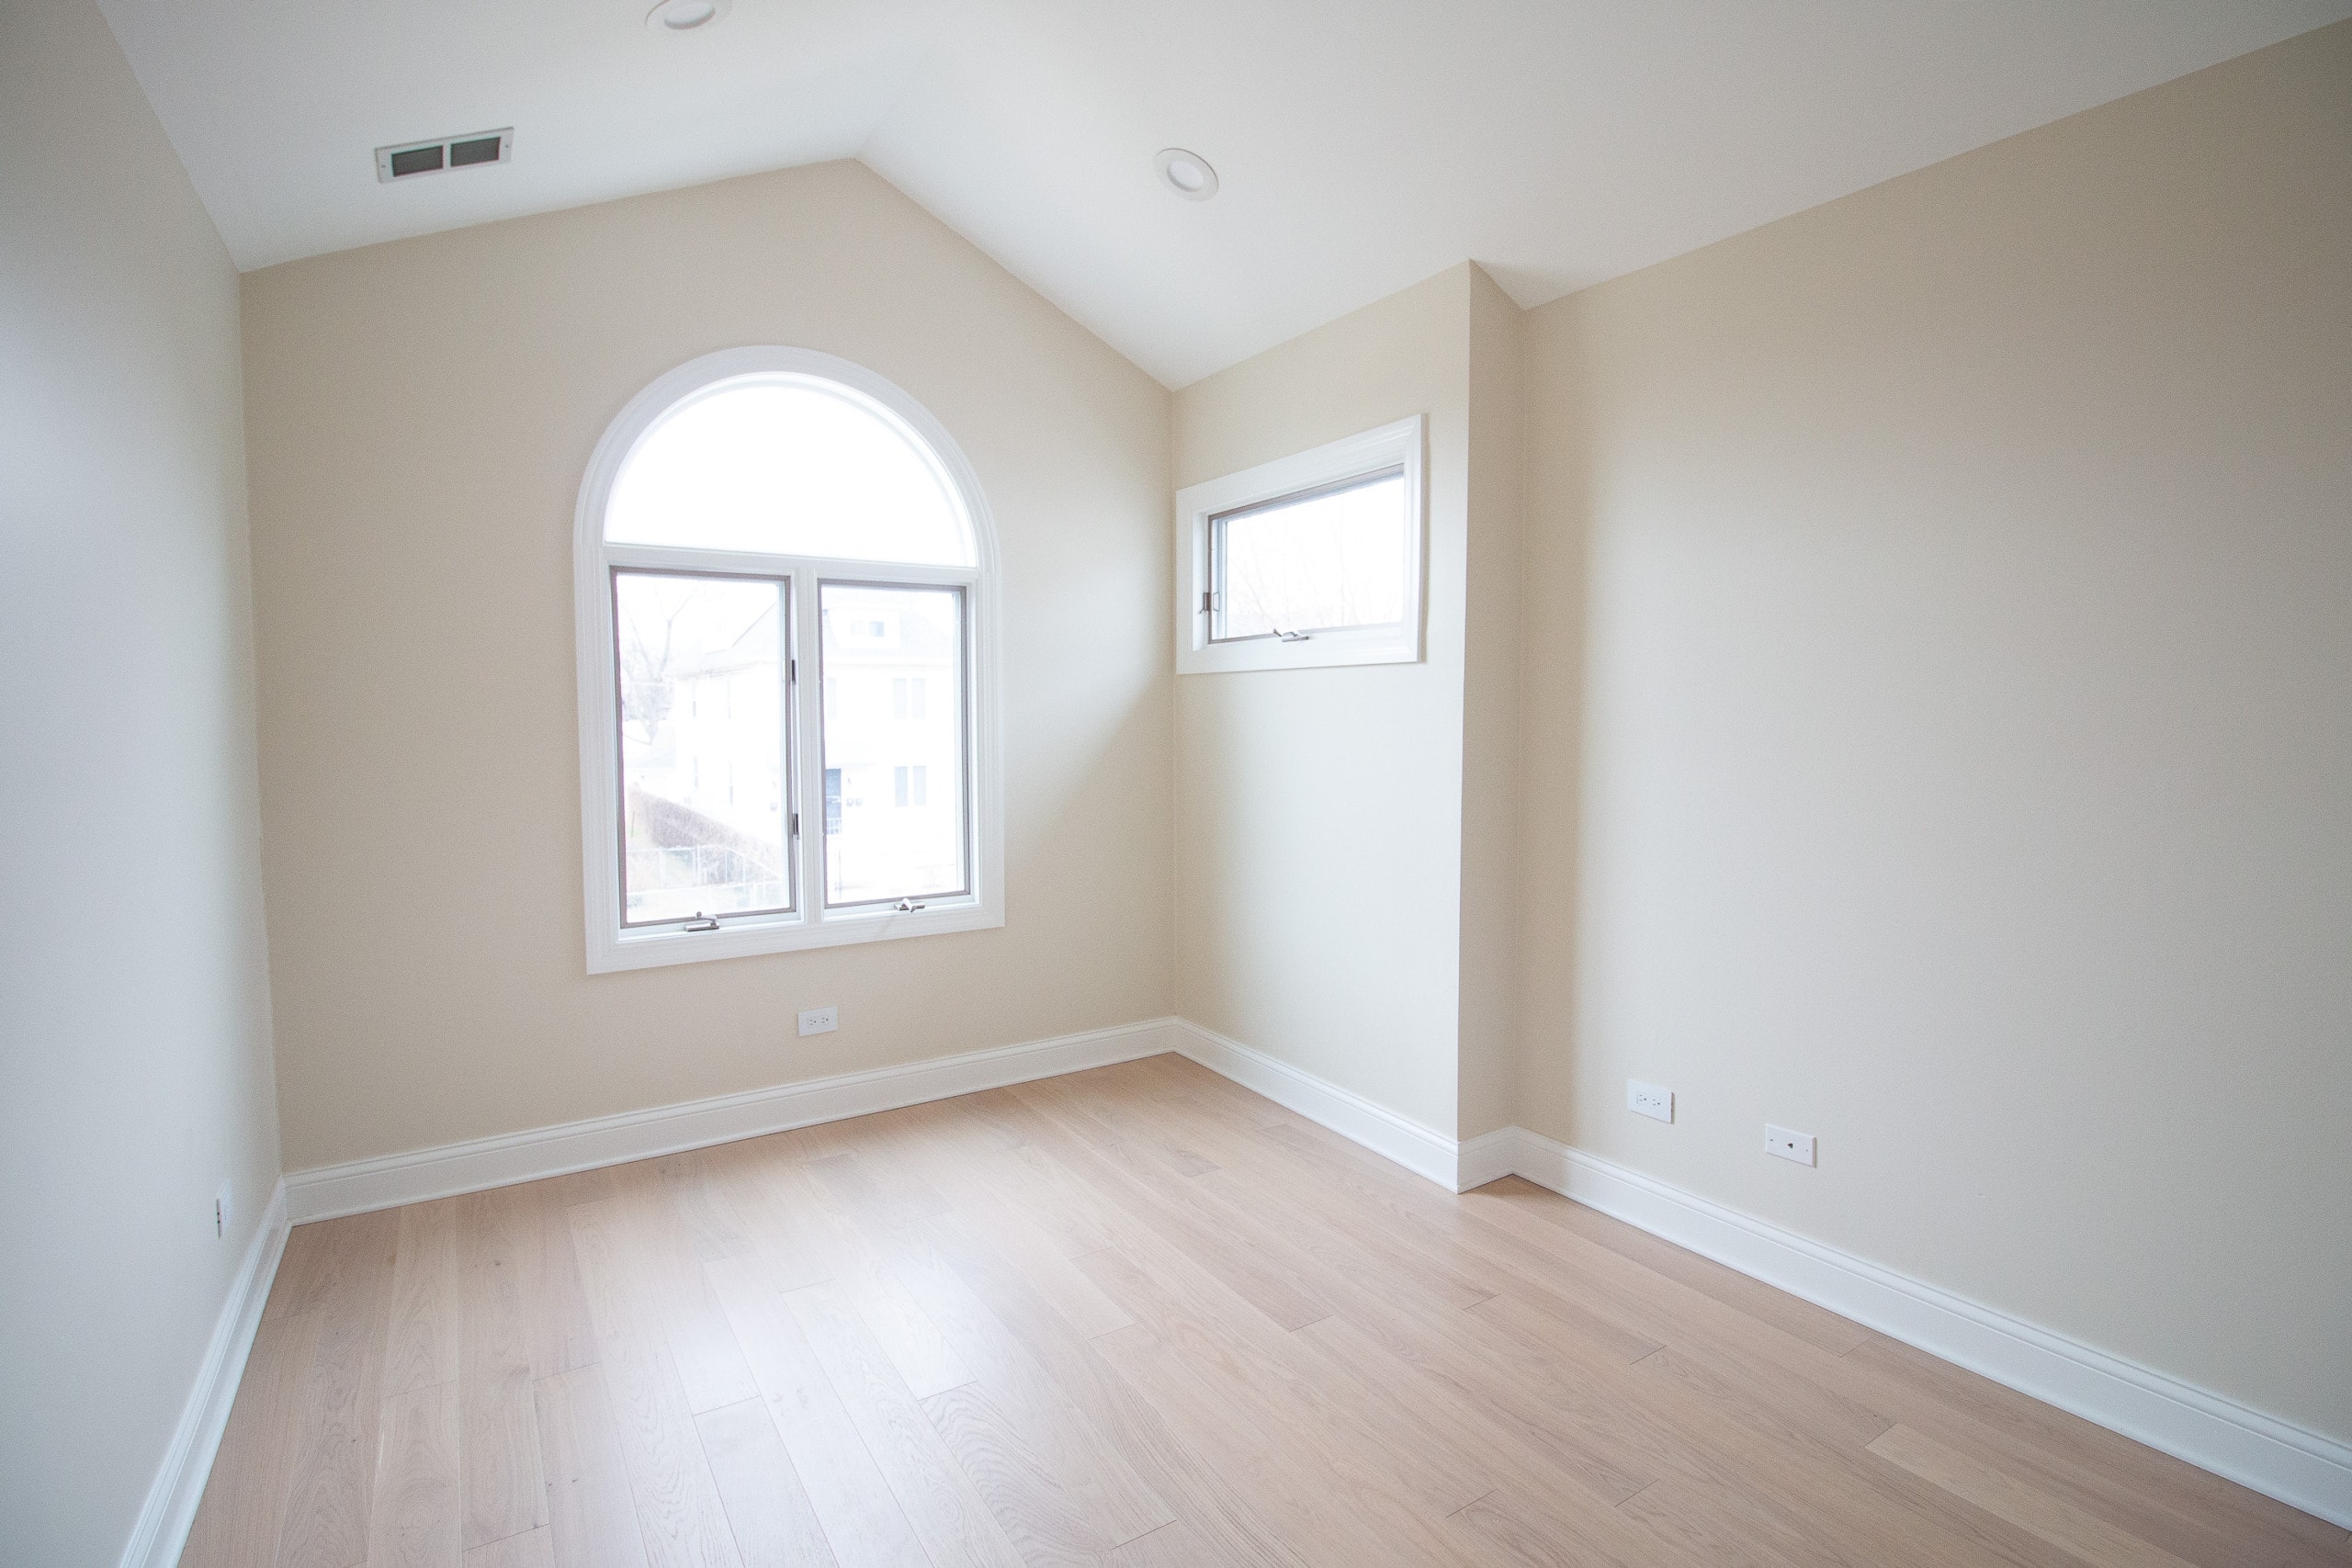
Those changes made things MUCH better, cleaner, and brighter! Then, this room sat like this for about six months. It was totally empty and bare and we rarely stepped foot in the room.
Adding Sage Green Built-Ins
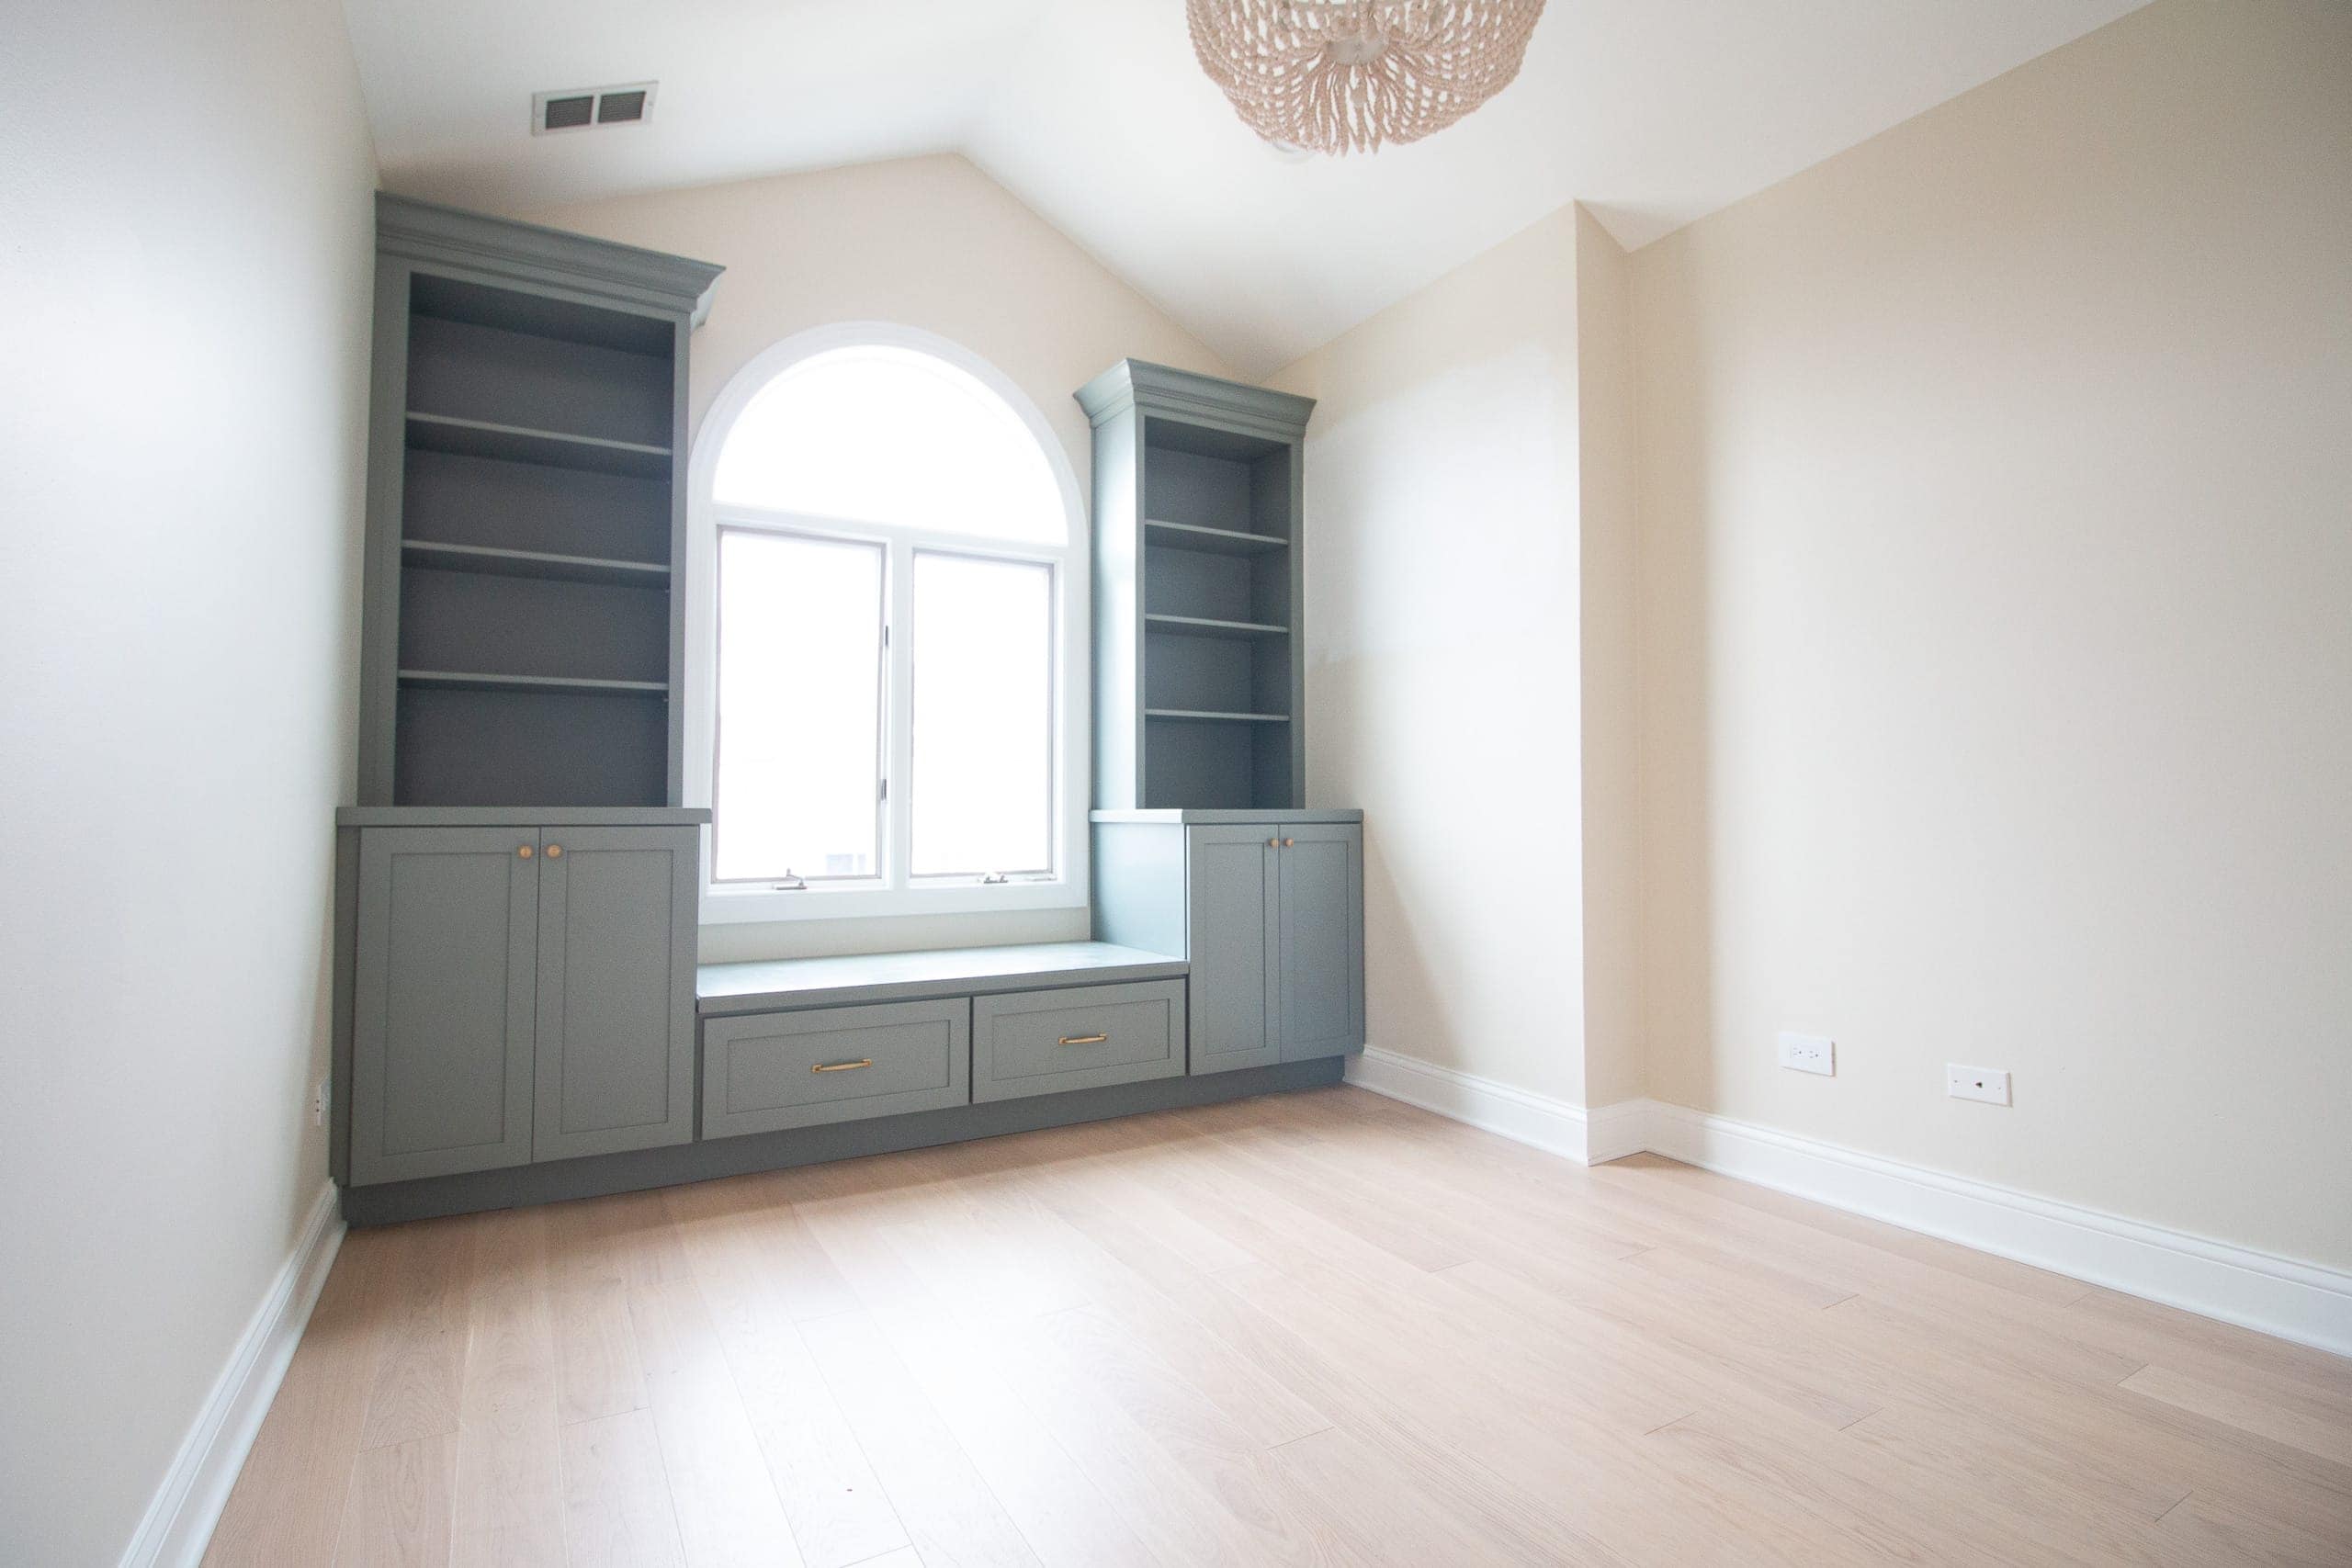
It took me a while to figure out my exact gameplan for this room, but I knew from the start that storage was important (it is a kid’s room after all!). I decided to do built-ins around the front window, so I could add a little window bench seat there too (I always dreamed of having one as a little girl!). 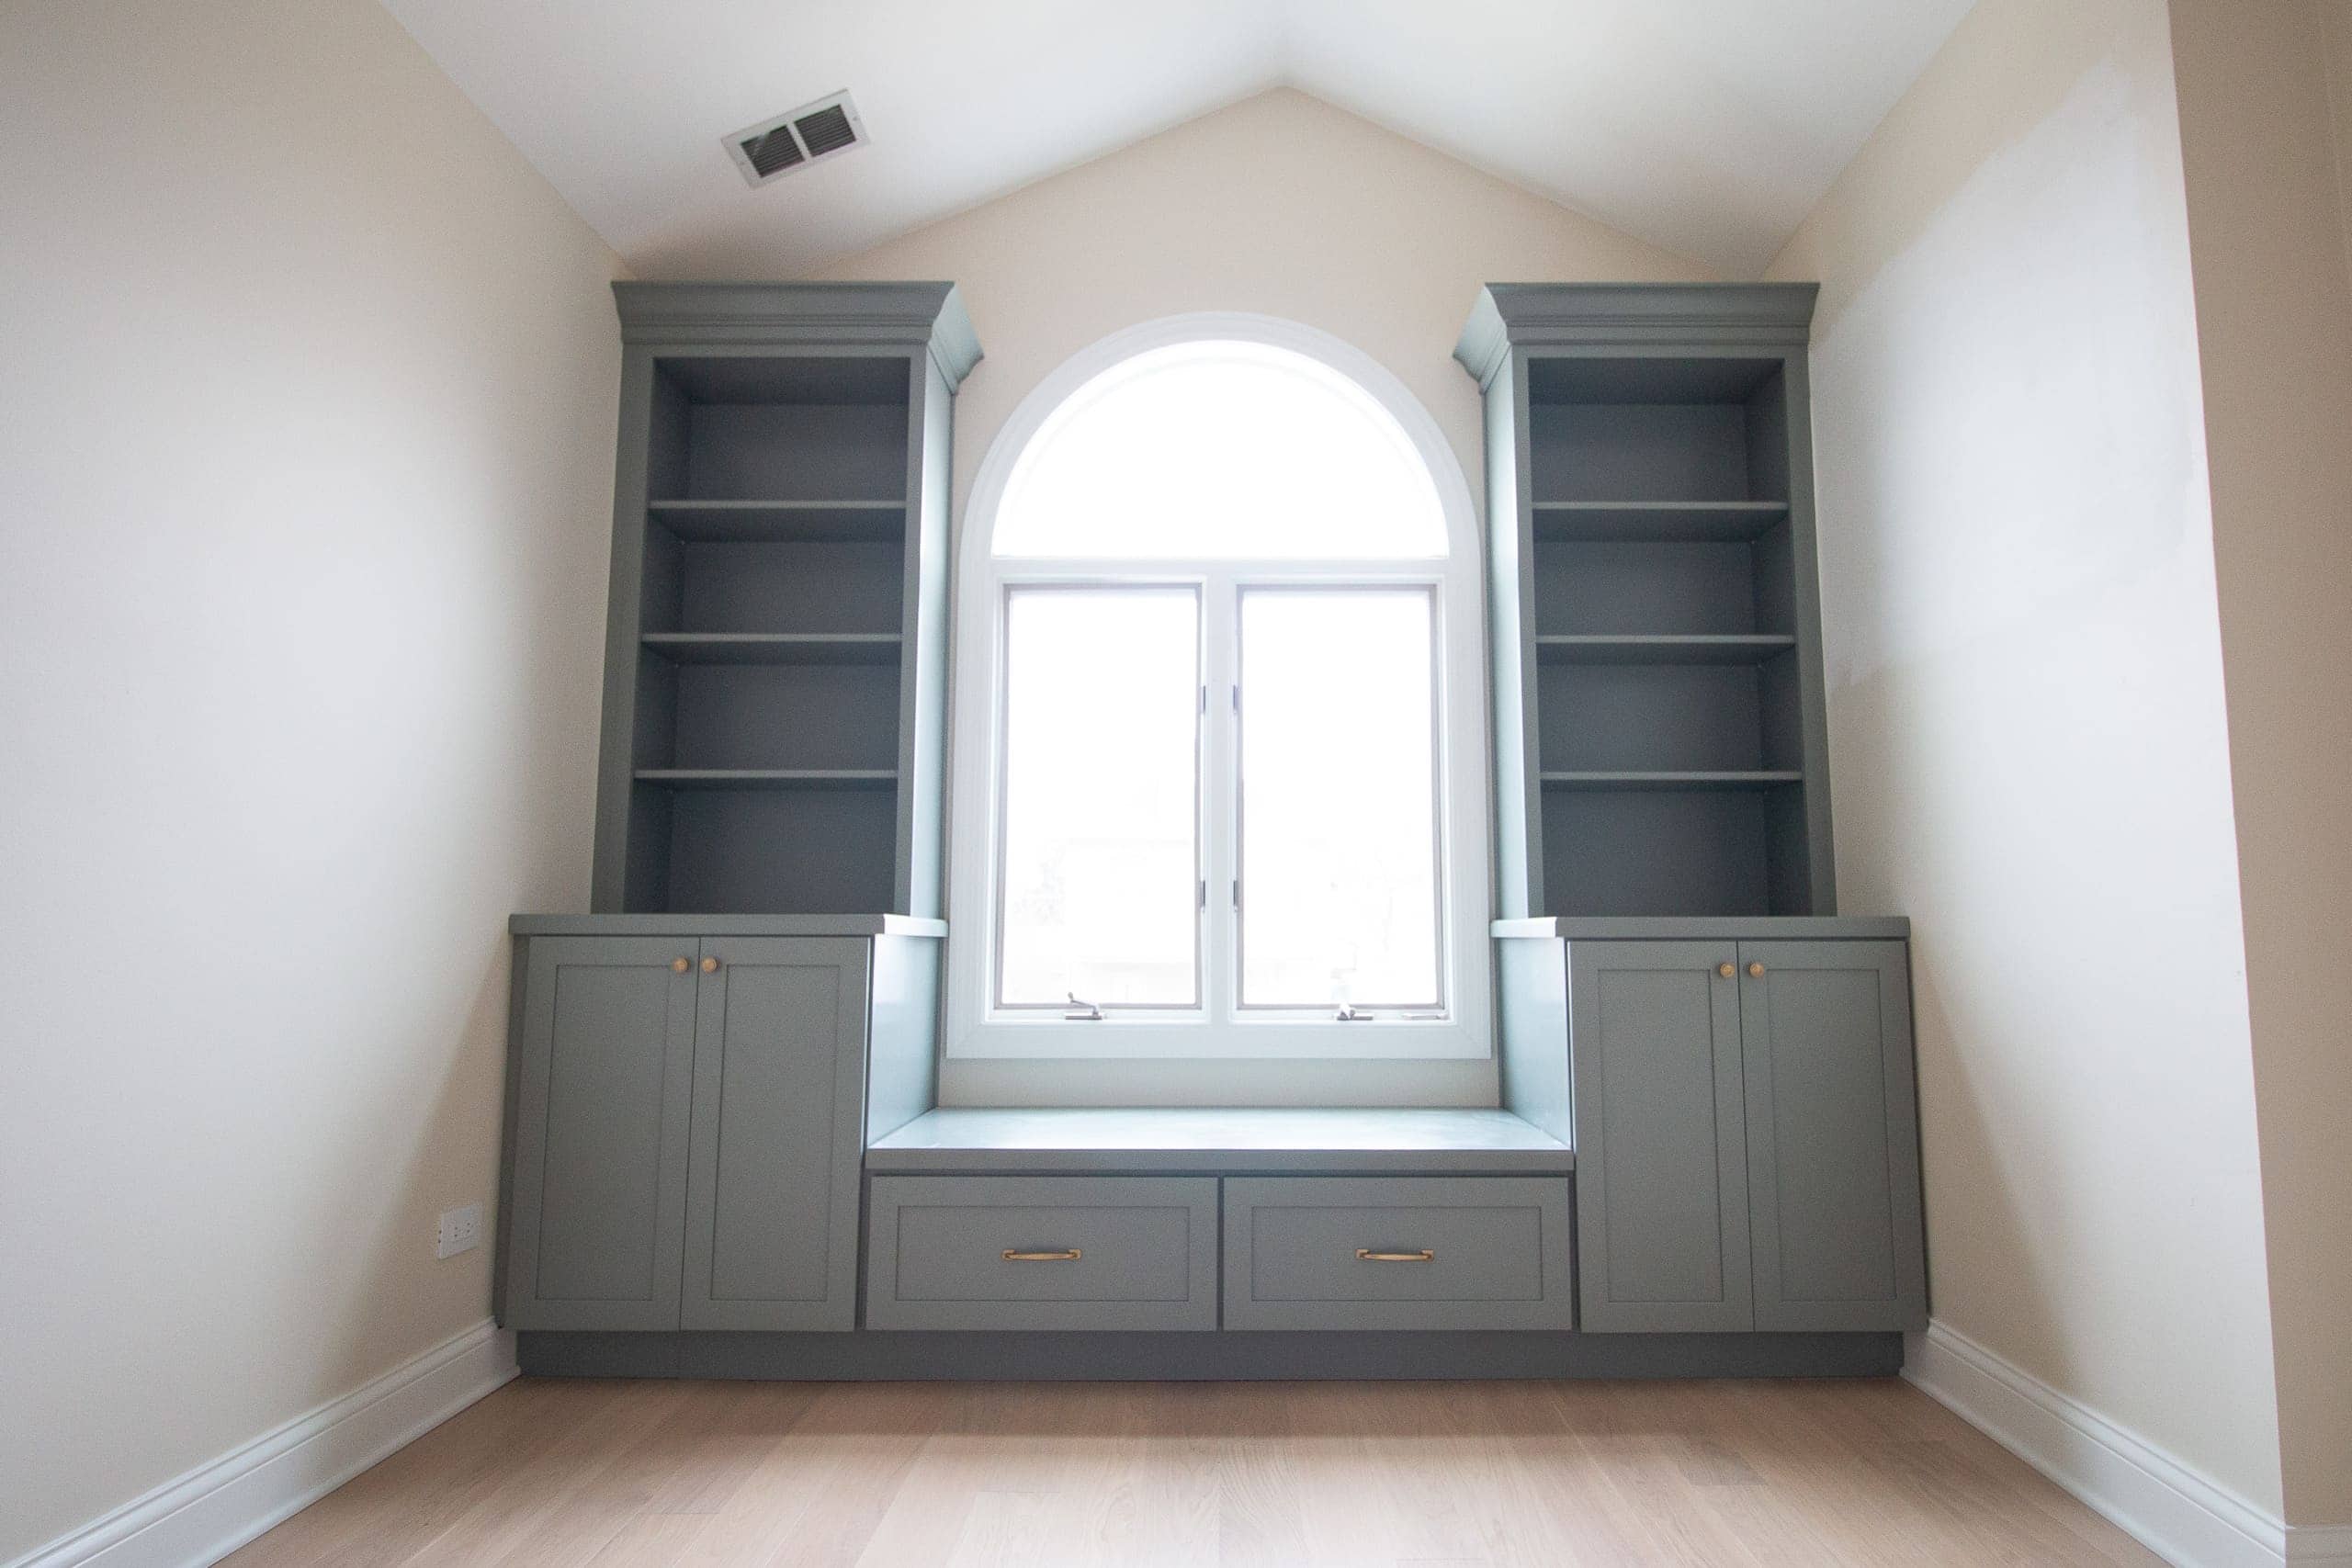
You can read about the design and installation process over in this post, as well as how my contractor removed the window to make room for these.
DIY Chair Rail
With the built-ins up, the rest of the room needed…something. Because I wanted traditional vibes for this space, I decided that a wood wall treatment would be the way to go! 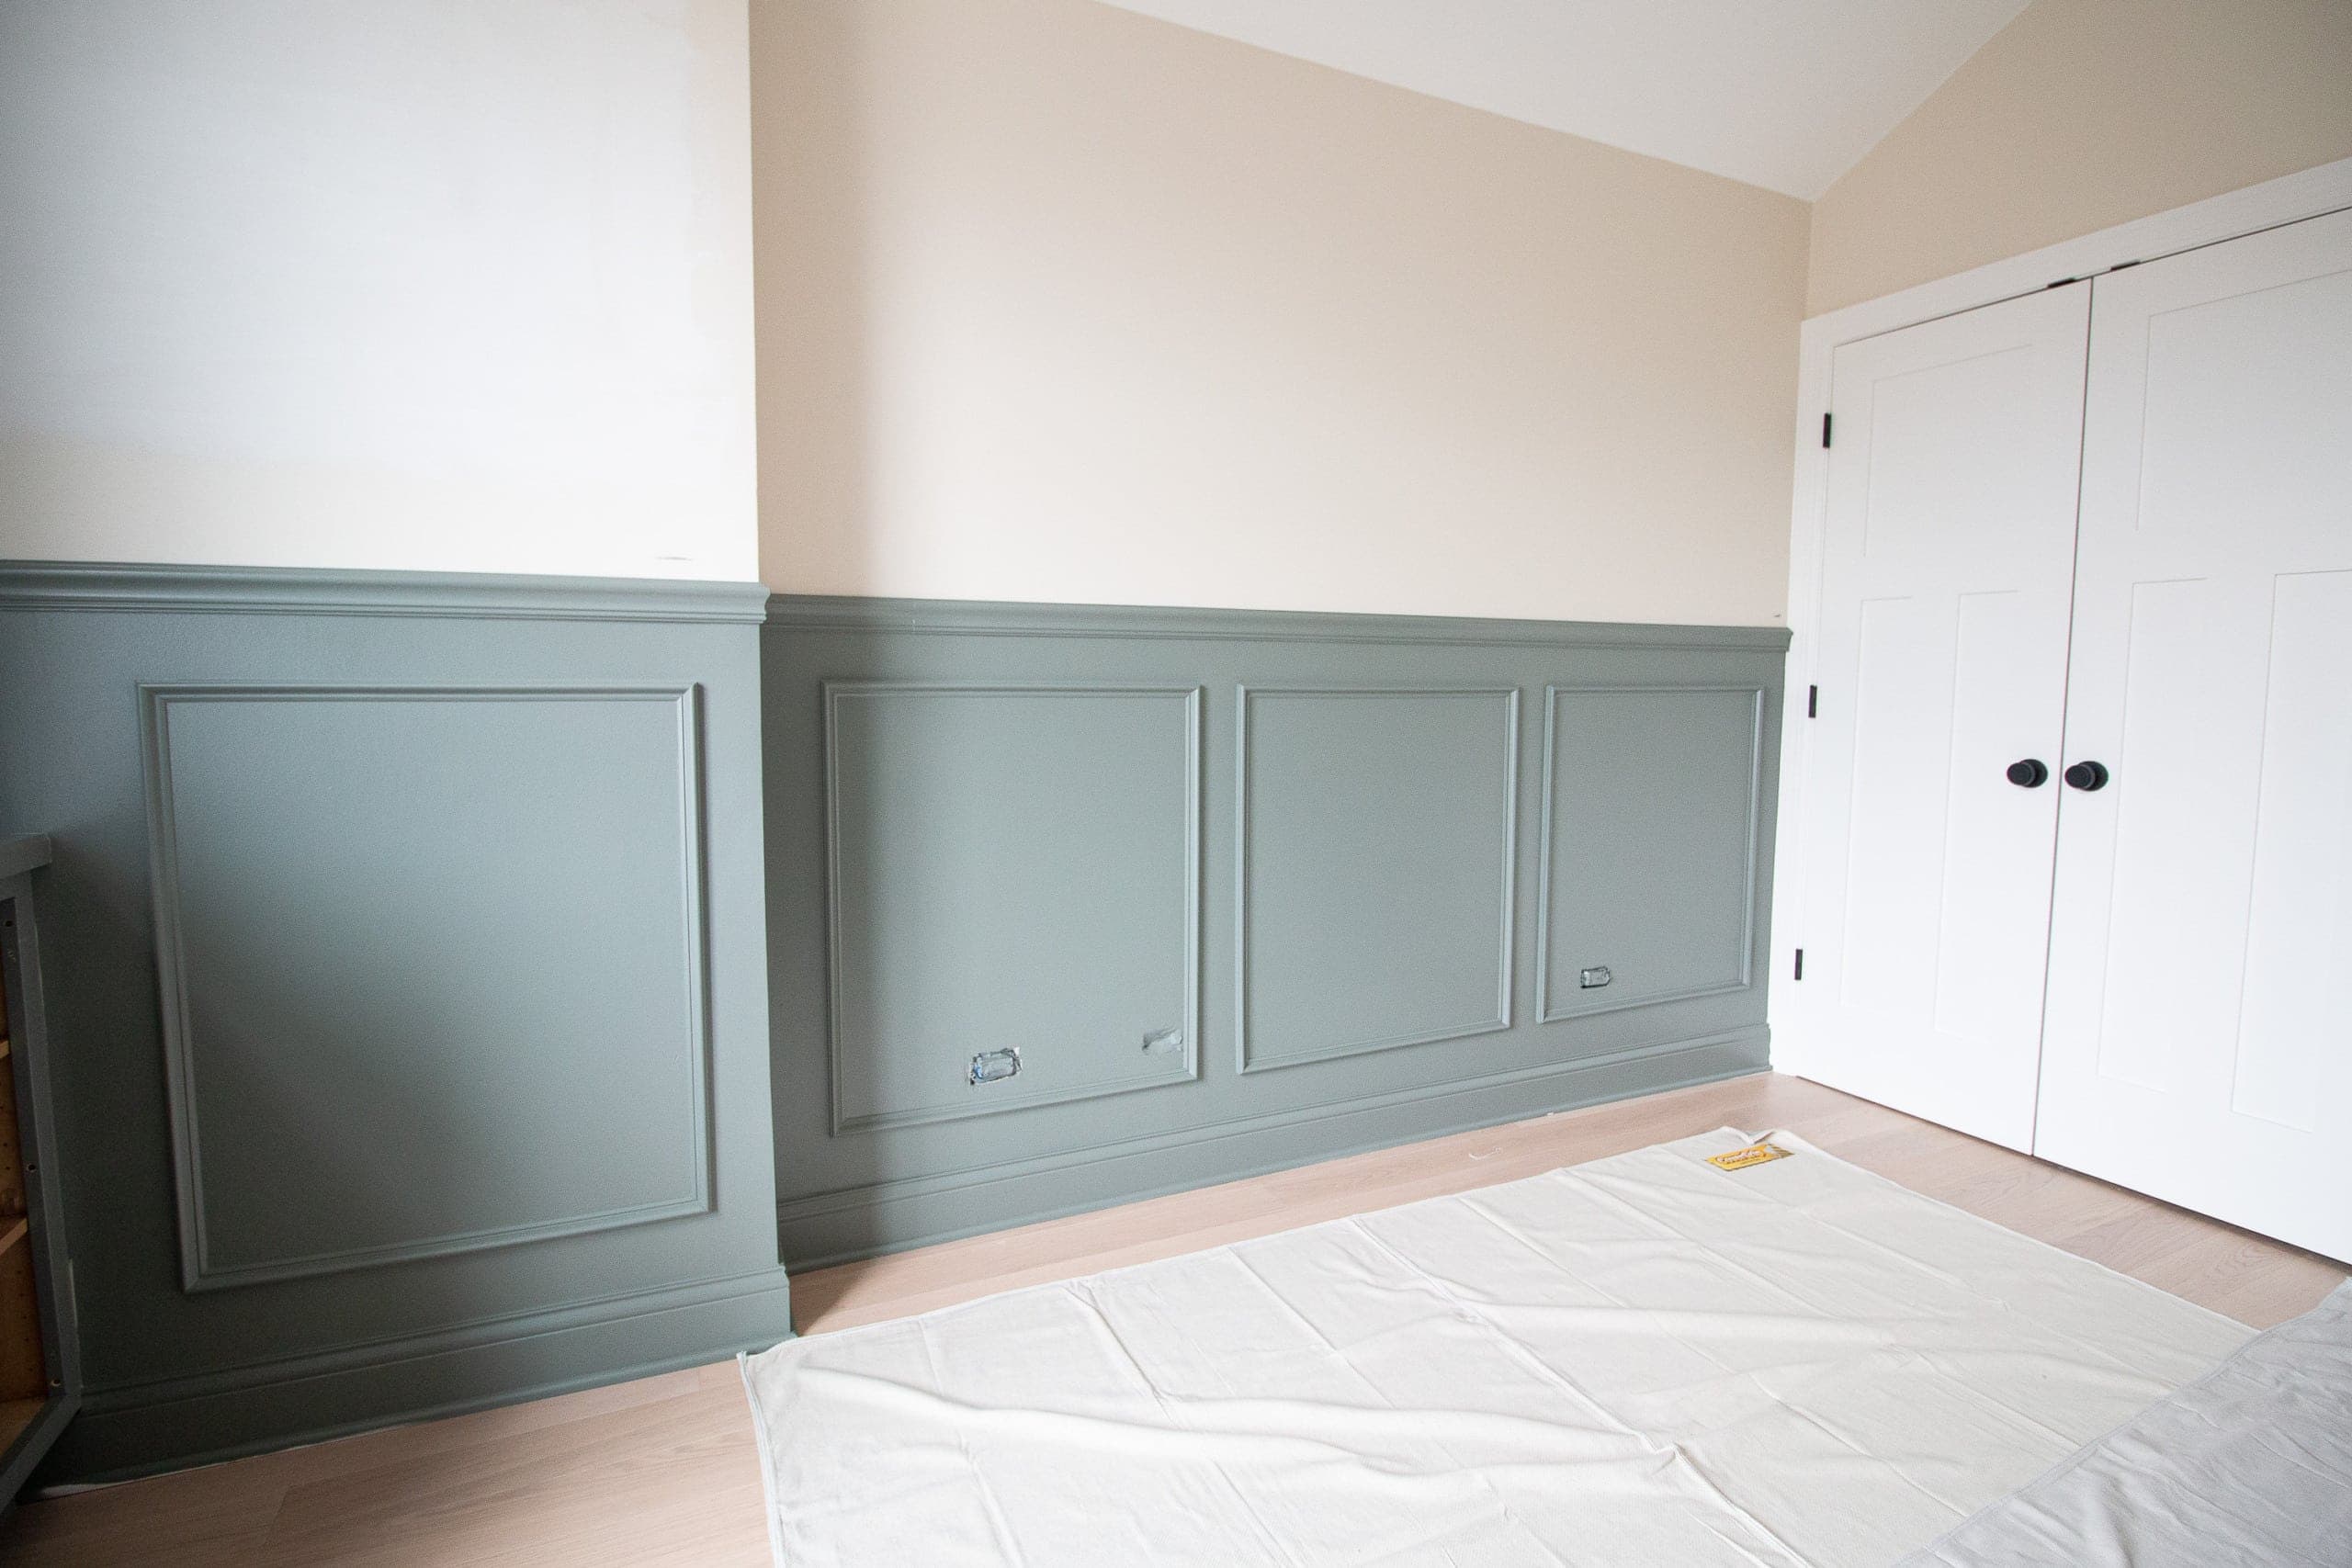
I shared a video and step-by-step tutorial for adding chair rail and picture frame molding over in this blog post. It was a pretty easy DIY project that made a huge difference in this space. And I’m soooo happy we painted it the same color to match the built-is (it’s a custom color I had matched, but you can find the formula over in this blog post).
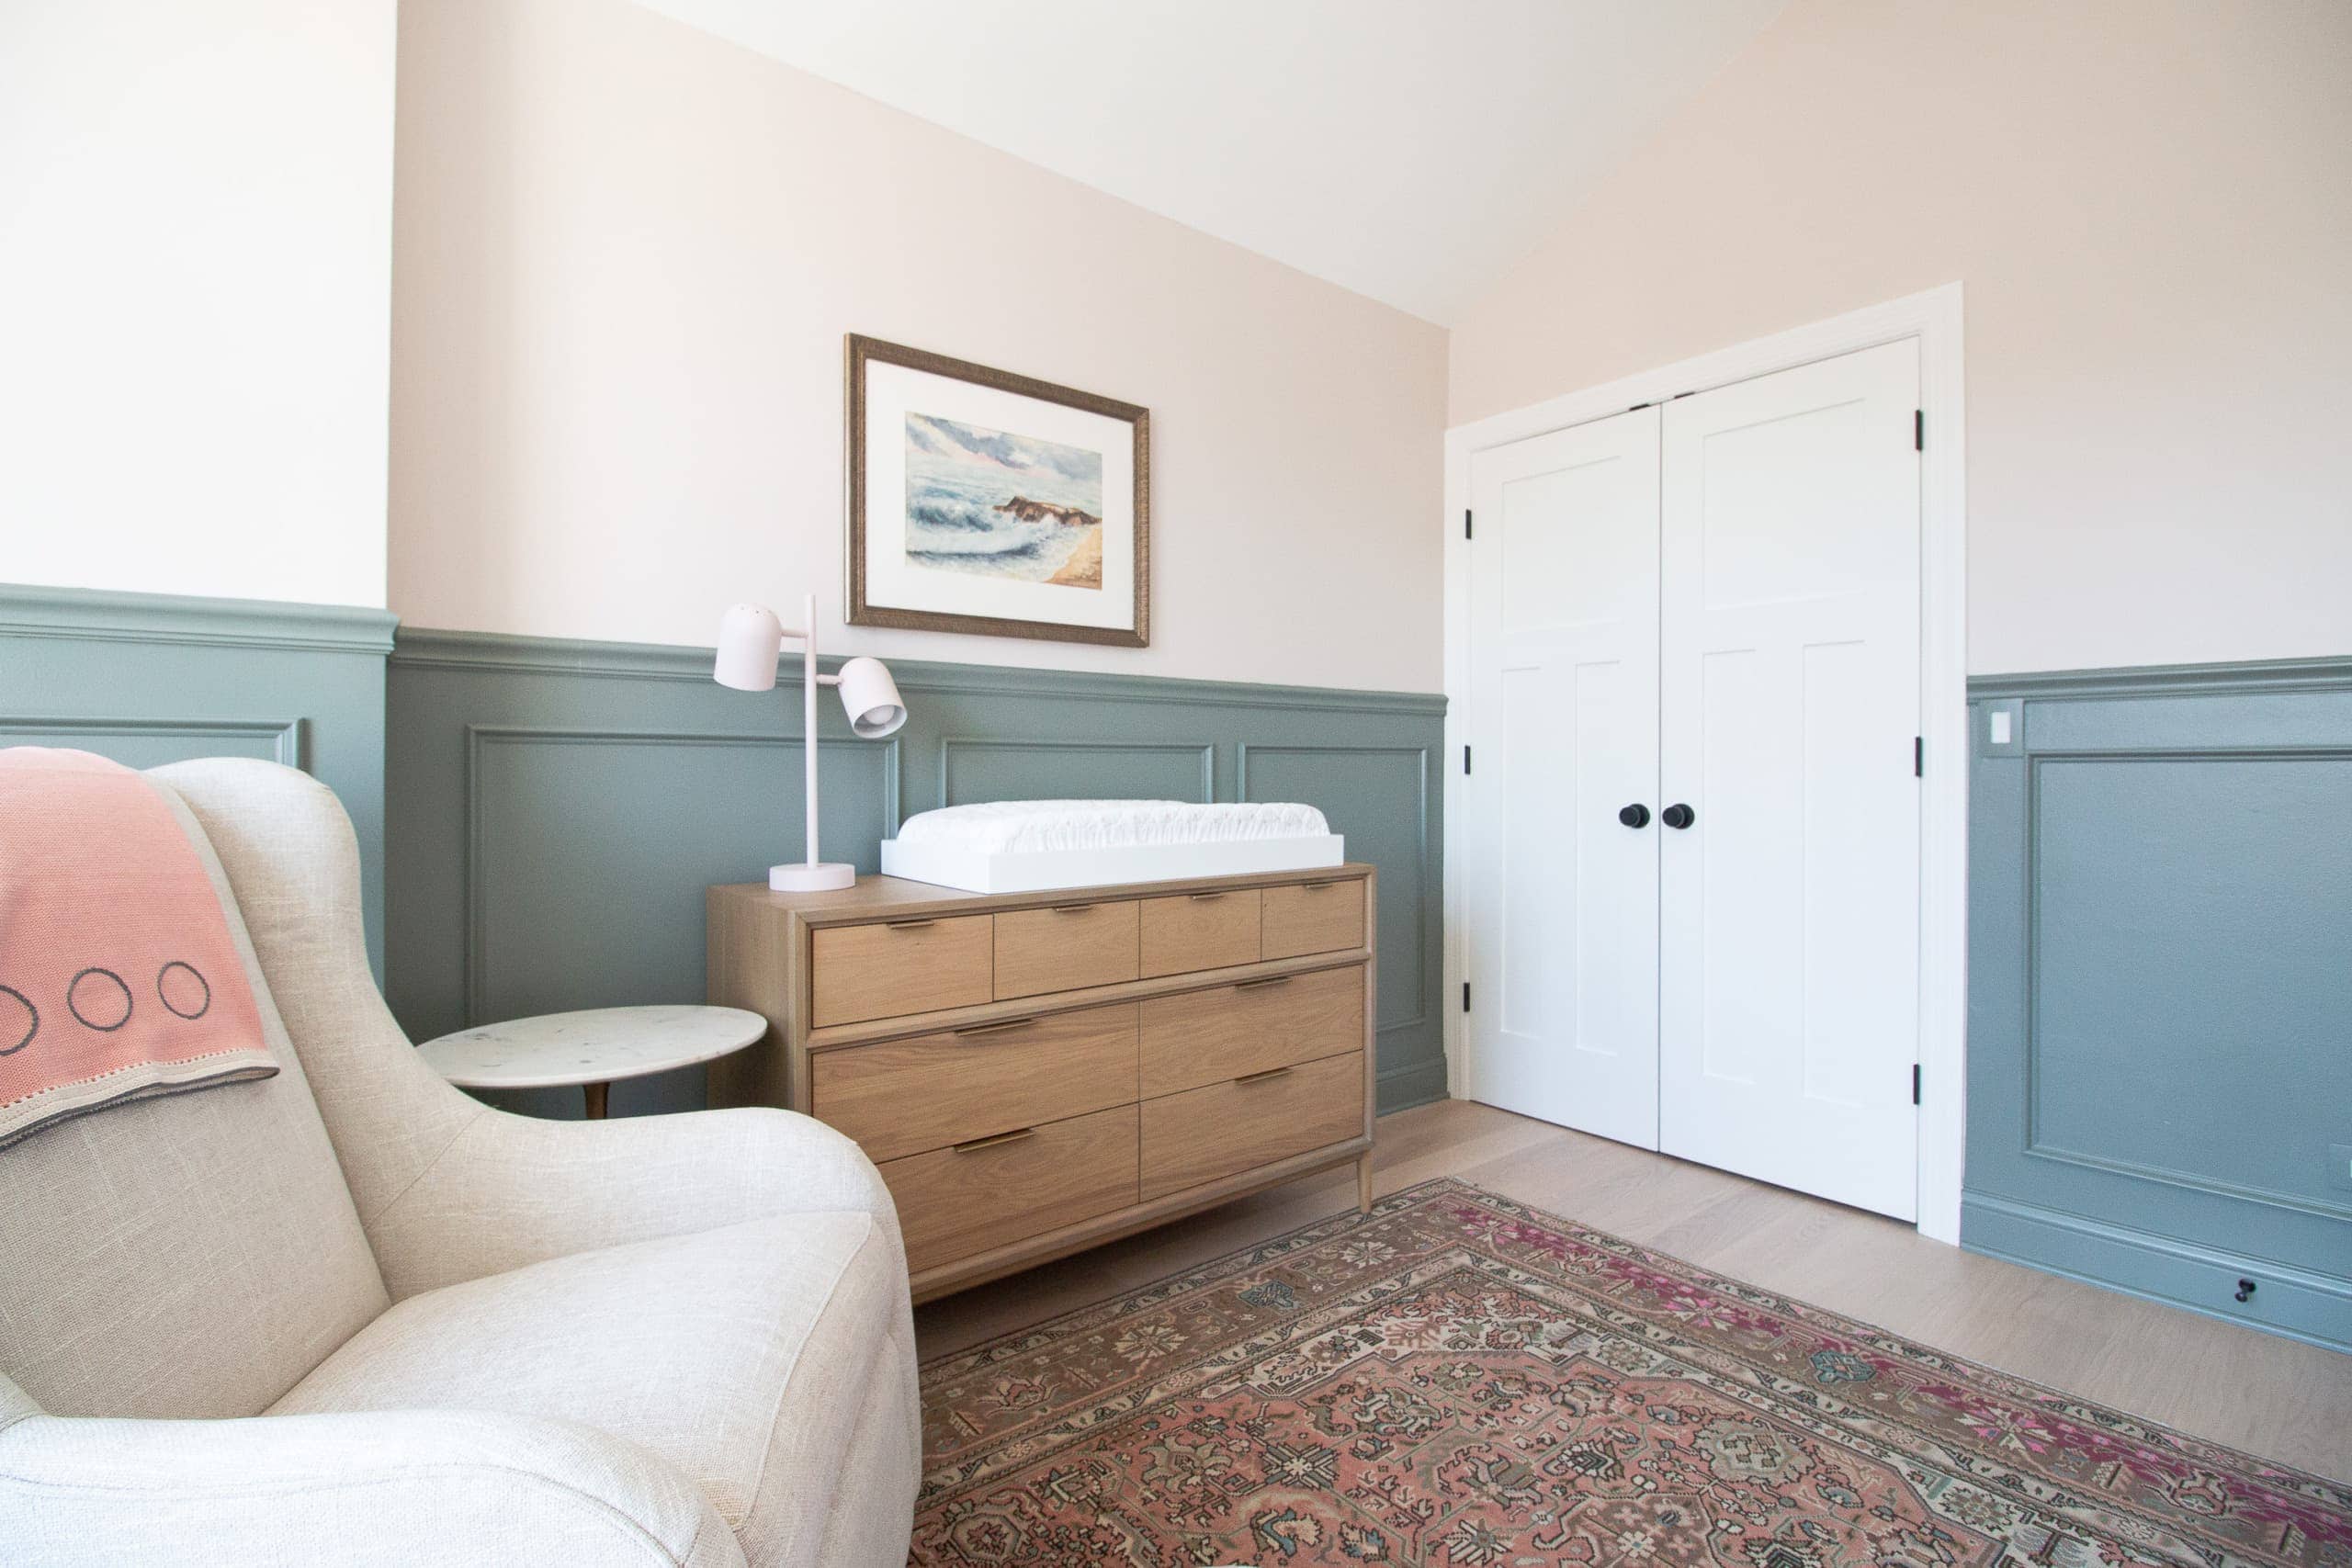
Finding a Blush Pink Paint Color
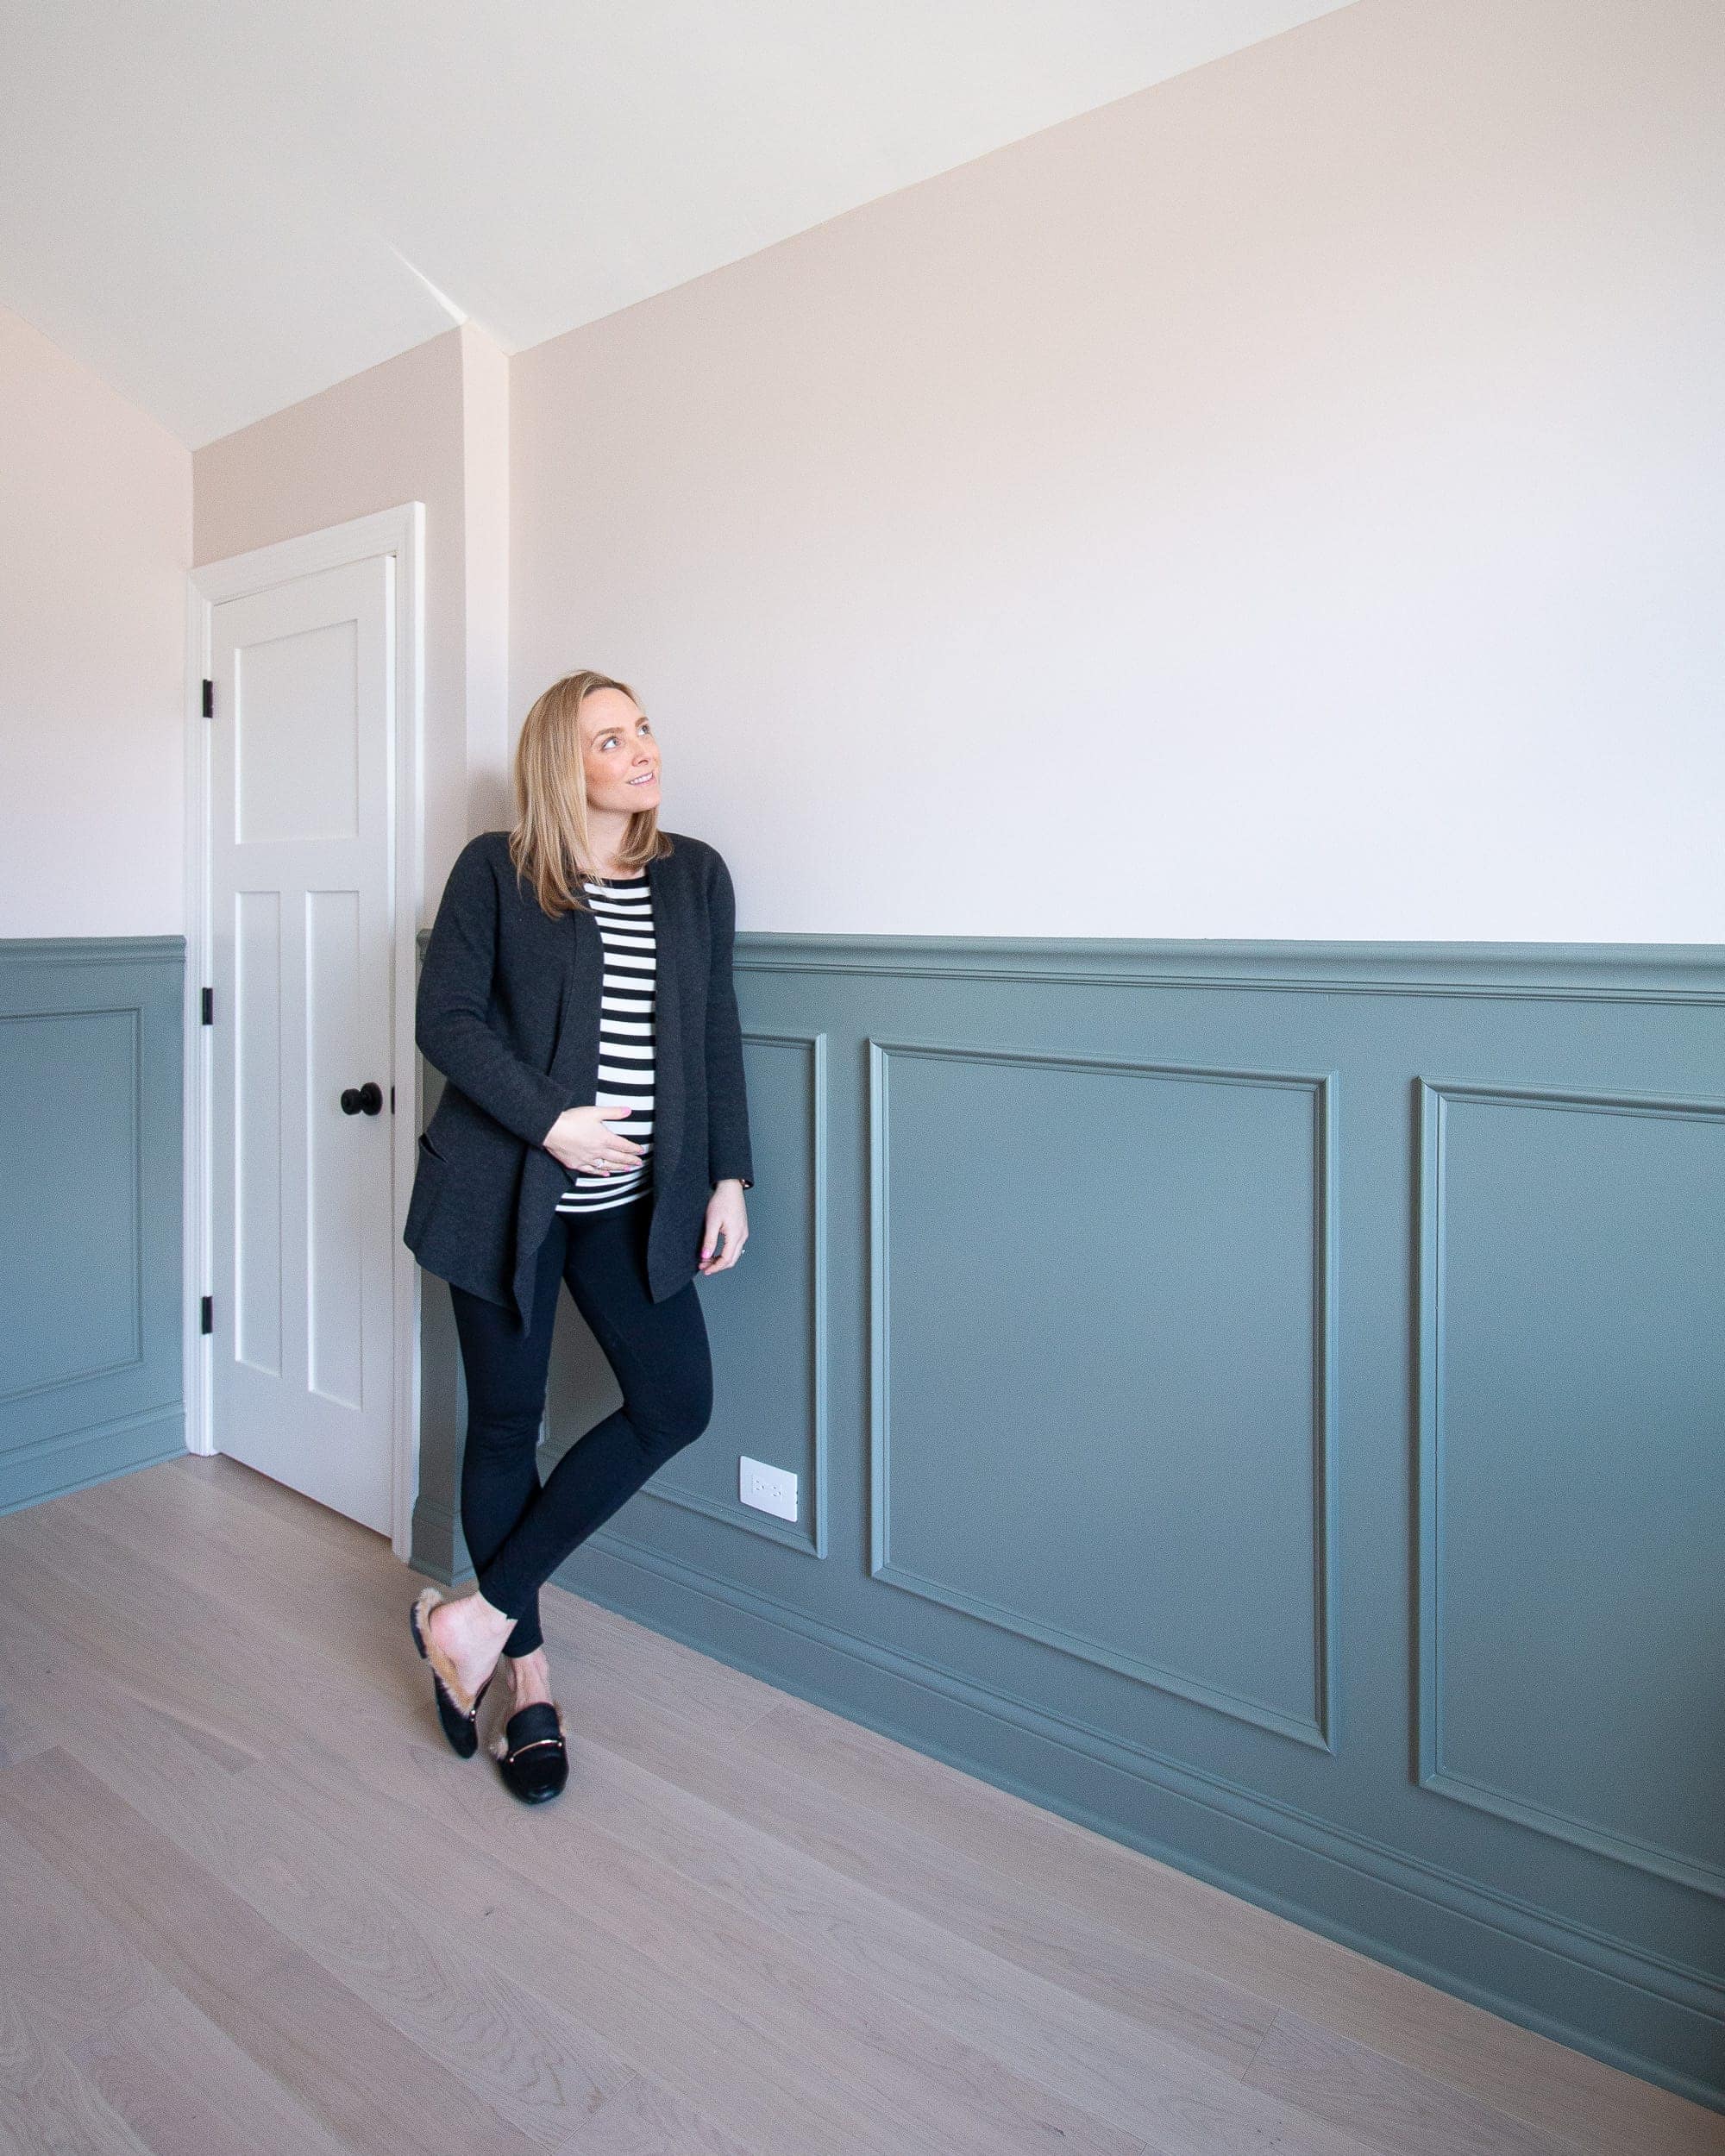
With the bottom painted that pretty sage, I had to figure out the best color for the top of the wall. Since it’s a baby girl’s room, I wanted a slight blush color…but, not bubblegum pink. I tried out lots of samples but ended up going with the color “Warm Fog” by Valspar. You can read more about the painting process here.
Closet Design Plan

The closet in this room was always empty, so we knew from the start that we would have to add some sort of closet system in here. 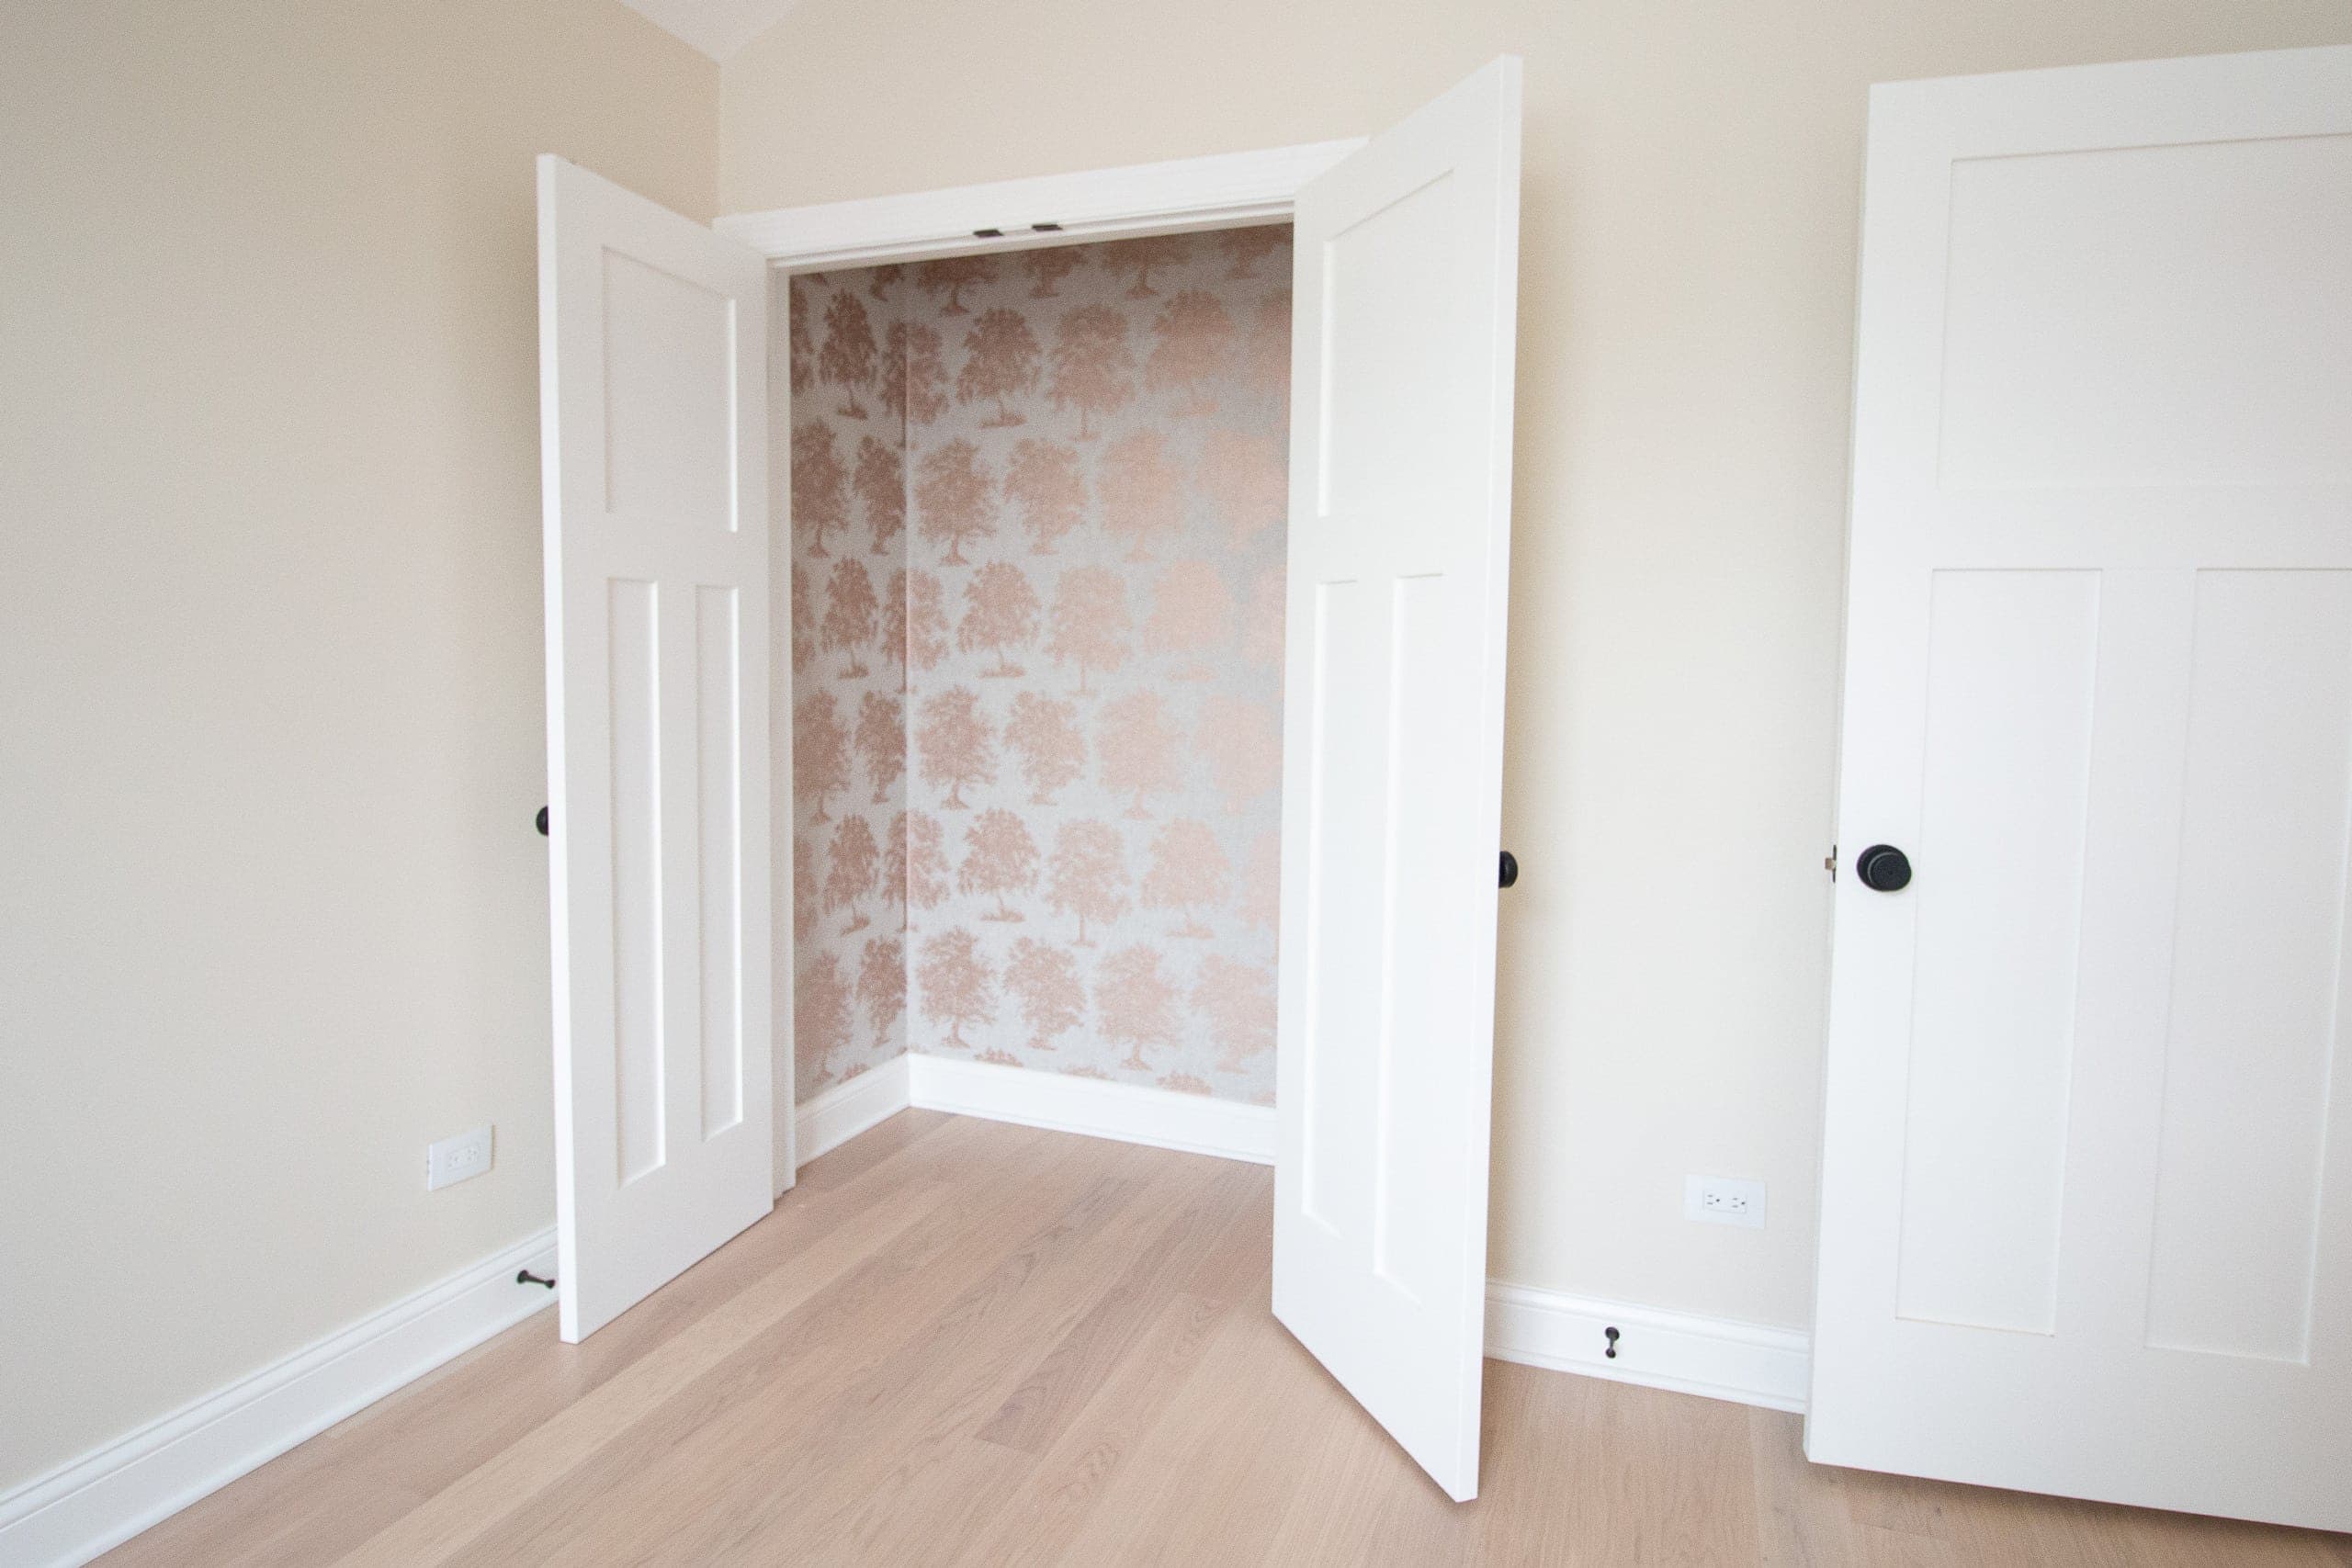 I decided to make it extra fun and girly with a rose gold wallpaper. I was actually surprised by how easy it was to install and it prompted me to do more wallpaper in our home office makeover!
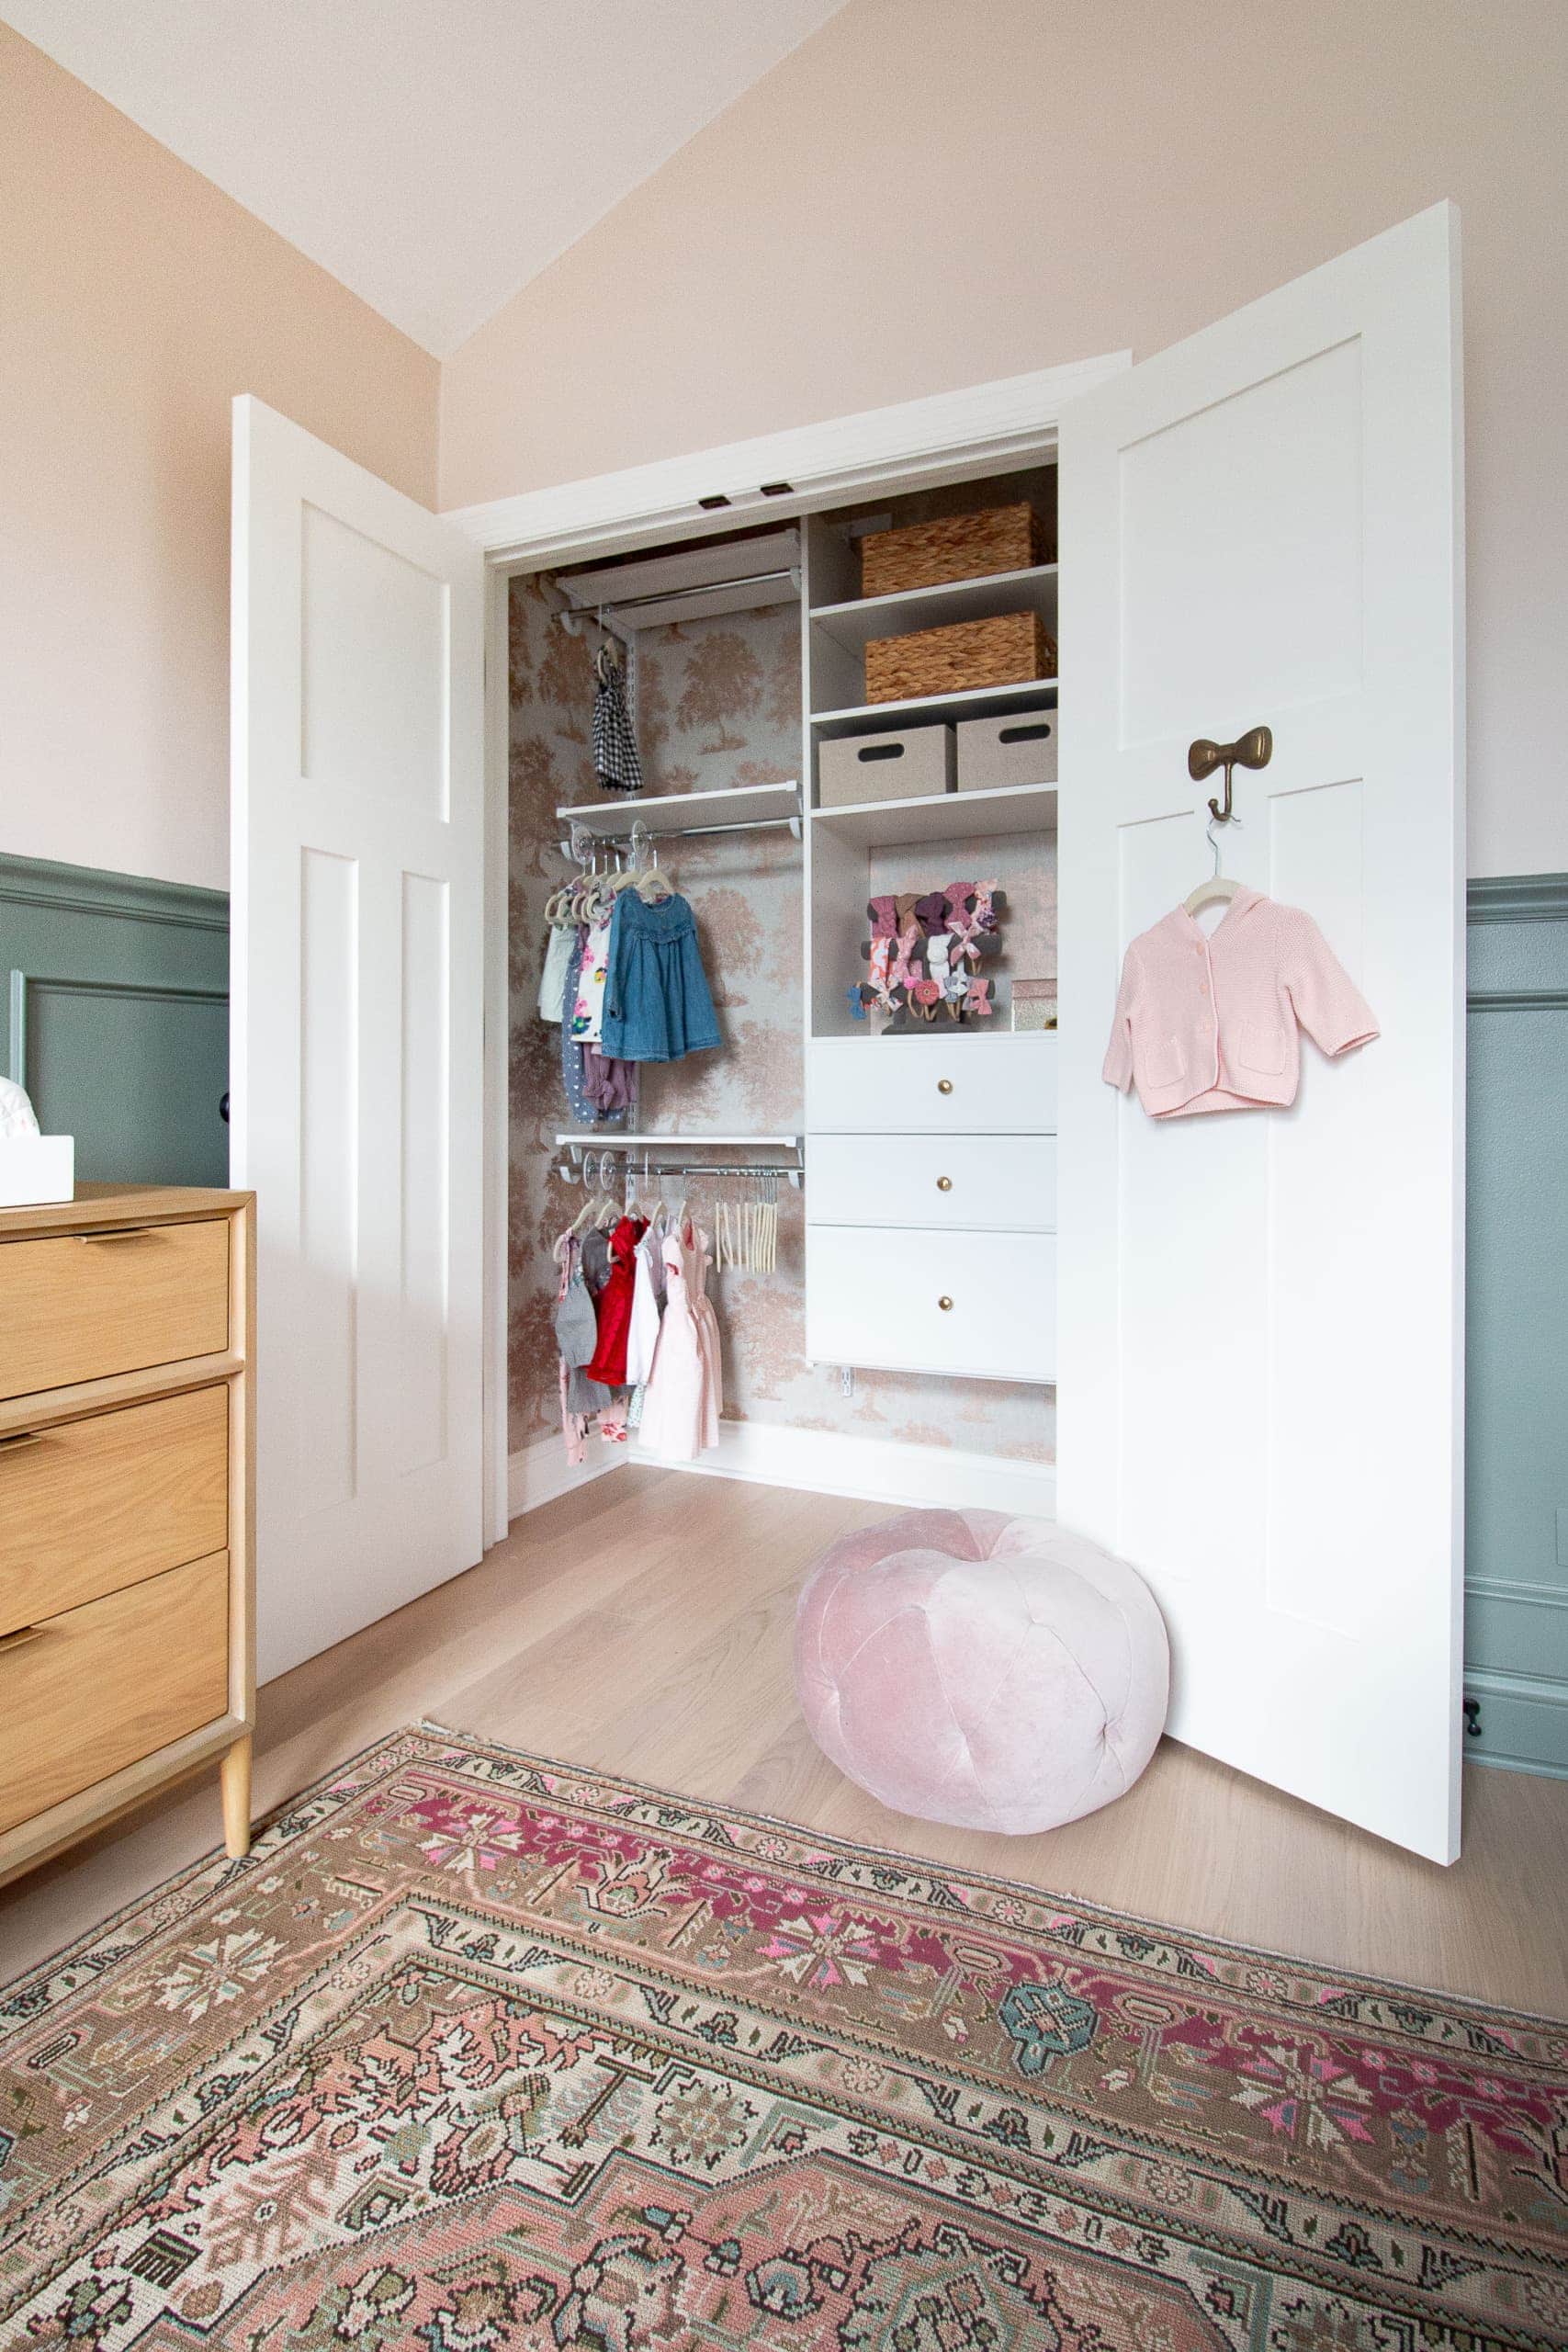
Finn and I came up with an organized closet plan and built it in a weekend. It wasn’t too difficult and we have more than enough room for all of her clothes, accessories (those bows!), and more! You can read all about the closet here.
Designing the Room
With the shell of the room finished, it was time to load this baby up with furniture and accessories. Here was my gameplan that I created earlier this year and I pretty much stuck to my original plan. 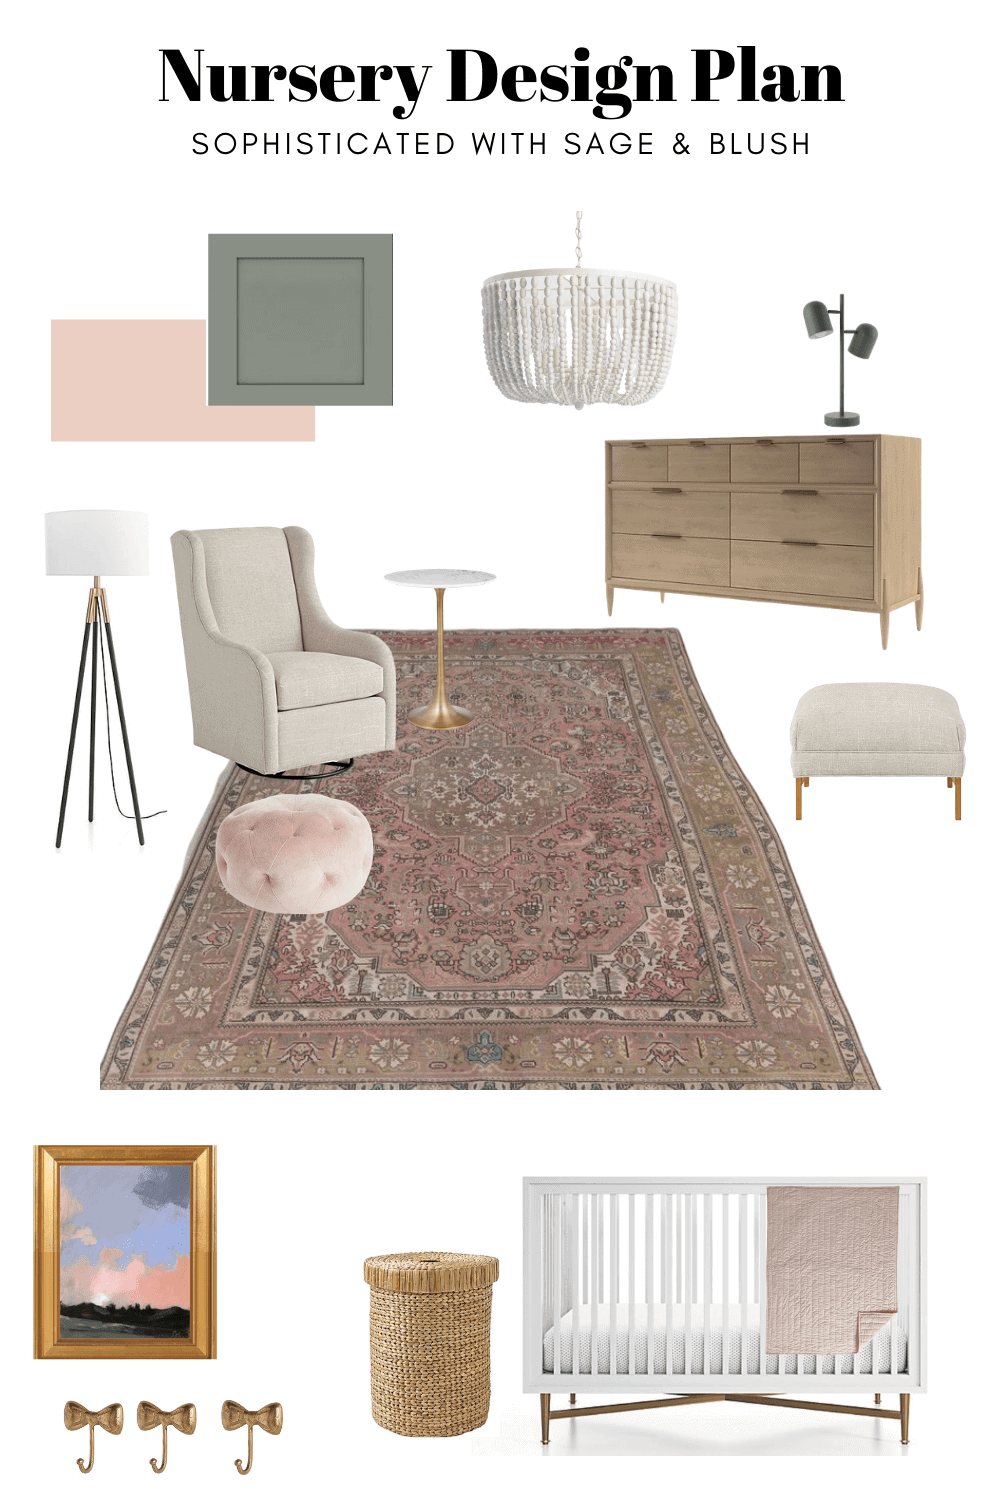
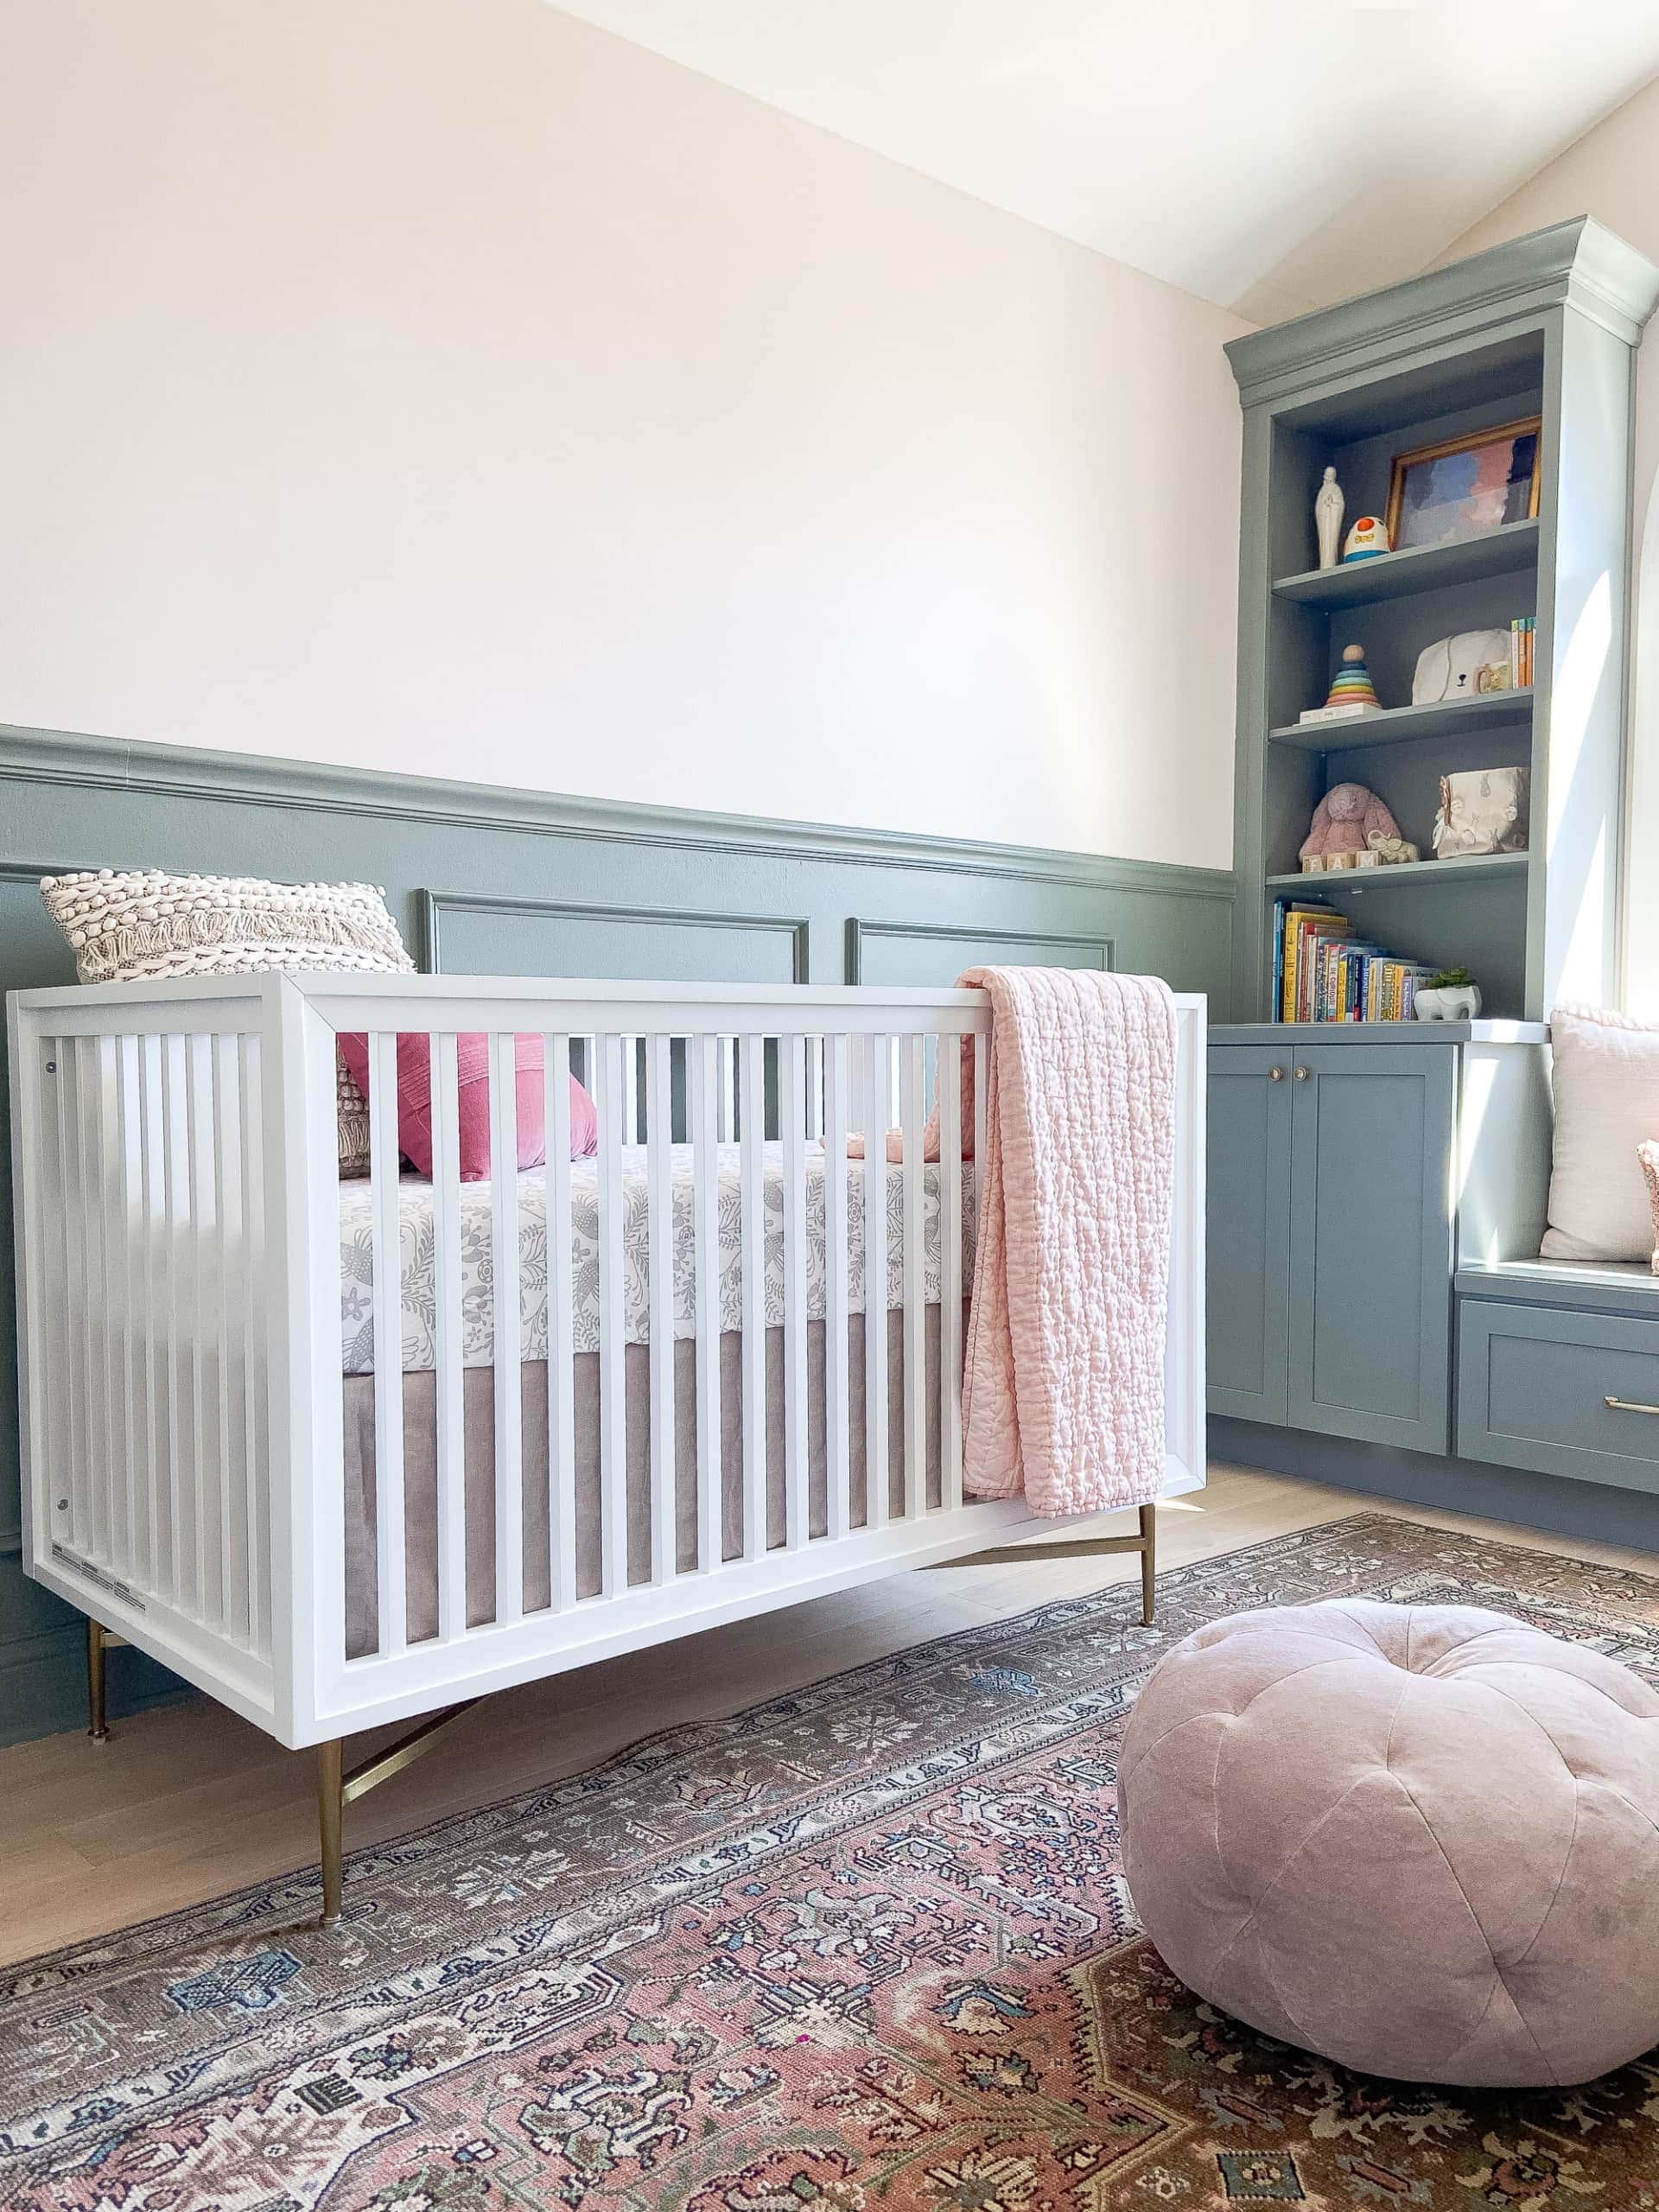
As you saw from yesterday’s nursery reveal, this is how the space turned out. Feminine, traditional, and sophisticated. I adore it.
Nursery Before and After
Okay, now let’s look at this space from every single angle!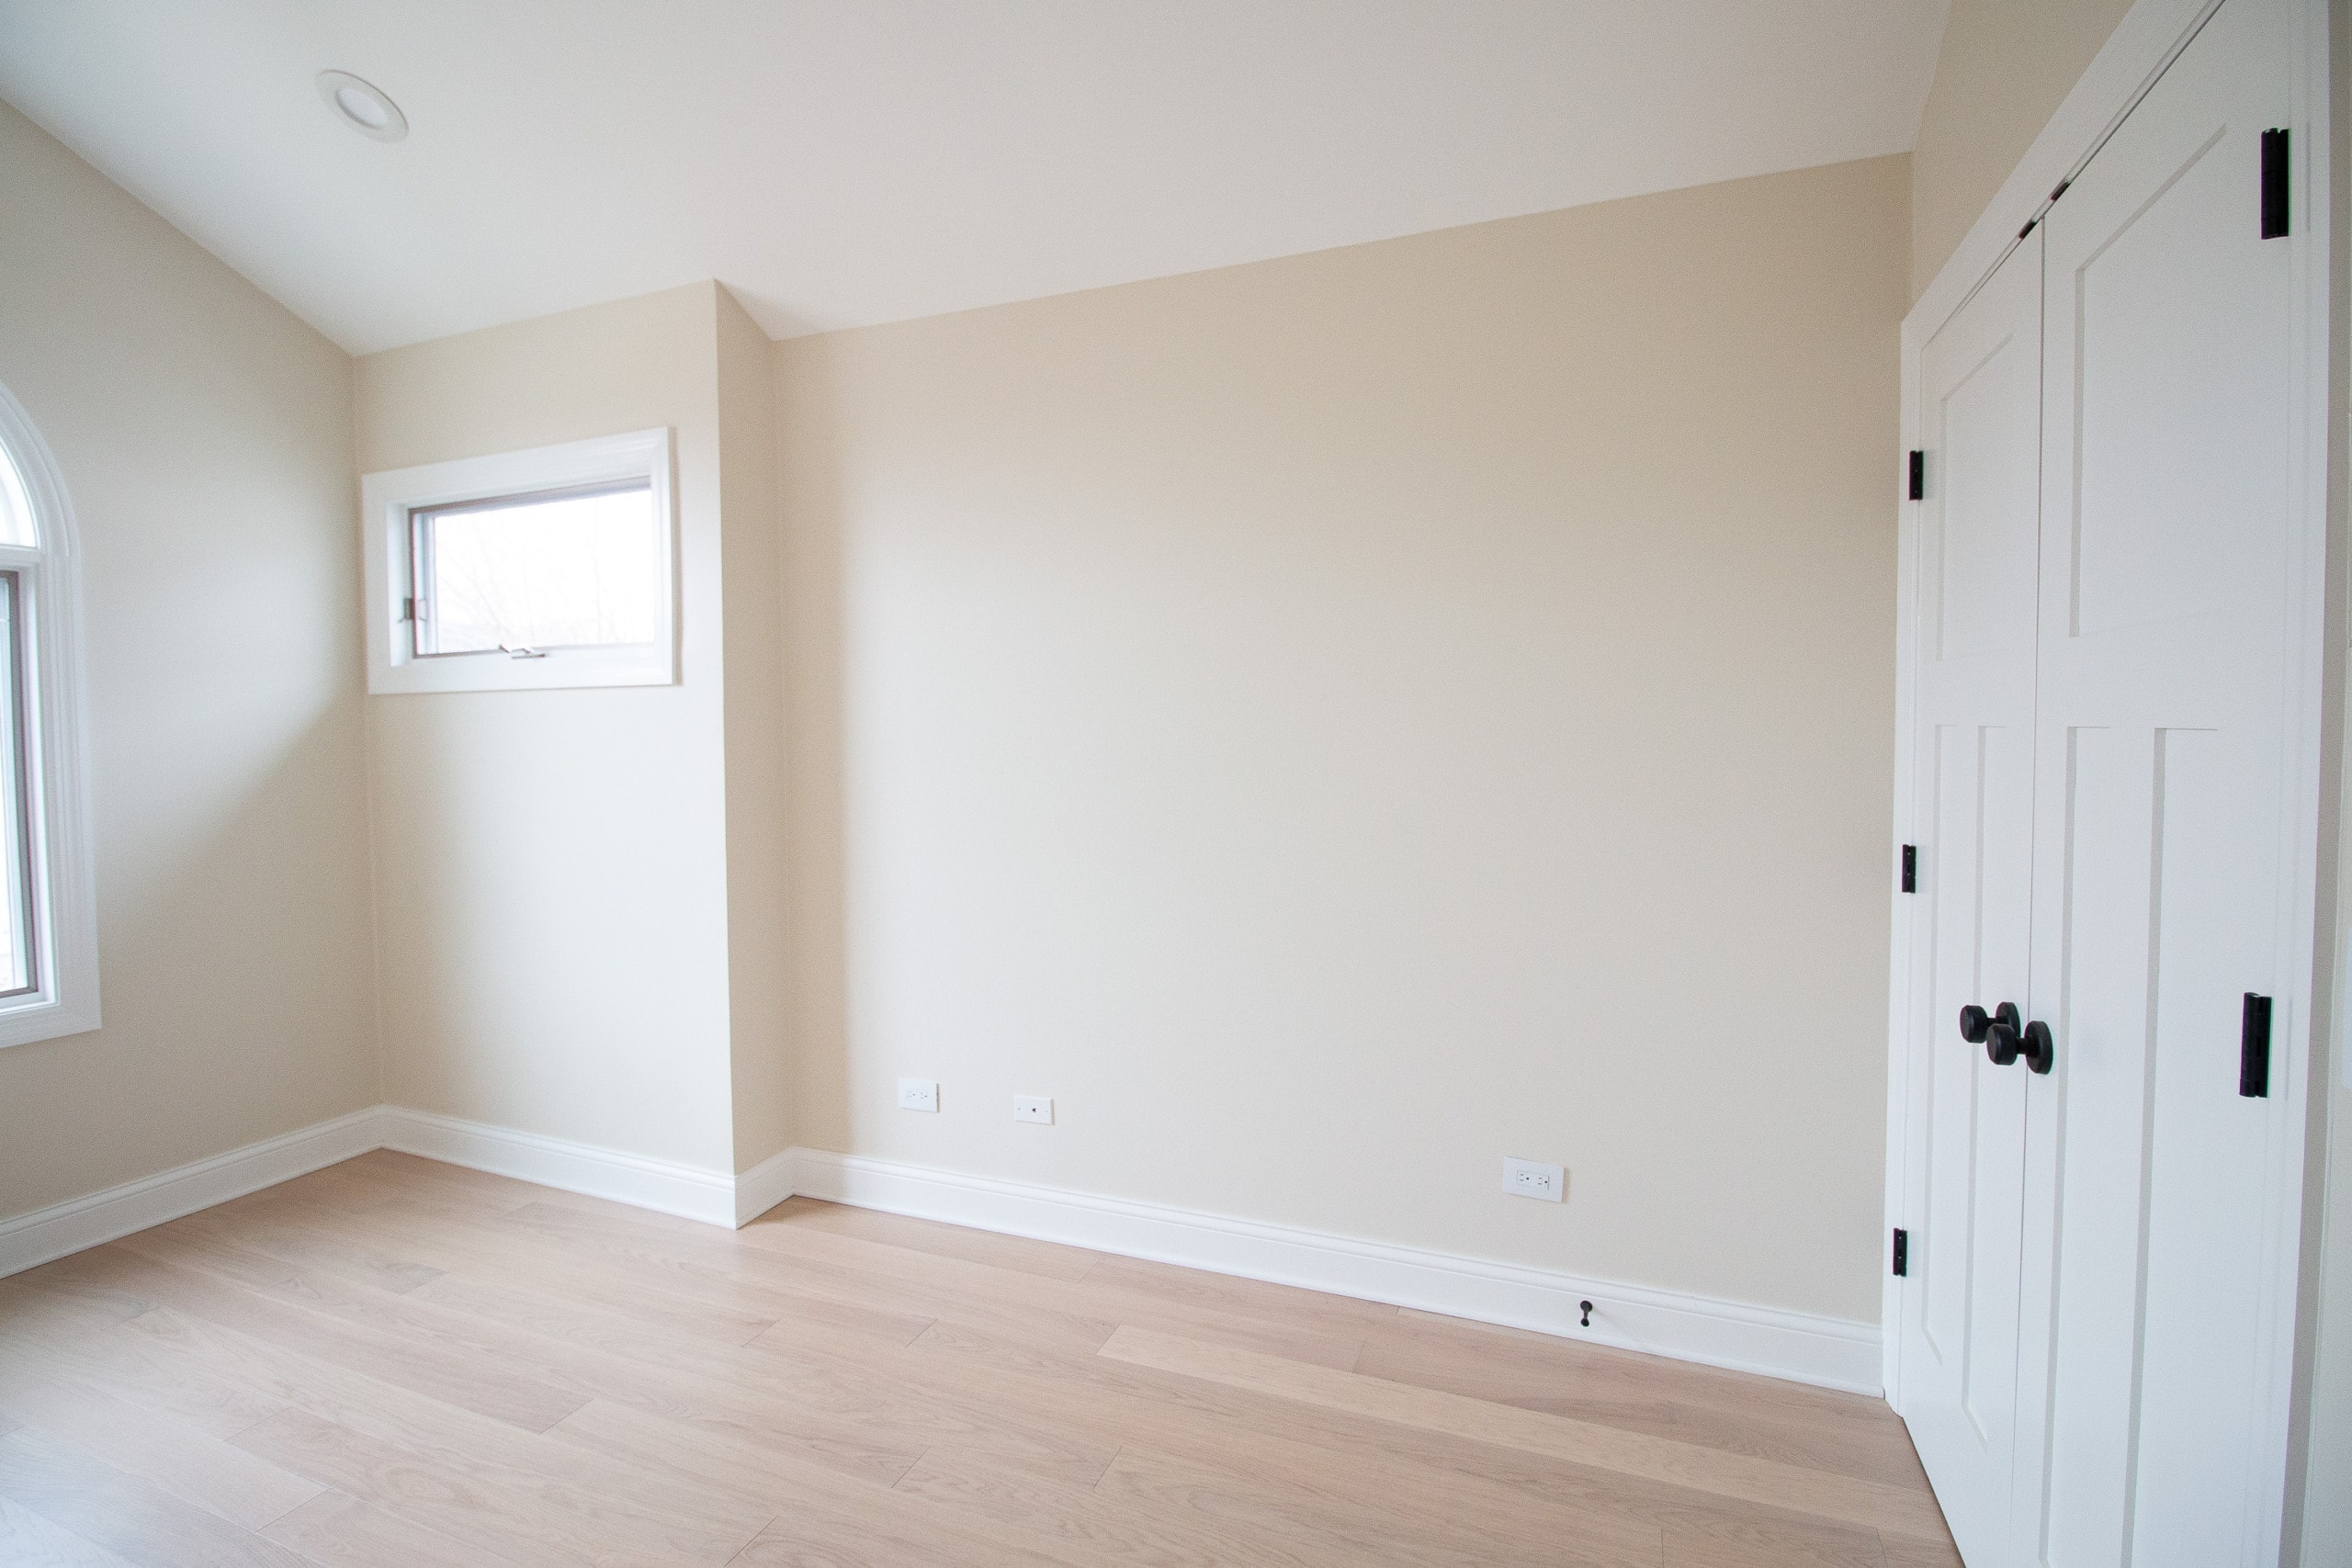


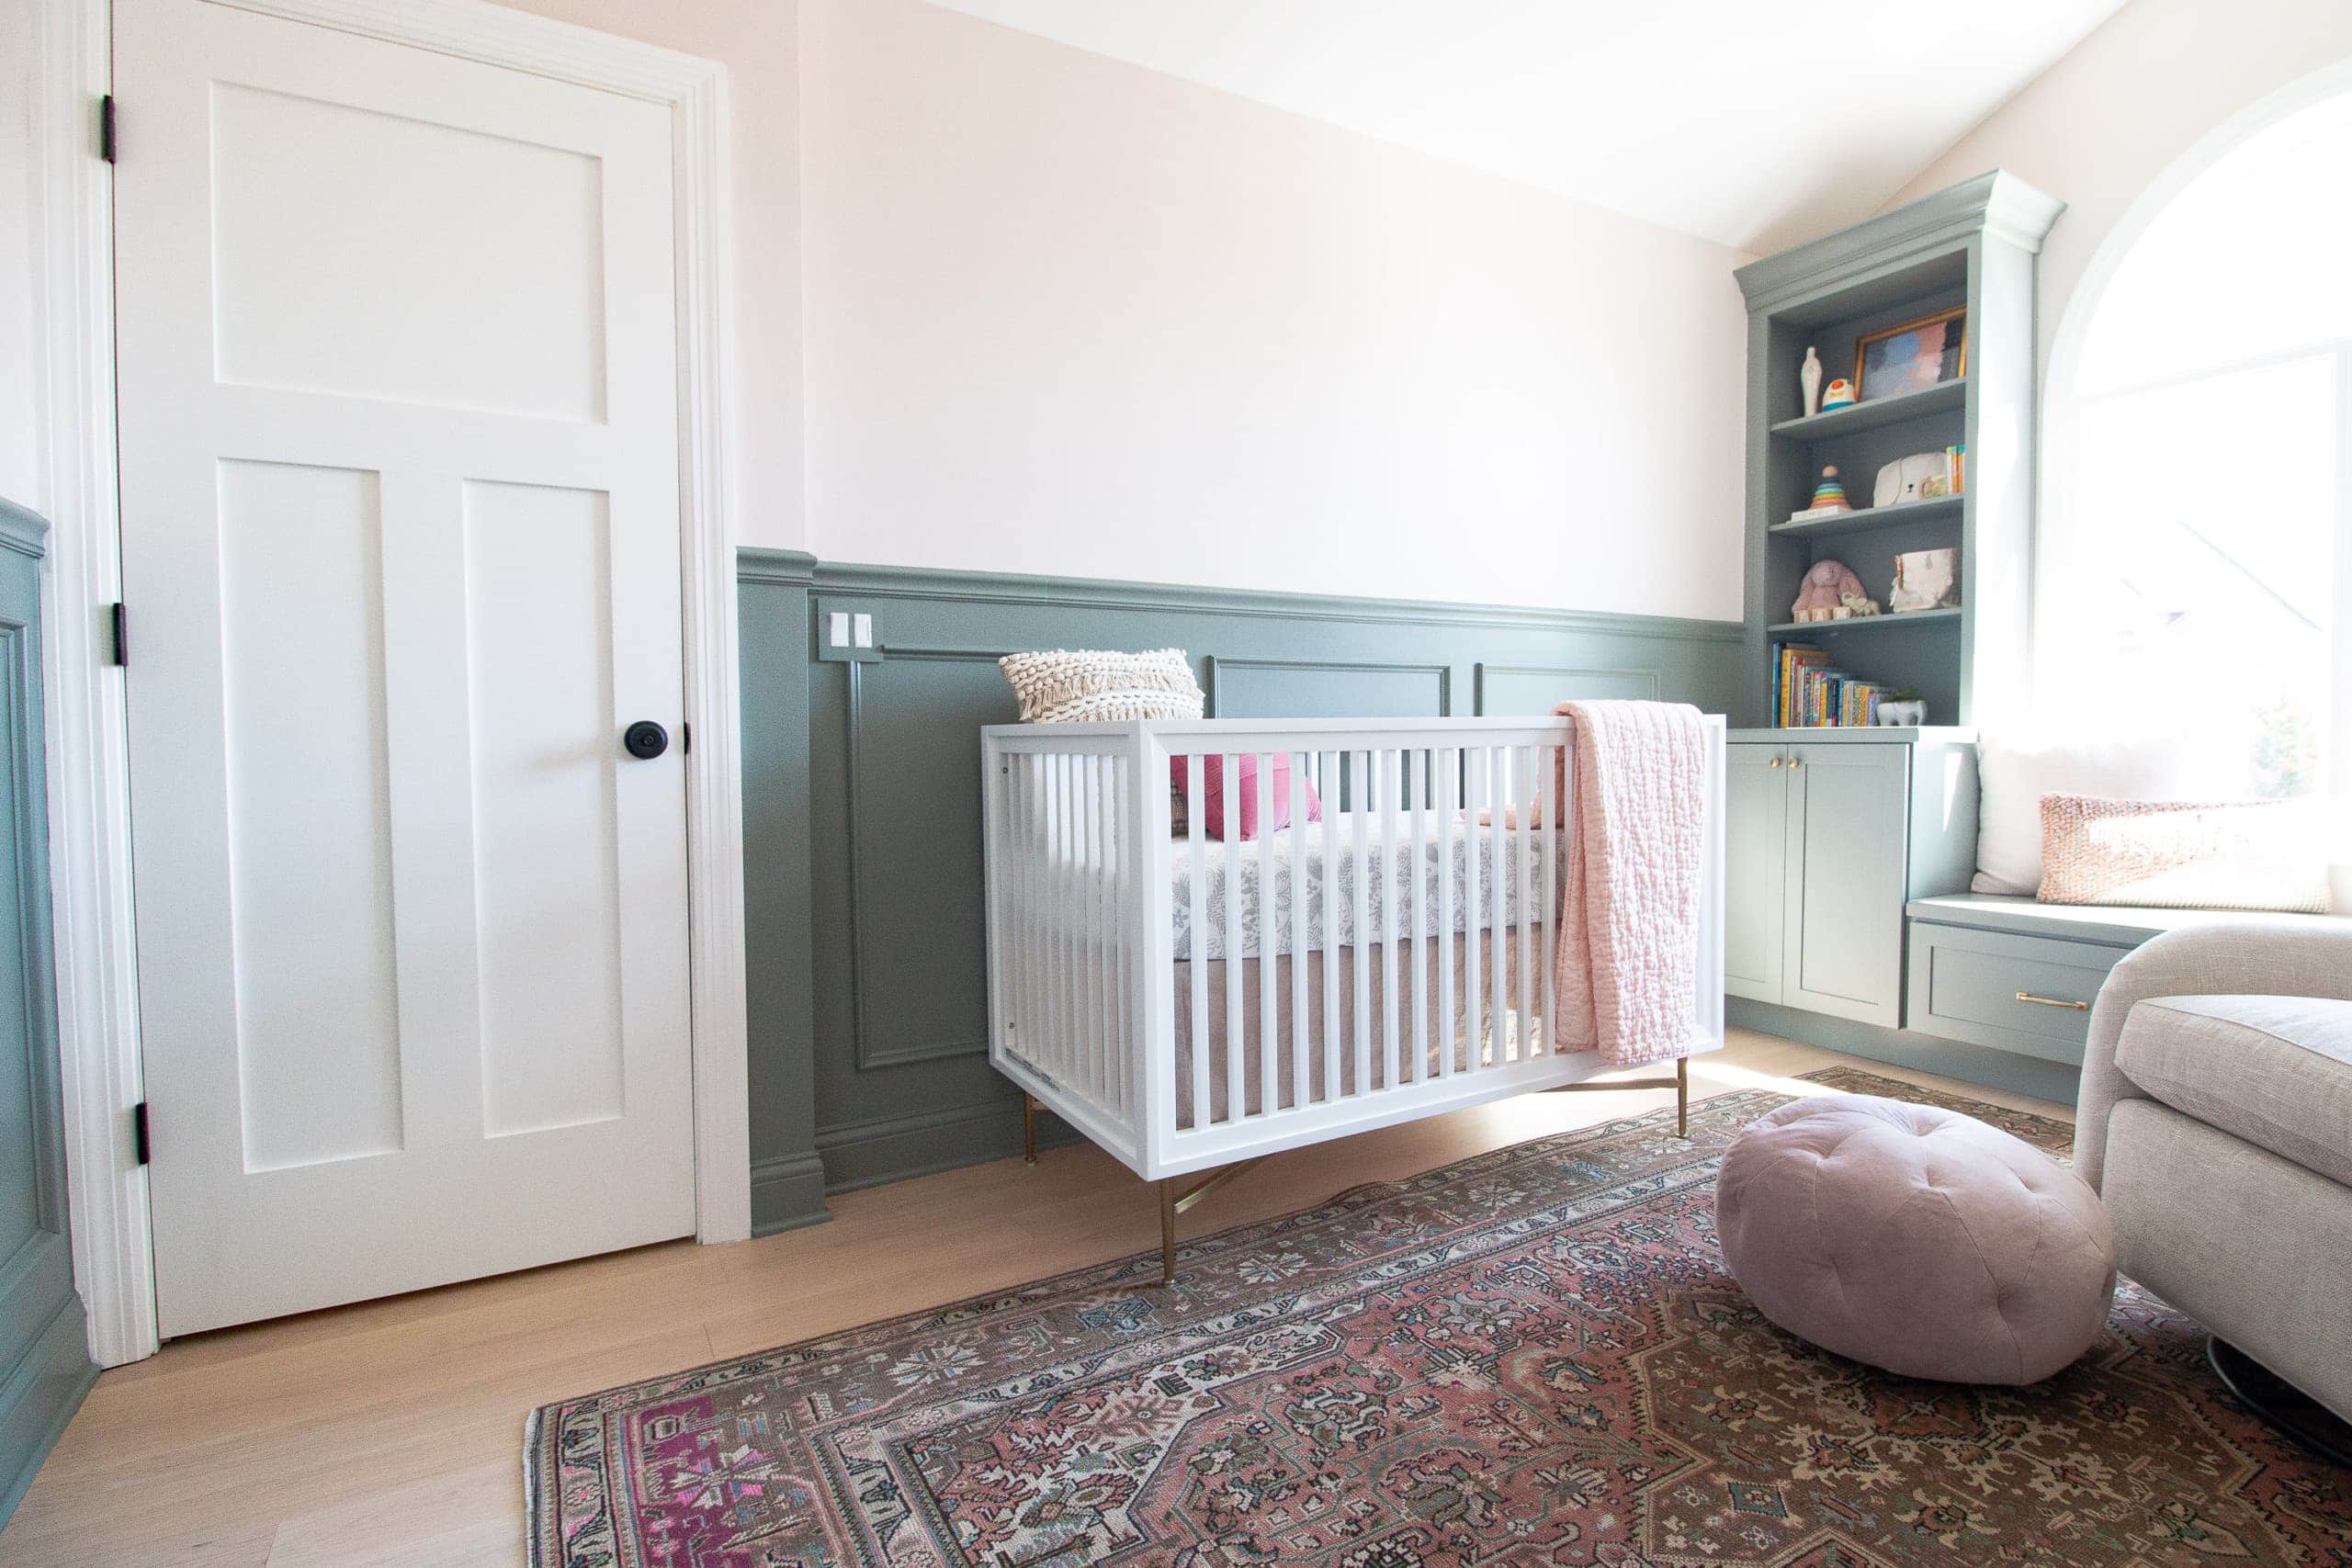


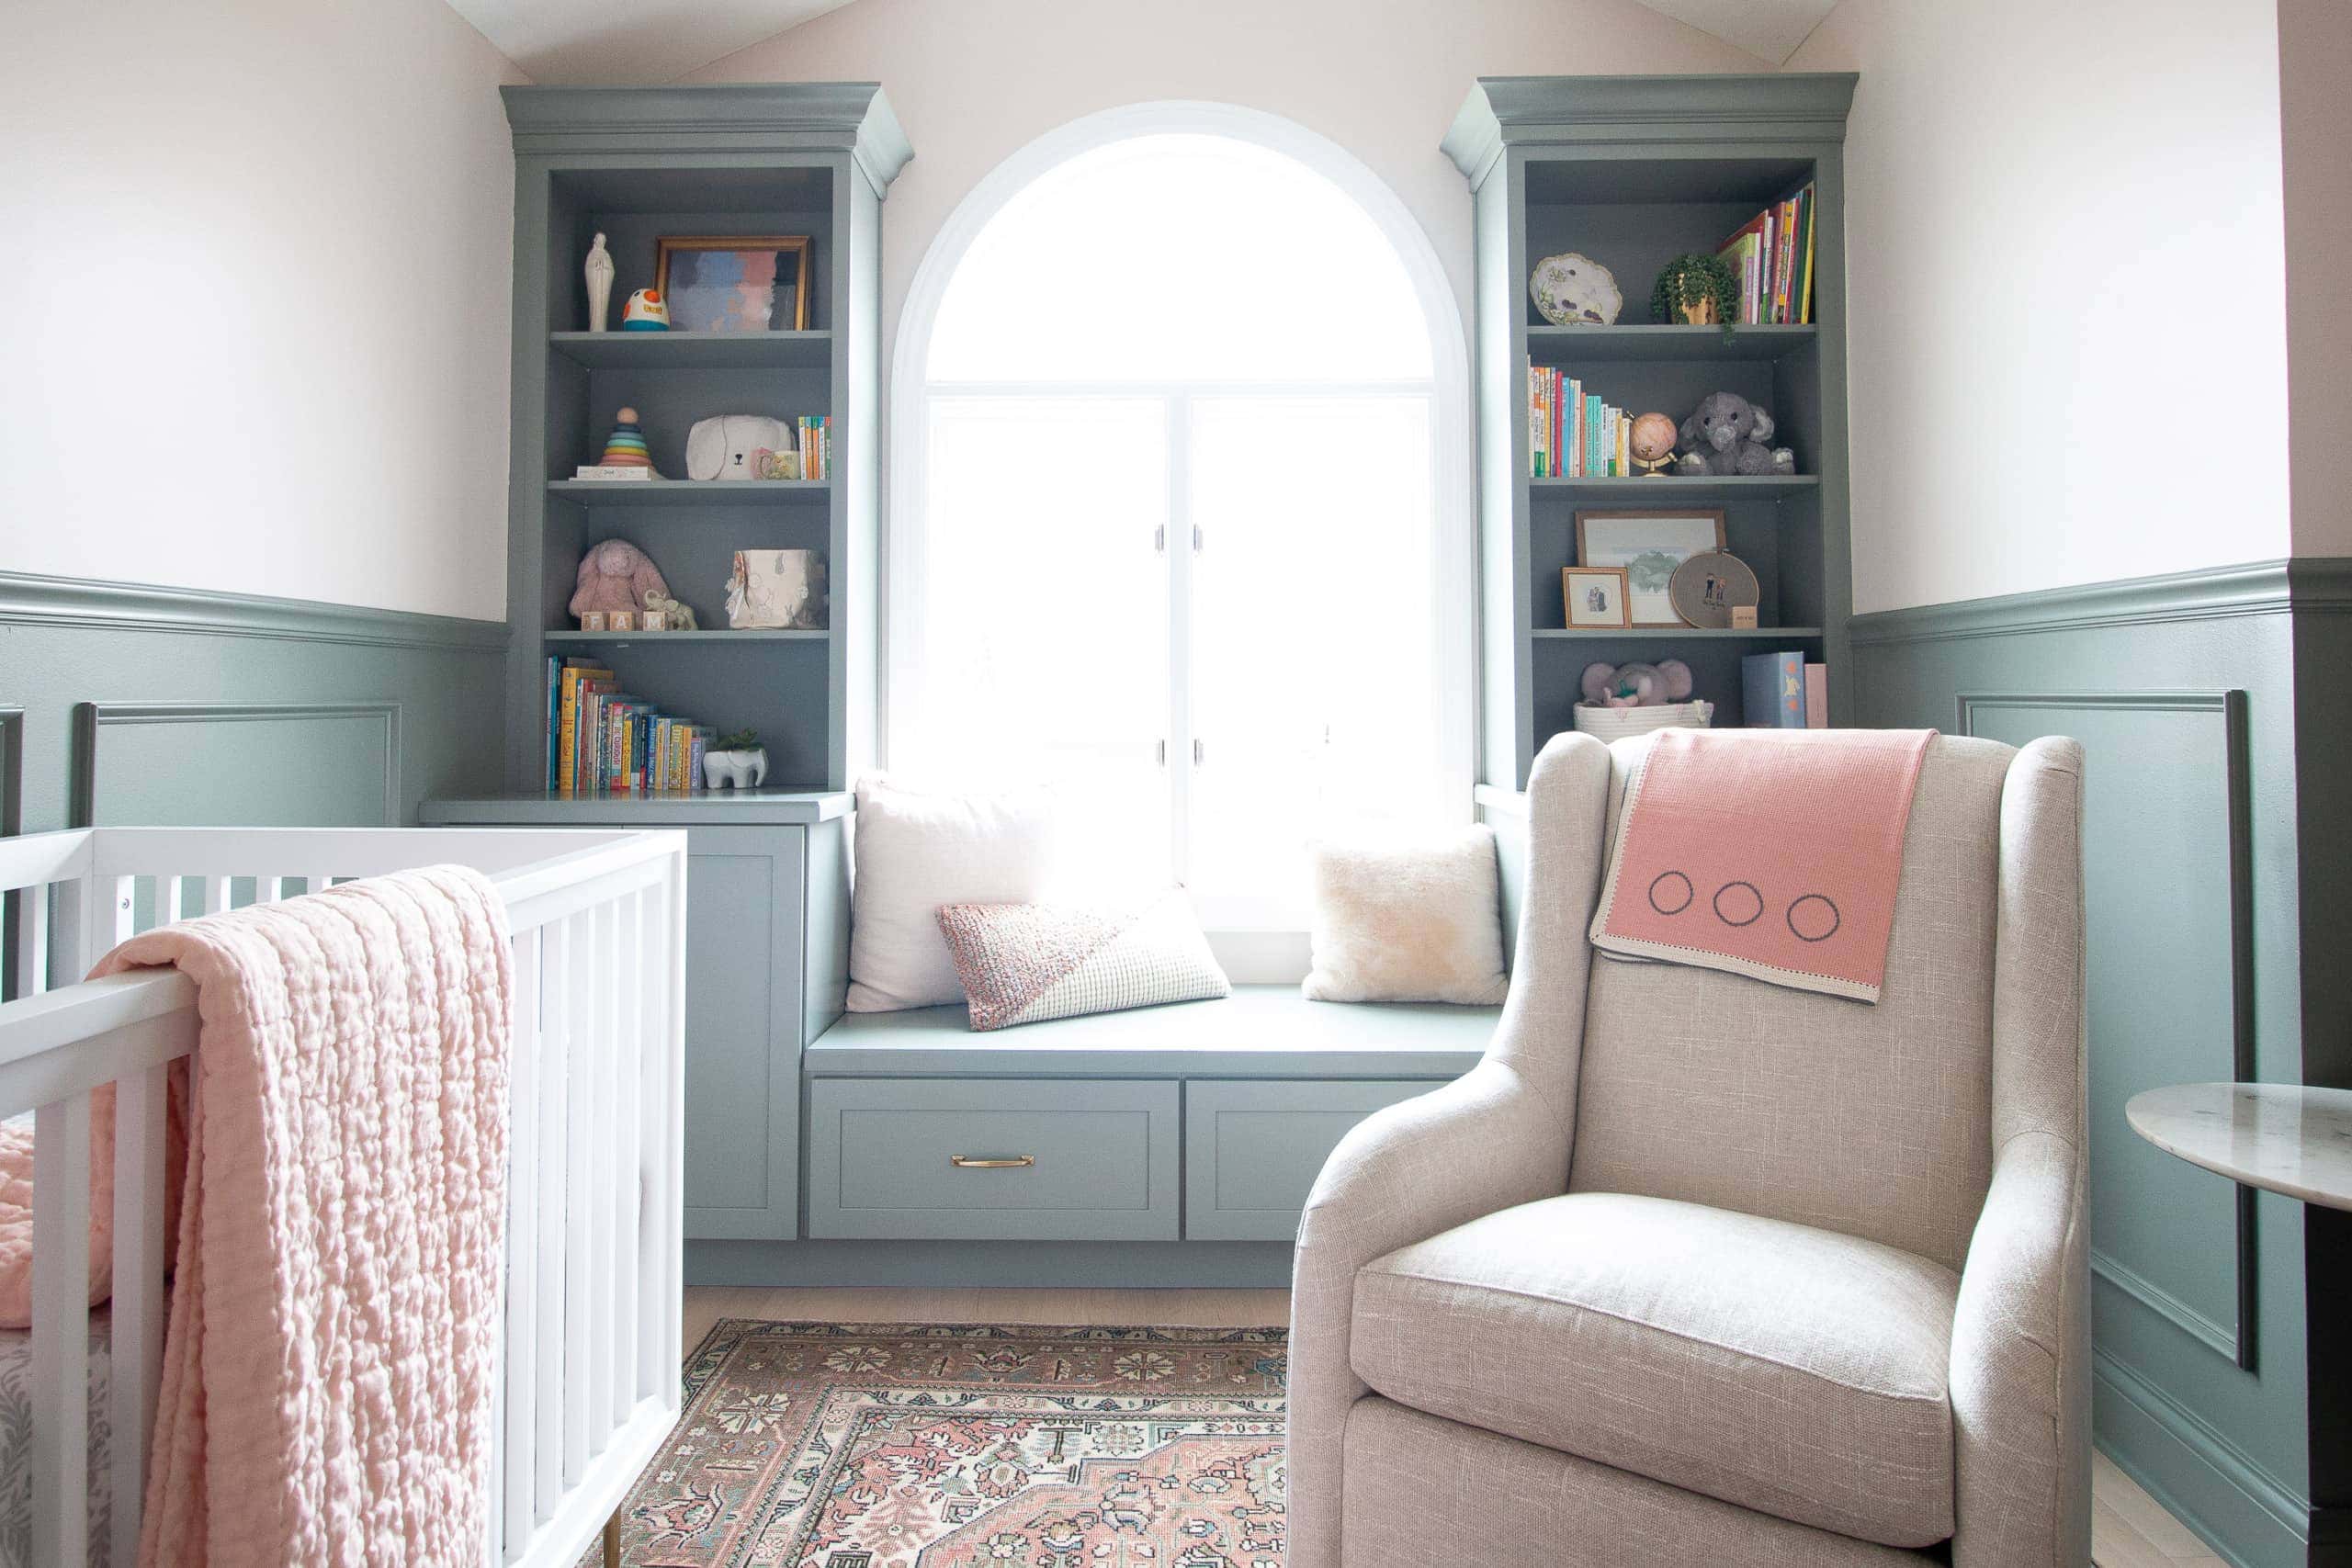
Quite the transformation, right?! It’s hard to believe that this big boring room is now full of personality and life!
Nursery Sources
Now let’s dive into the sources for every single item in this room. If I don’t list something, it’s probably vintage or a gift. But I did my best to highlight everything in this room.

Hardwood Floors // Wall Color: Valspar “Warm Fog” // Chair Rail Color: Custom (formula in this blog post) // Door & Door Knob Details // Light Fixture // Chair Rail Tutorial // Vintage Rug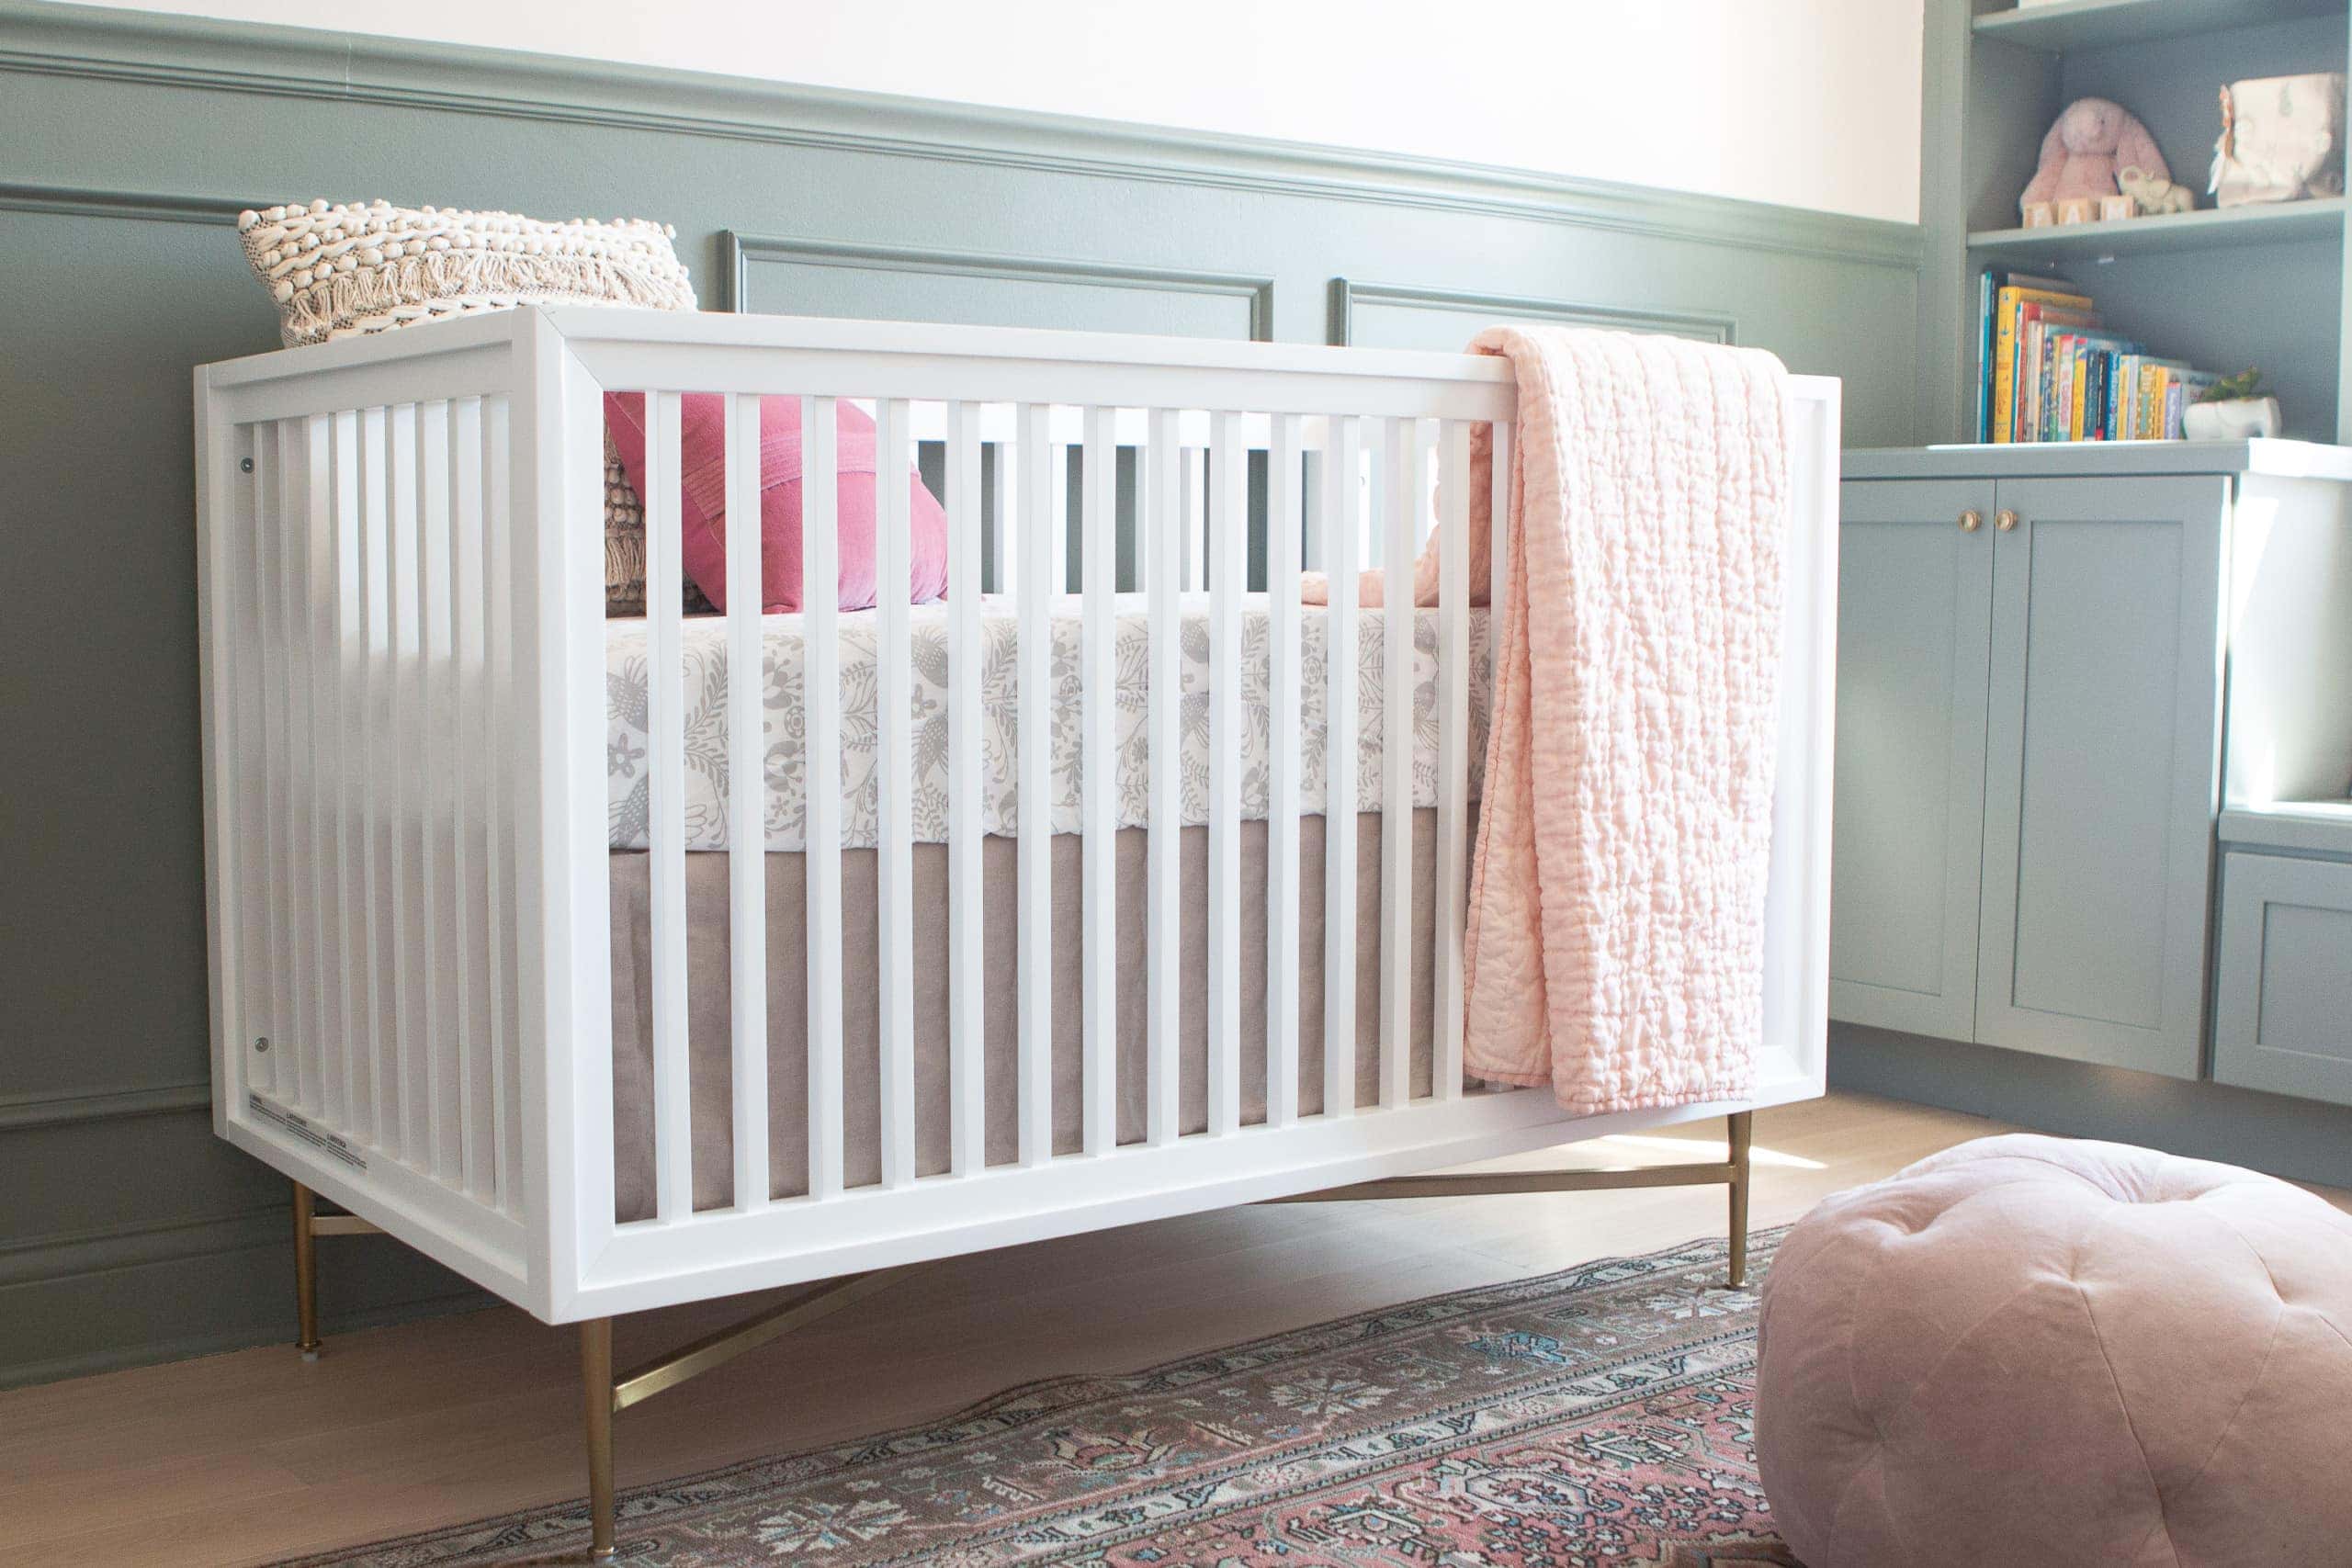 Crib // Mattress // Mattress Pad Cover // Crib Sheet (no longer sold) // Crib Skirt // Textured Pillow (HomeGoods) // Pink Lumbar (no longer sold) // Blush Quilt (similar)
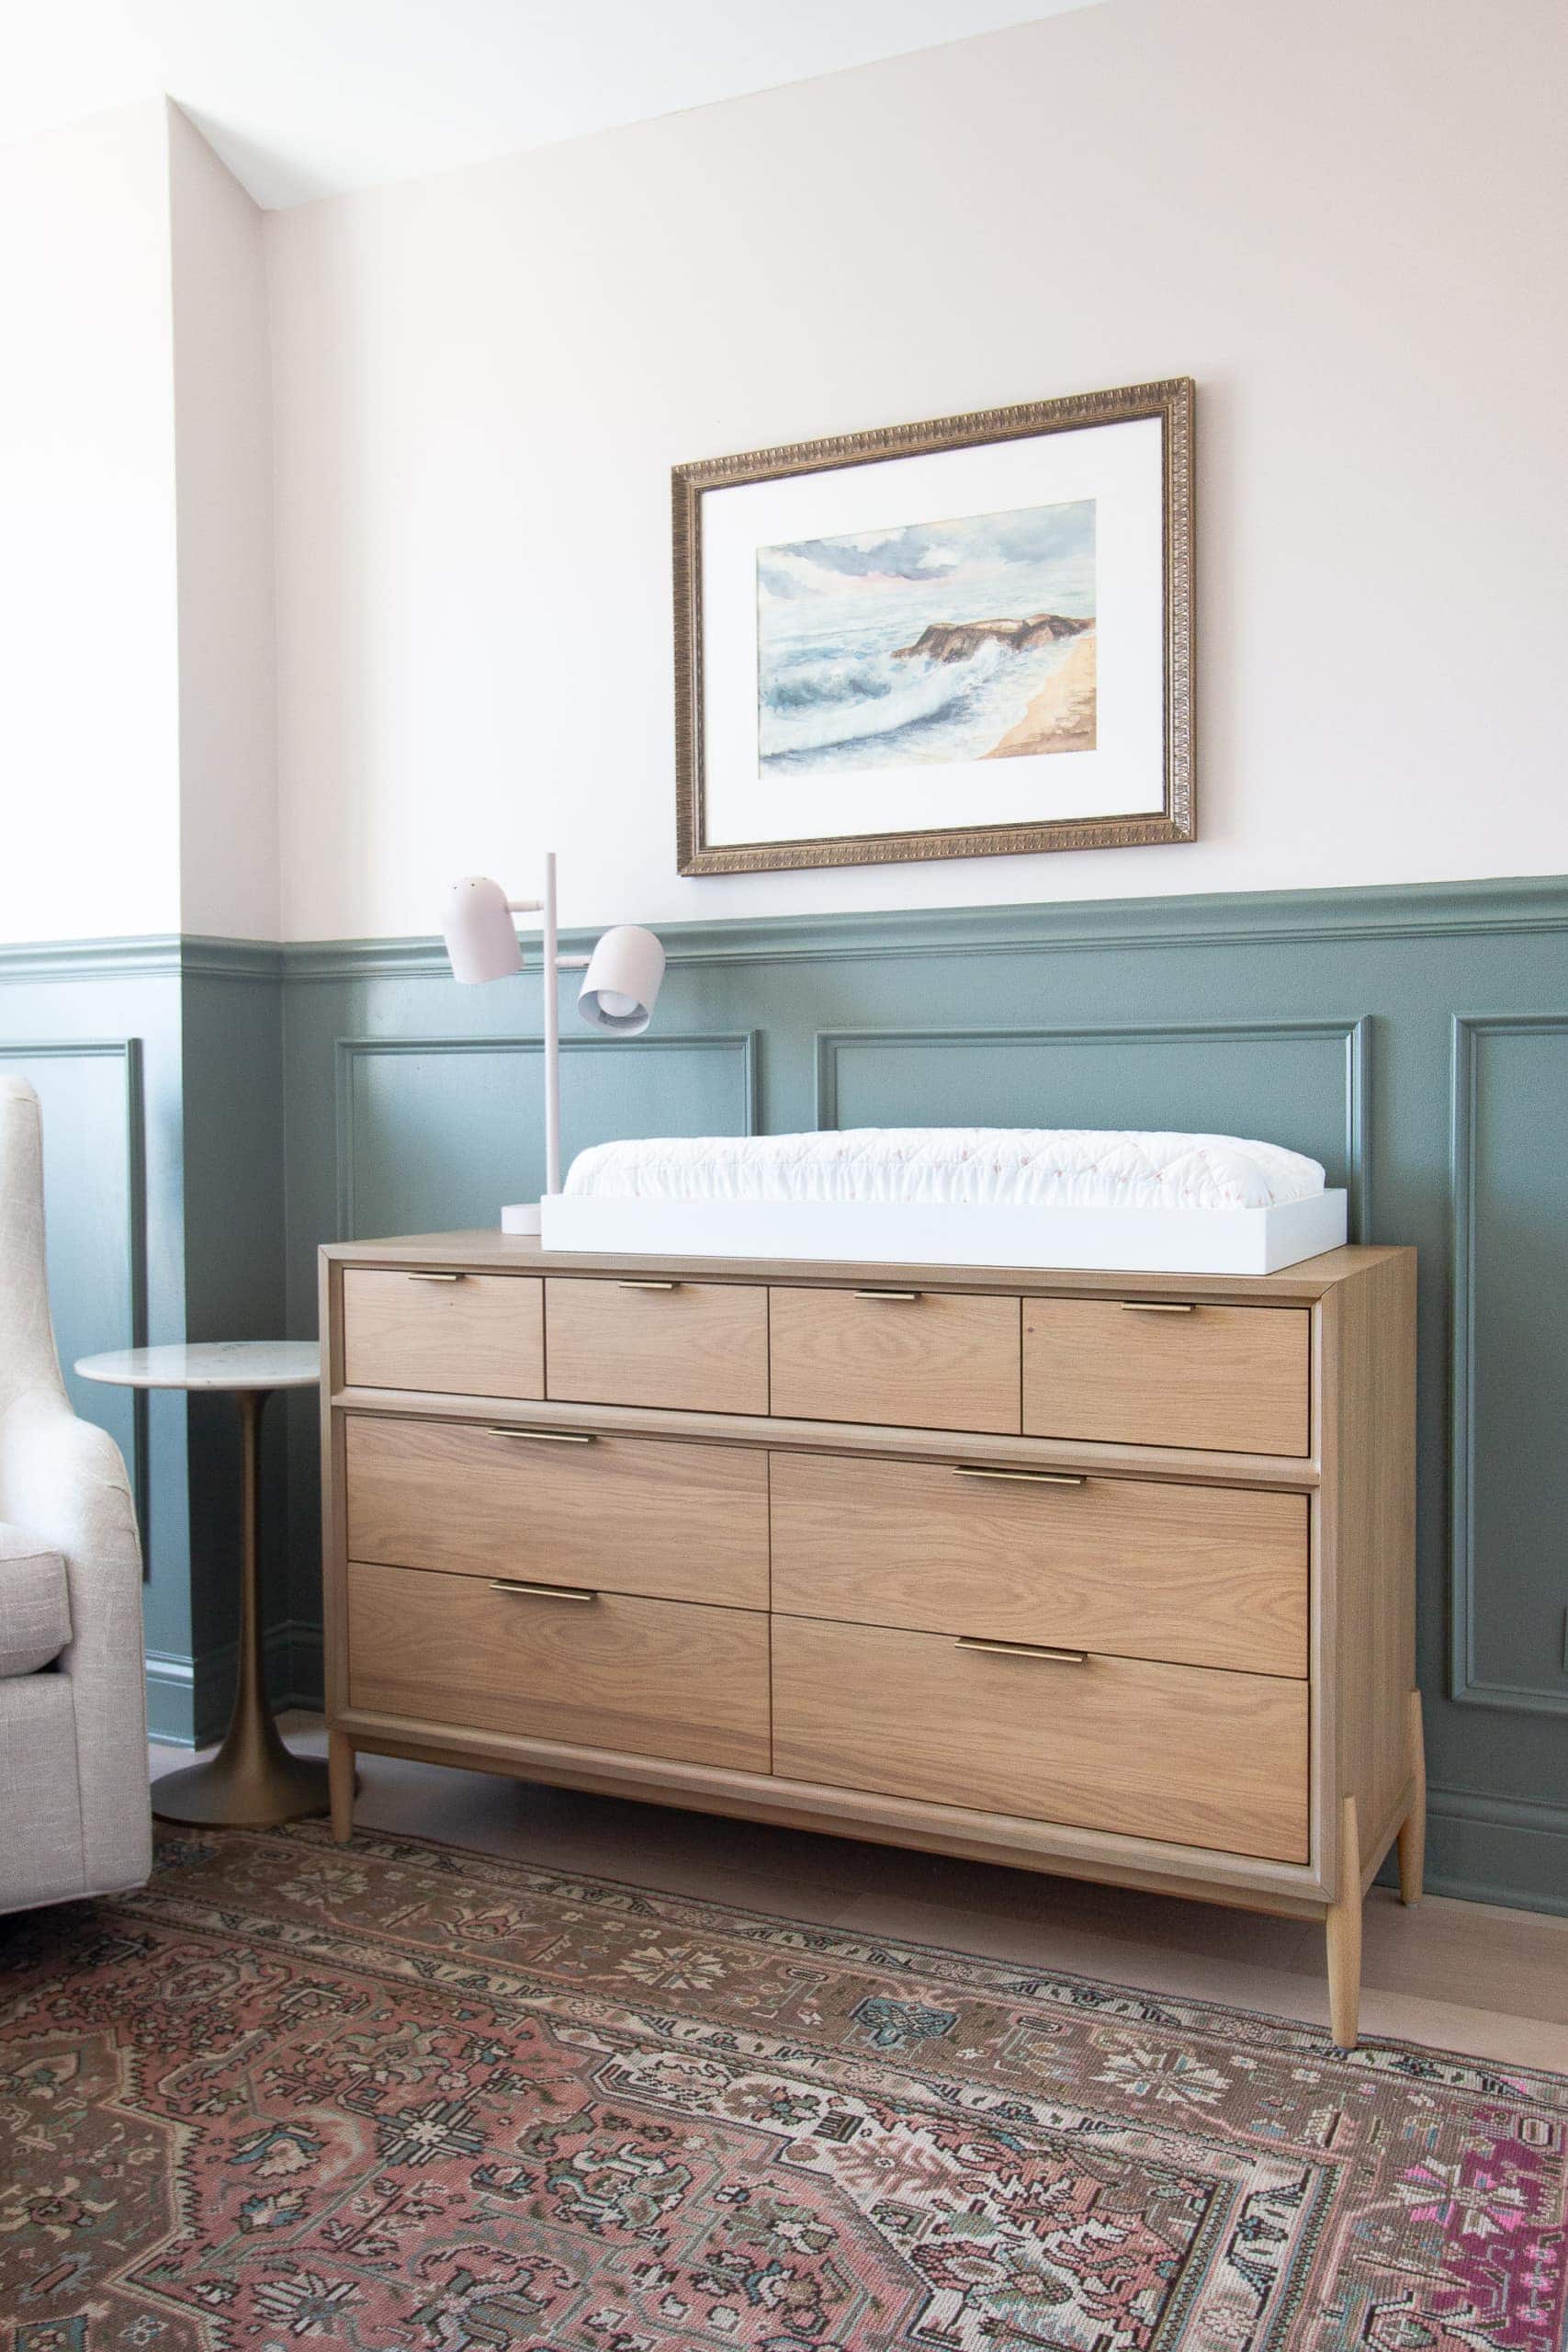
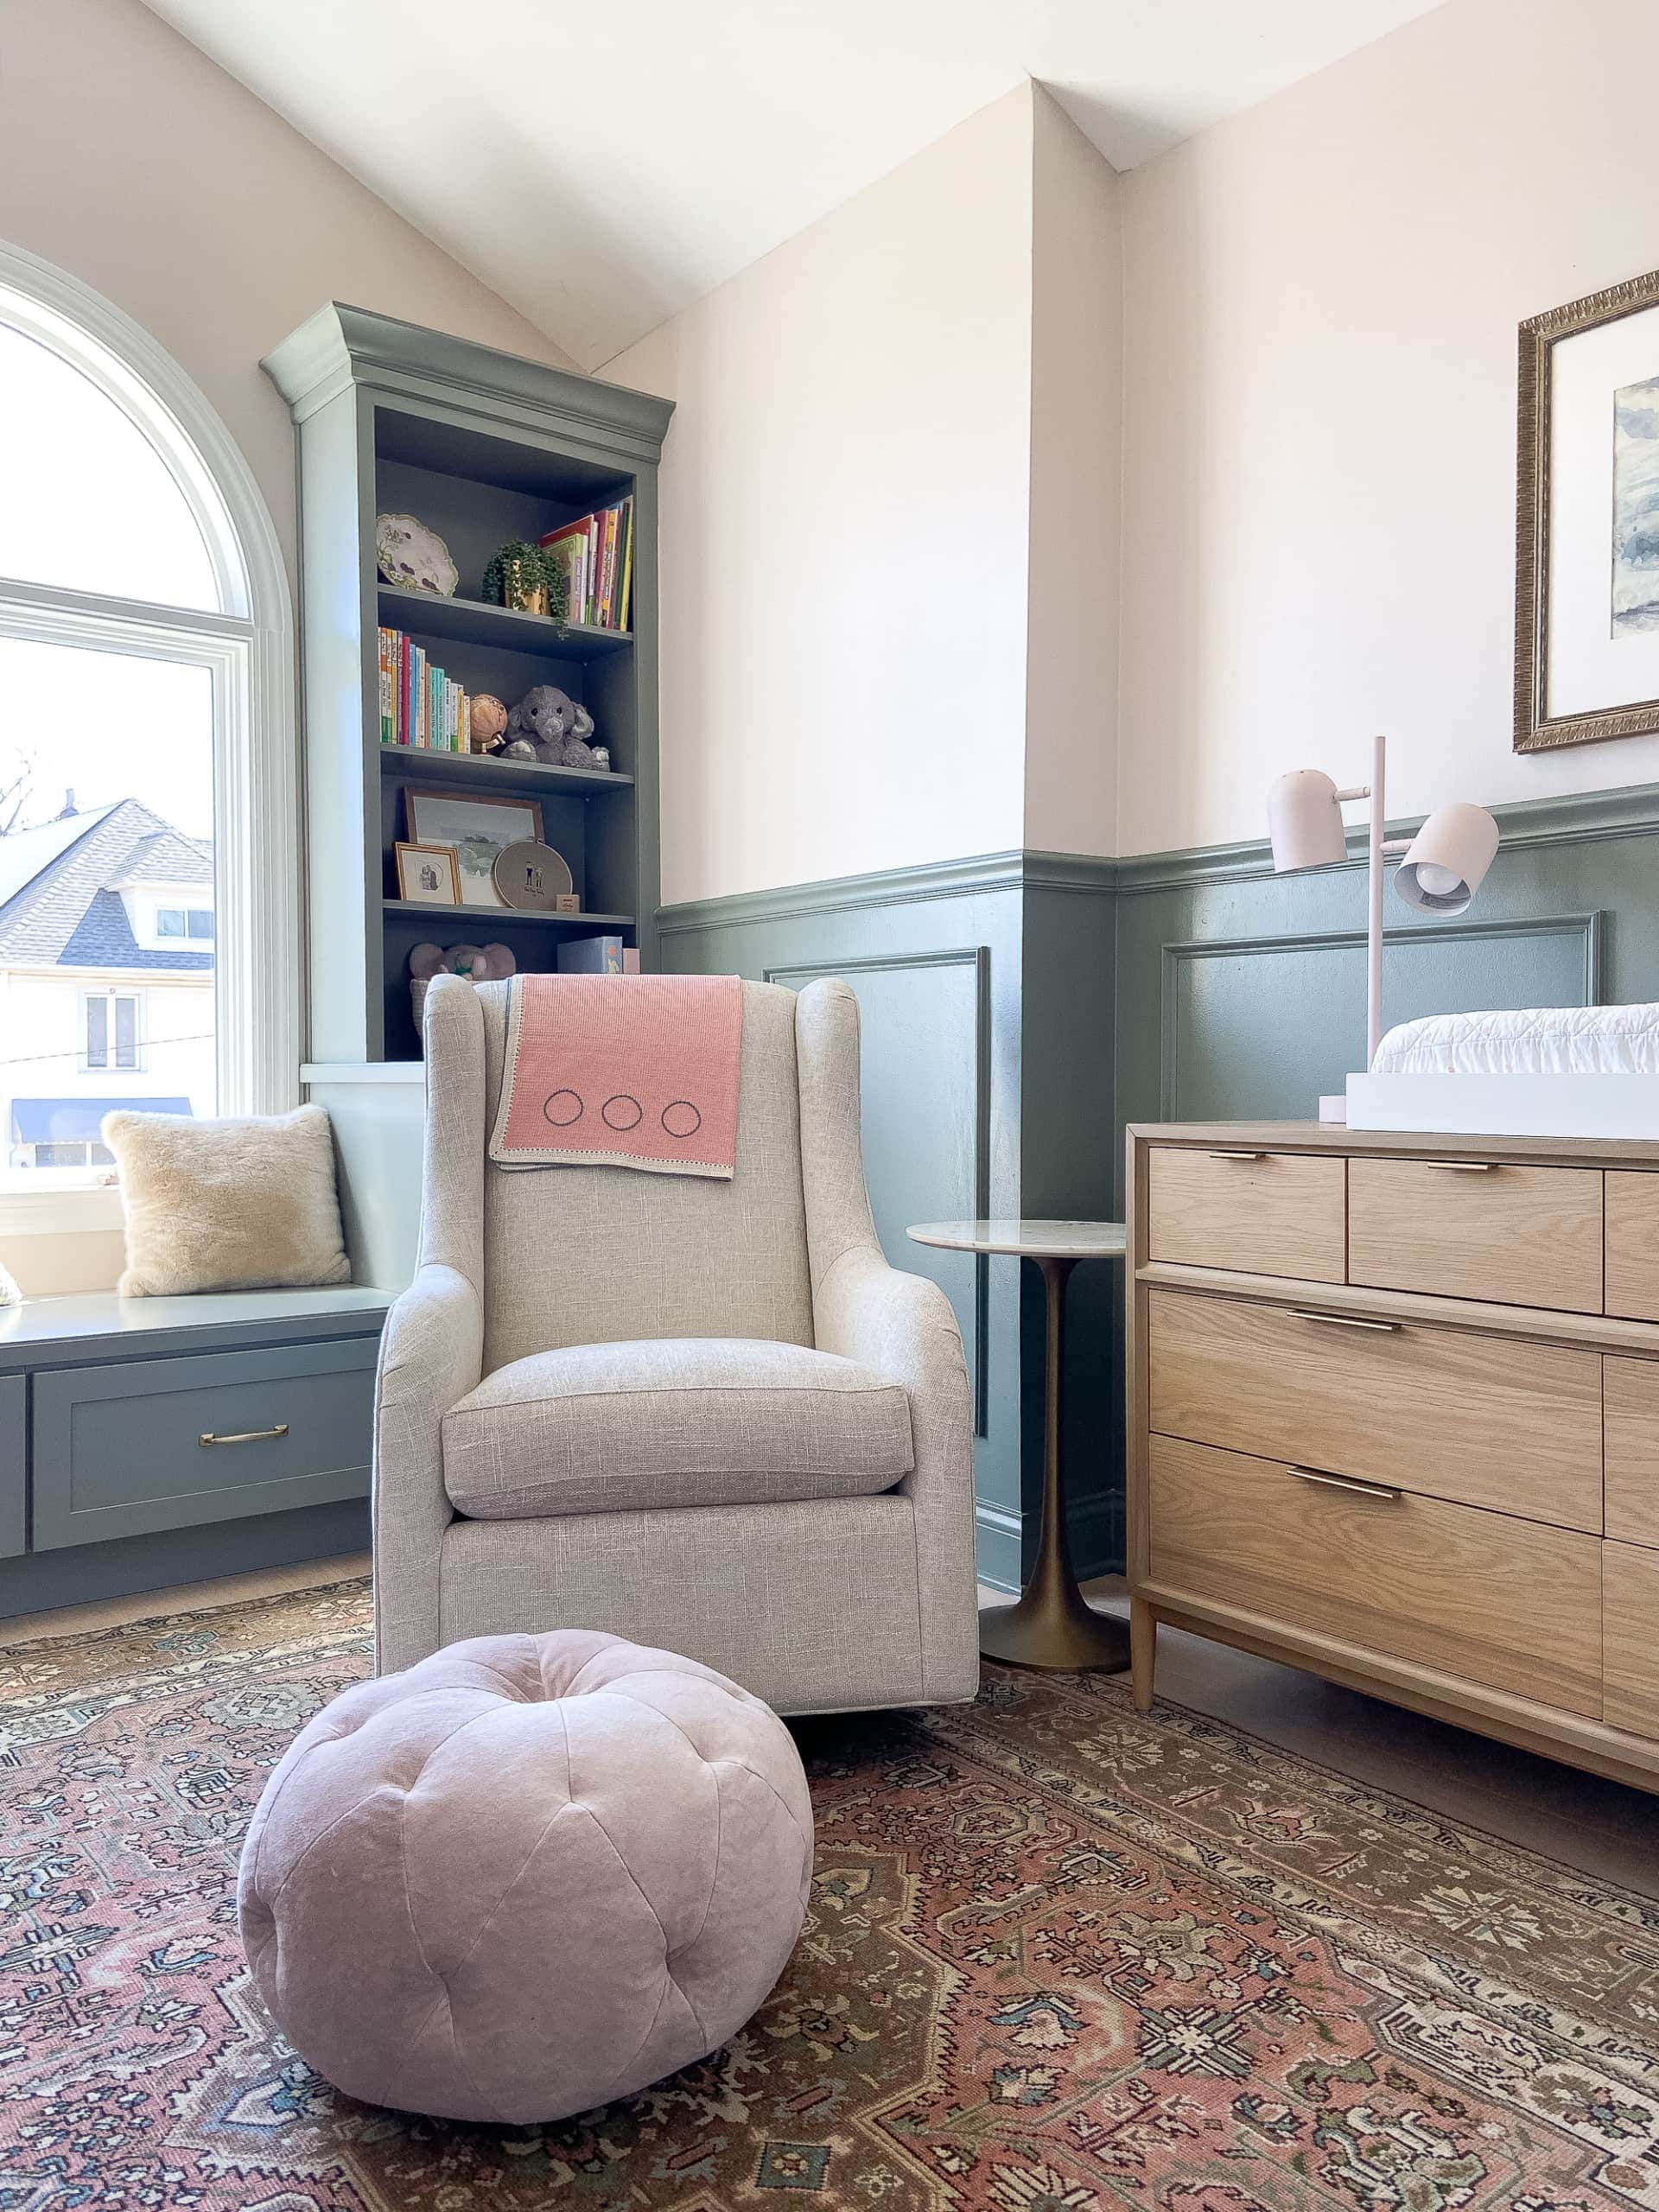
Wood Dresser // Table Lamp (spray painted this color) // Changing Pad Topper // Changing Pad // Changing Pad Cover // Watercolor Art (painted by my great grandmother) 
Glider (similar) // Velvet Pouf (similar) // Marble Side Table // Pink Blanket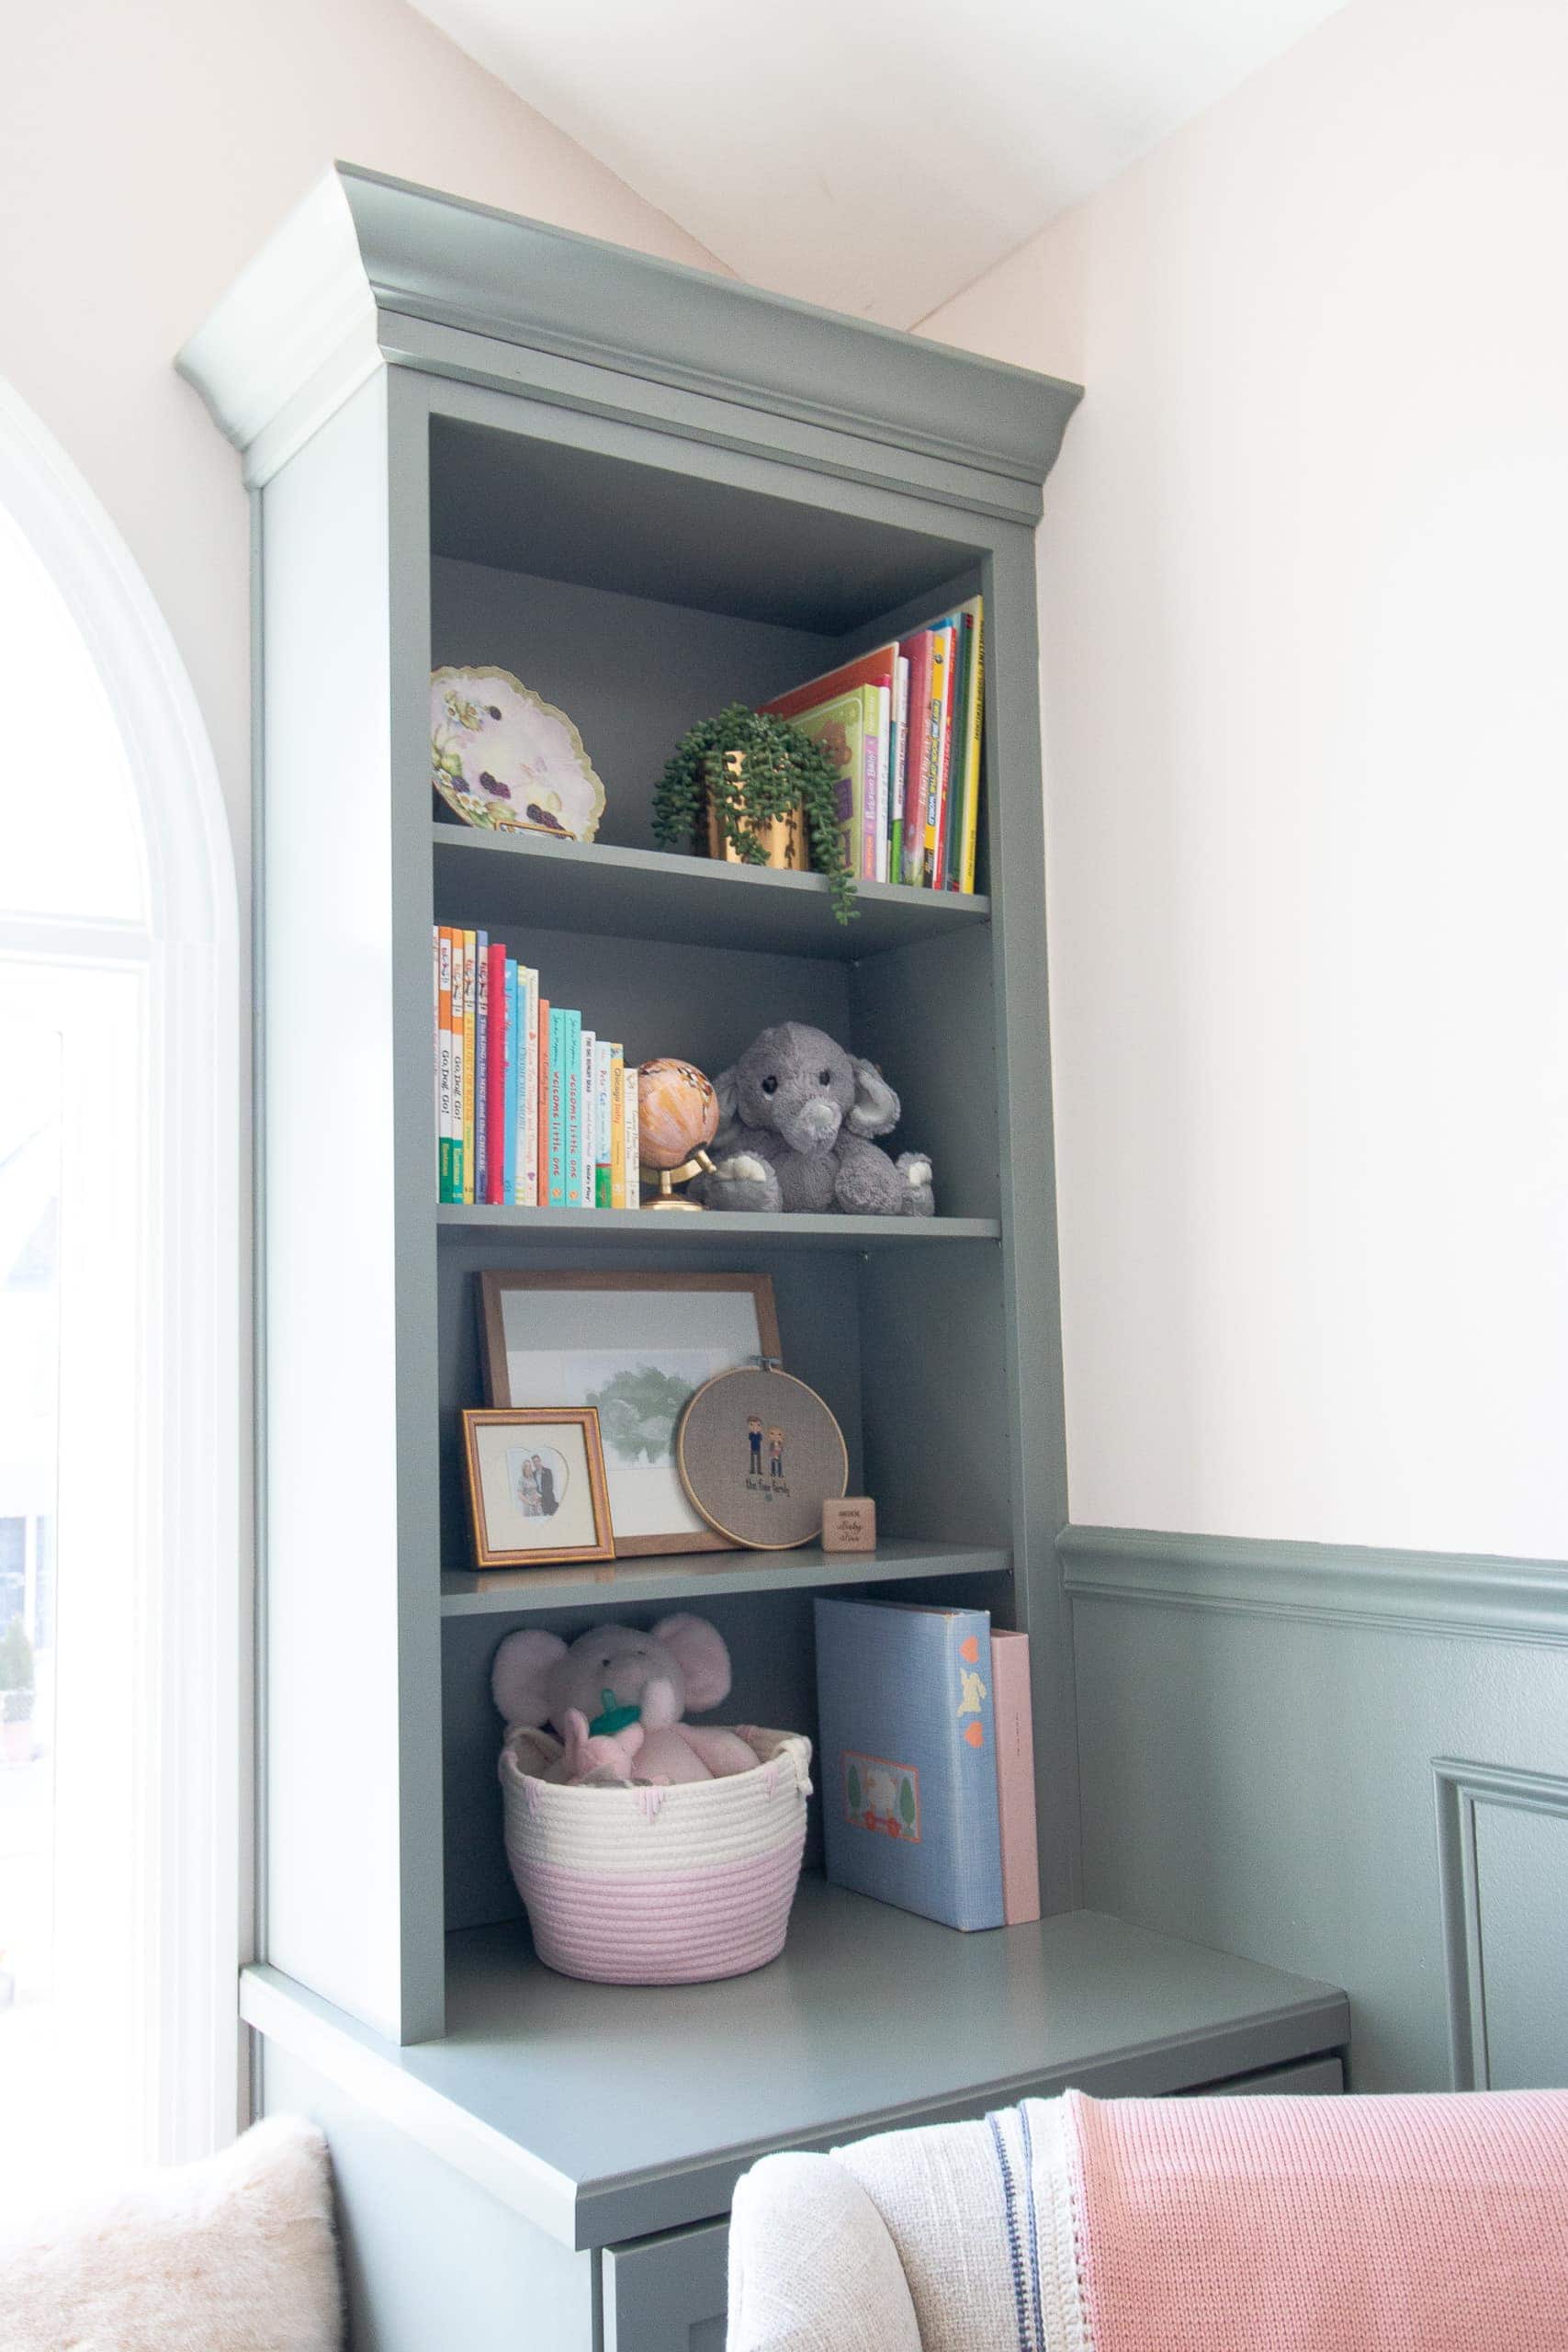
Built-In Details (top to bottom, left to right) // Plate (painted by my great grandmother) // Gold Plate Holder // Blush Globe (Anthropologie) // Elephant Stuffed Animal // Heart Frame (gift) // Wood Frame // Personalized Ultrasound // Family Stitch // Personalized Wood Block // Pink Basket (gift) // My Old Baby Book from 1988 // New Baby Book
Built-In Details (top to bottom, left to right) // Virgin Mary (family heirloom) // Toy (from Finn’s childhood) // Artwork // Stacking Rings // Personalized Pillow (gift) // Painted Teacup (great-grandmother painted) // Rabbit (gift) // Ceramic Elephant (vintage) // Wooden Blocks // Basket (gift) // Elephant Planter (HomeGoods) // Lumbar (no longer available)

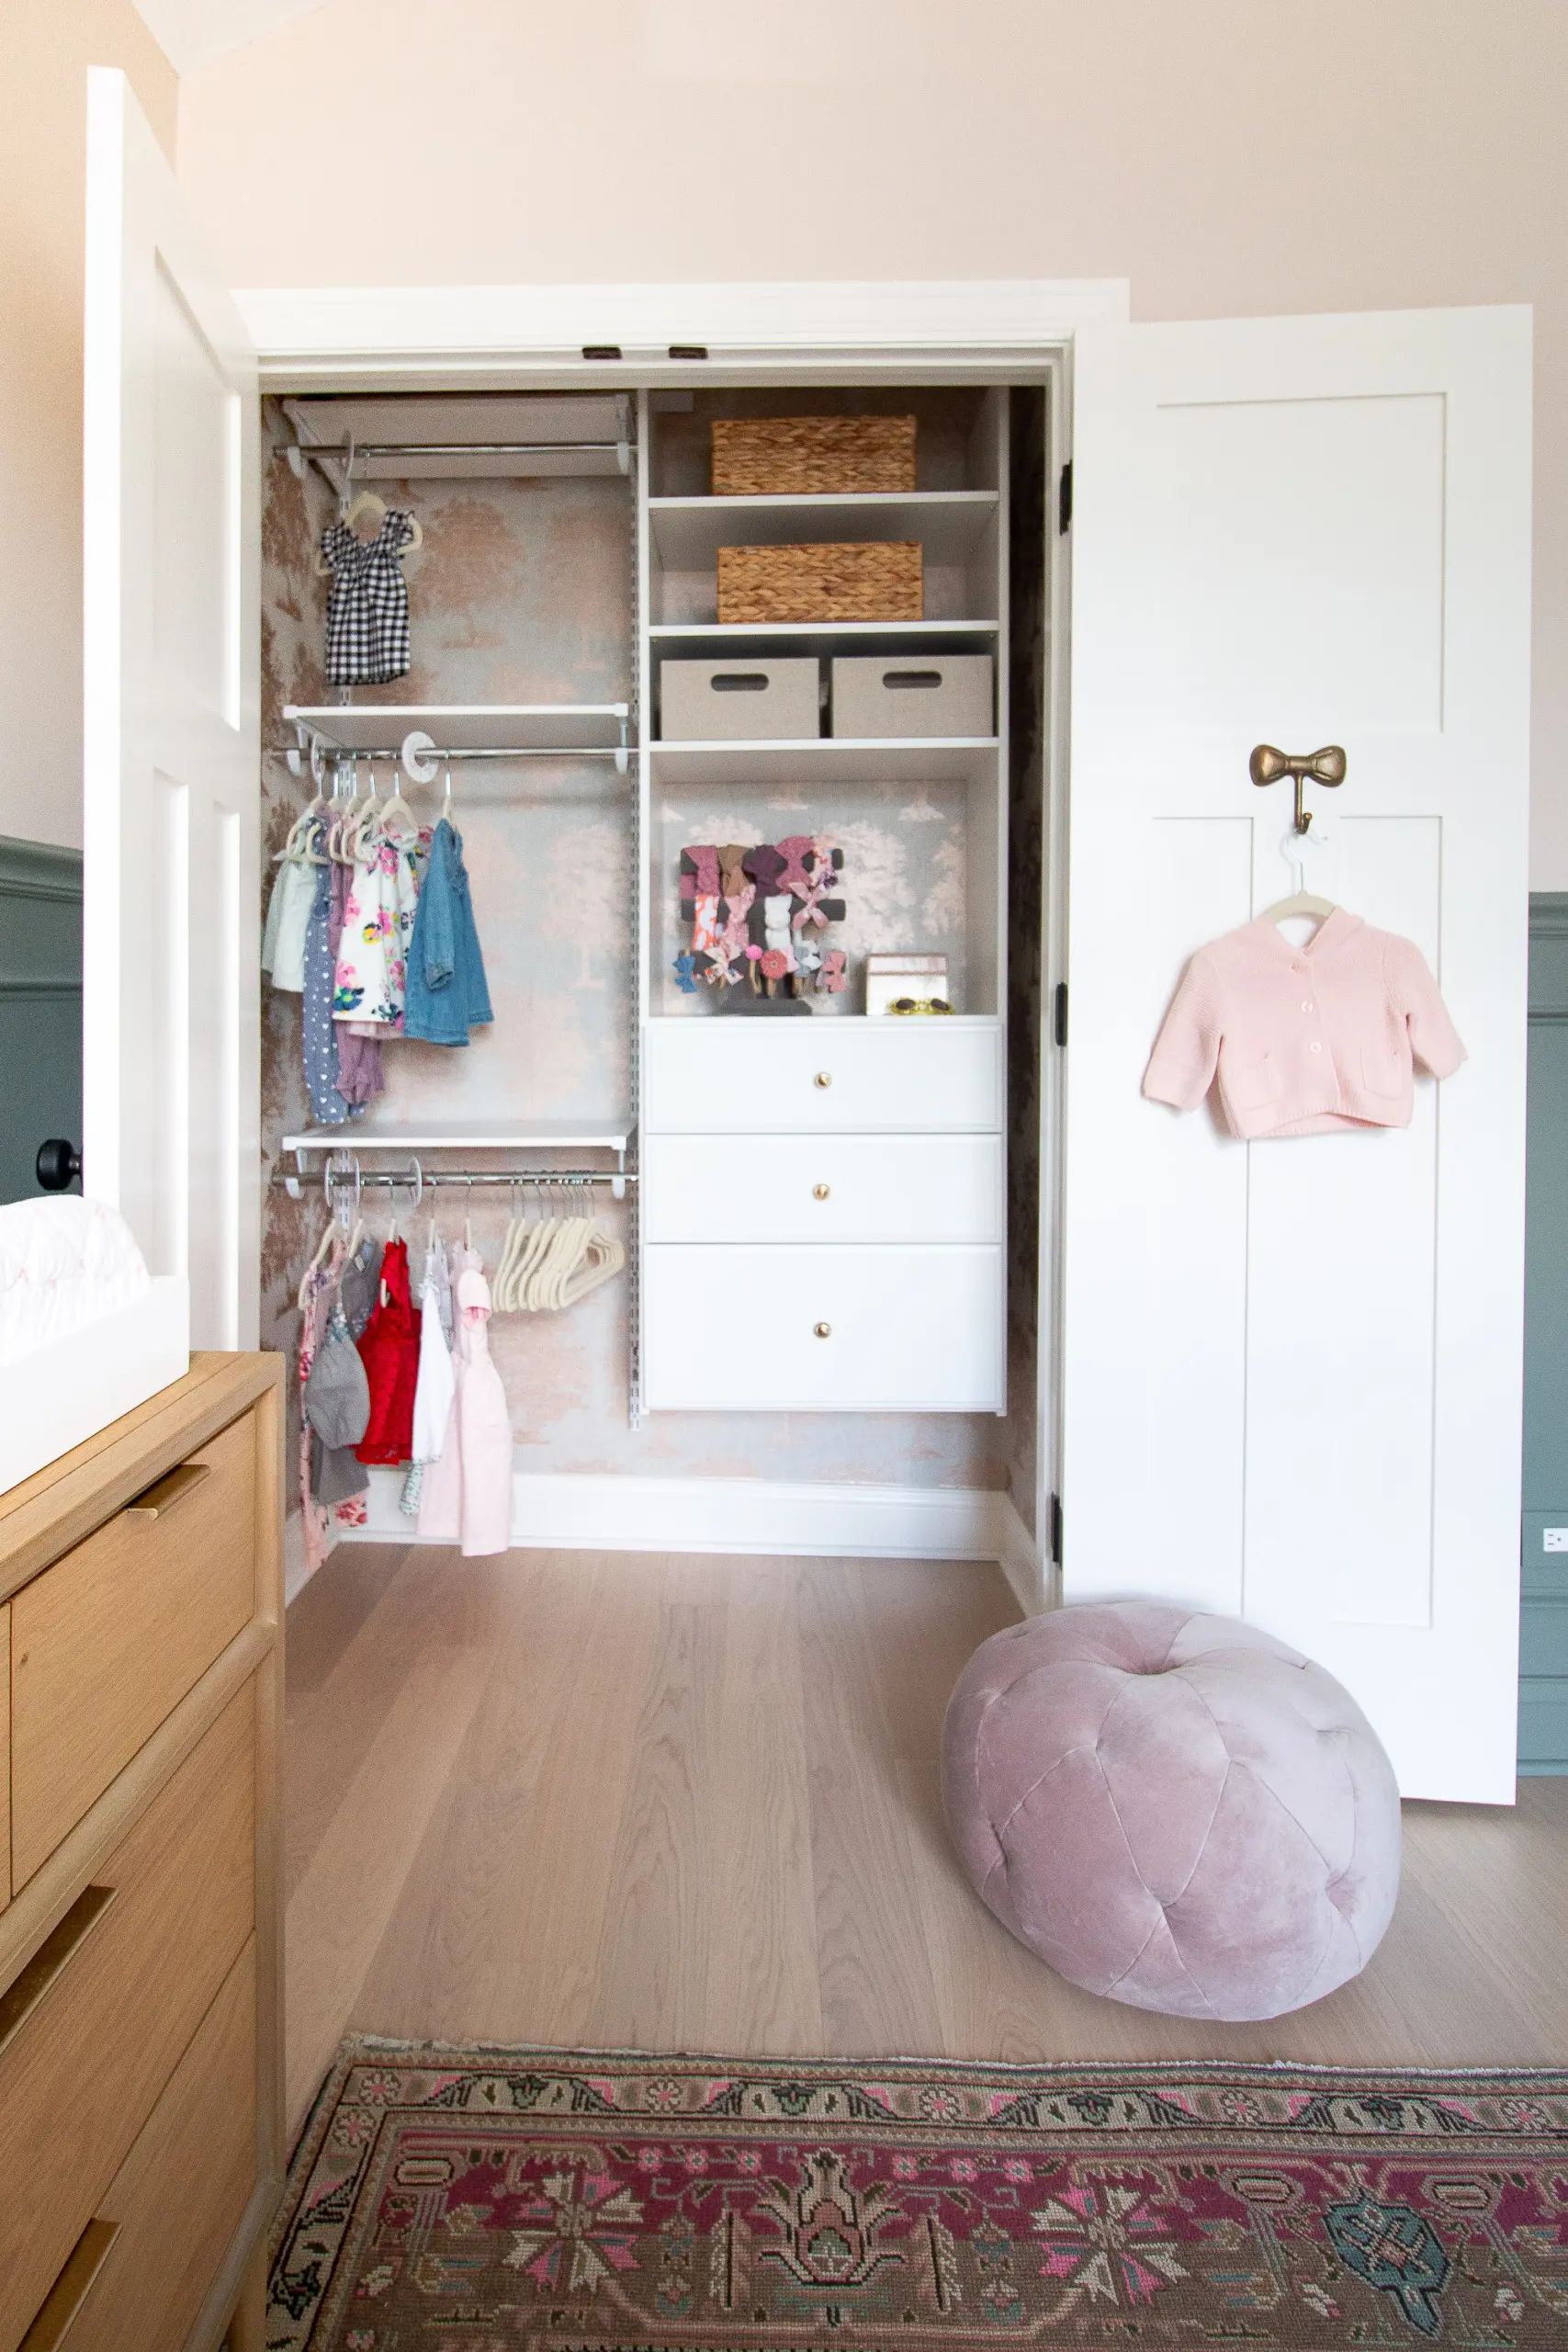
Wallpaper // Wicker Baskets // Cream Fabric Bins // Cabinet Knobs // Easy Track White Wood Closet Kit// Bow Hook // Bow Holder // Size Dividers // Baby Hangers // Closet Tutorial
Window Treatments
The last thing left on my to-do list are window treatments and the window bench seat. I placed the order at the beginning of March but the pandemic stopped production. So we’ll be waiting on those items a while longer. Luckily, baby girl will sleep in our bedroom for a few months so we should have plenty of time to get it all finished in here before she “moves” in. You can read more about the window treatments I chose in this blog post. And I’ll be sure to do a post about the new window treatments when I’m back from maternity leave in June.

It feels wild to think that I’ll soon be sitting in this rocking chair with our baby girl. I’ve dreamed of this for years and putting this nursery together was the most joyful experience for me. Any time an item would arrive for the room I would squeal with delight. The evening Finn and I finished this space up, we sat in the room for hours just talking and imagining what our days will soon be like. Our struggle to get to this point has made us appreciate and savor every moment of this experience. To think that I’ll be bringing our child home to this room next week (!!!!) makes me so incredibly happy.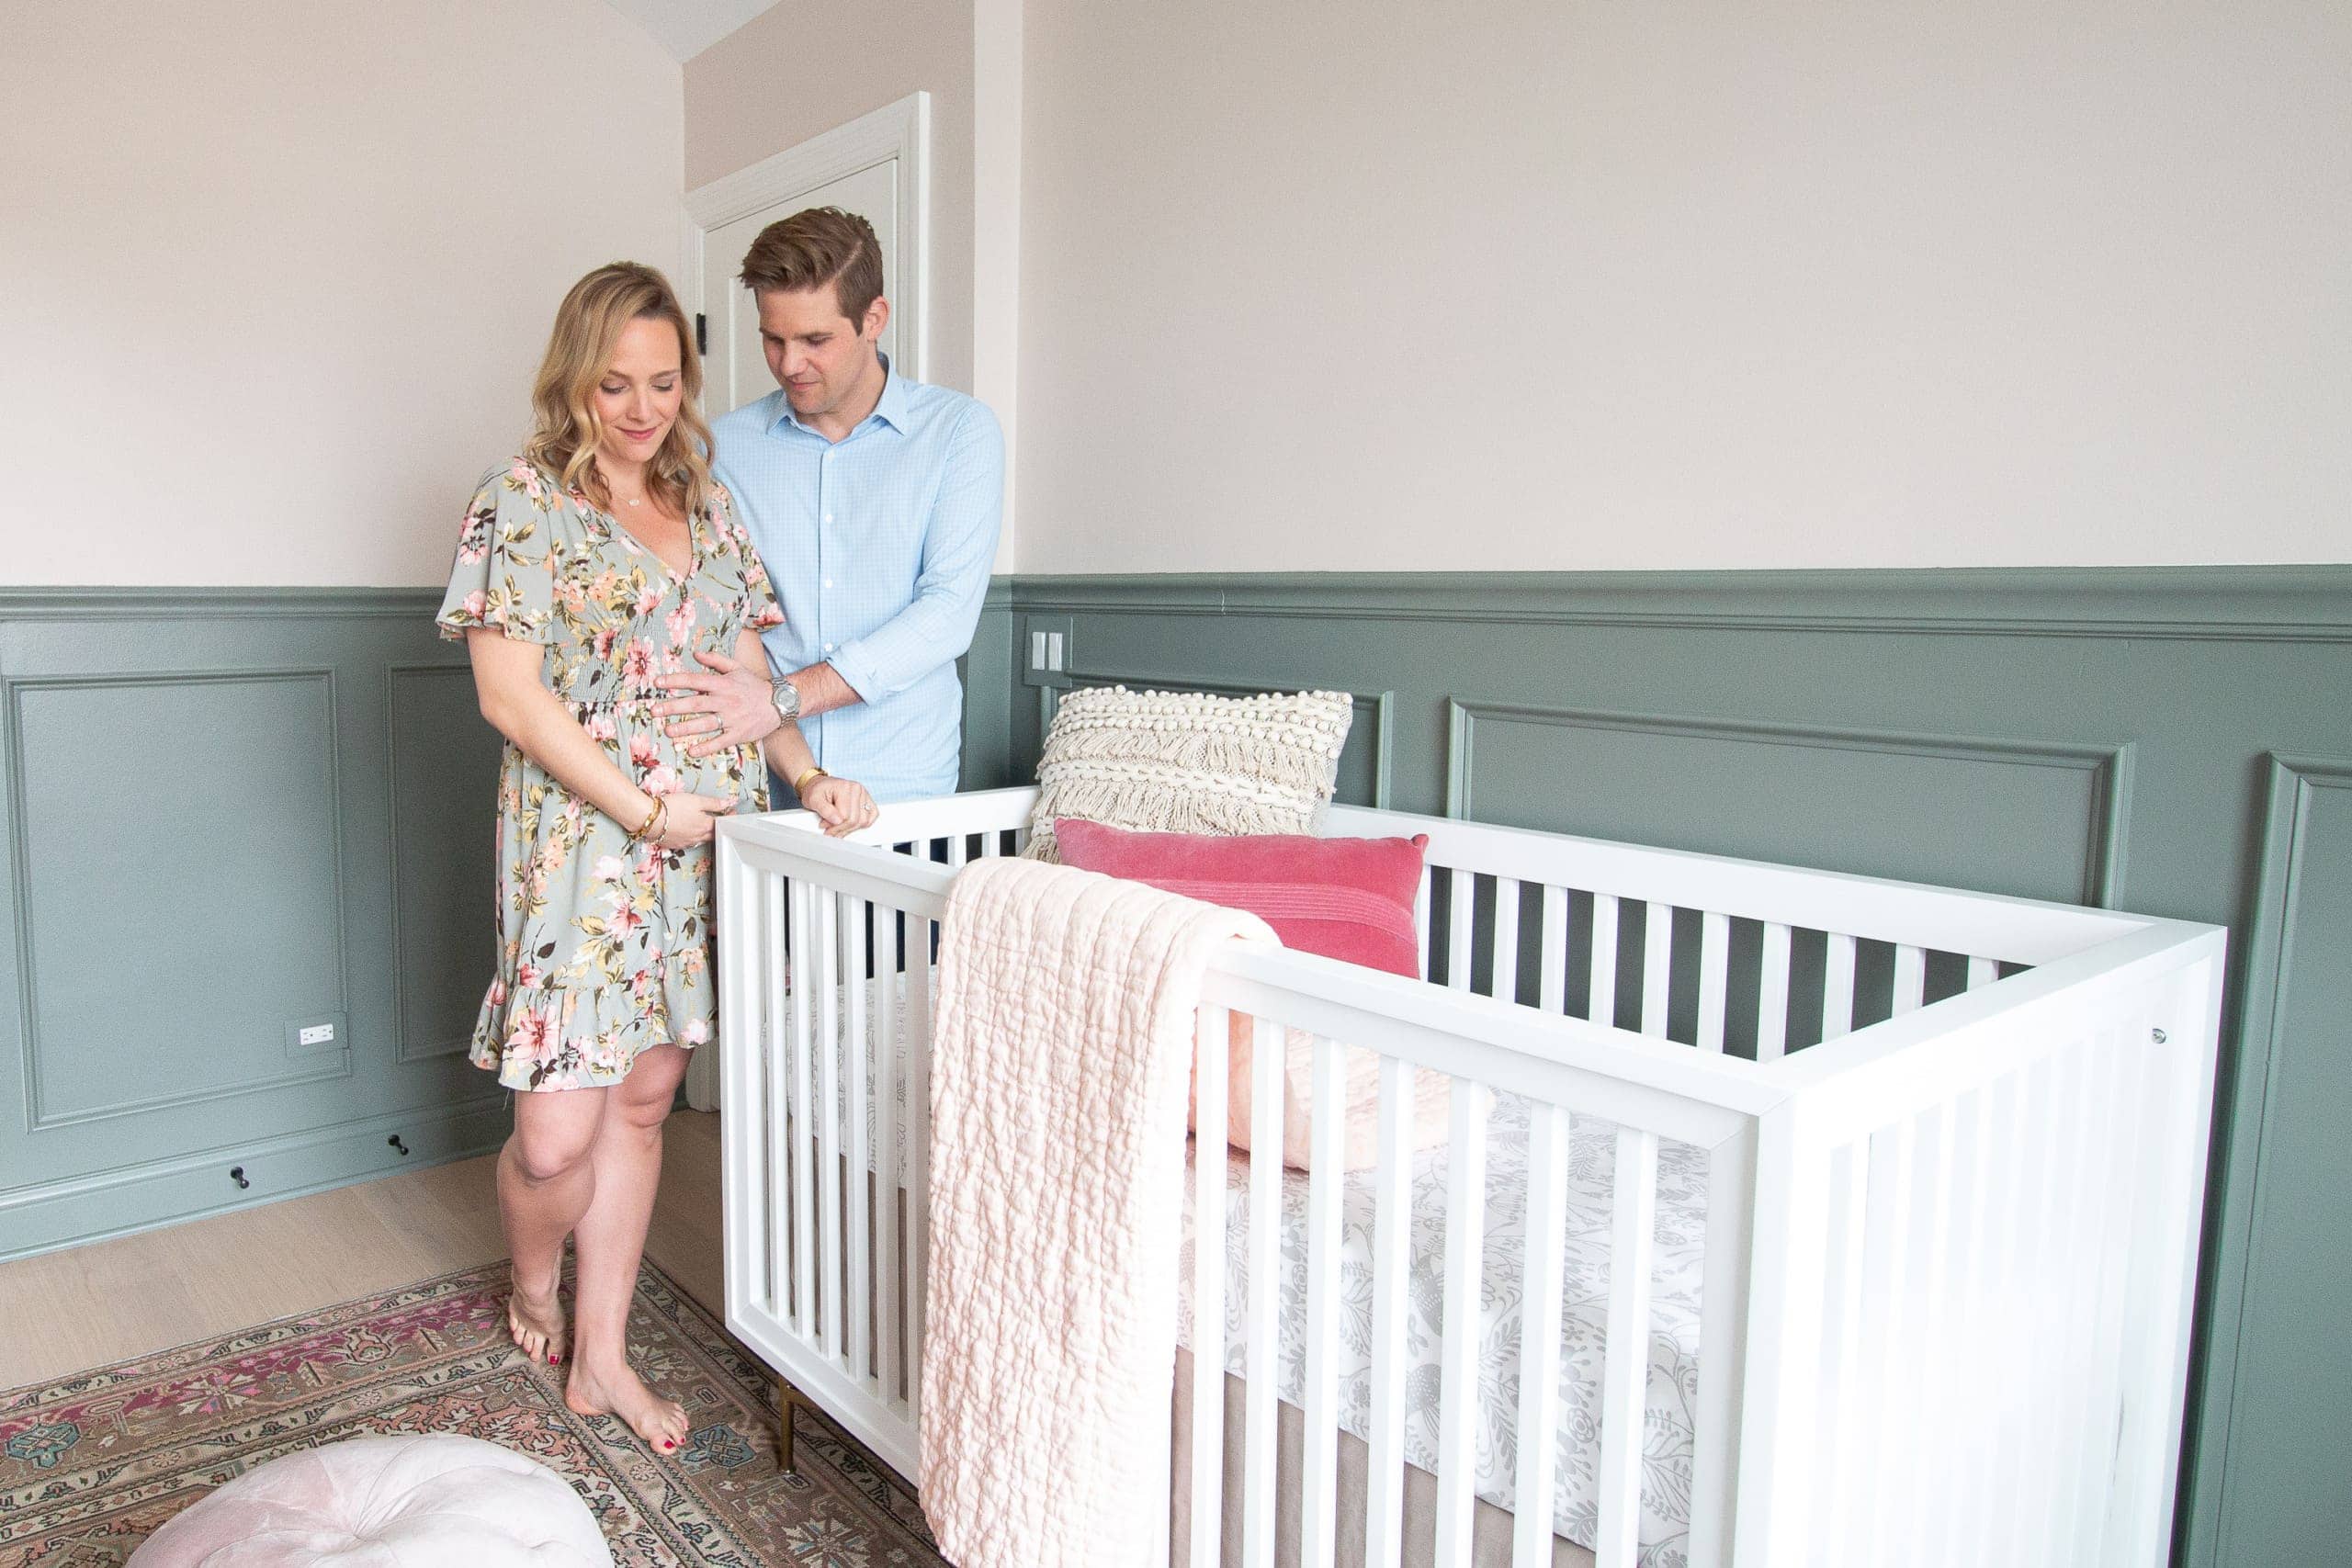
Thanks for all of your love during this process (both our journey to parenthood and the nursery design!). We’re lucky to have you cheering us on from afar.
P.S. Our sweet Rory girl is growing up. Come see her big girl bedroom almost five years later.
Casey
Nursery Posts
- Wallpapered Closet
- Nursery DIY Plan
- Sage Green Built-In Reveal
- Nursery Furniture & Design Plan
- Adding DIY Chair Rail
- Painting the Nursery Blush
- Nursery Closet & Organized Drawers
- Window Treatment Plan
- Nursery Reveal
- Nursery Before and After + Sources
- Rory’s Nursery – Changes We’ve Made
- Making Special Vintage Art for Rory’s Room
- Creating Rory’s Nursery Gallery Wall


