Creating an Organized Nursery Closet
Disclaimer: This post is sponsored by Lowe’s Home Improvement.
When designing our little one’s nursery, I knew that the most important thing would be to add as much storage as possible. Finn and I are both pretty minimal when it comes to “stuff” and we’re constantly purging and decluttering our home. But babies (and kids) come with lots of stuff (holy smokes, it’s overwhelming already) and having handy places to store all of it was key in my nursery design plan. 
The sage green built-ins have so much storage (the cabinets! the drawers! the shelves!), but they will mostly hold toys, books, and other random keepsakes. We needed a spot for all of her tiny, adorable clothes and knew that we had to create our ultimate organized nursery closet. 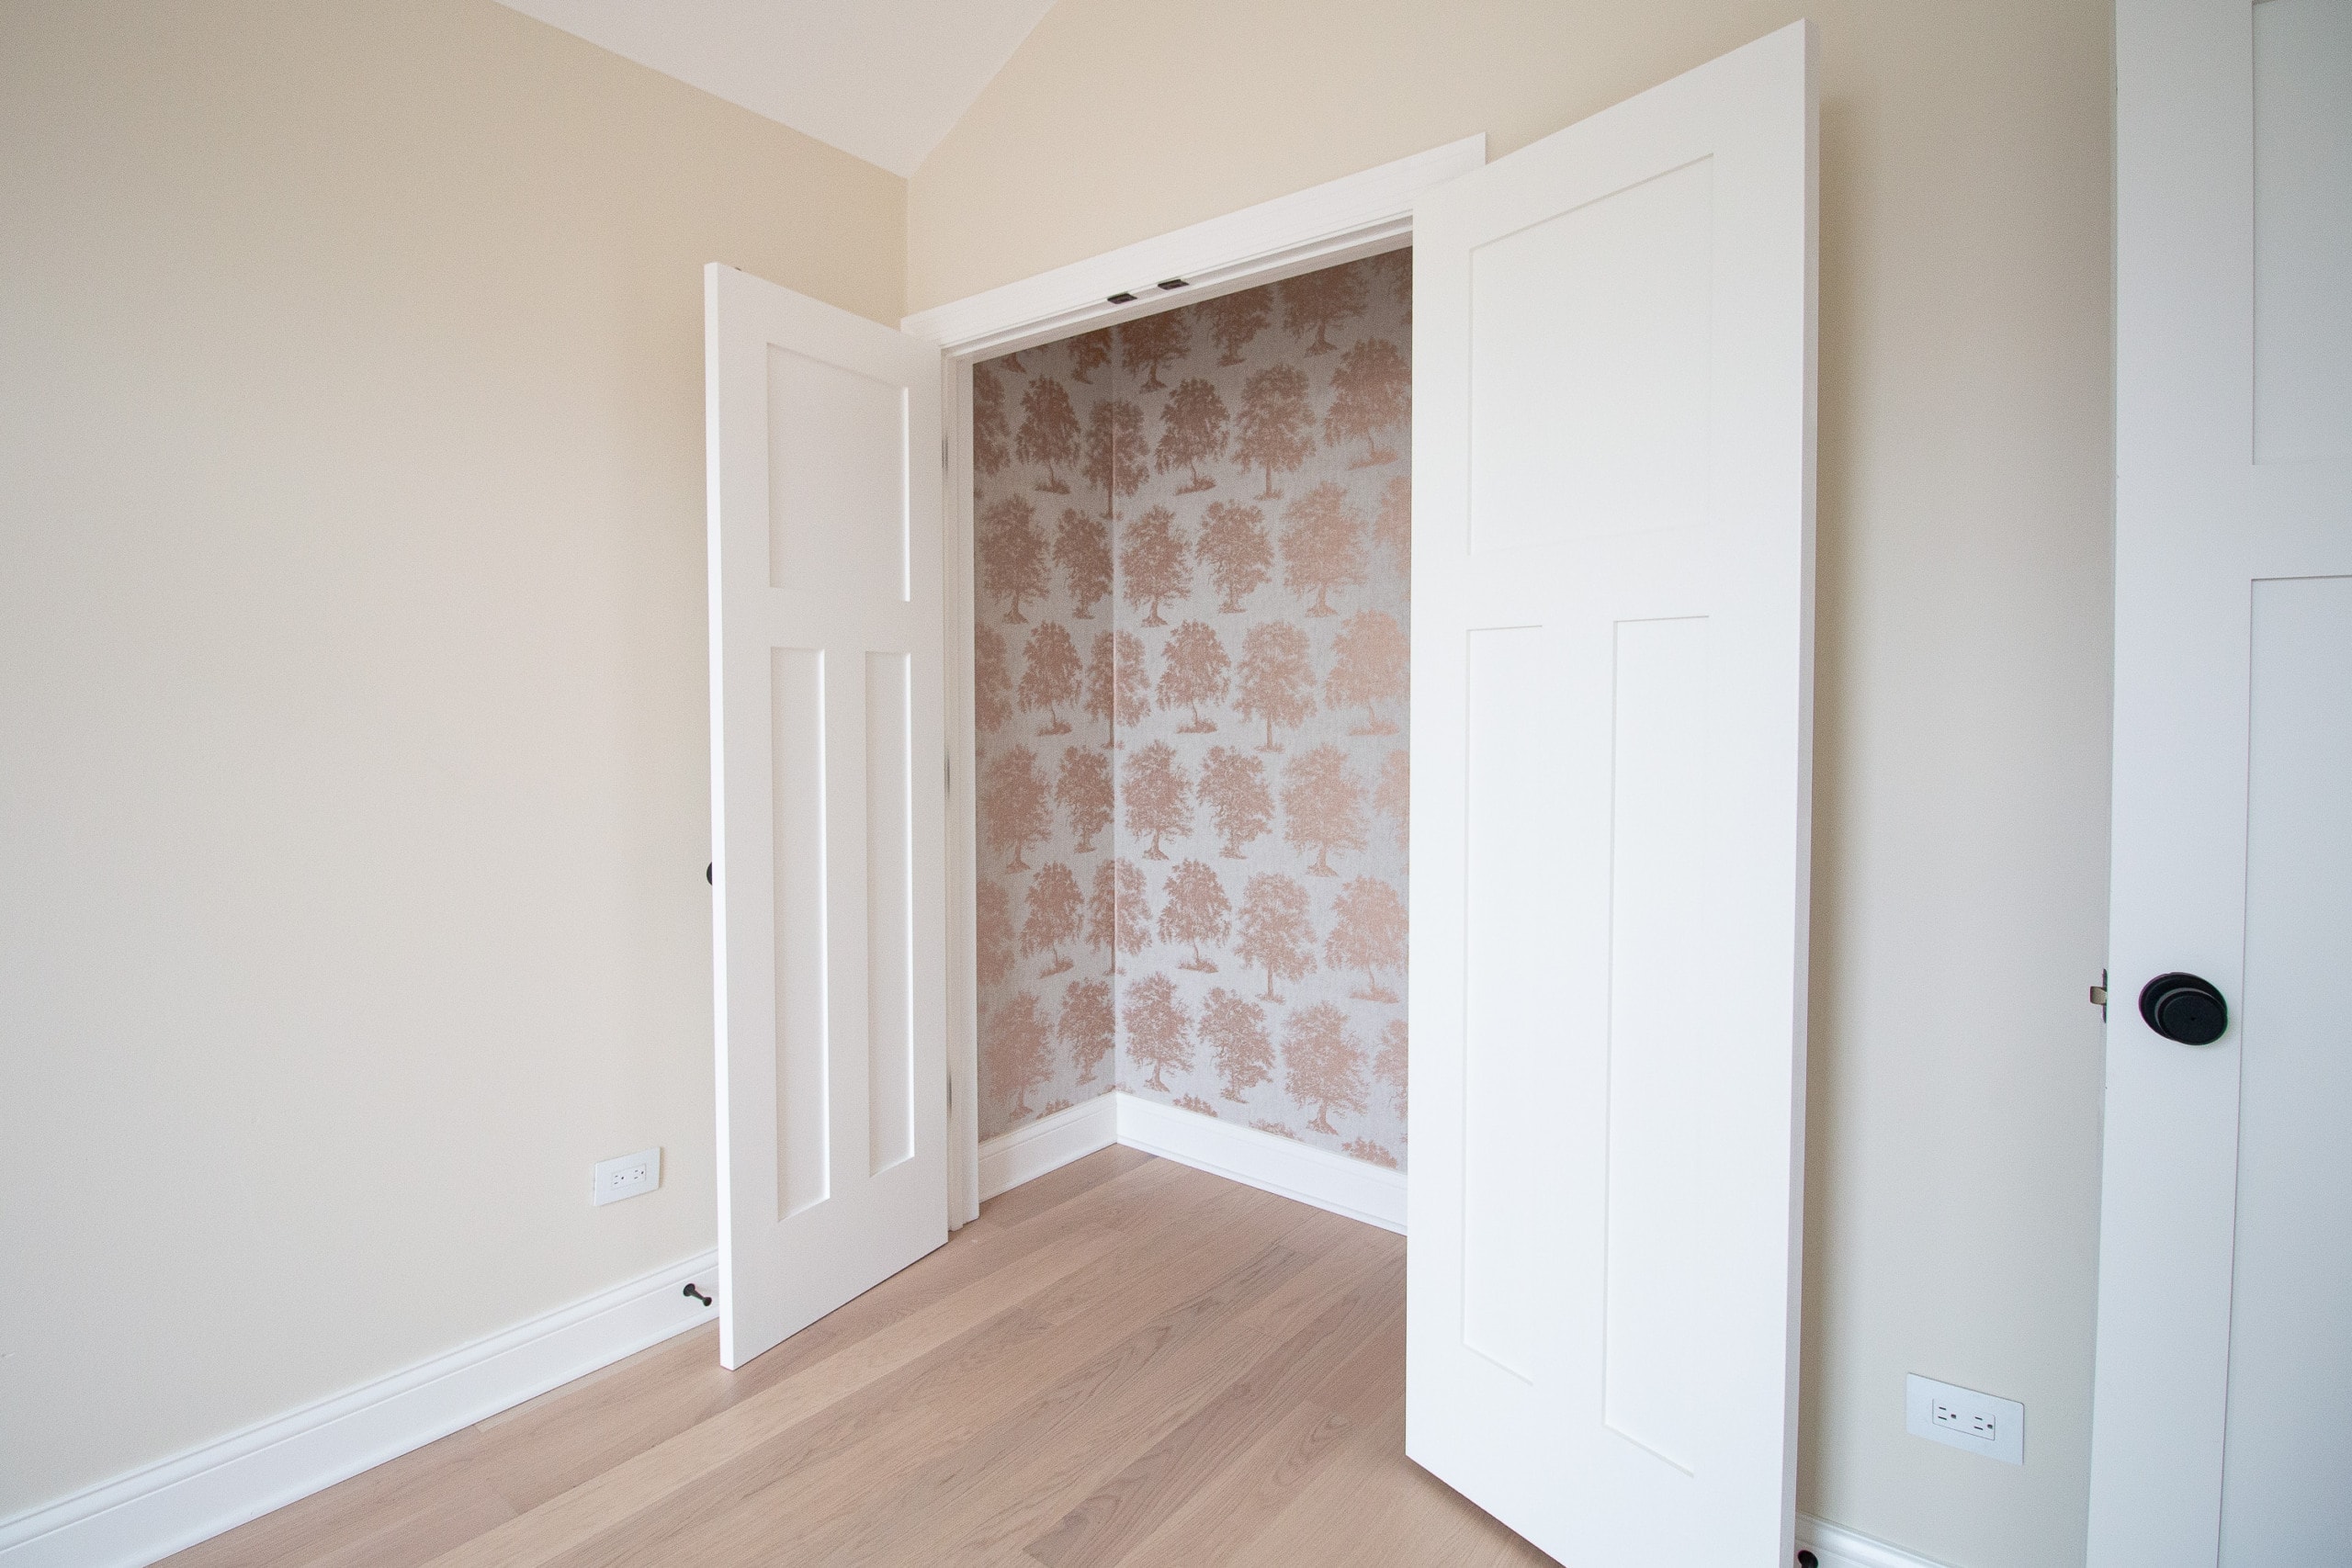
At the beginning of the year, I wallpapered the closet with the most beautiful rose gold wallpaper from Lowe’s. It then sat that empty for quite some time, as we finished up the DIY office built-ins project. Once that was finished, Finn and I started scheming about the layout for the nursery closet and how to best maximize the space.
Our Organized Nursery Closet – Supplies
We ended up combining two closet systems from Lowe’s to create this. Our closet is 53 inches wide by 97 inches tall and about two feet deep, and we wanted to make the most of every square inch of space. Here’s what we bought to create the finished product.
- Hanging Rod (2)
- Shelf Brackets (6)
- Shelving Rail
- Hardware Kit
- White Shelves (3)
- Rod Hangers (2)
- Shelving Uprights (2)
- Cabinet Knobs
- Easy Track White Wood Closet Kit
Tips for Closet Installation
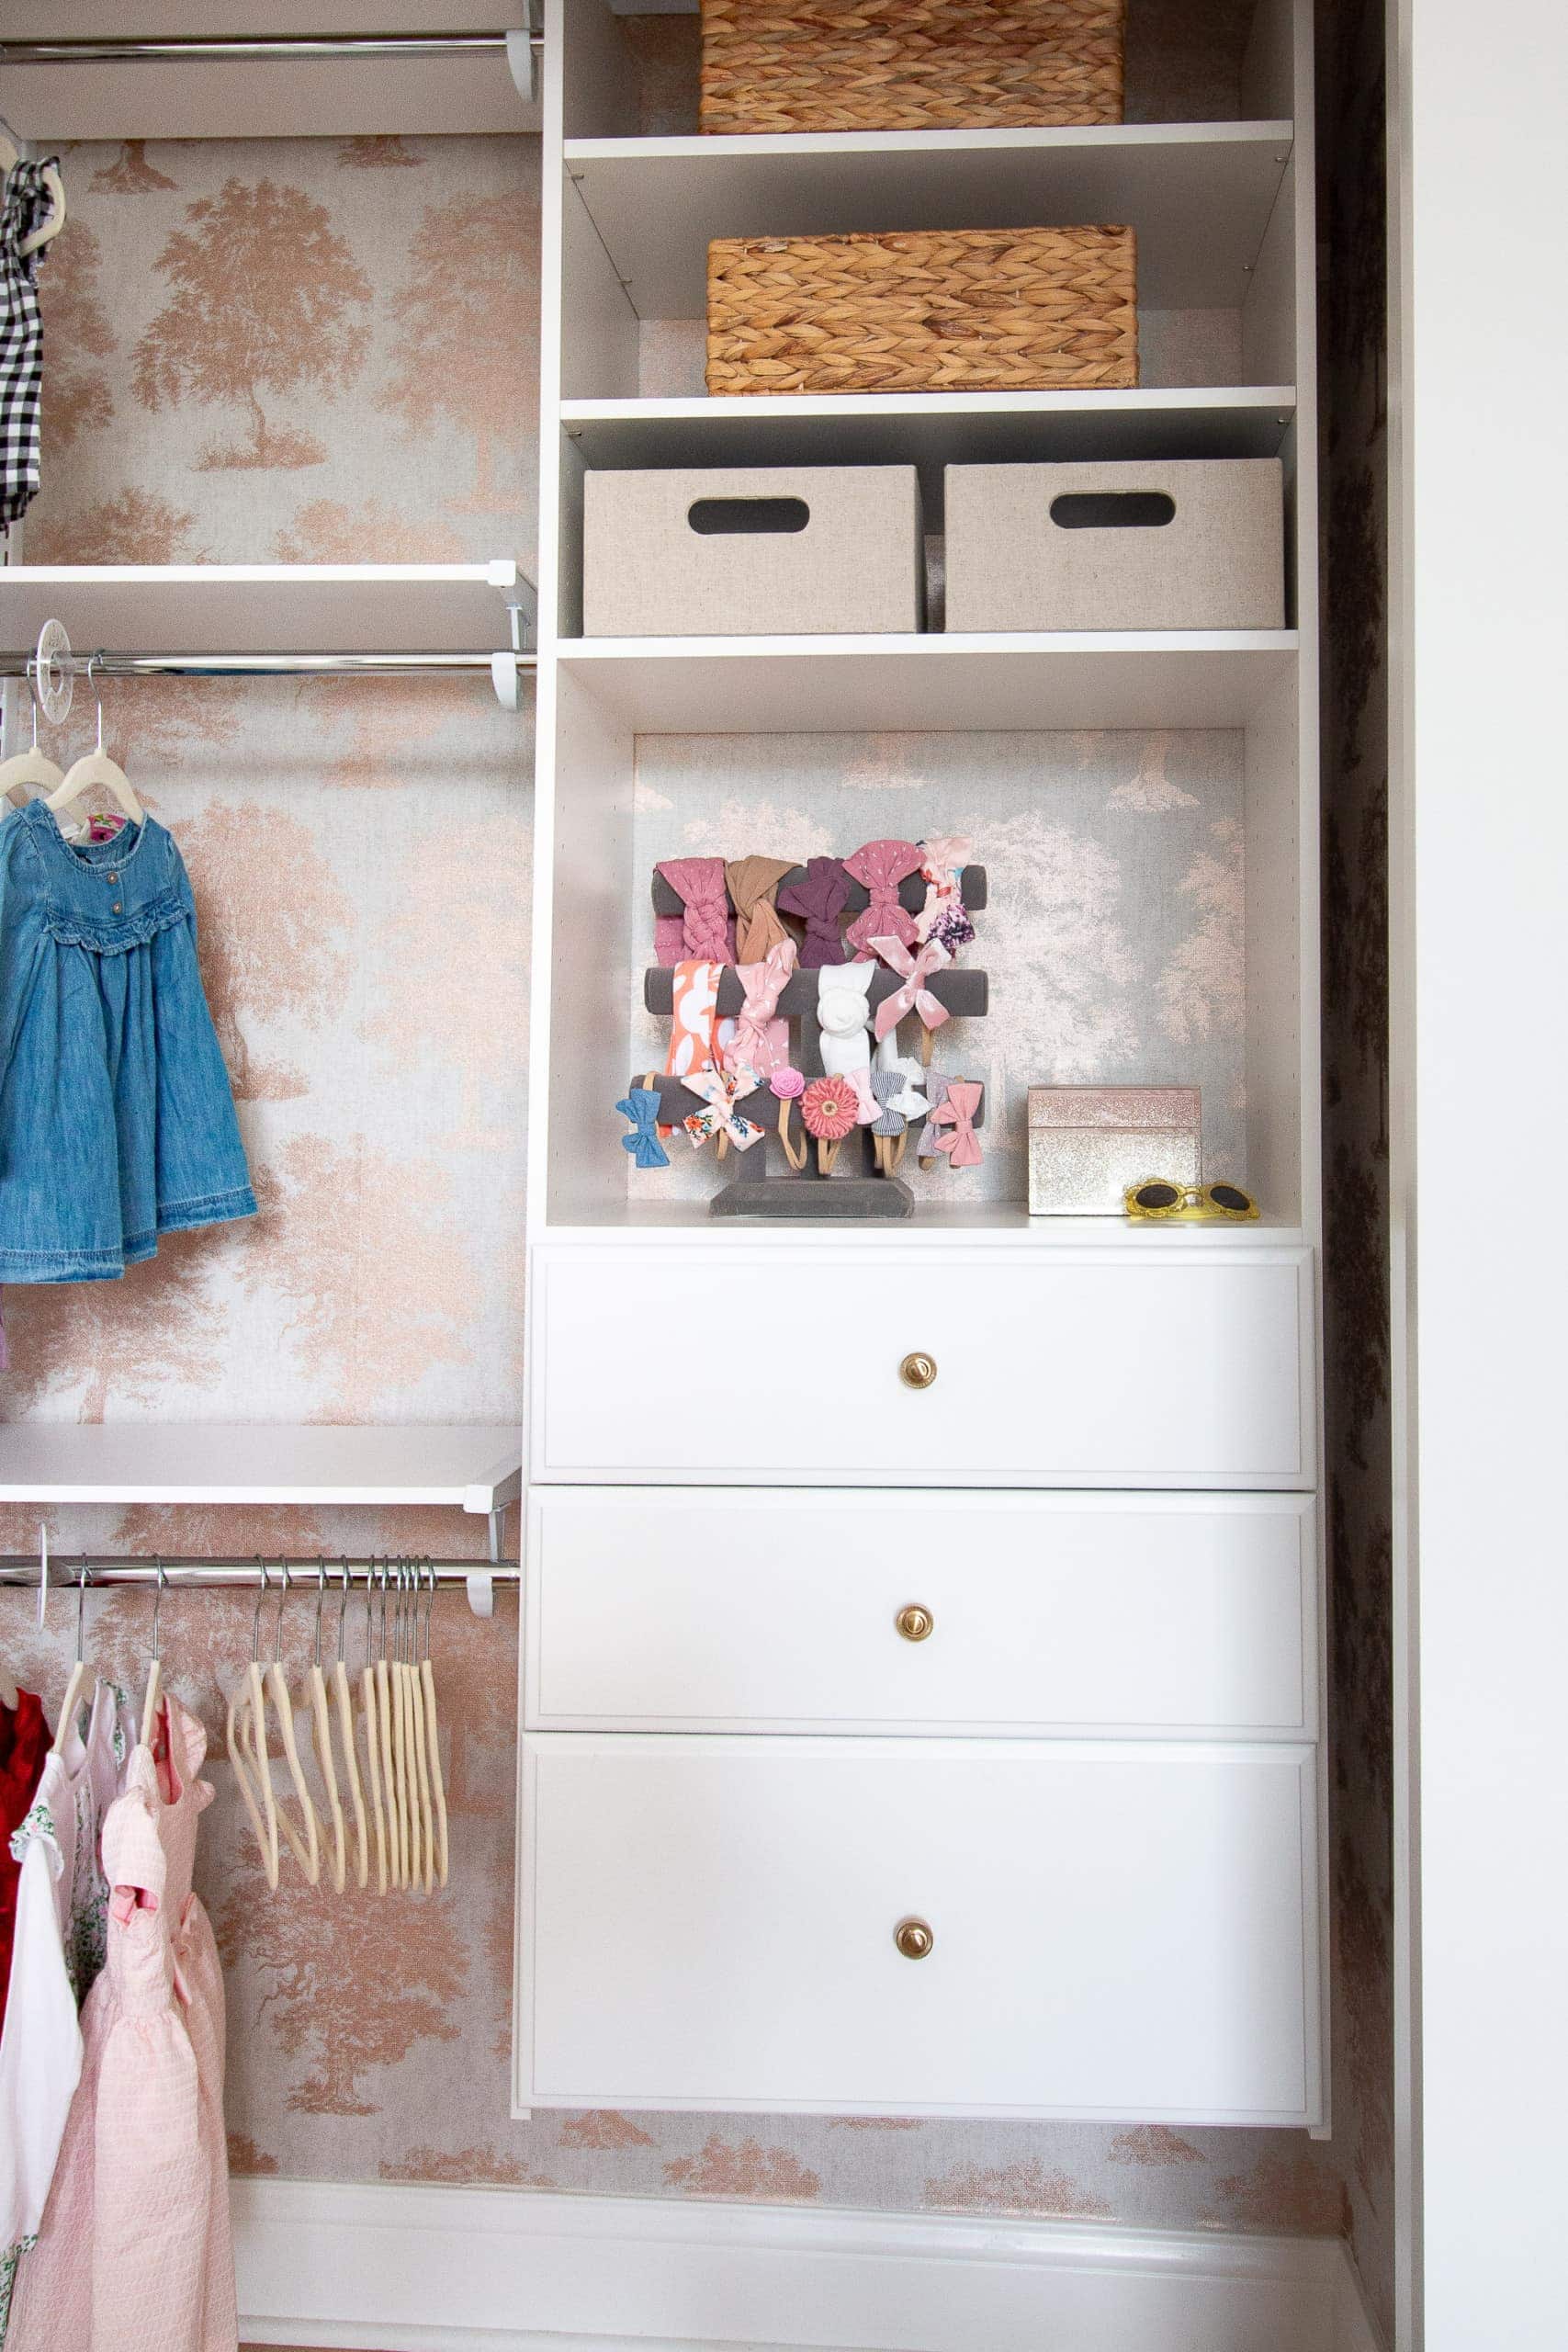
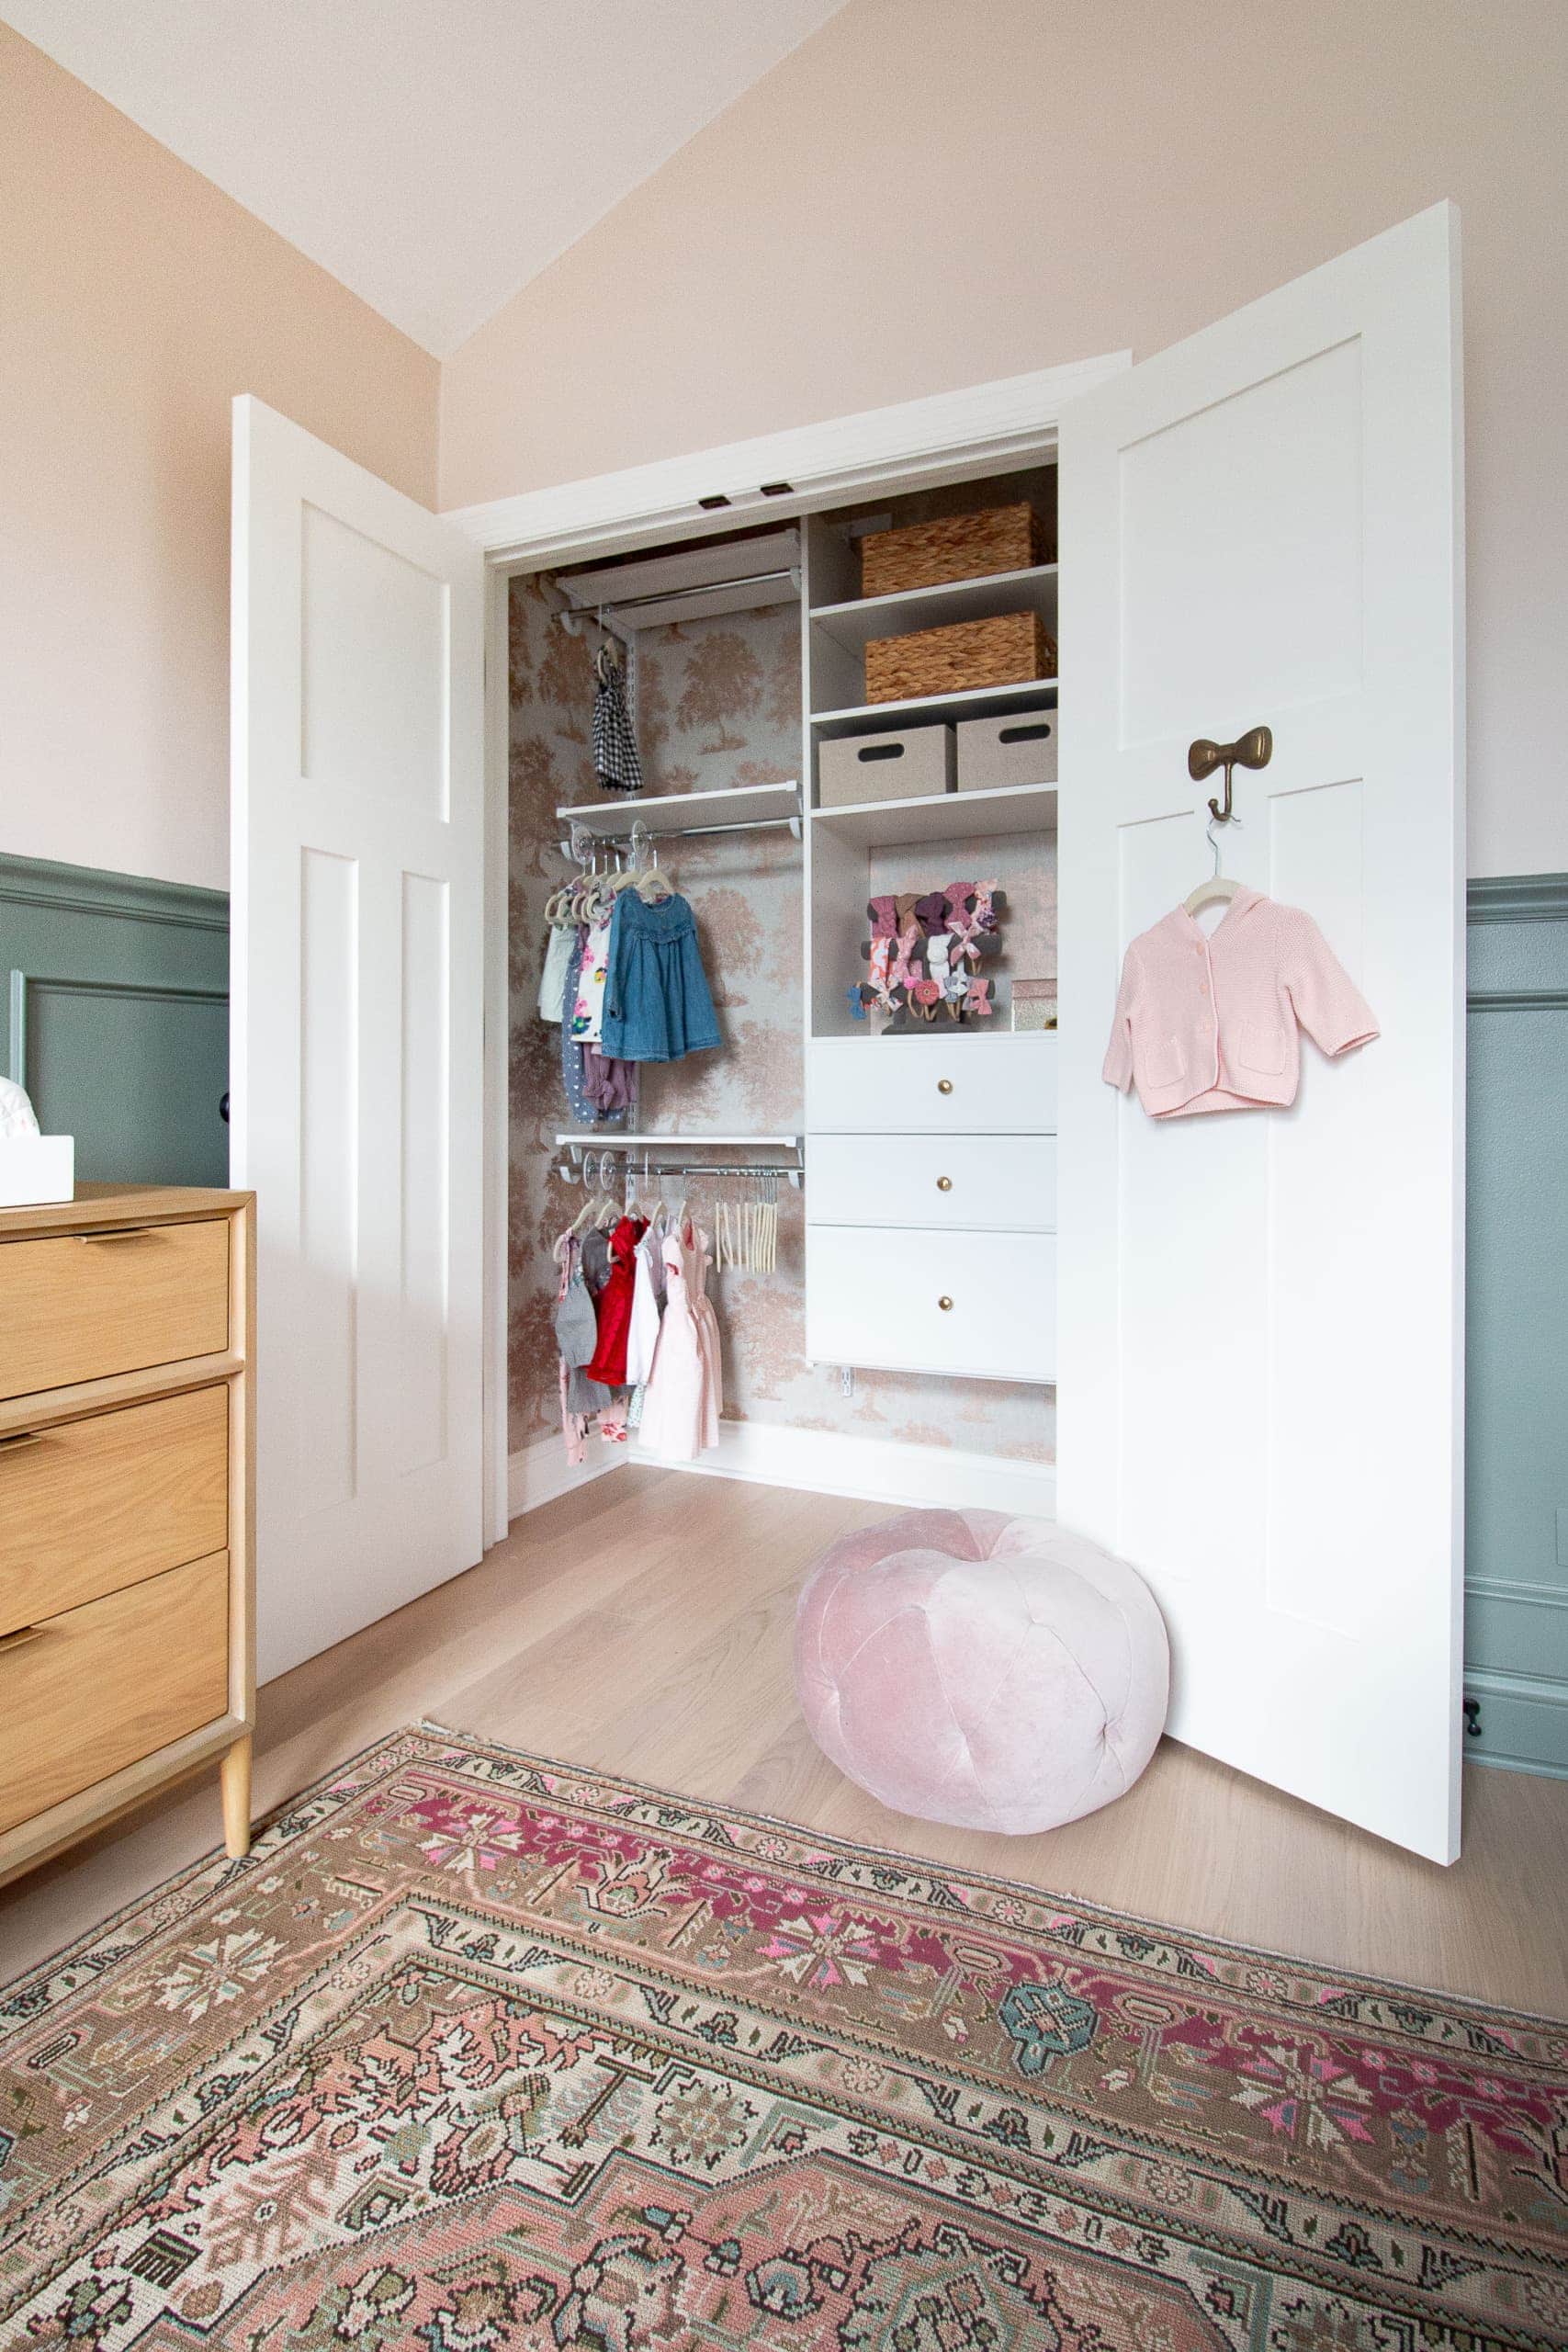
Let’s chat about the right side of the closet first. For this side, we used the Easy Track White Wood Closet Kit. This kit comes with everything you need to build the tower and install it. We liked this closet system because it’s slim and has both concealed storage and open storage. Plus, the shelves are adjustable so we can move them around, down the line, as our storage needs change.
It took me about an hour to build the drawers and tower one evening and we didn’t install it until we had a gameplan for the other half of the closet. It comes with a rail that you hang into the studs on the wall and you then lift it onto the rail. It was not difficult at all and it is so nice that it comes with absolutely everything you need (including the hardware to attach it to the wall). Oh, and I also swapped out the knobs that come with it for these brass ones.
Designing The Left Side of the Closet
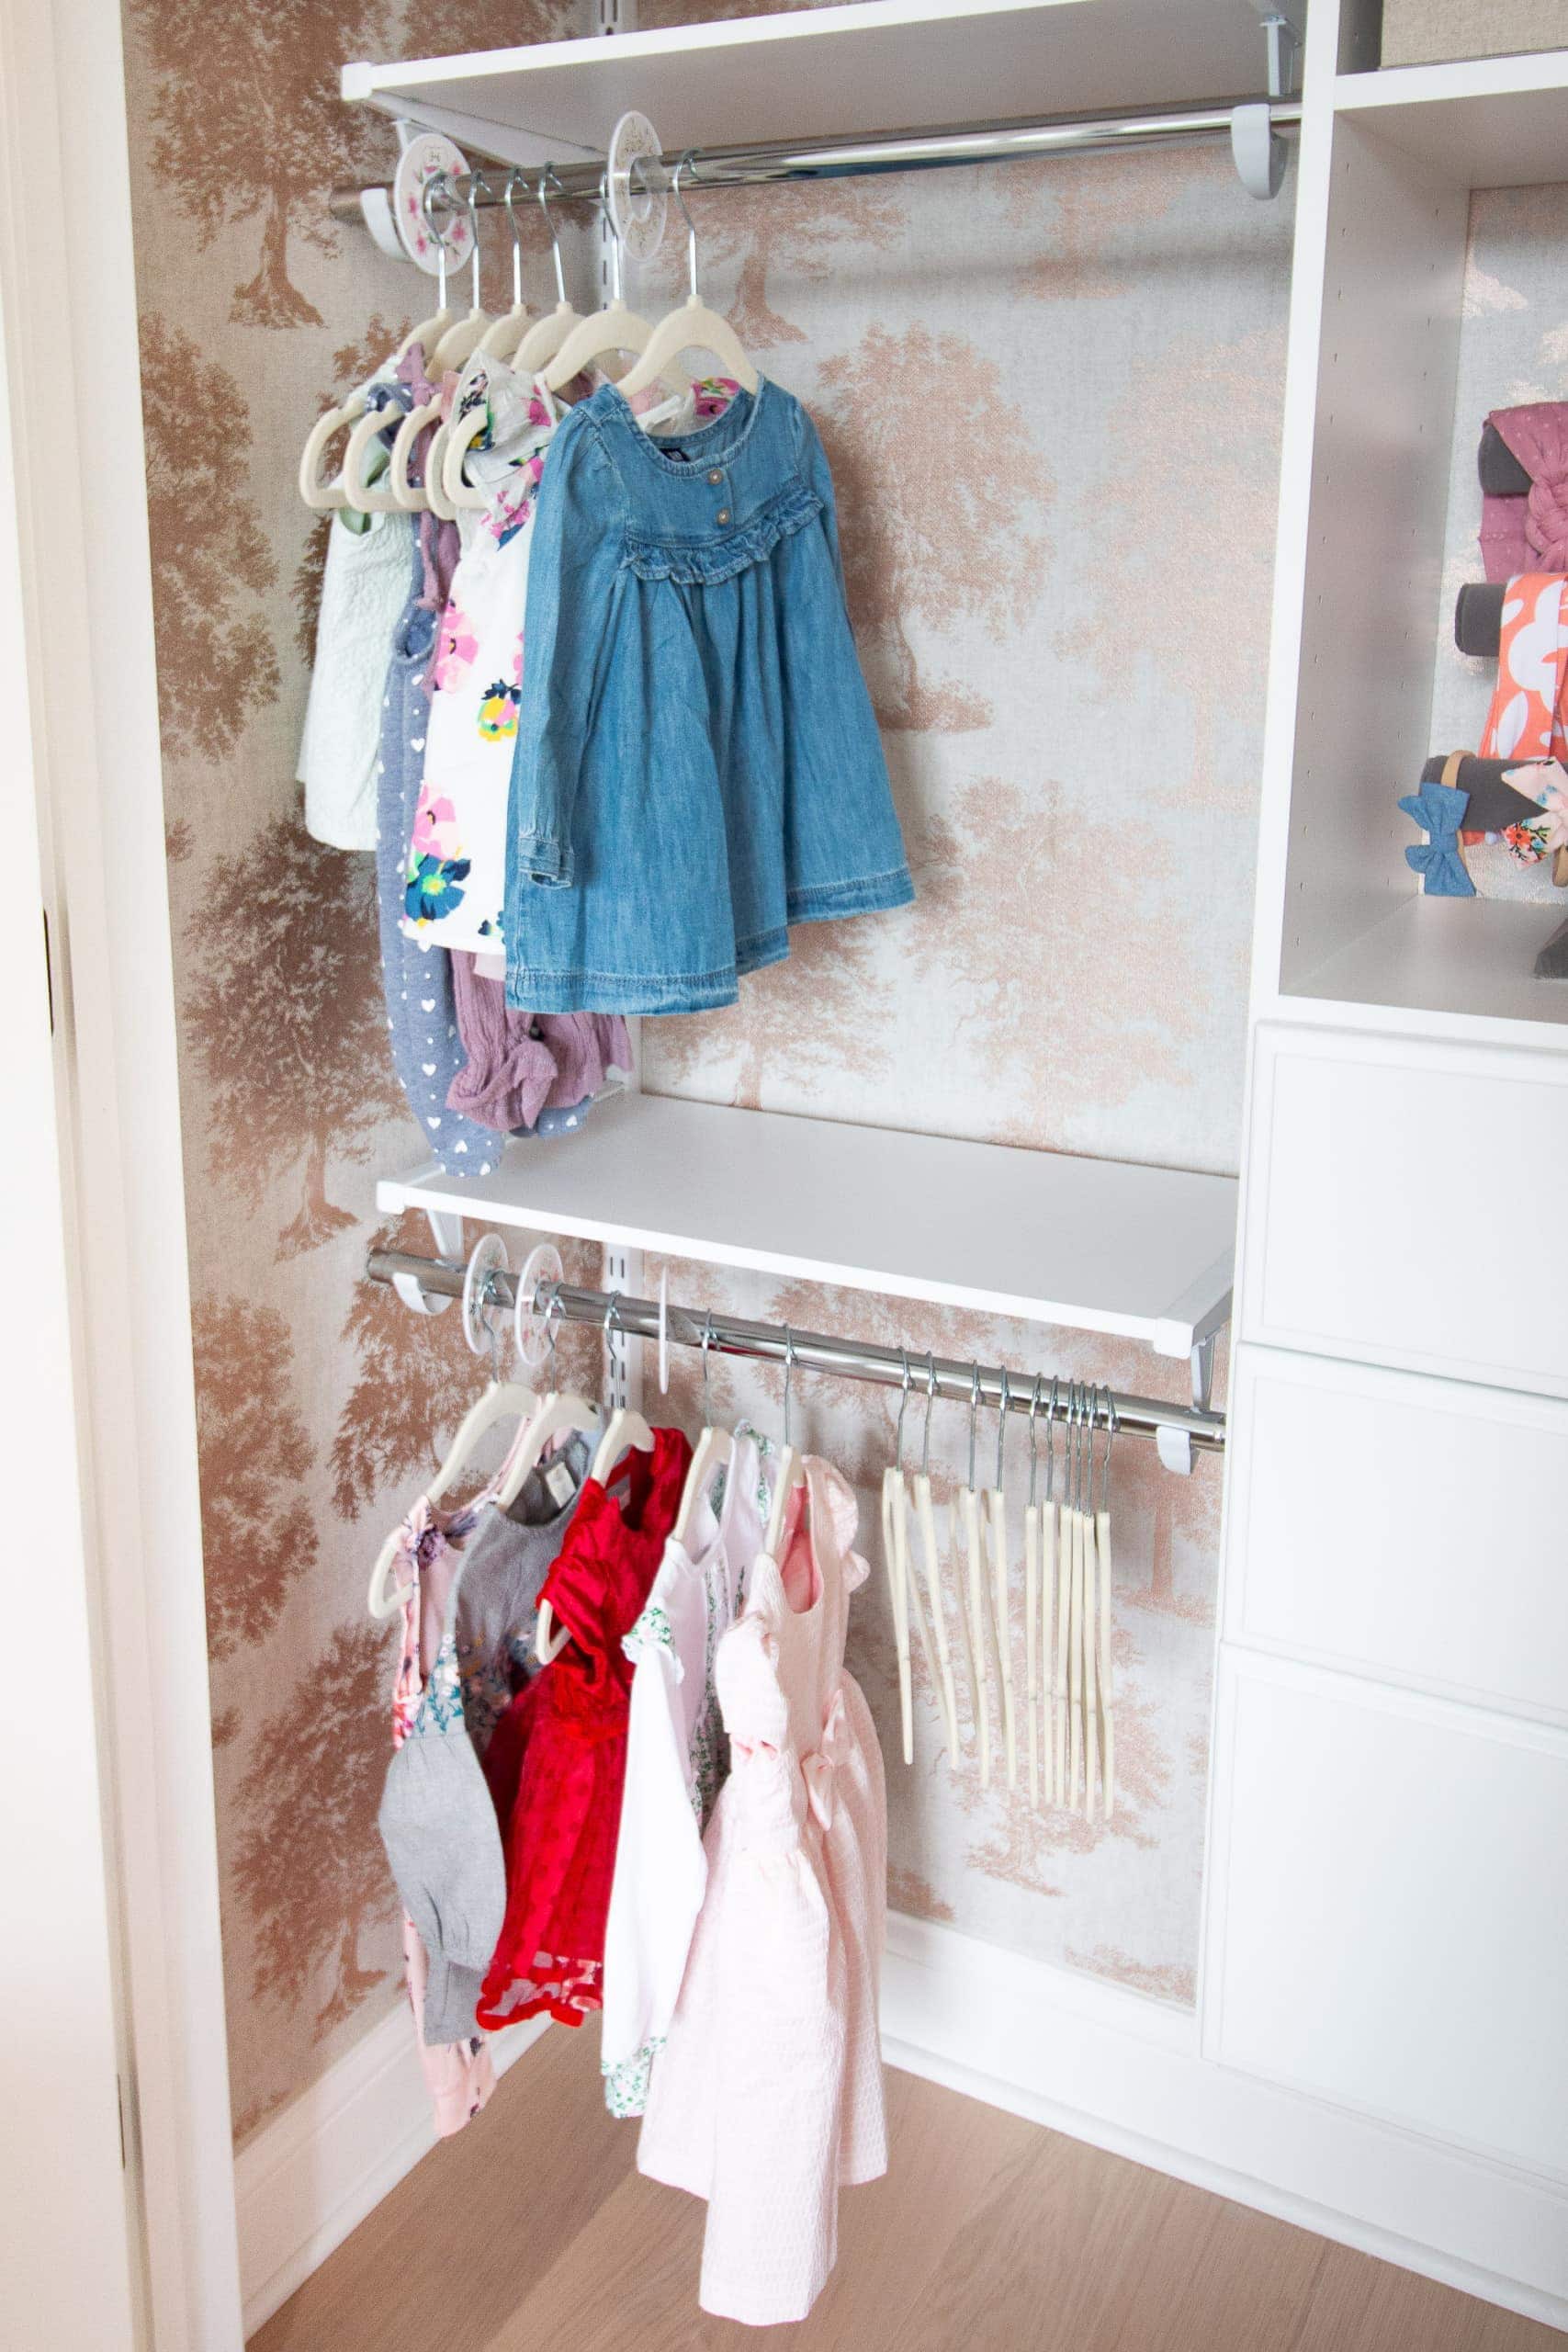
After building the tower, we knew we still needed some hanging space in here. Since baby clothes are so incredibly tiny, we decided that we could do three rows of shelves and rods. However, we wanted to make sure these were adjustable so we could easily move them up or down as her clothes get bigger and bigger.
I used this Rubbermaid FastTrack Closet Kit for my mom’s closet and loved the system. However, that entire unit was a bit too much for what we needed in here. We decided to use all of the Rubbermaid components and design our own organized nursery closet. The supply list above showcases all of the individual pieces you’ll need to buy to do three shelves and three rods in your own closet. I did end up forgetting a few crucial items (I thought the shelf brackets came with the shelf, but they didn’t!), so make sure you follow my list closely if you’re recreating this in your house.
We also used these toggle bolts to secure the top rail (when we didn’t hit a stud) and Finn used this oscillating tool to cut the rail to size. All in all, it only took us about an hour or two to get the left side of our closet looking good!
Our Organized Nursery Closet
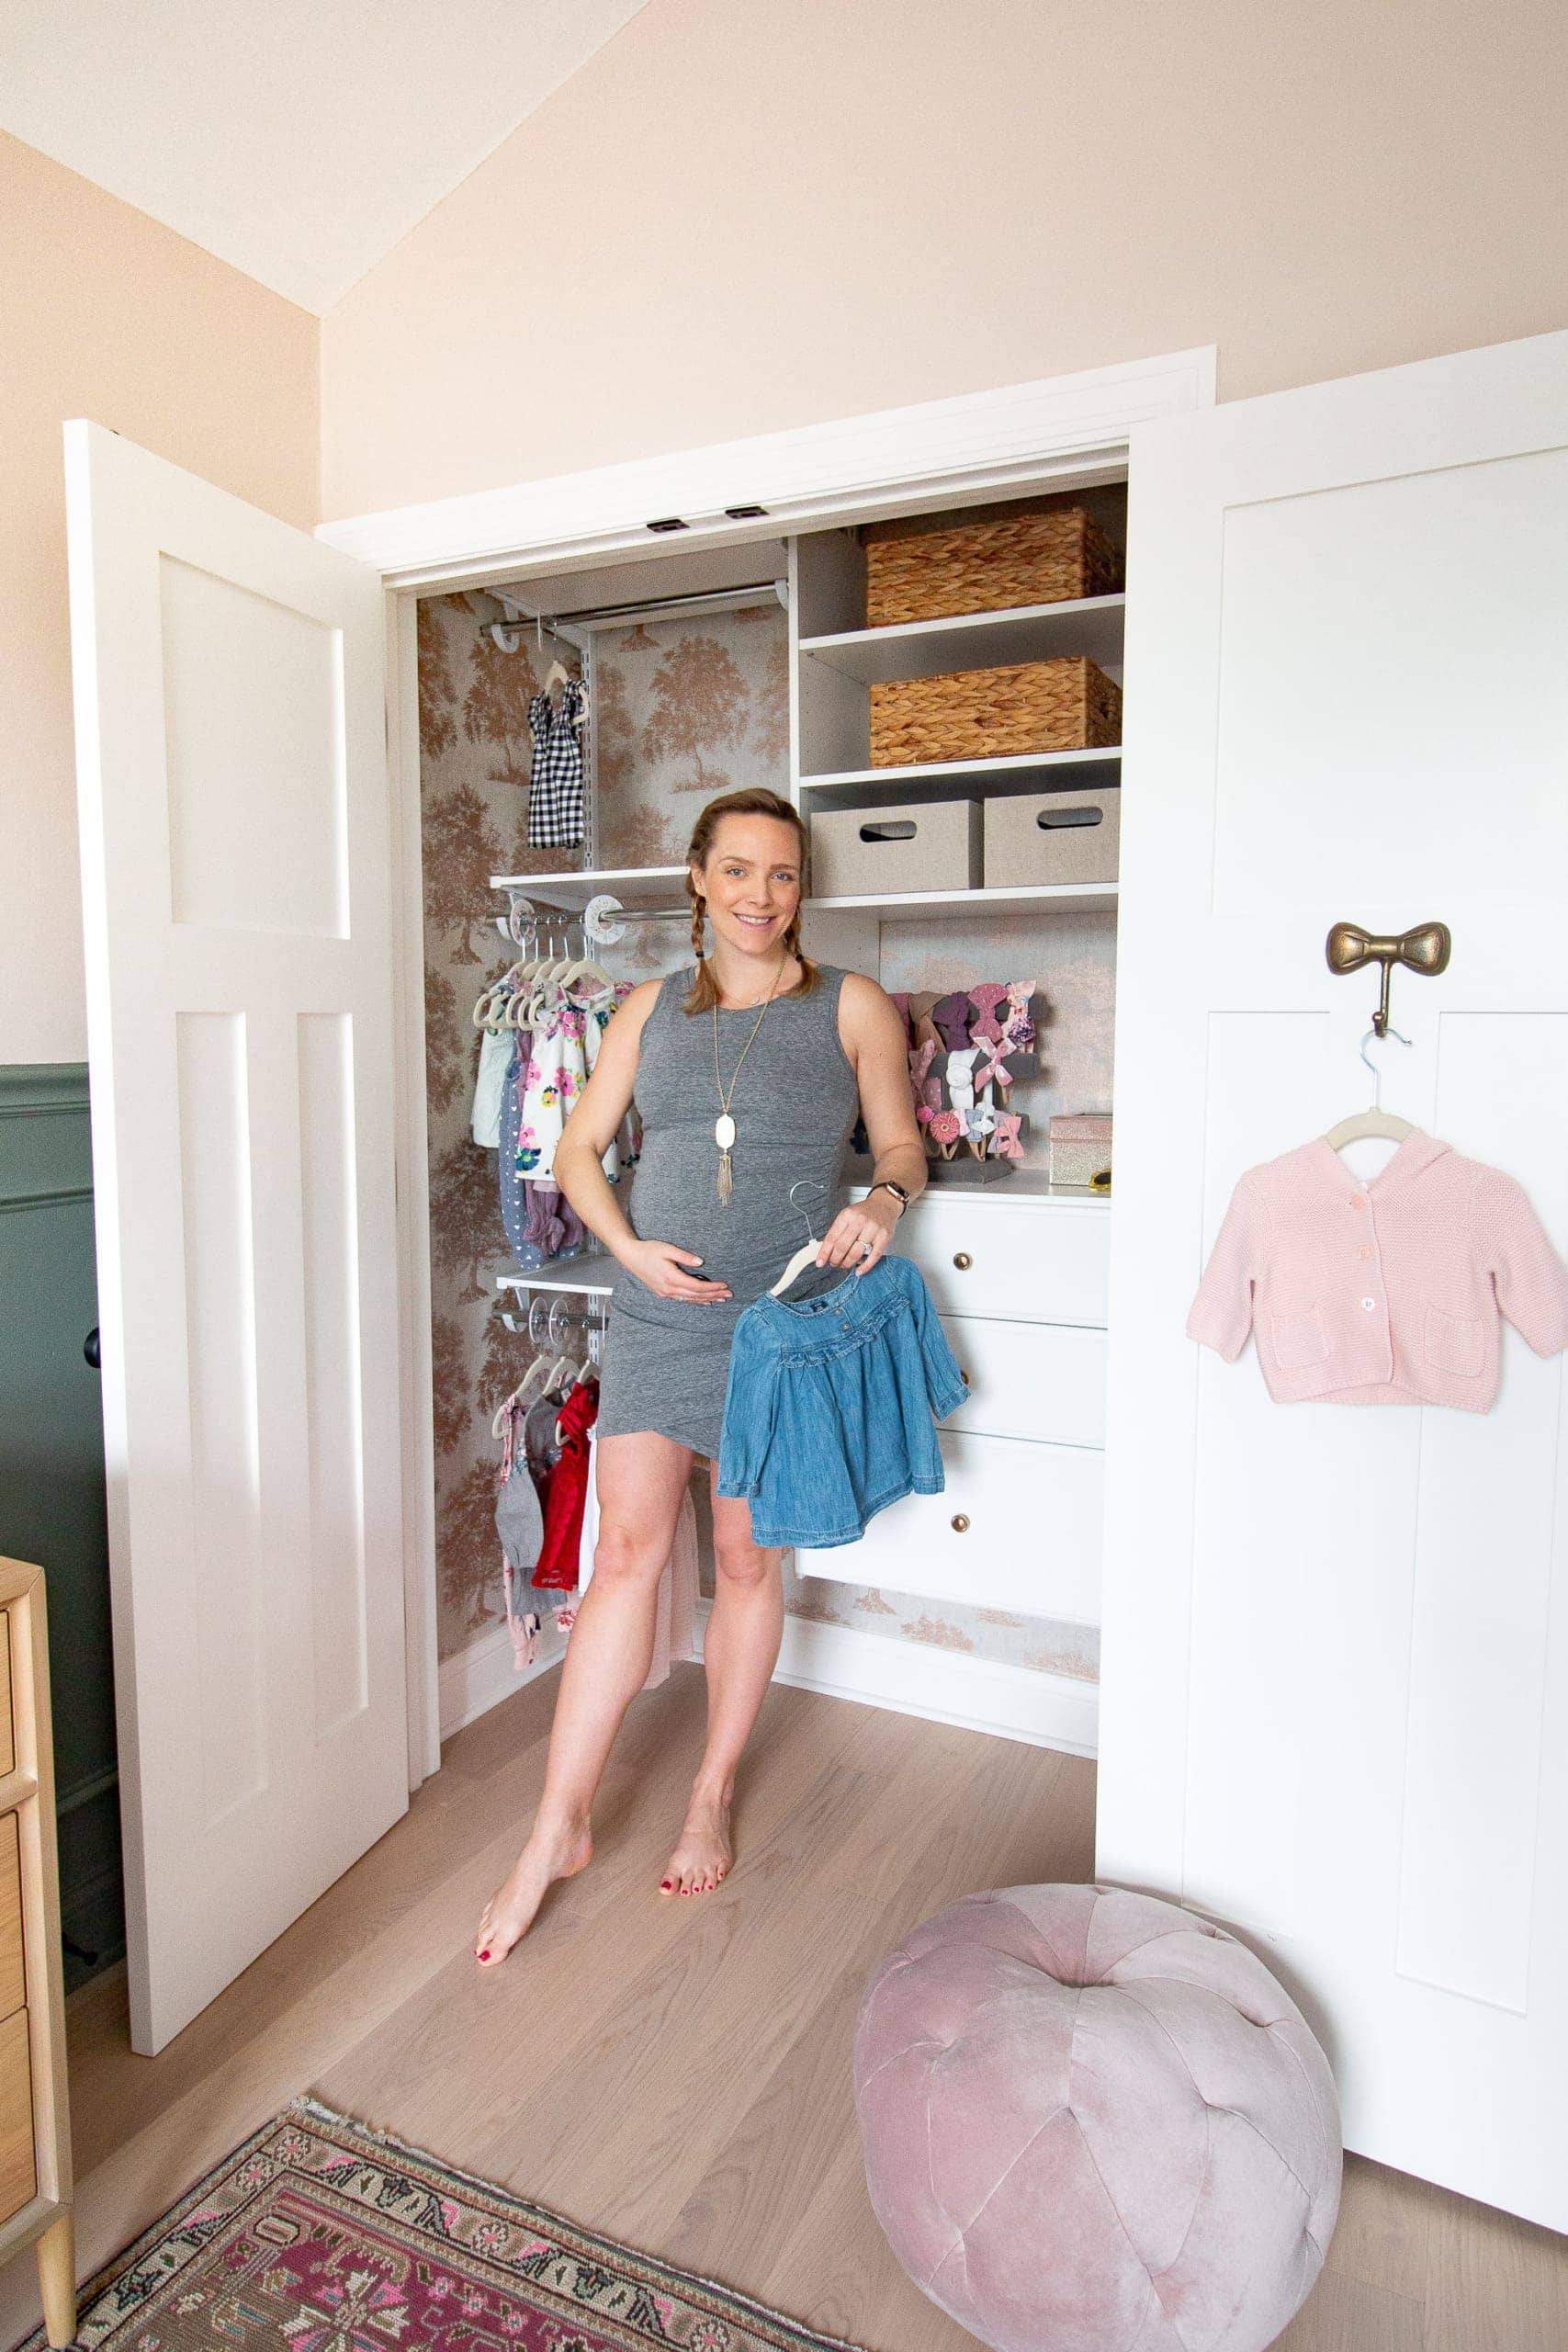
Now, let’s discuss all the cuteness happening in here! 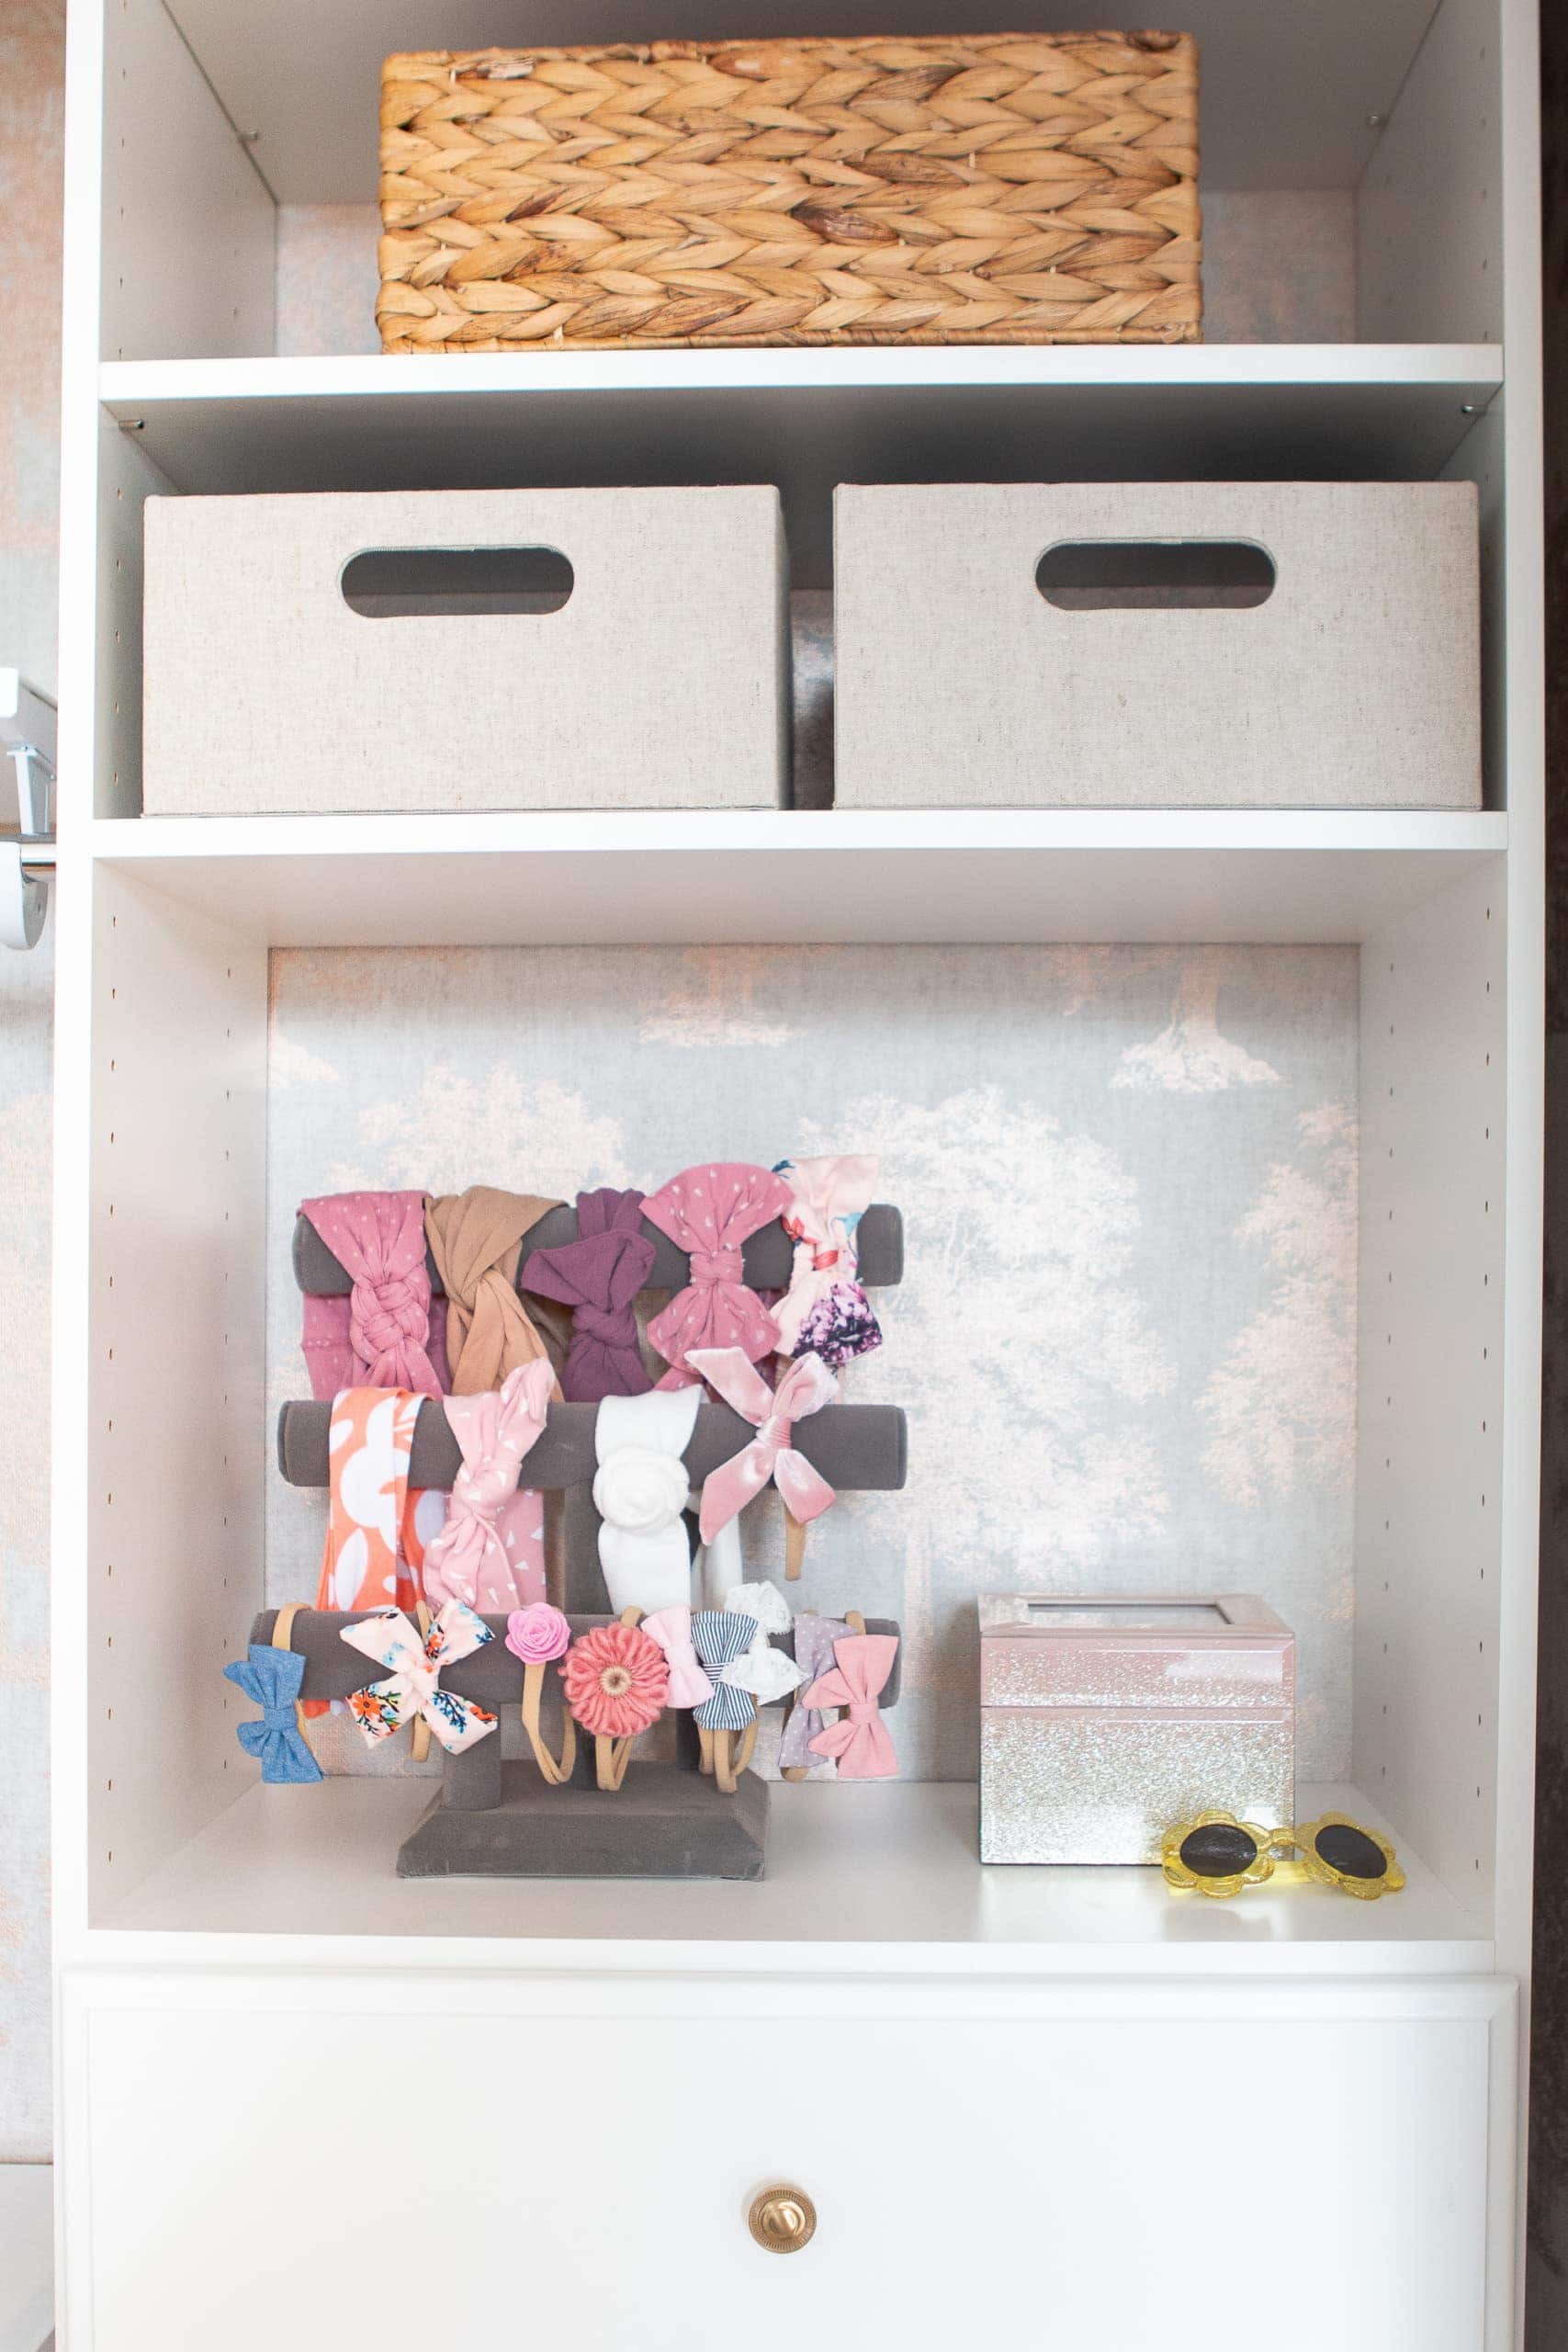
On the right side, we have open shelving up top and three drawers down below. I filled the little cubbies with these cream fabric bins and these wicker baskets. Honestly, they’re all empty still! Which I secretly love because I know we’ll soon be filling them up!
We left one cubby open to put all of her bows (I bought a bracelet holder for this!), a little box for mementos, and the tiniest sunglasses you ever did see. 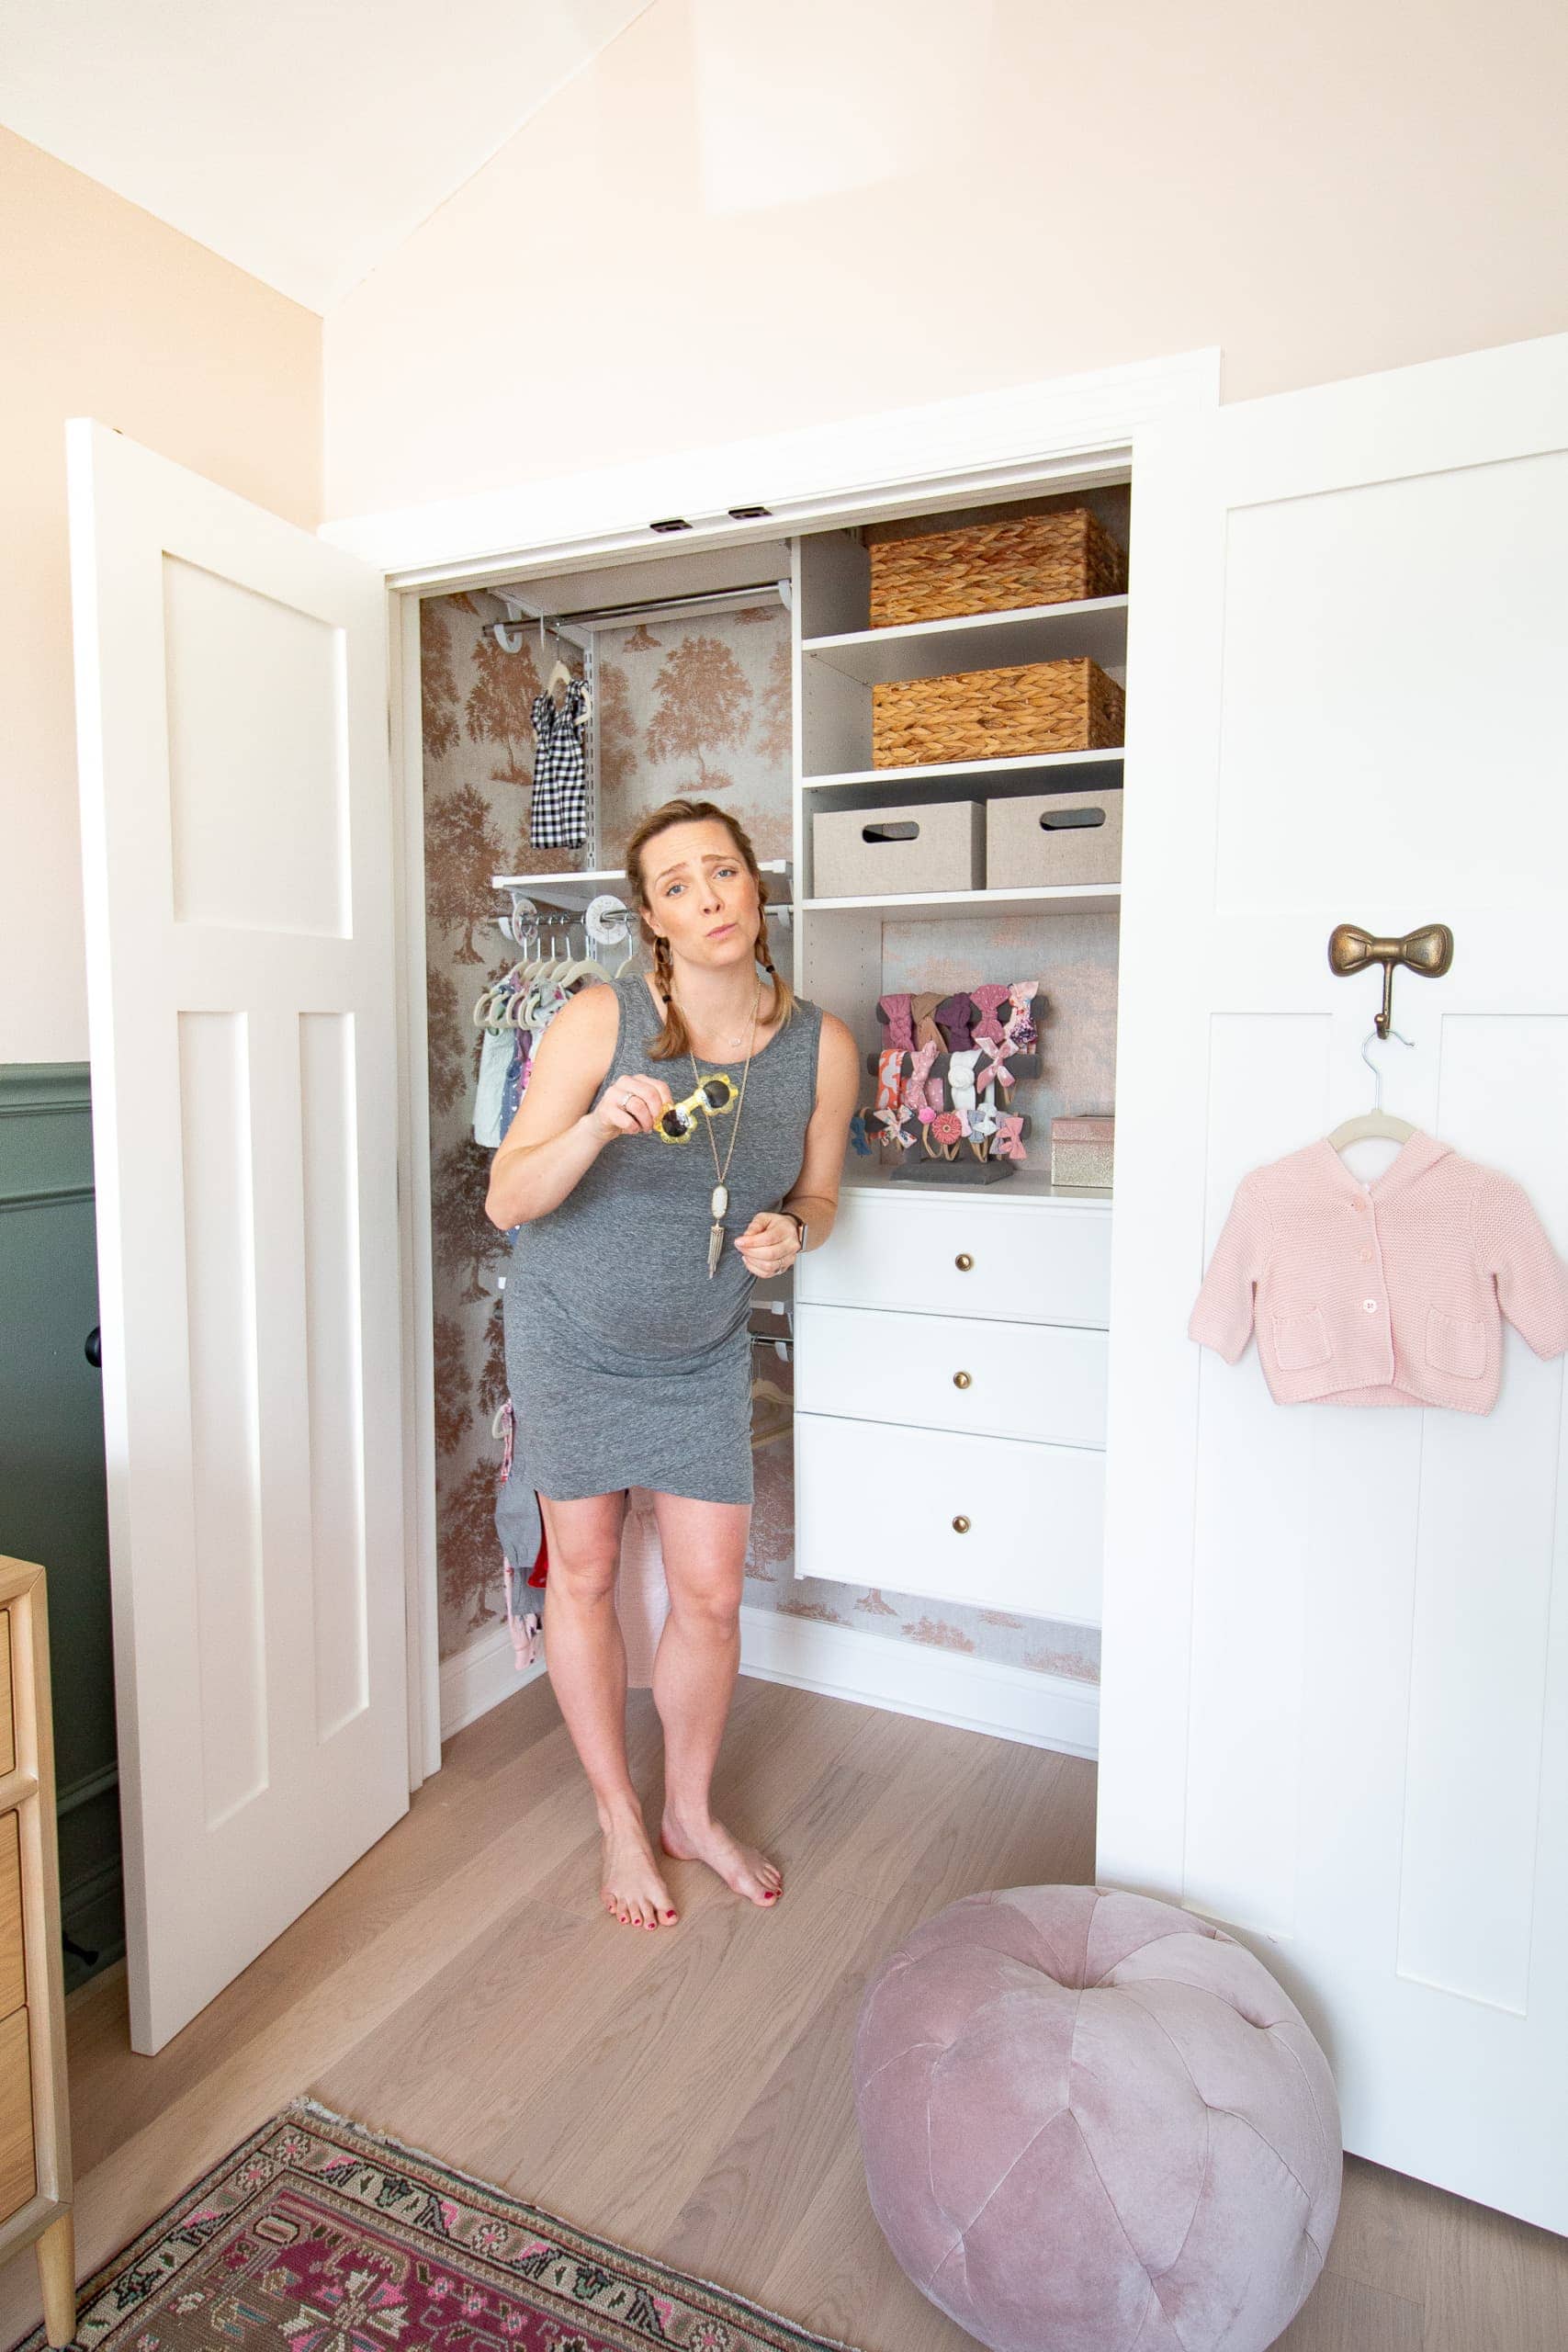
I can’t even with the sunglasses, they’re just too cute!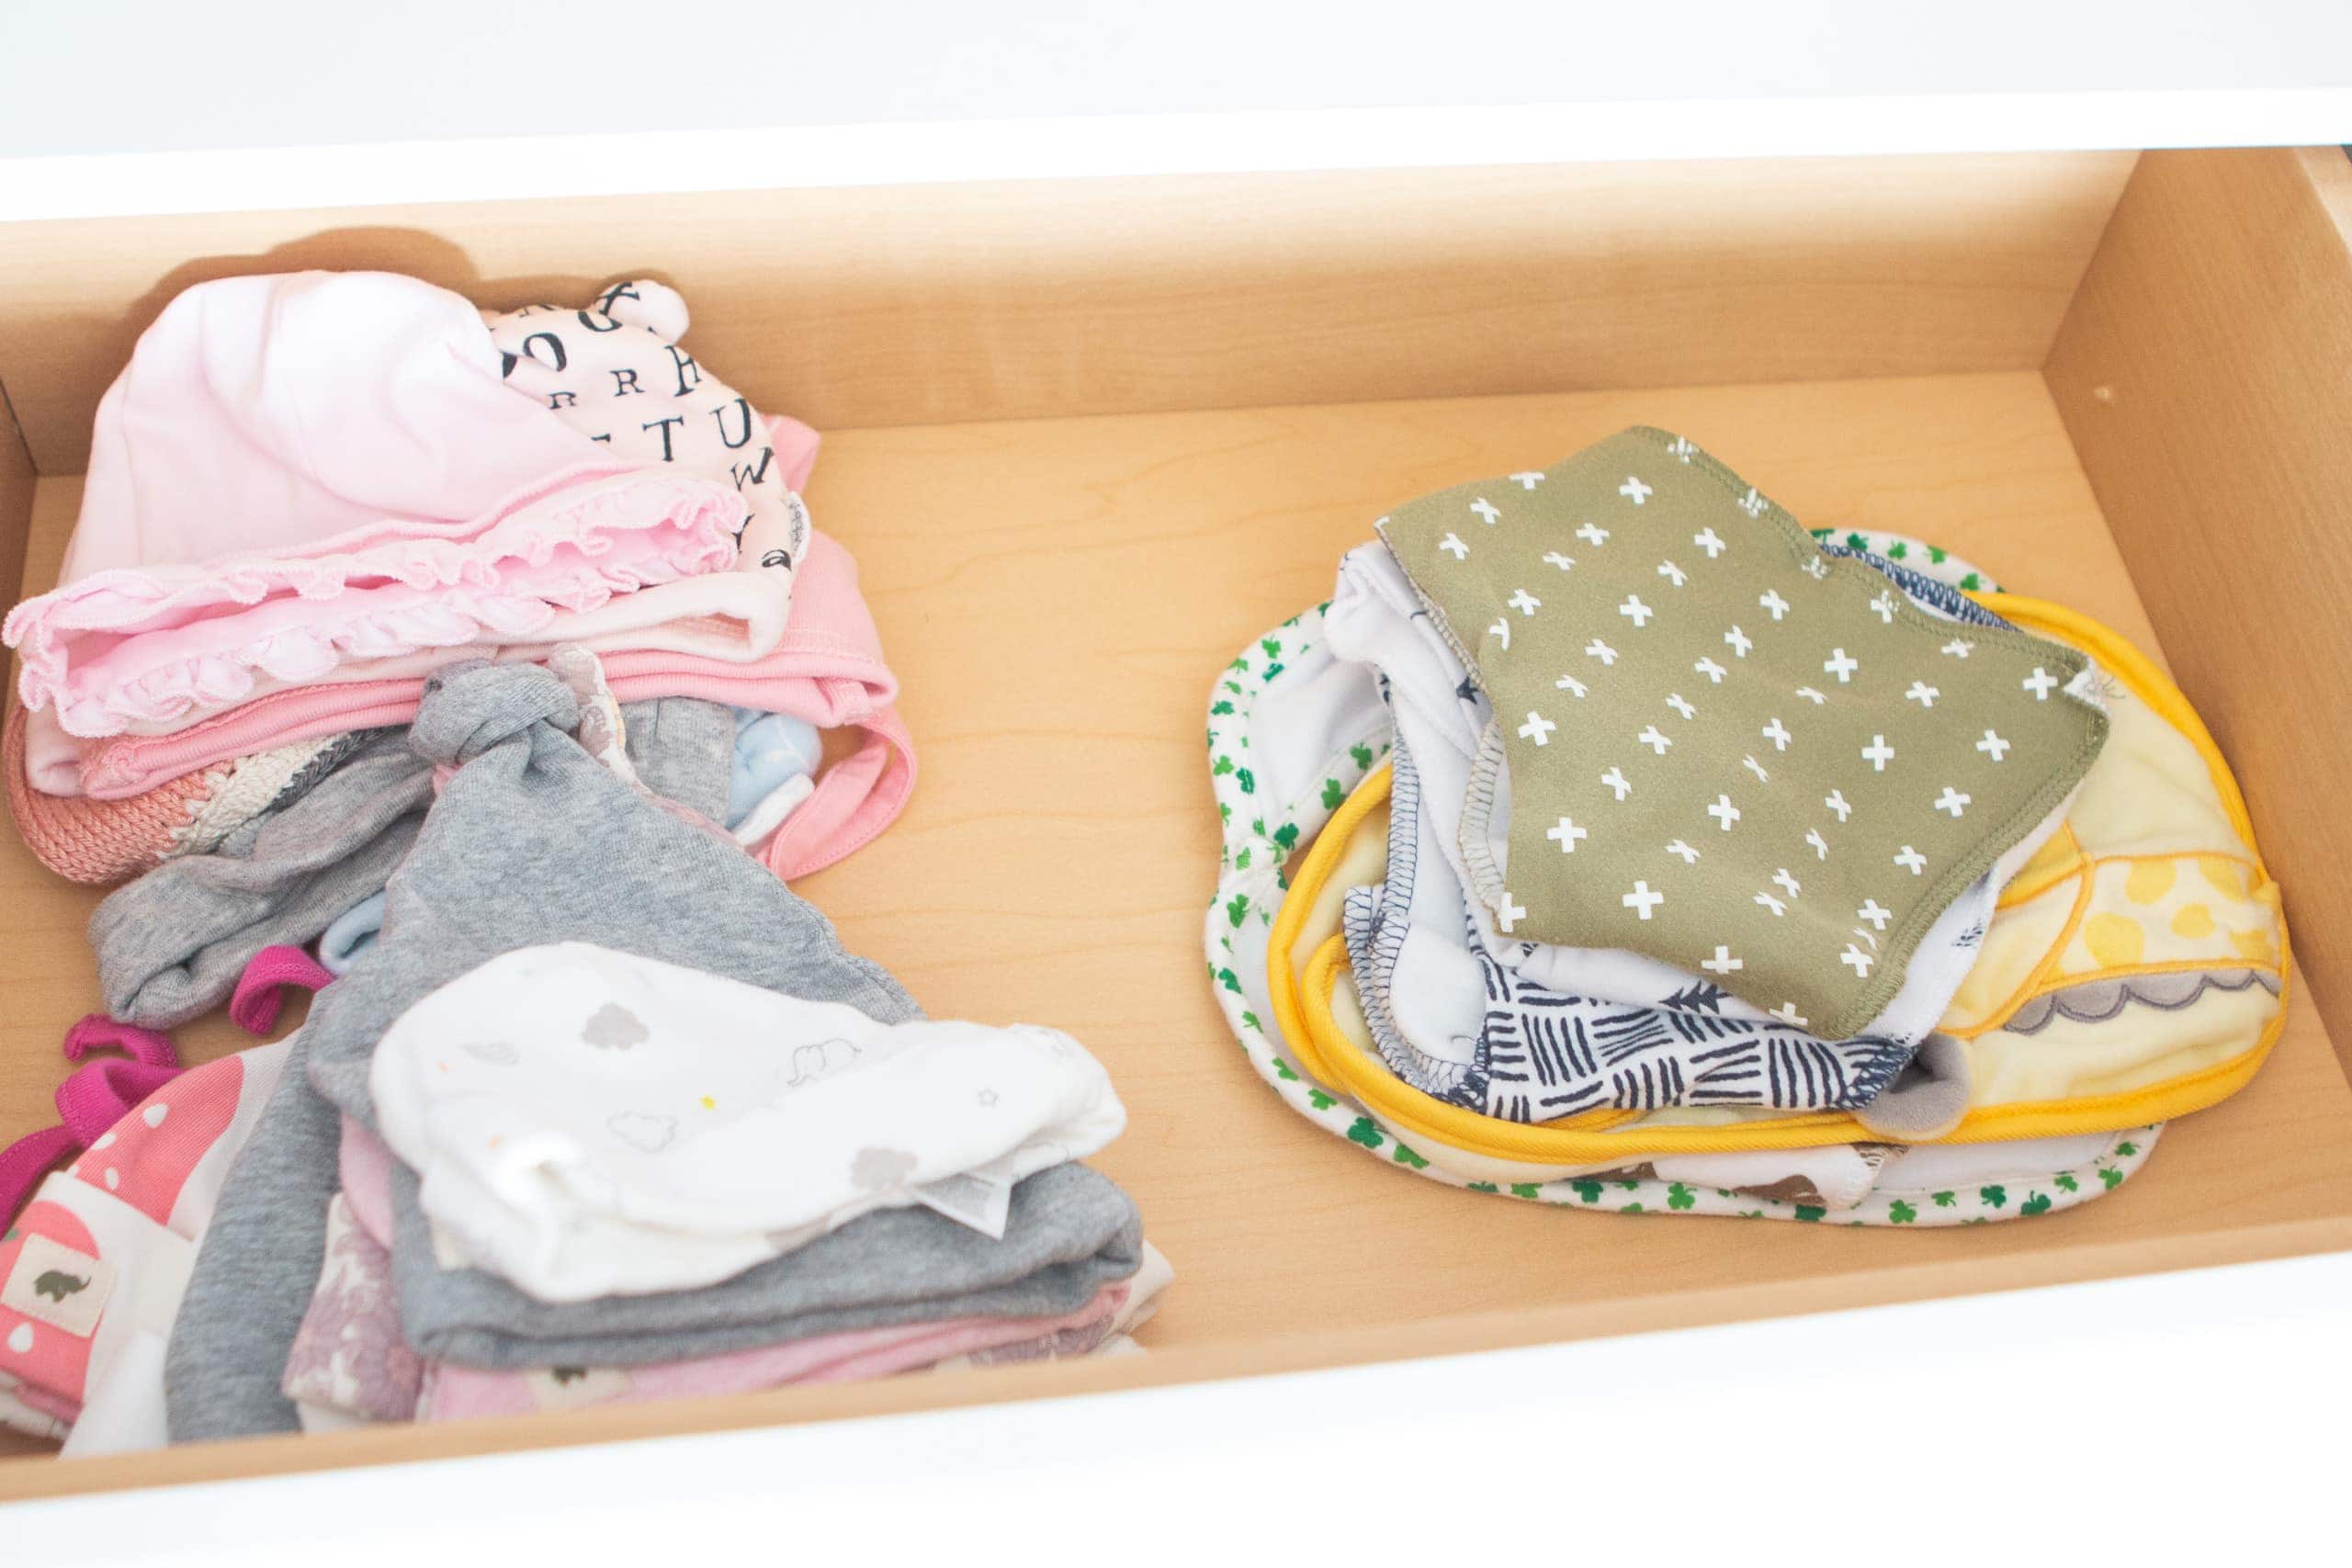
In the top drawer, I have all of her hats (I can’t even believe how many she has! I haven’t bought this child one piece of clothing yet…these are all generous gifts from friends and family!) and bibs. I decided this is her accessory area. 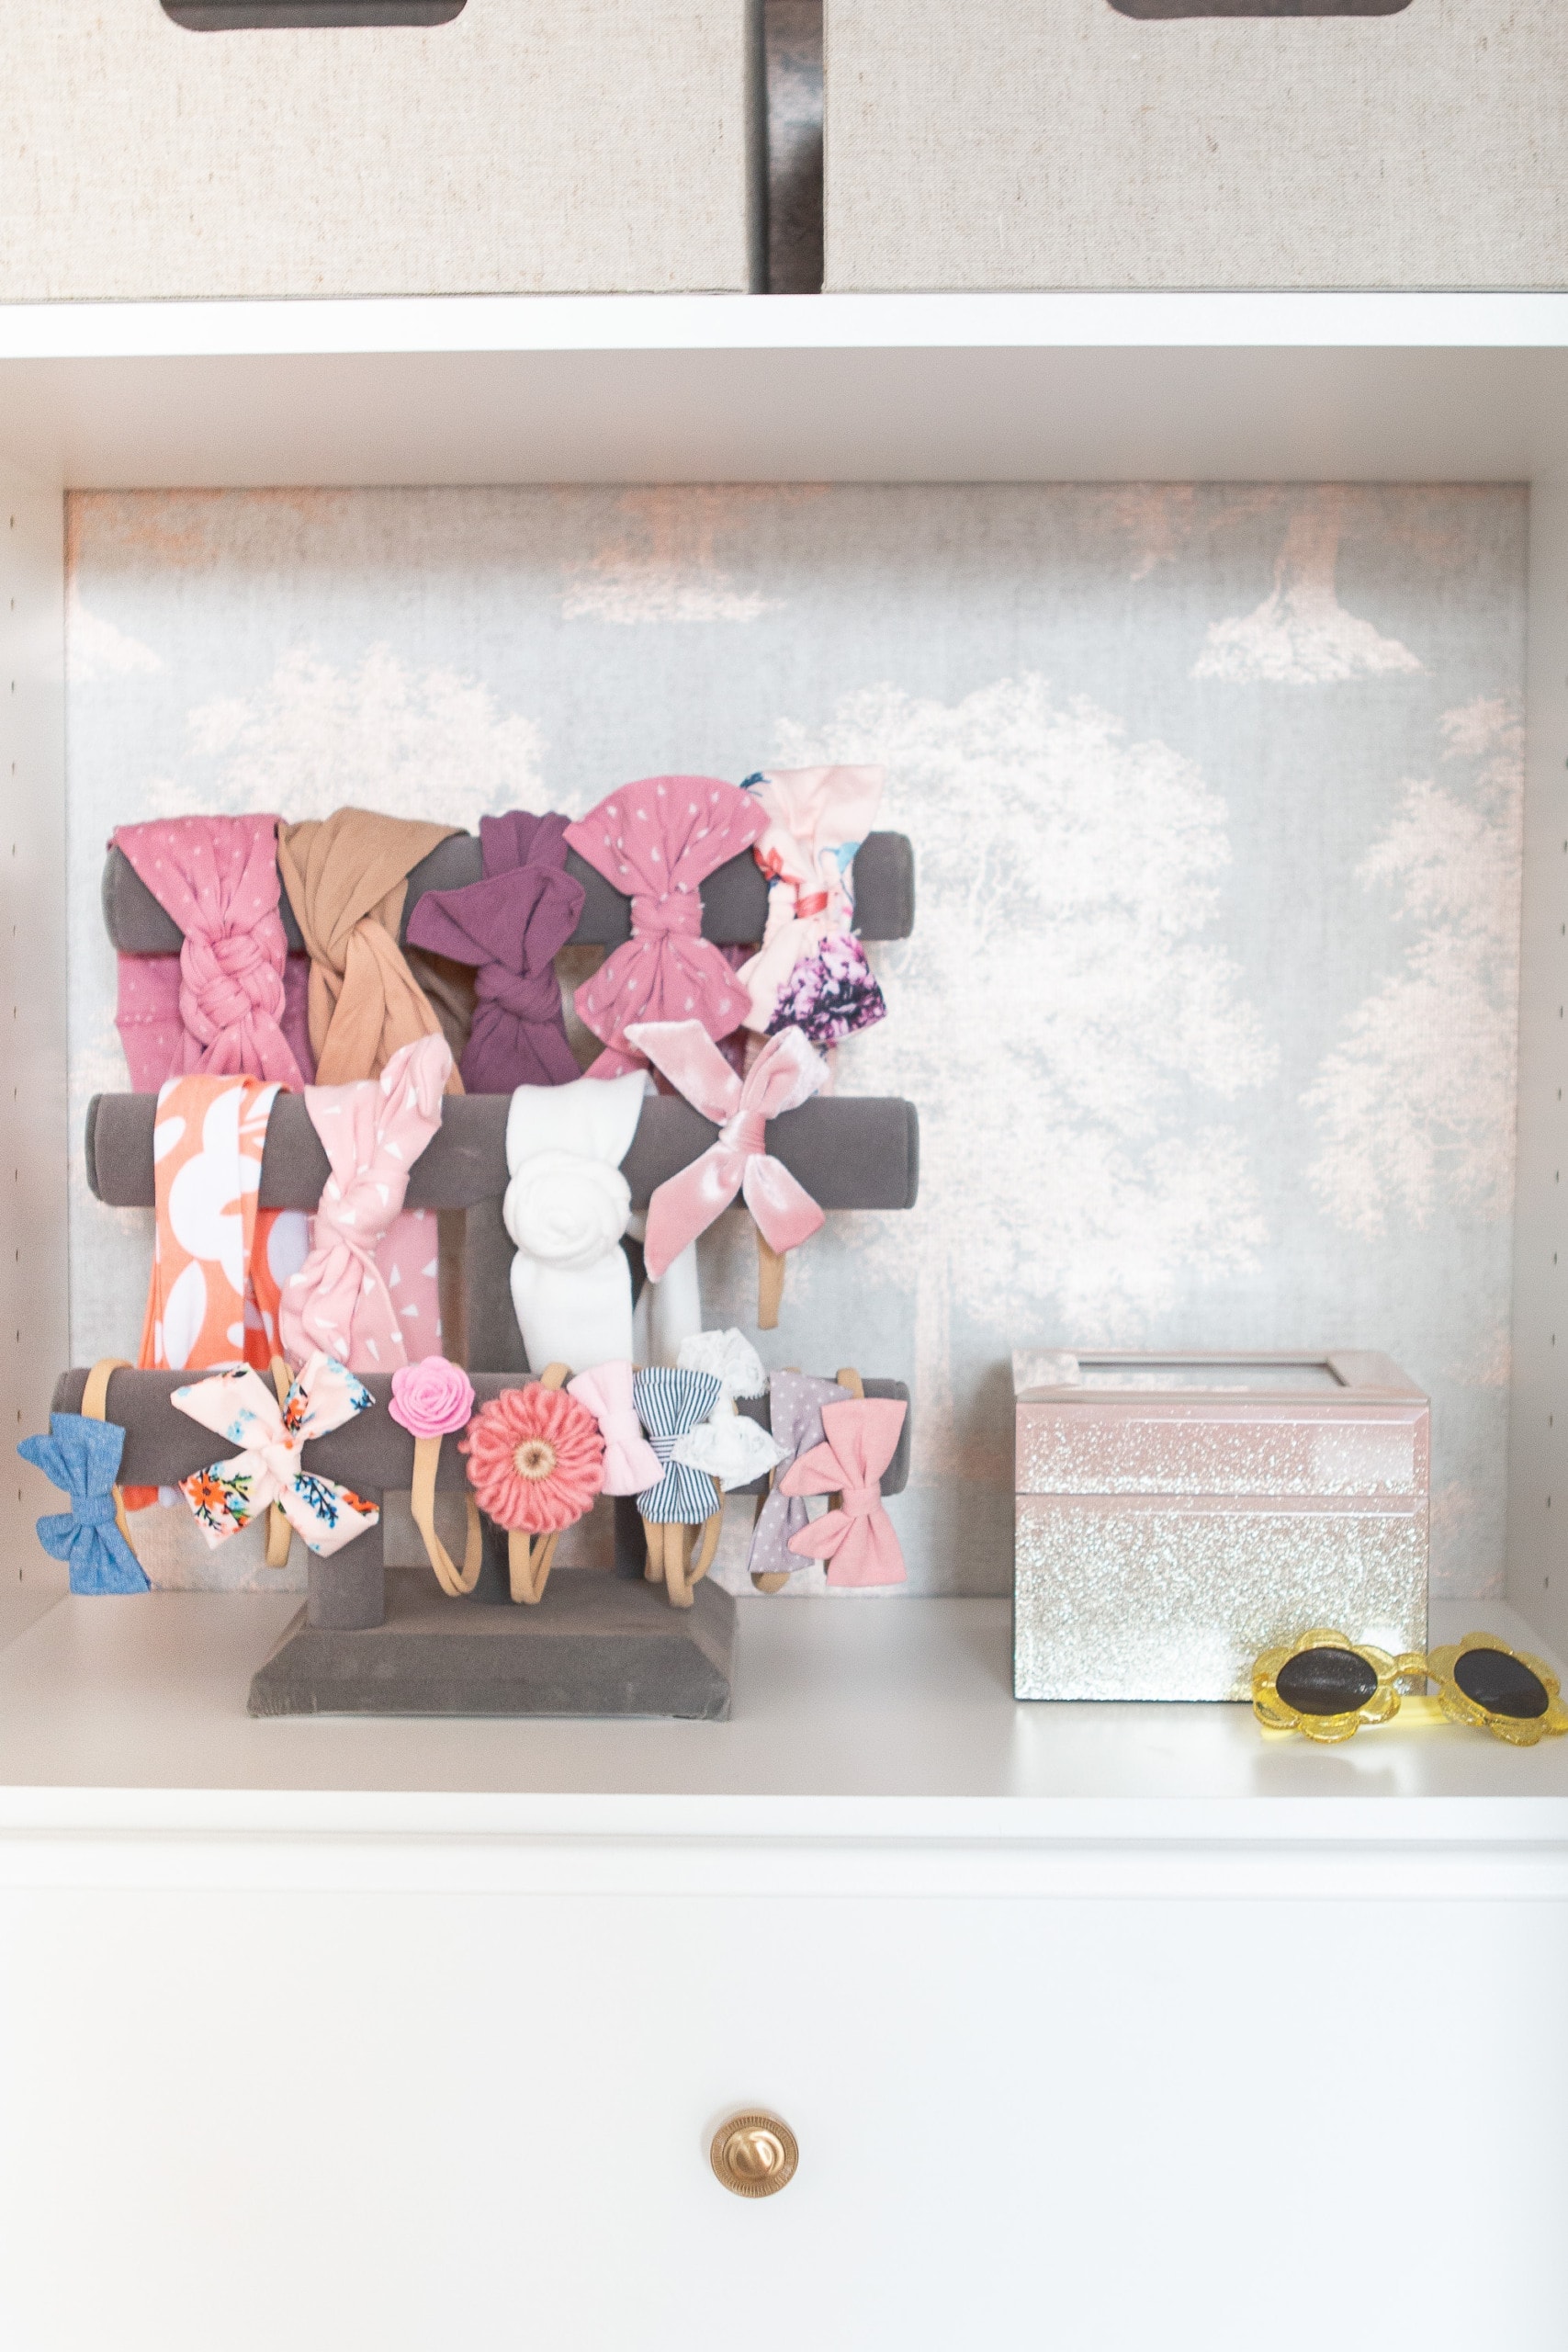
I used the same gold knobs from the drawers on the built-ins for some continuity. And guess what?! The other two drawers in here are still empty! Lots of room to grow in this space.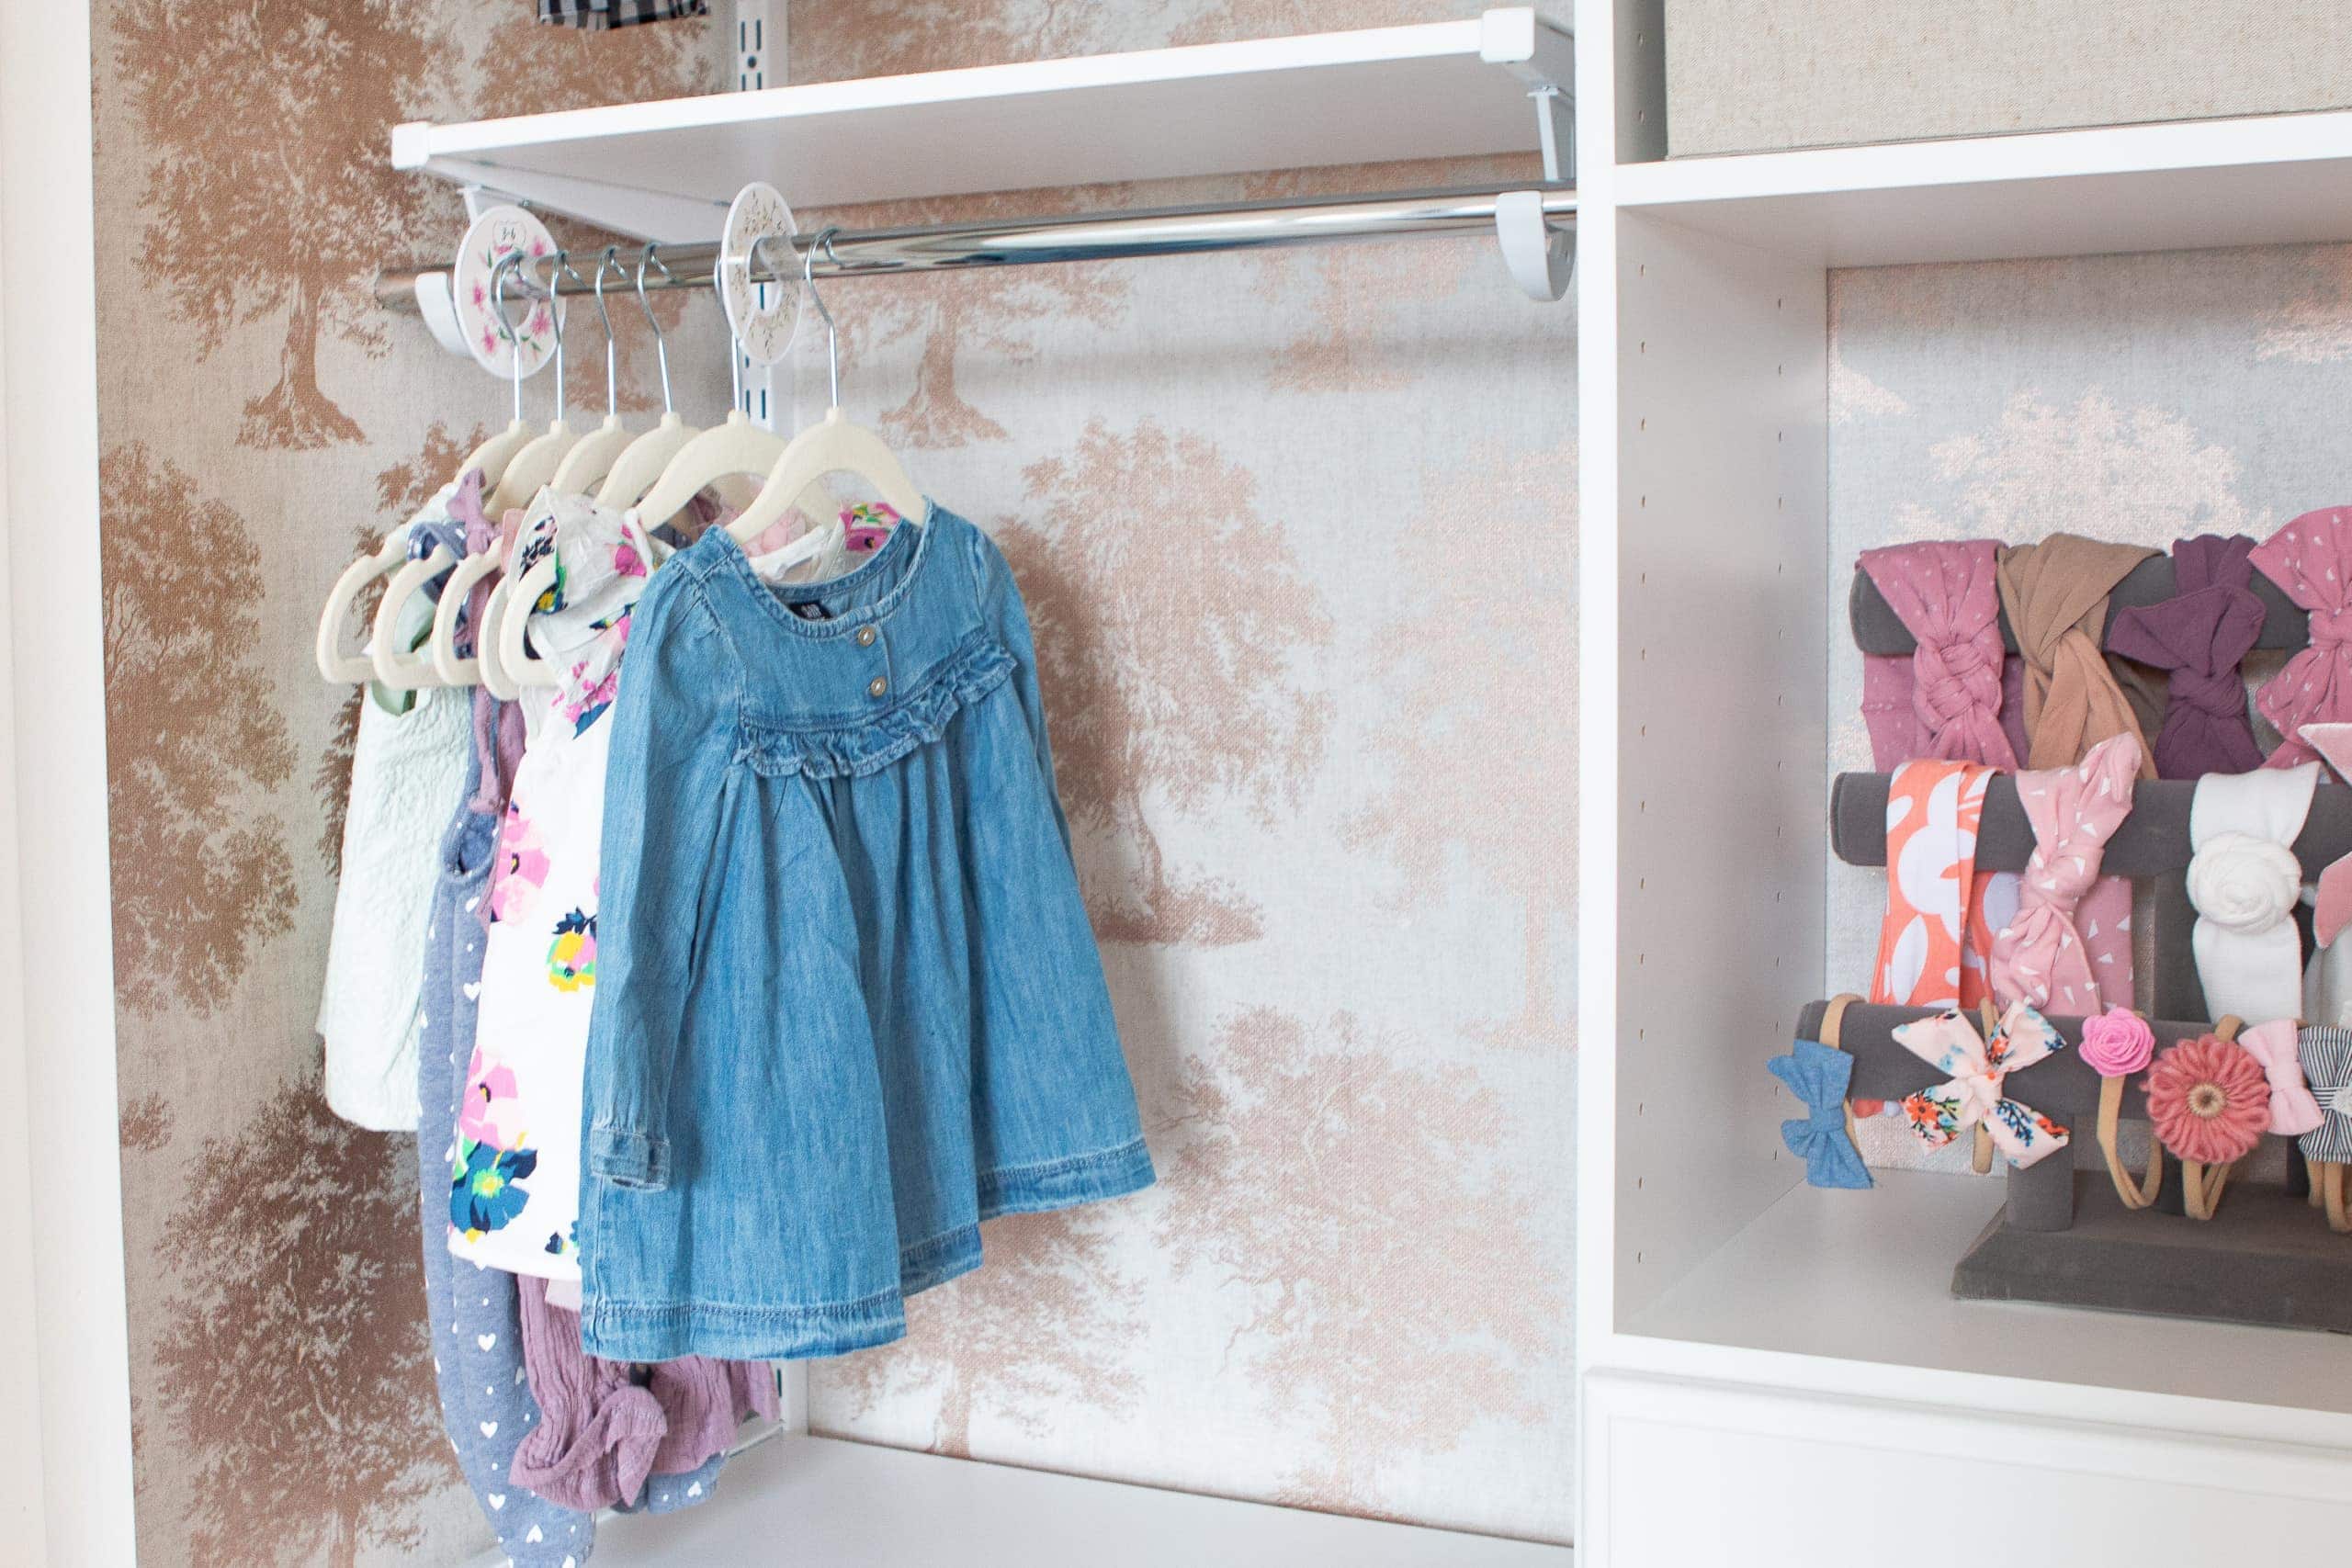
On the left side, we have her hanging clothes. My mom keeps buying her the cutest little outfits (she even has her Christmas and Easter dresses for next year!) and they’re all hanging in here. 
I bought cute size dividers so I can organize them that way (0-3, 3-6, etc.). 
I’m sure this will change as we accumulate more clothes and she grows, but for now, we have all of her “special” clothes hanging up in here. 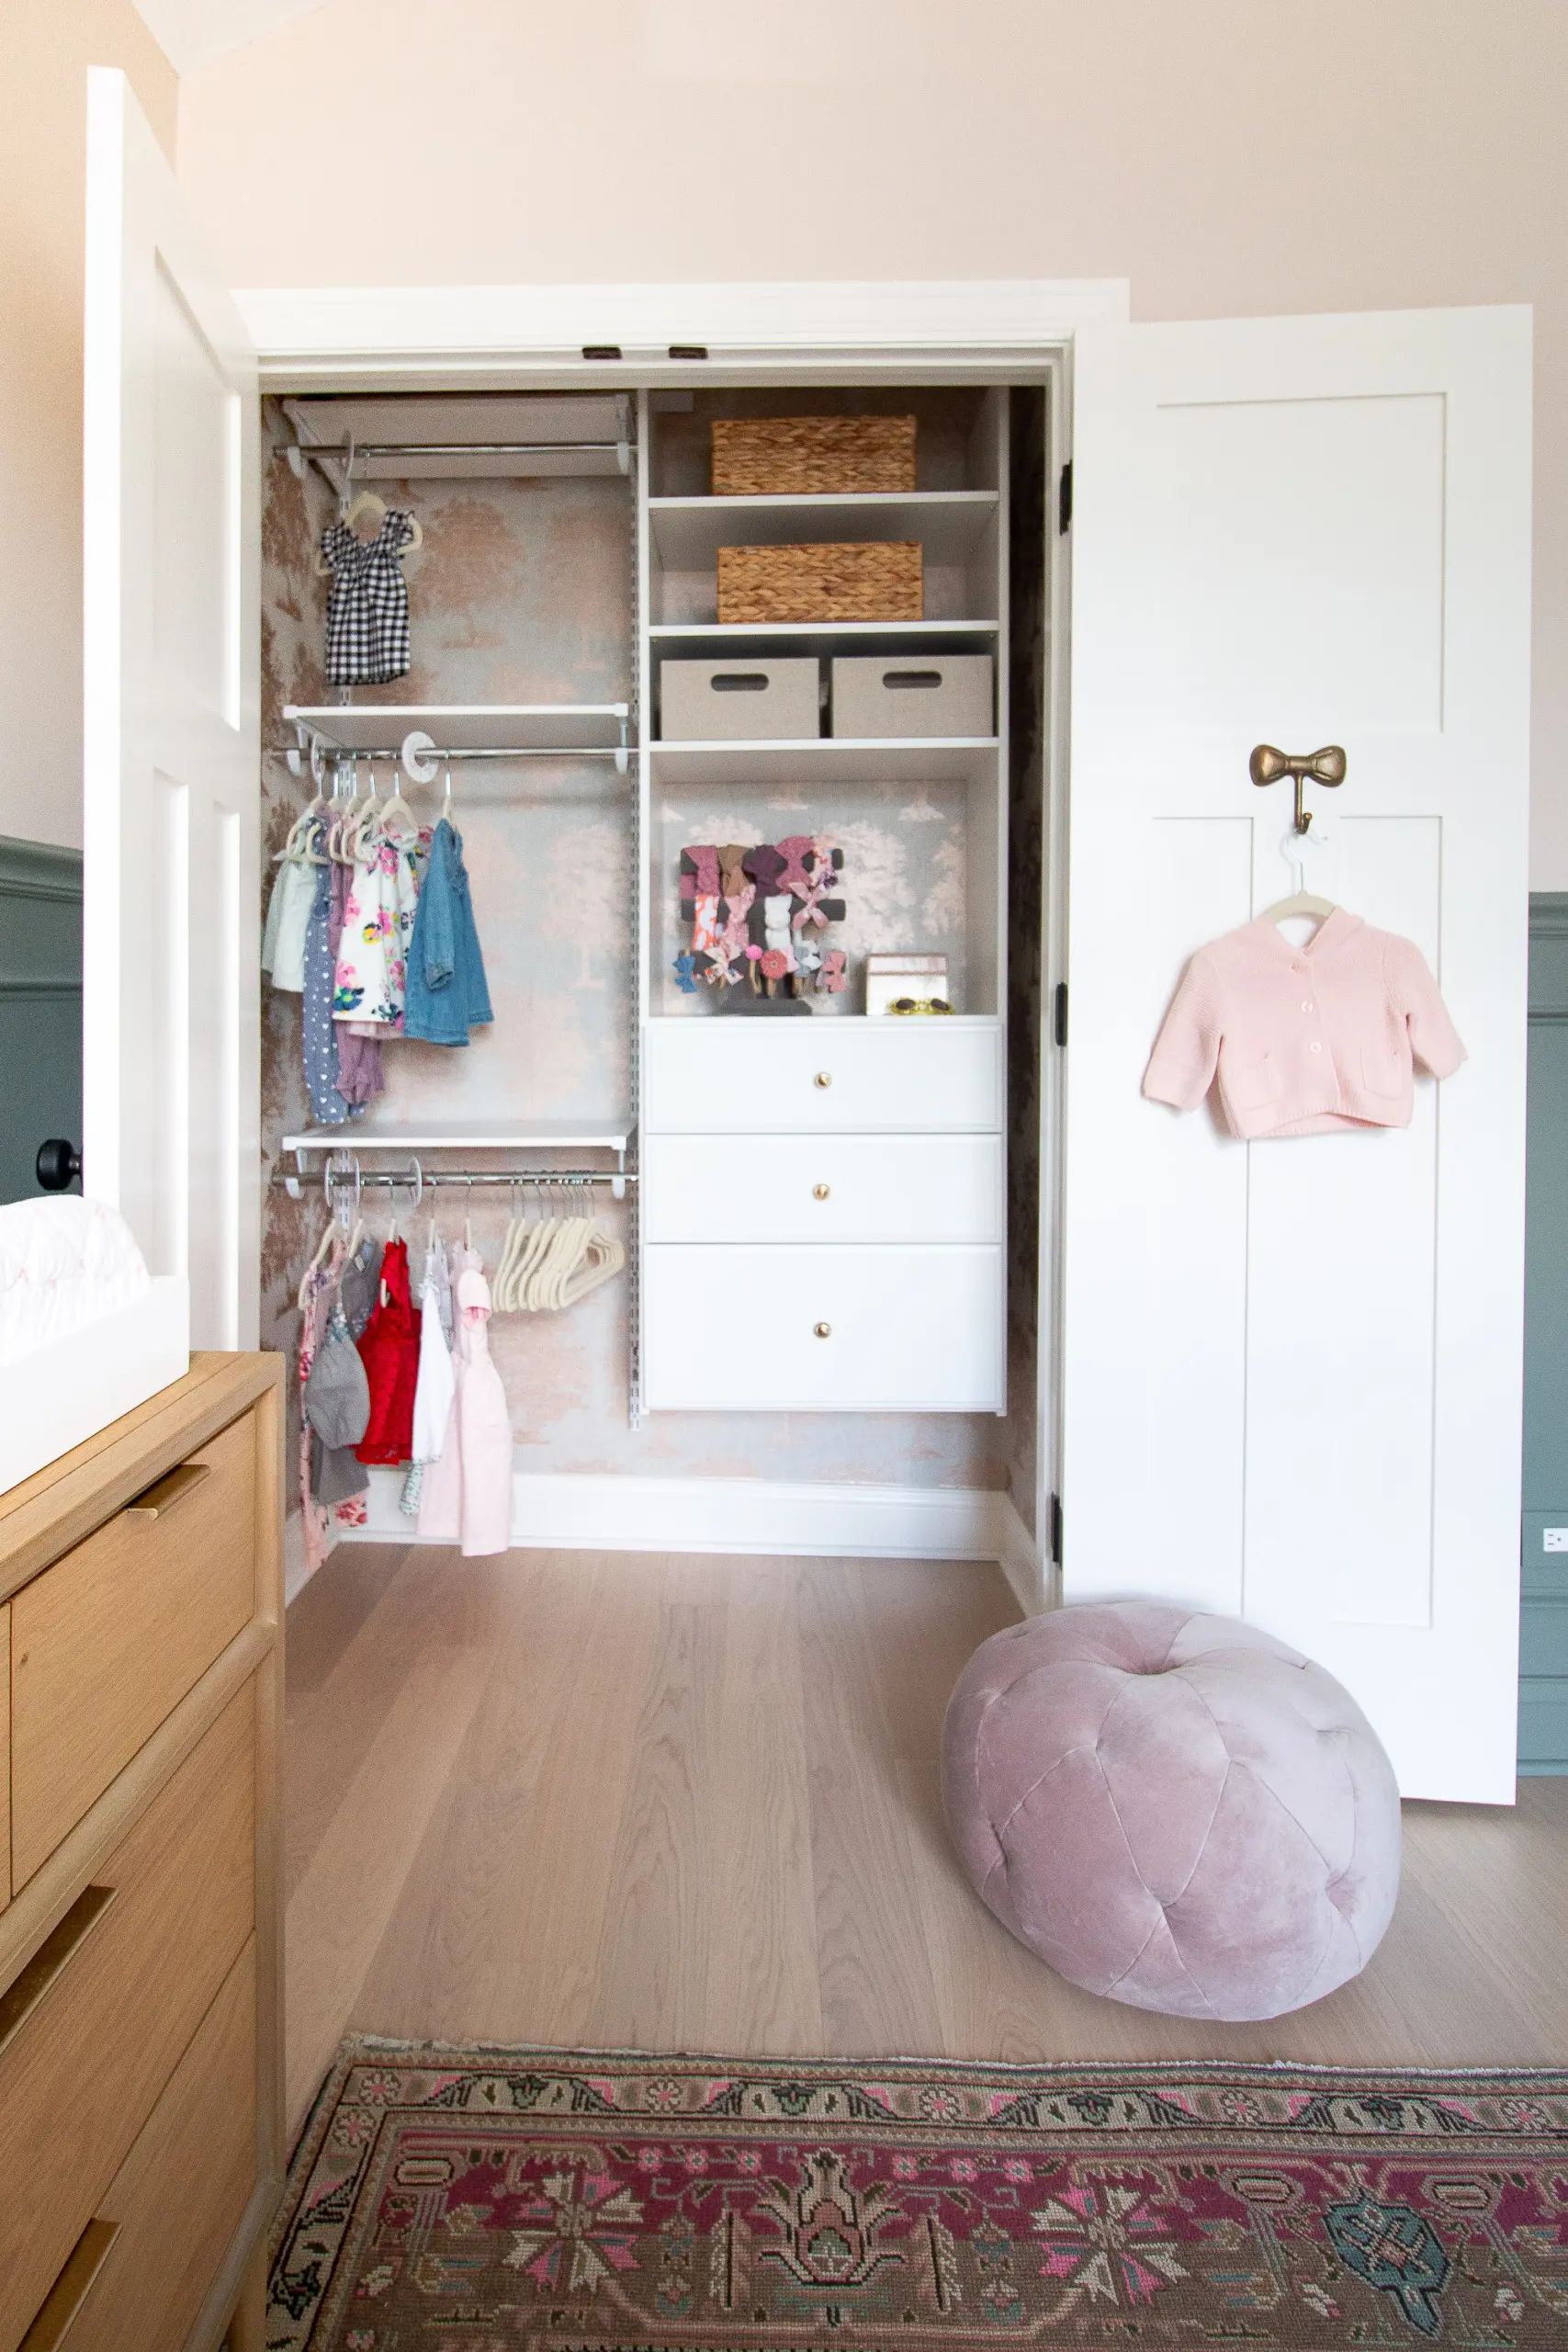
I’m really pleased with how this closet turned out. We have lots of space and more importantly, plenty of space to grow into!
Prepping the Dresser
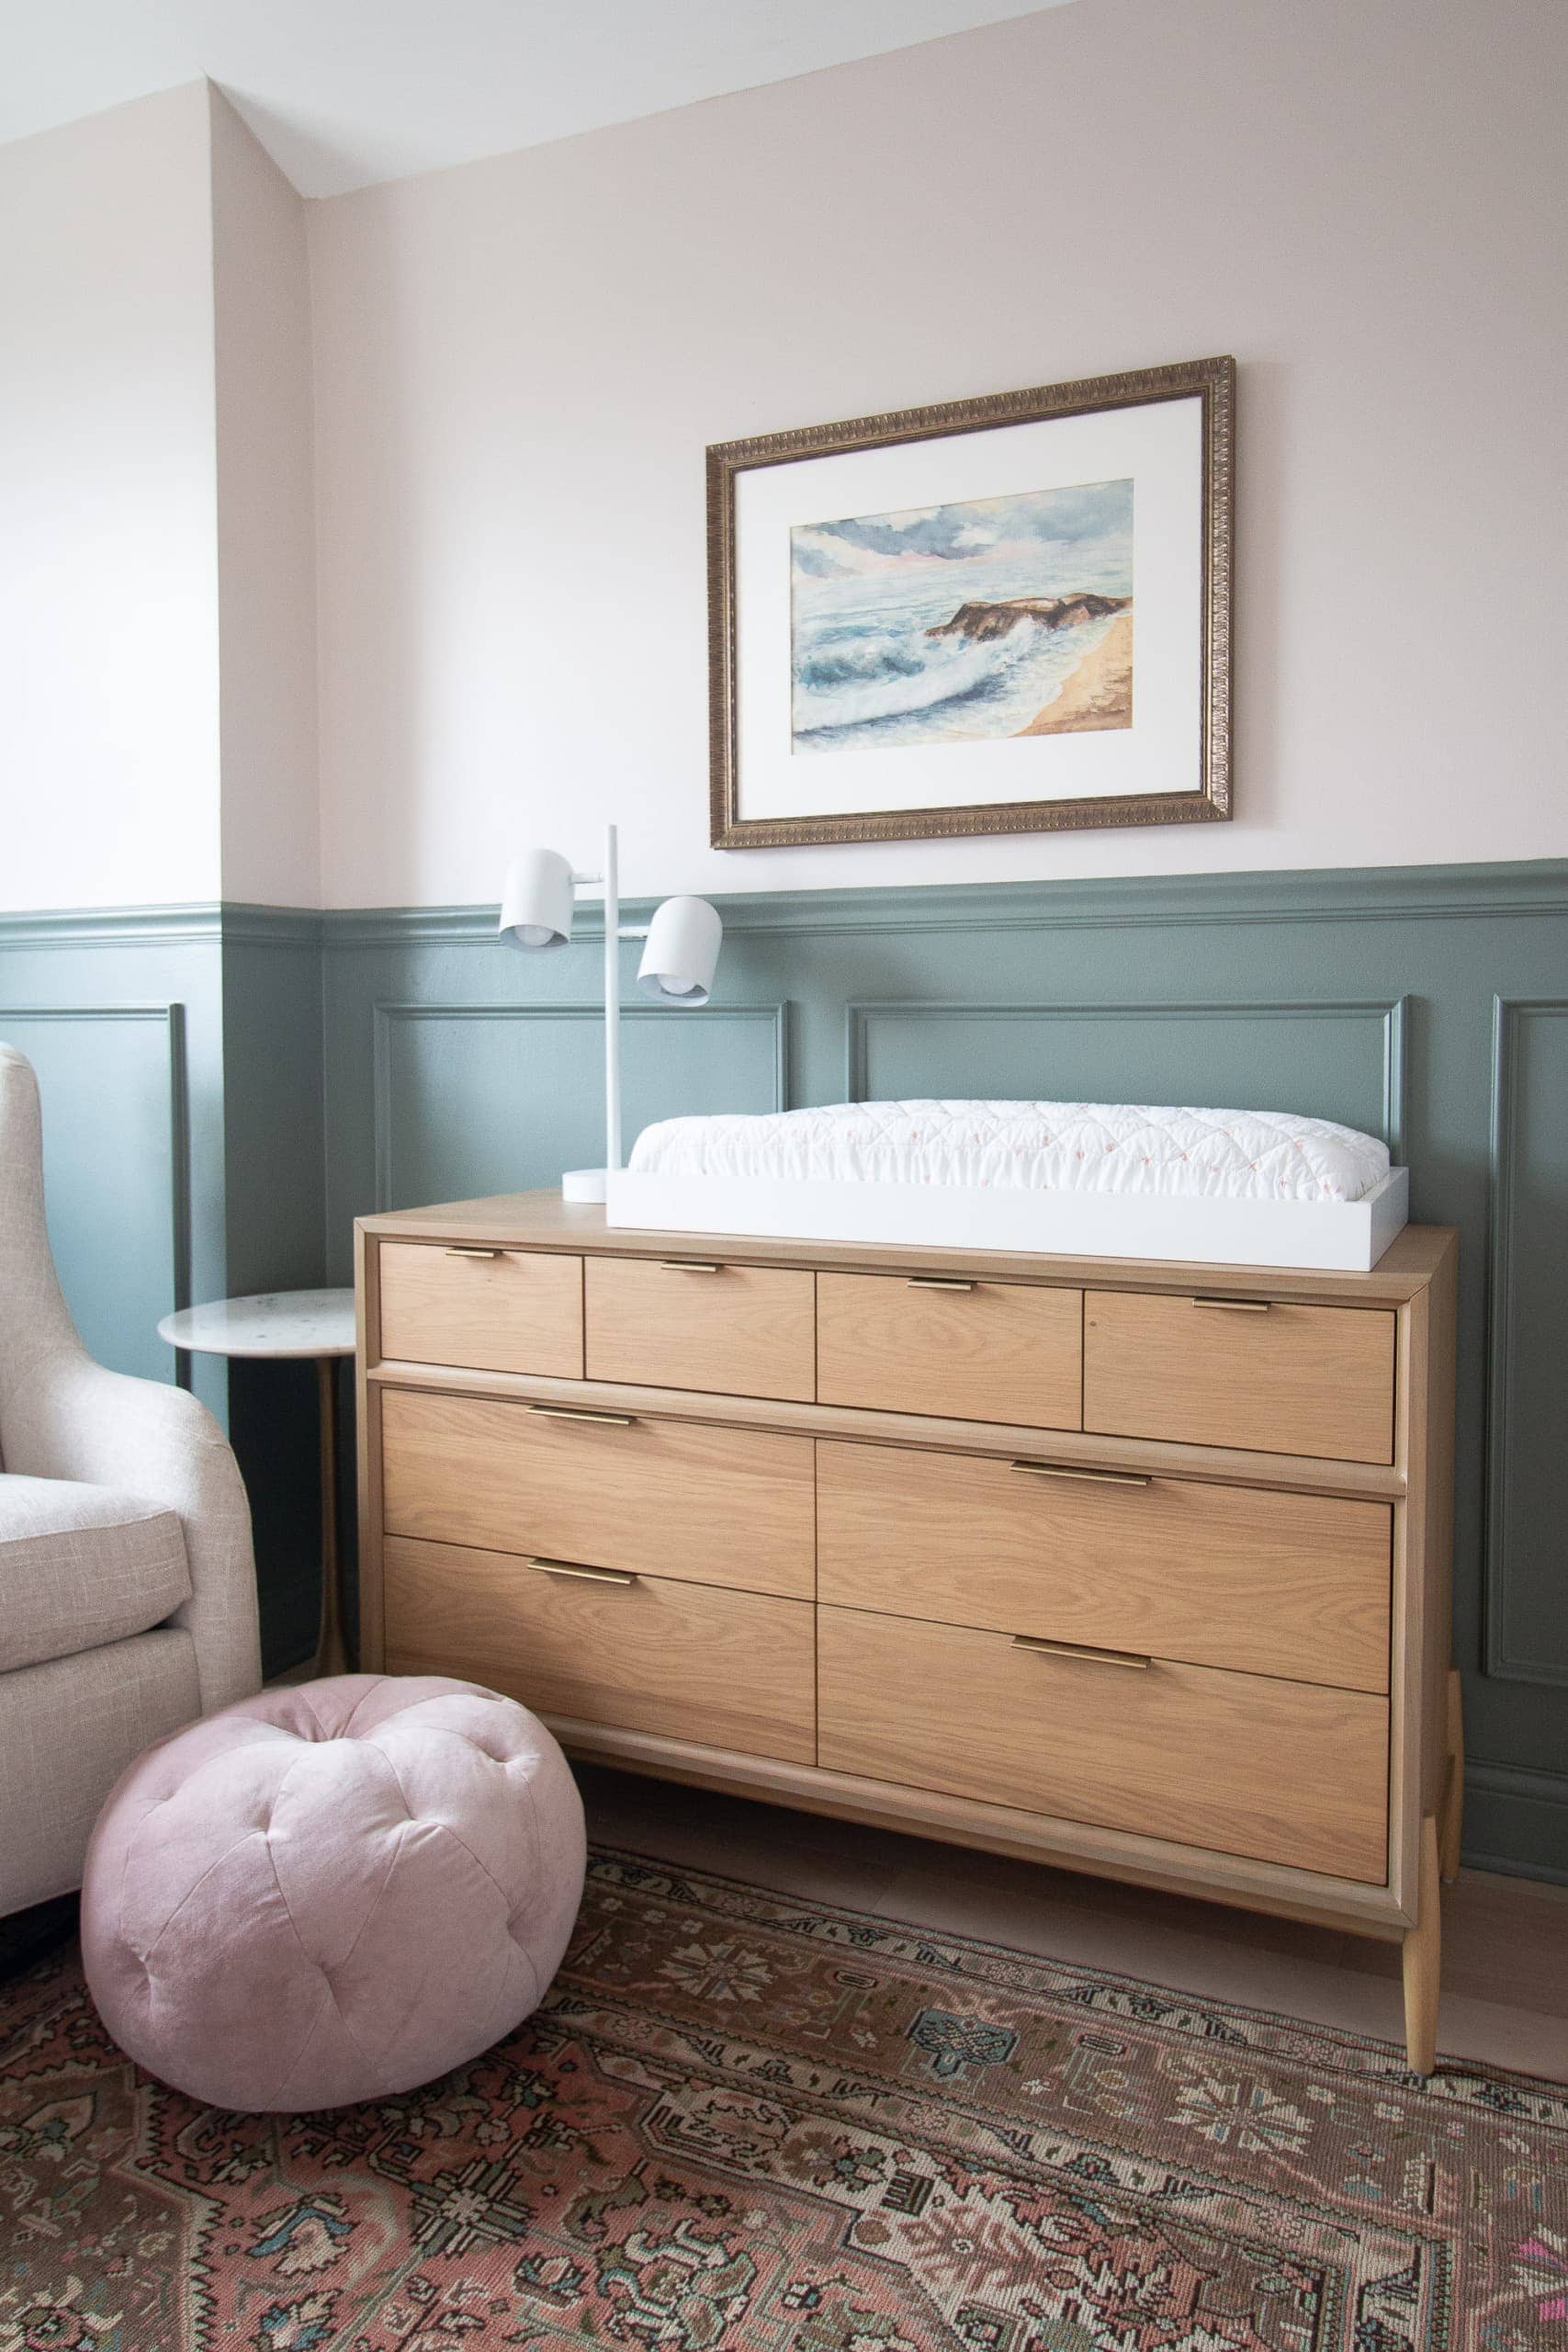
The dresser holds lots of onesies and casual clothing. Let’s take a look…
I like that the top drawers are smaller so we can keep items a bit more compact. Since her changing pad is right on top, we’re planning to do her diaper changes right here and want all of the essentials nearby. I’ve got lots of diapers in one drawer. 
And then in the next drawer, I’ve got diaper accessories like wipes and butt cream. I’m sure this too will change as we get adjusted to life as a newborn and figure out her favorite items. I bought this pack of plastic drawer organizers to keep little items corraled and they’re awesome. 
The plastic bins are especially handy to control all of those teeny tiny baby socks! 
In the drawers, I have onesies, tops, little pants, and sleepers. These are the clothes we’ll be reaching for every day, so I wanted them close by when we change her. I used this rolling technique and did my best to organize by size. It’s hard to plan these out exactly since we don’t know how big she’ll be when she arrives. 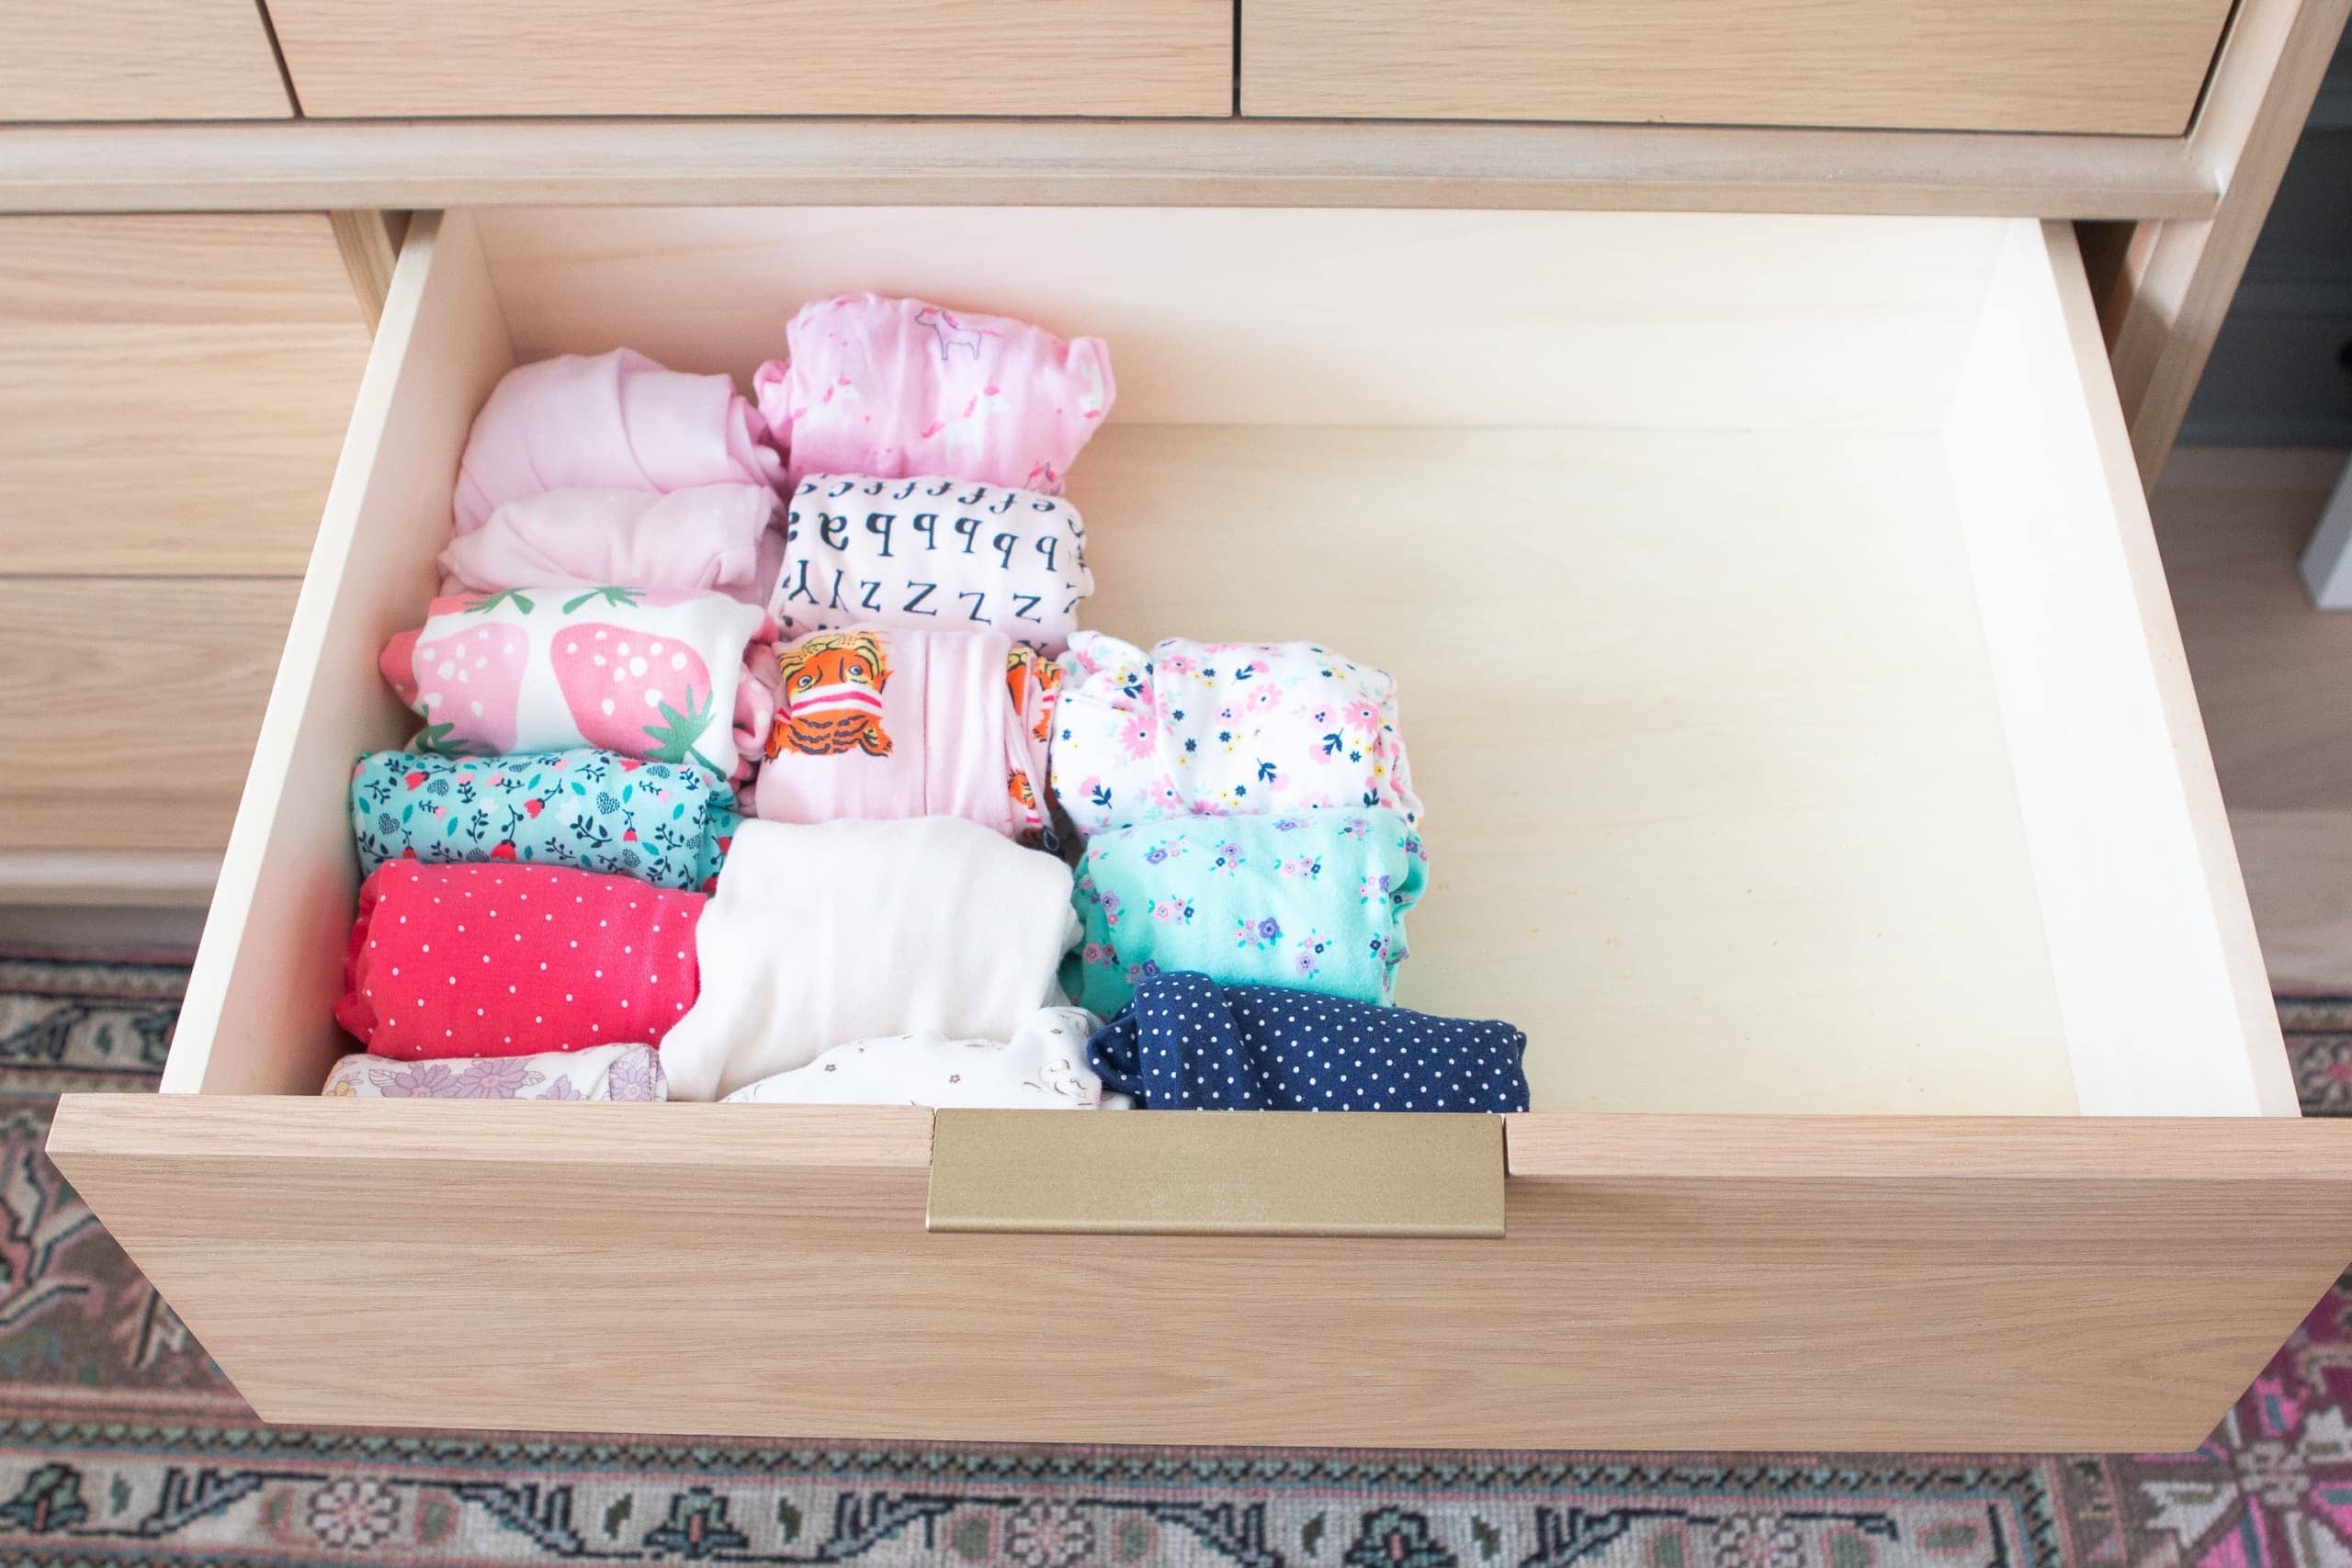
In here, I rolled up her footed pajamas. She is going to be one stylish little girl!
More Storage in the Built-Ins

The drawers in the built-ins are super handy and convenient. In here, we put her toys for easy access. Isn’t the “My First Tools” toy the cutest? A reader sent it to me and it was the most thoughtful gift ever. 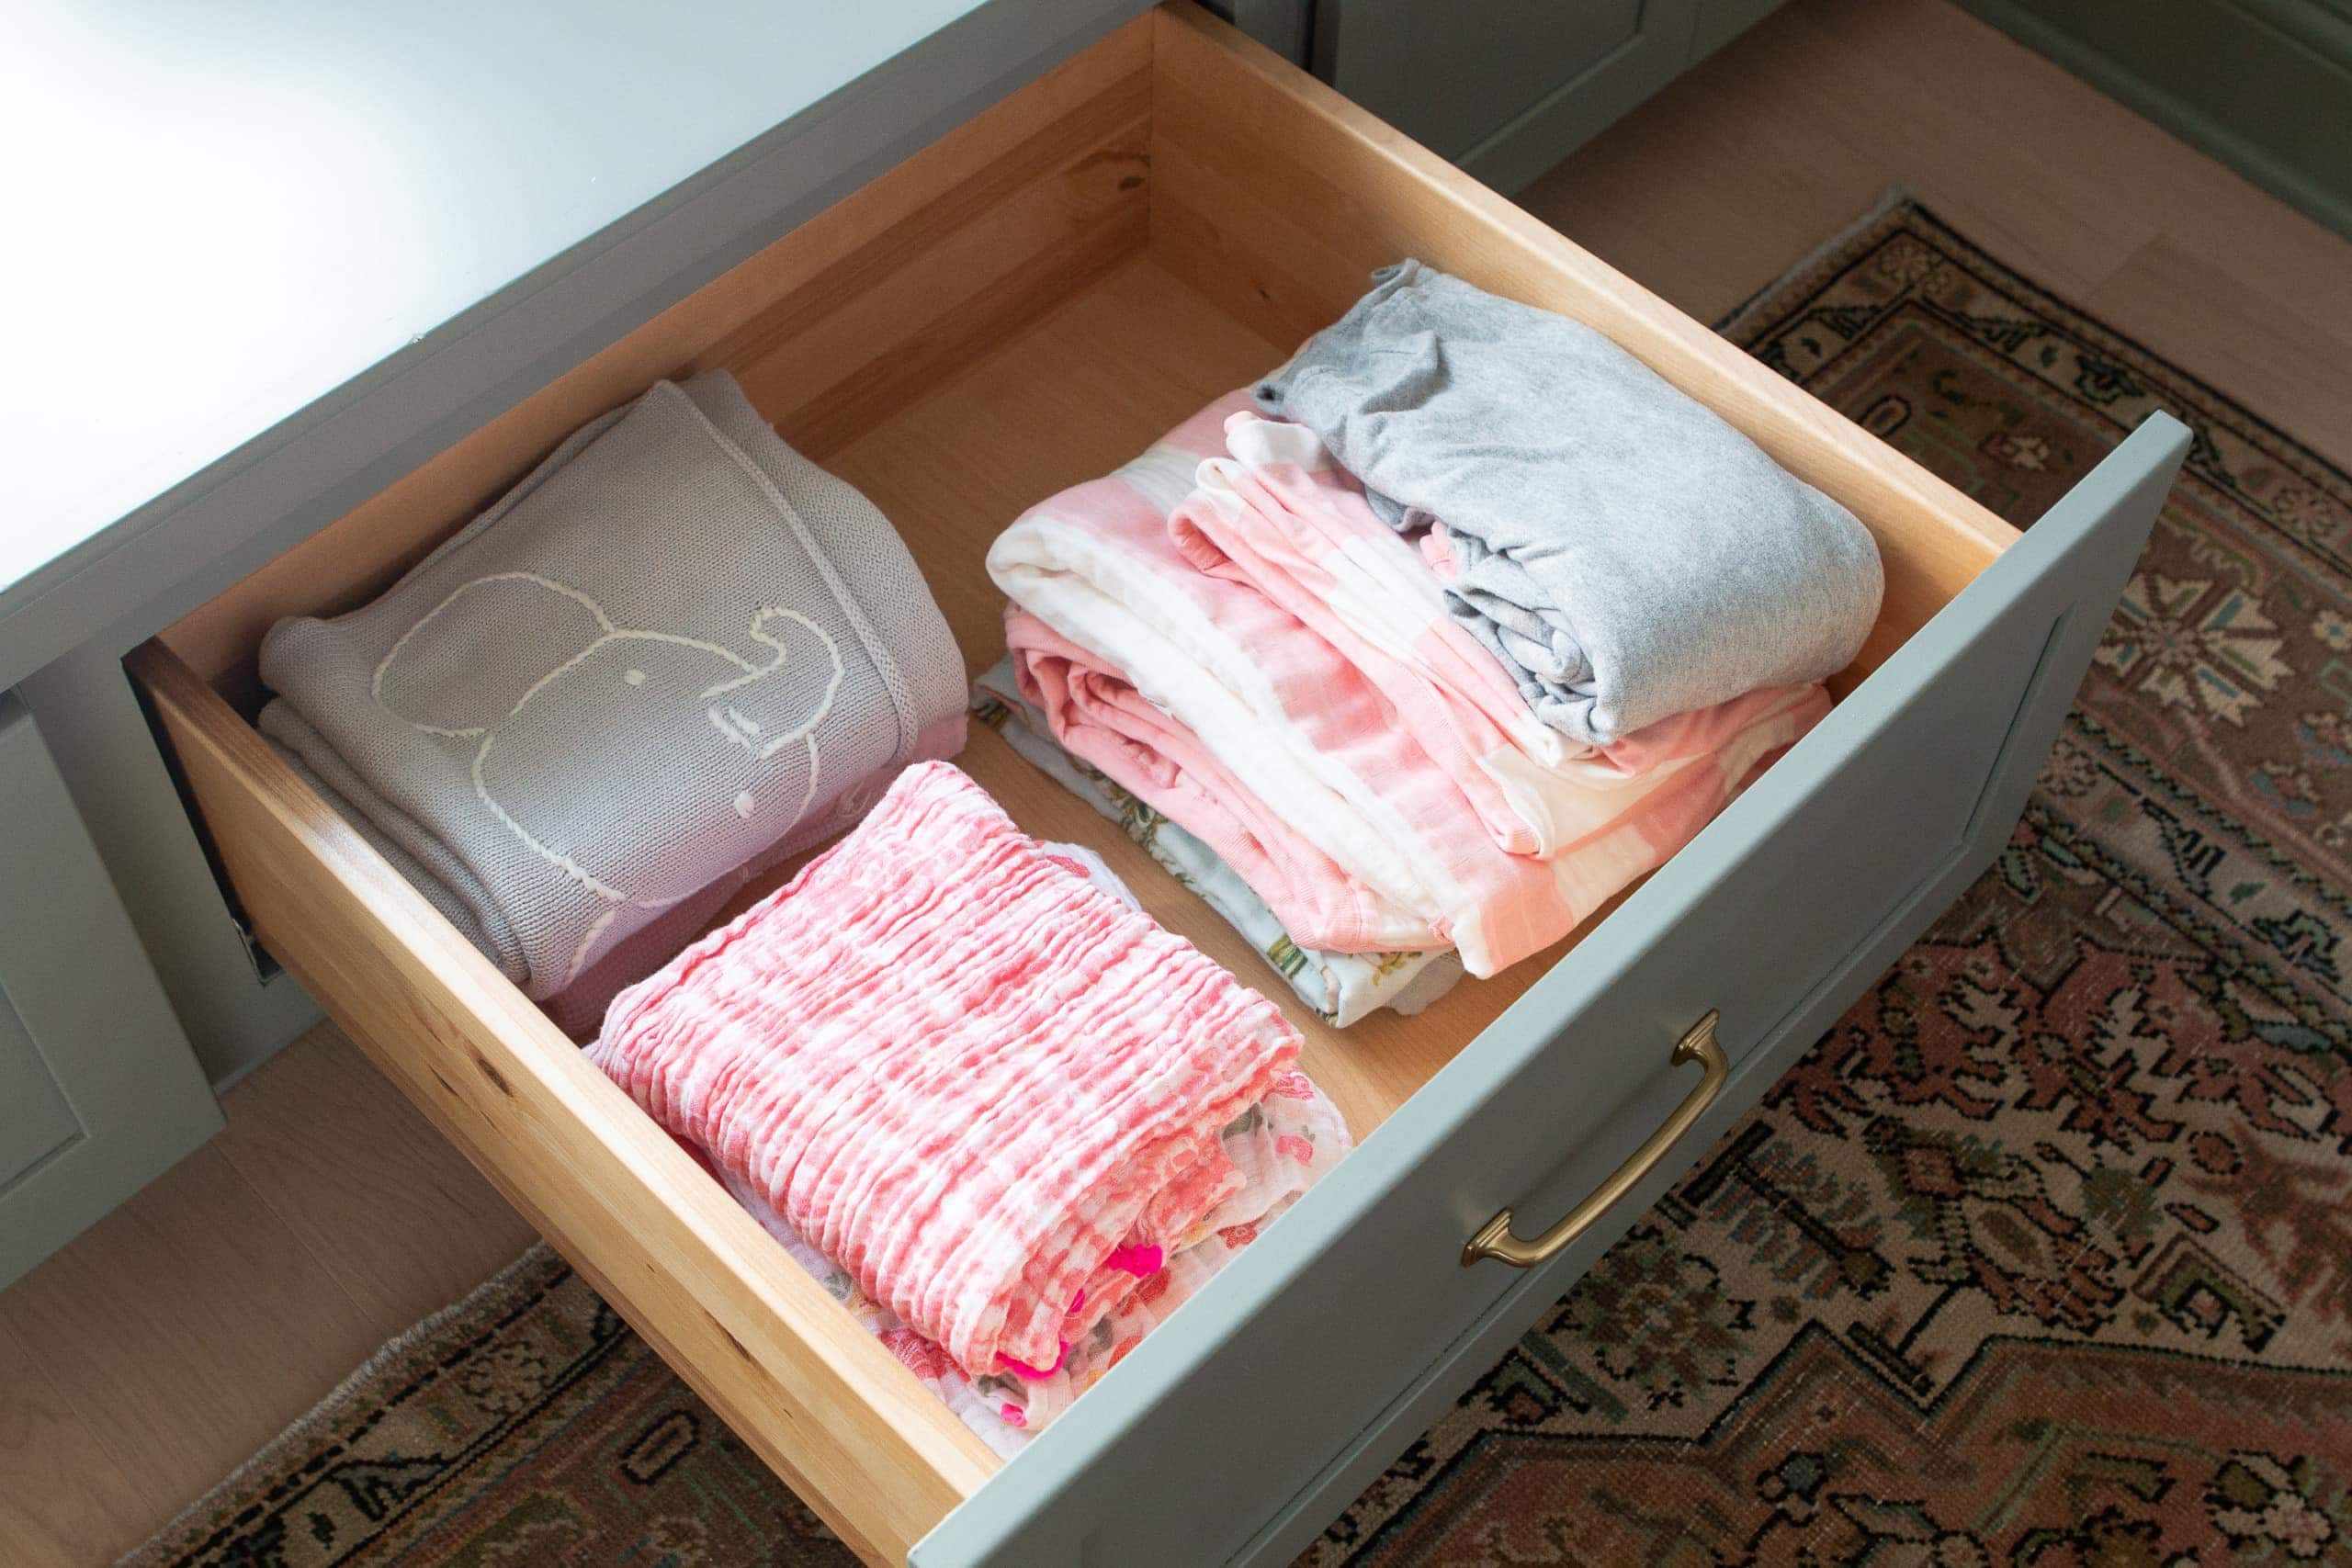
The other drawer holds blankets and swaddles. It’s nice to have them near the rocker so I can grab what I need quickly. 
Inside the built-ins are pretty empty! I purchased more fabric bins to hold items when they eventually start to accumulate, but for now, three out of the four are empty. All we have in these cabinets are the electronics we still have to set up in the room (baby monitor, white noise machine, etc.) It’s the last item on our to-do list!
Organizing a Nursery – Sources
Here are all of the sources for the organizing components in the space. Keep in mind, next week I’m revealing the entire room so I’ll be sharing all of the final sources at that time. 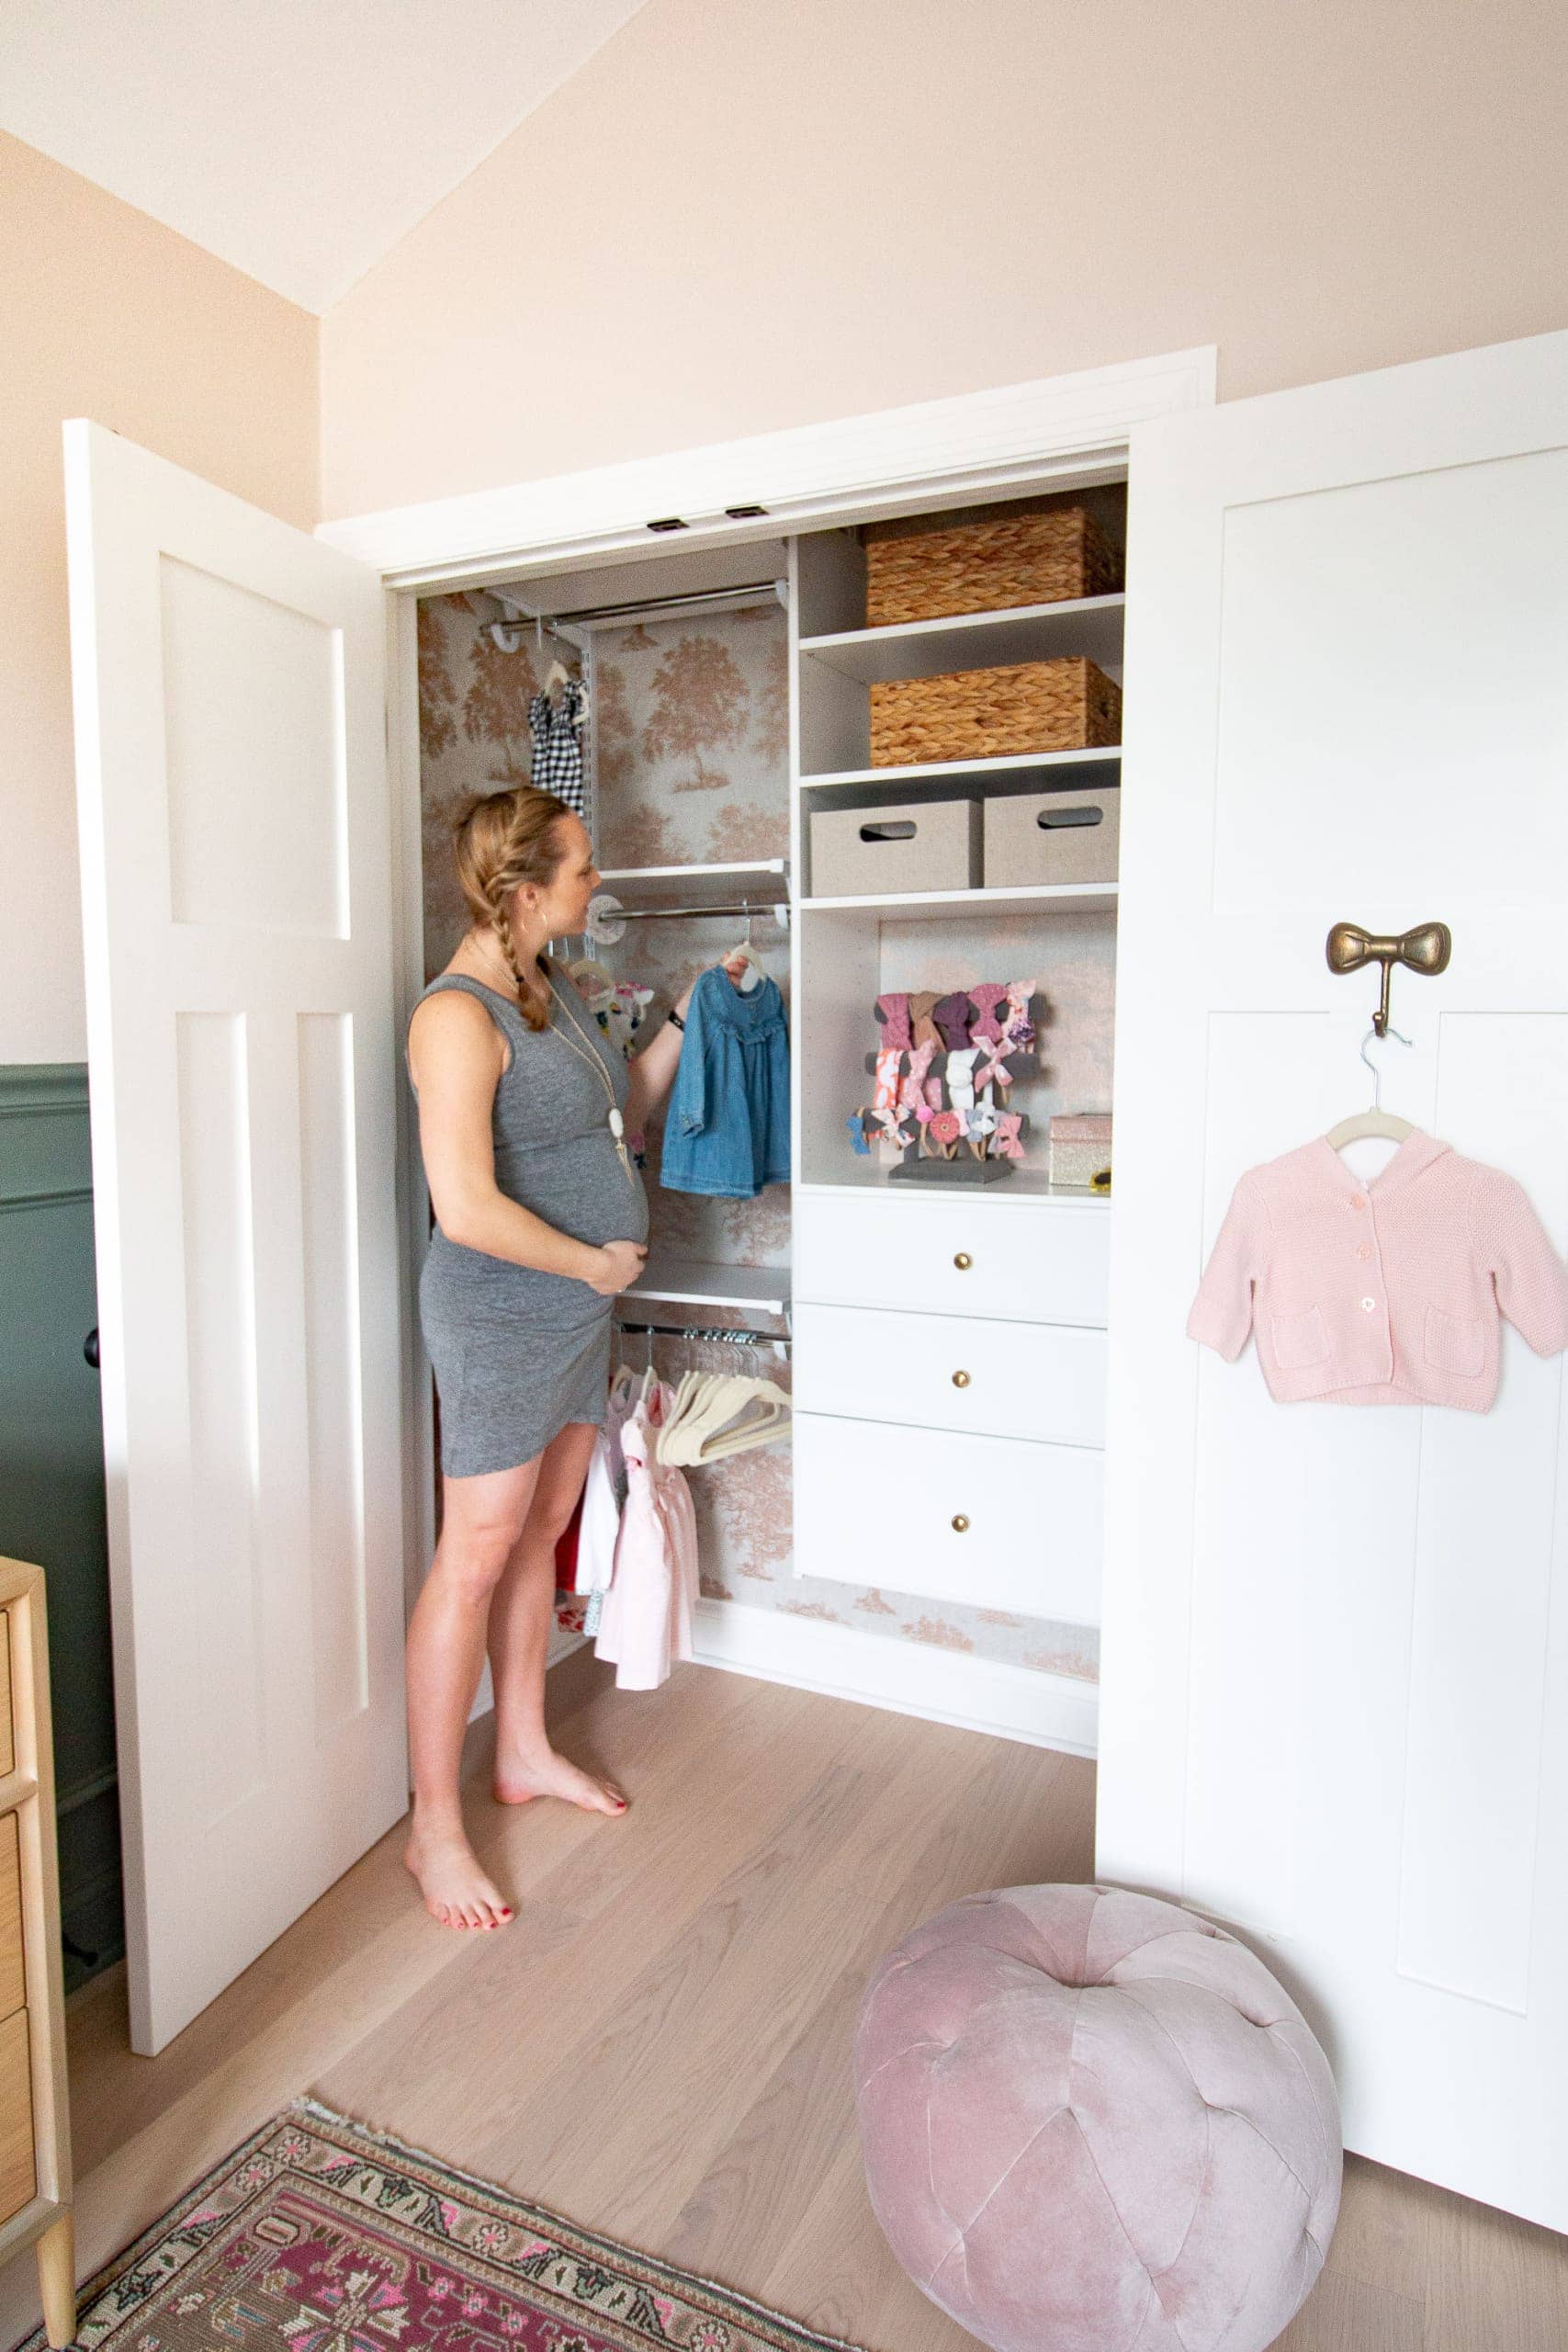
Wall Color, Valspar “Warm Fog” // Chair Rail Paint Color (custom color in this post) // Built-Ins // Wallpaper // Wicker Baskets // Plastic Drawer Organizers // Cream Fabric Bins // Hanging Rod (2) // Shelf Brackets (6) // Shelving Rail // Hardware Kit // White Shelves (3) // Rod Hangers (2) // Shelving Uprights (2) // Cabinet Knobs // Easy Track White Wood Closet Kit// Bow Hook // Bow Holder // Size Dividers // Baby Hangers
The next time you see this room, you’ll see ALL OF IT! Yep, the final nursery reveal hits the blog next Monday. I have a video planned and tons of photos of this entire space. I can’t wait to share my favorite room design of all time…
Casey
Nursery Posts
- Wallpapered Closet
- Nursery DIY Plan
- Sage Green Built-In Reveal
- Nursery Furniture & Design Plan
- Adding DIY Chair Rail
- Painting the Nursery Blush
- Nursery Closet & Organized Drawers
- Window Treatment Plan
- Nursery Reveal
- Nursery Before and After + Sources
- Rory’s Nursery – Changes We’ve Made
- Making Special Vintage Art for Rory’s Room
- Creating Rory’s Nursery Gallery Wall