How to Install a Wall Mural
Our blue built-ins are such a statement piece in our office. They’re bold, dark, and your eye is automatically drawn to them. However, they kinda made the rest of the room look a bit dull. While I didn’t want to go ahead and paint the other walls super dark, I knew I needed to do something on the other side of the room to bring a bit of life in here. 
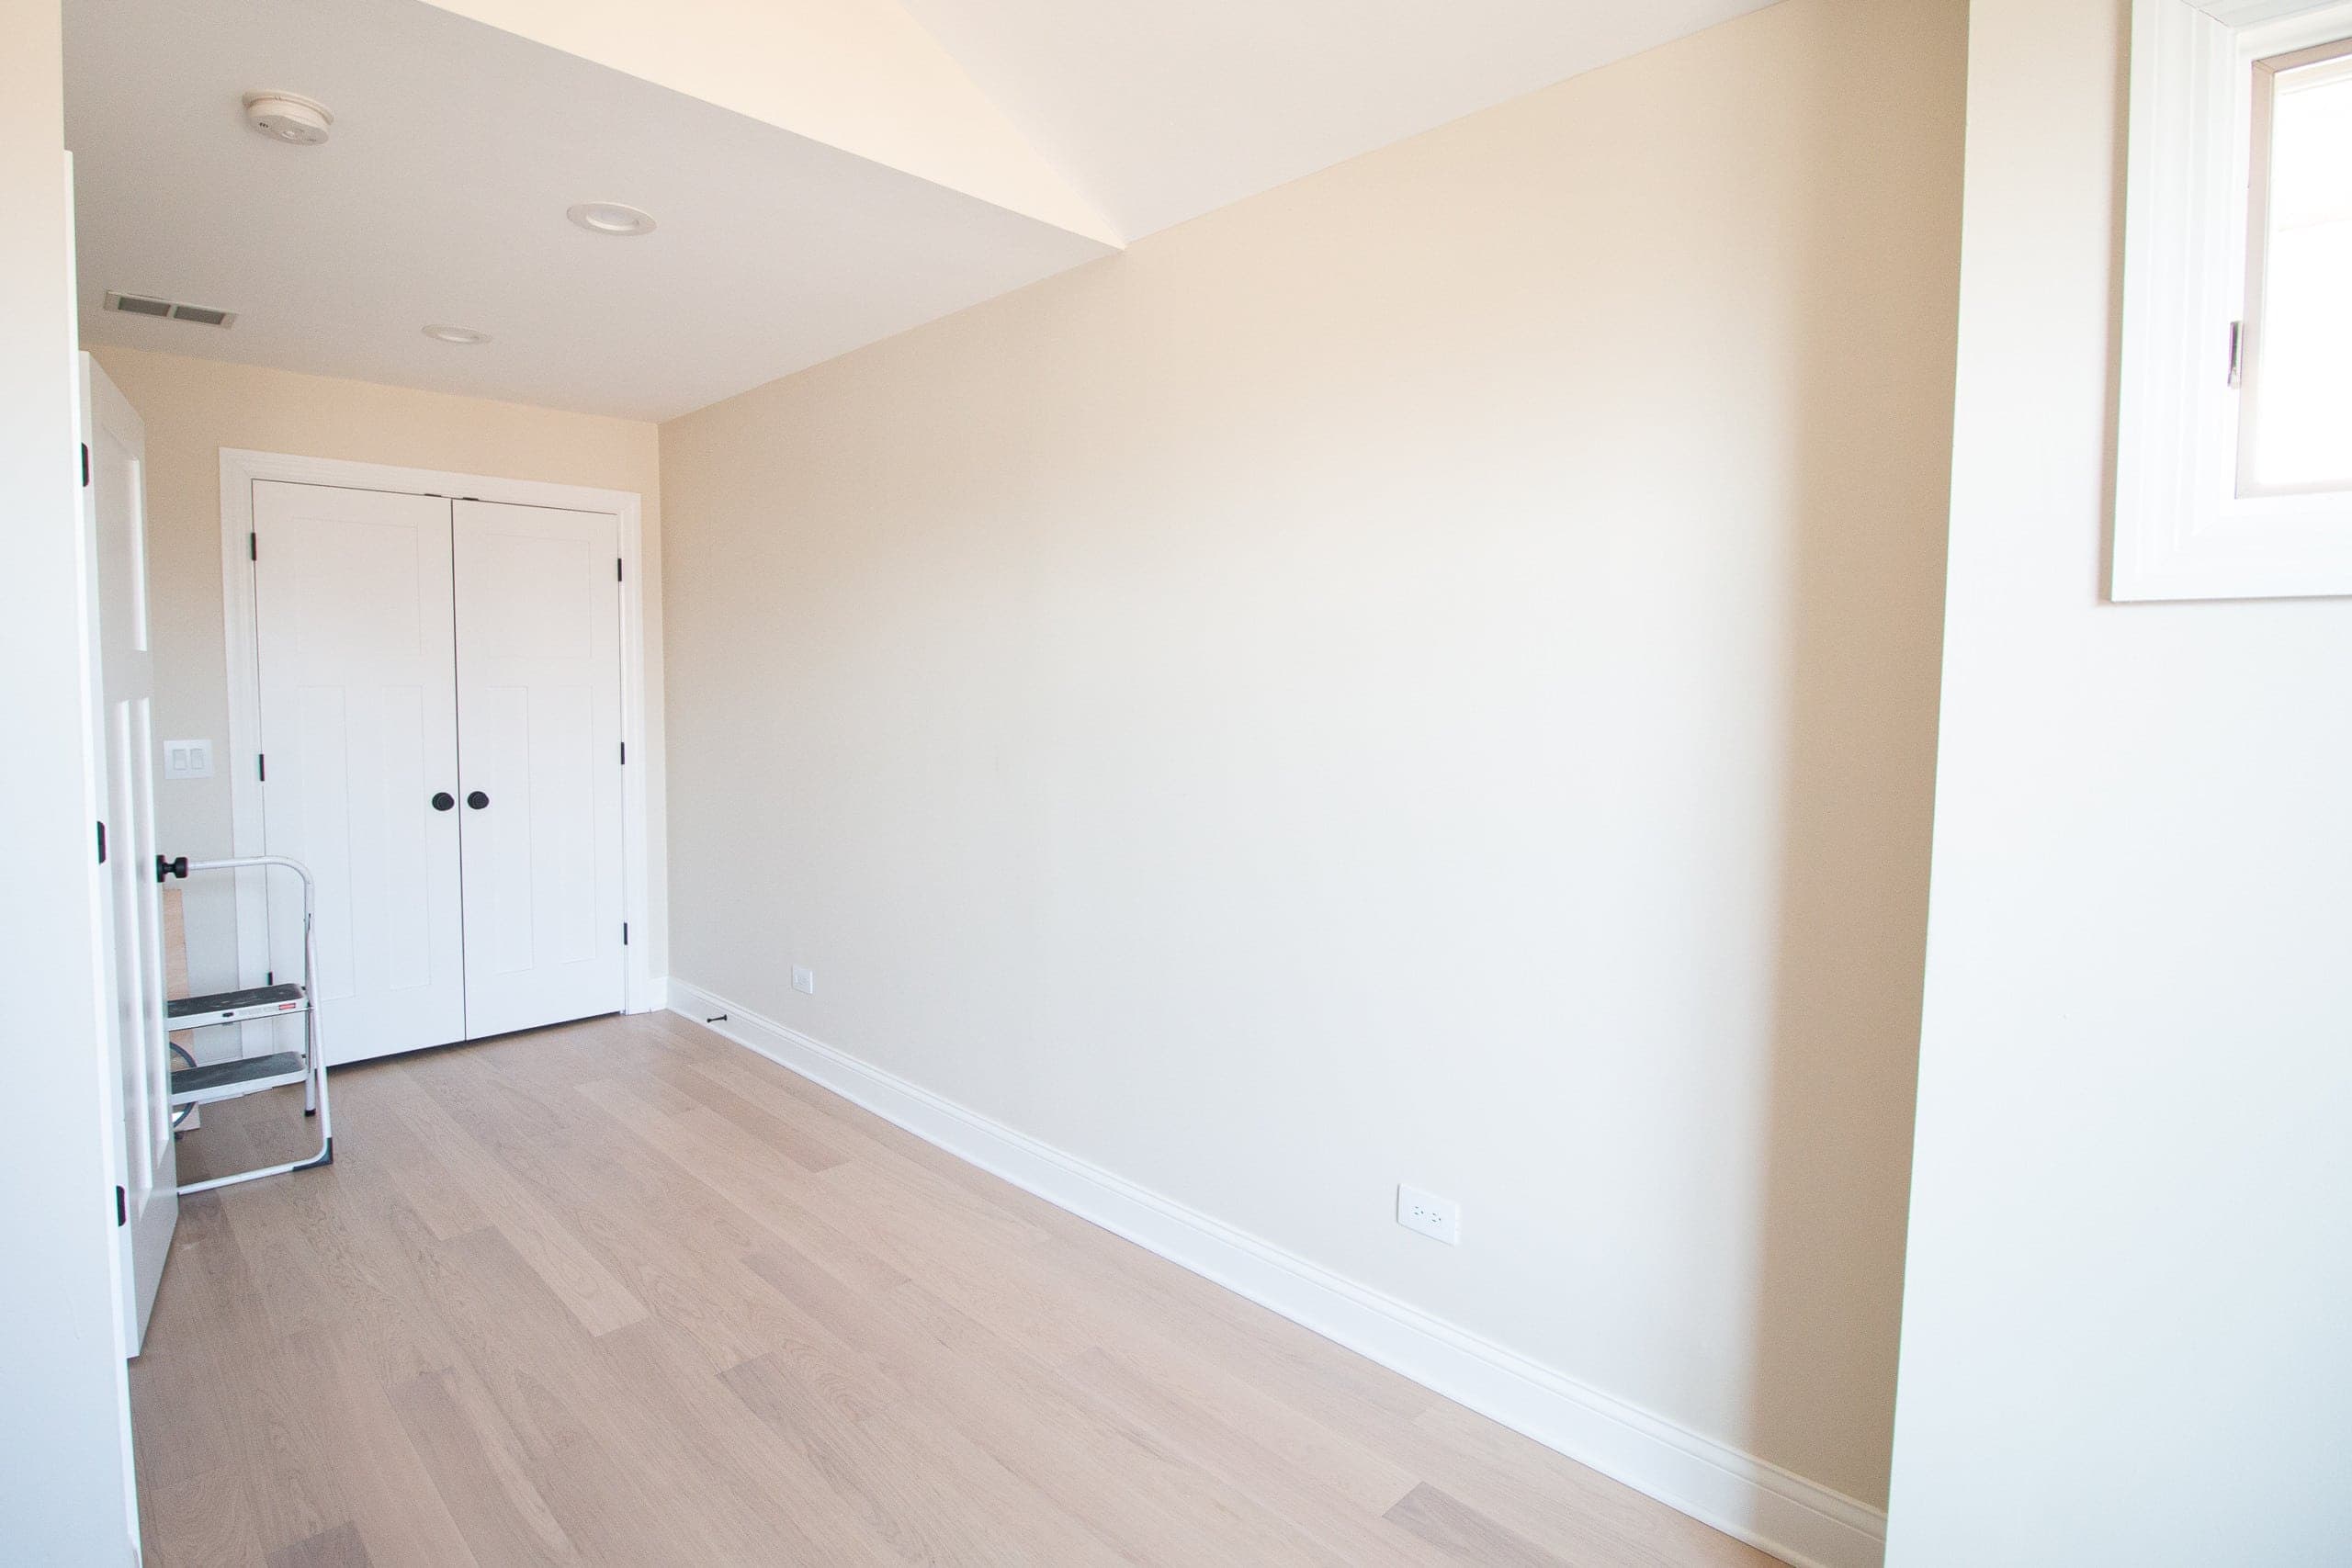
Here’s the huuuuge blank wall on the other side of the room. It’s about 15 feet wide and 8 feet tall. I love the wall color (Benjamin Moore “Ballet White”), but it just needed something a little extra. I considered doing another wallpaper since I’m alllll aboard the wallpaper train these days (I’m so into it since doing the nursery closet!). But I thought a repeating pattern over and over might be a bit much in here. That’s when I came up with the idea to do a wall mural here! Something subtle, something different, and something to add a bit of interest to this wall without distracting from the built-ins.
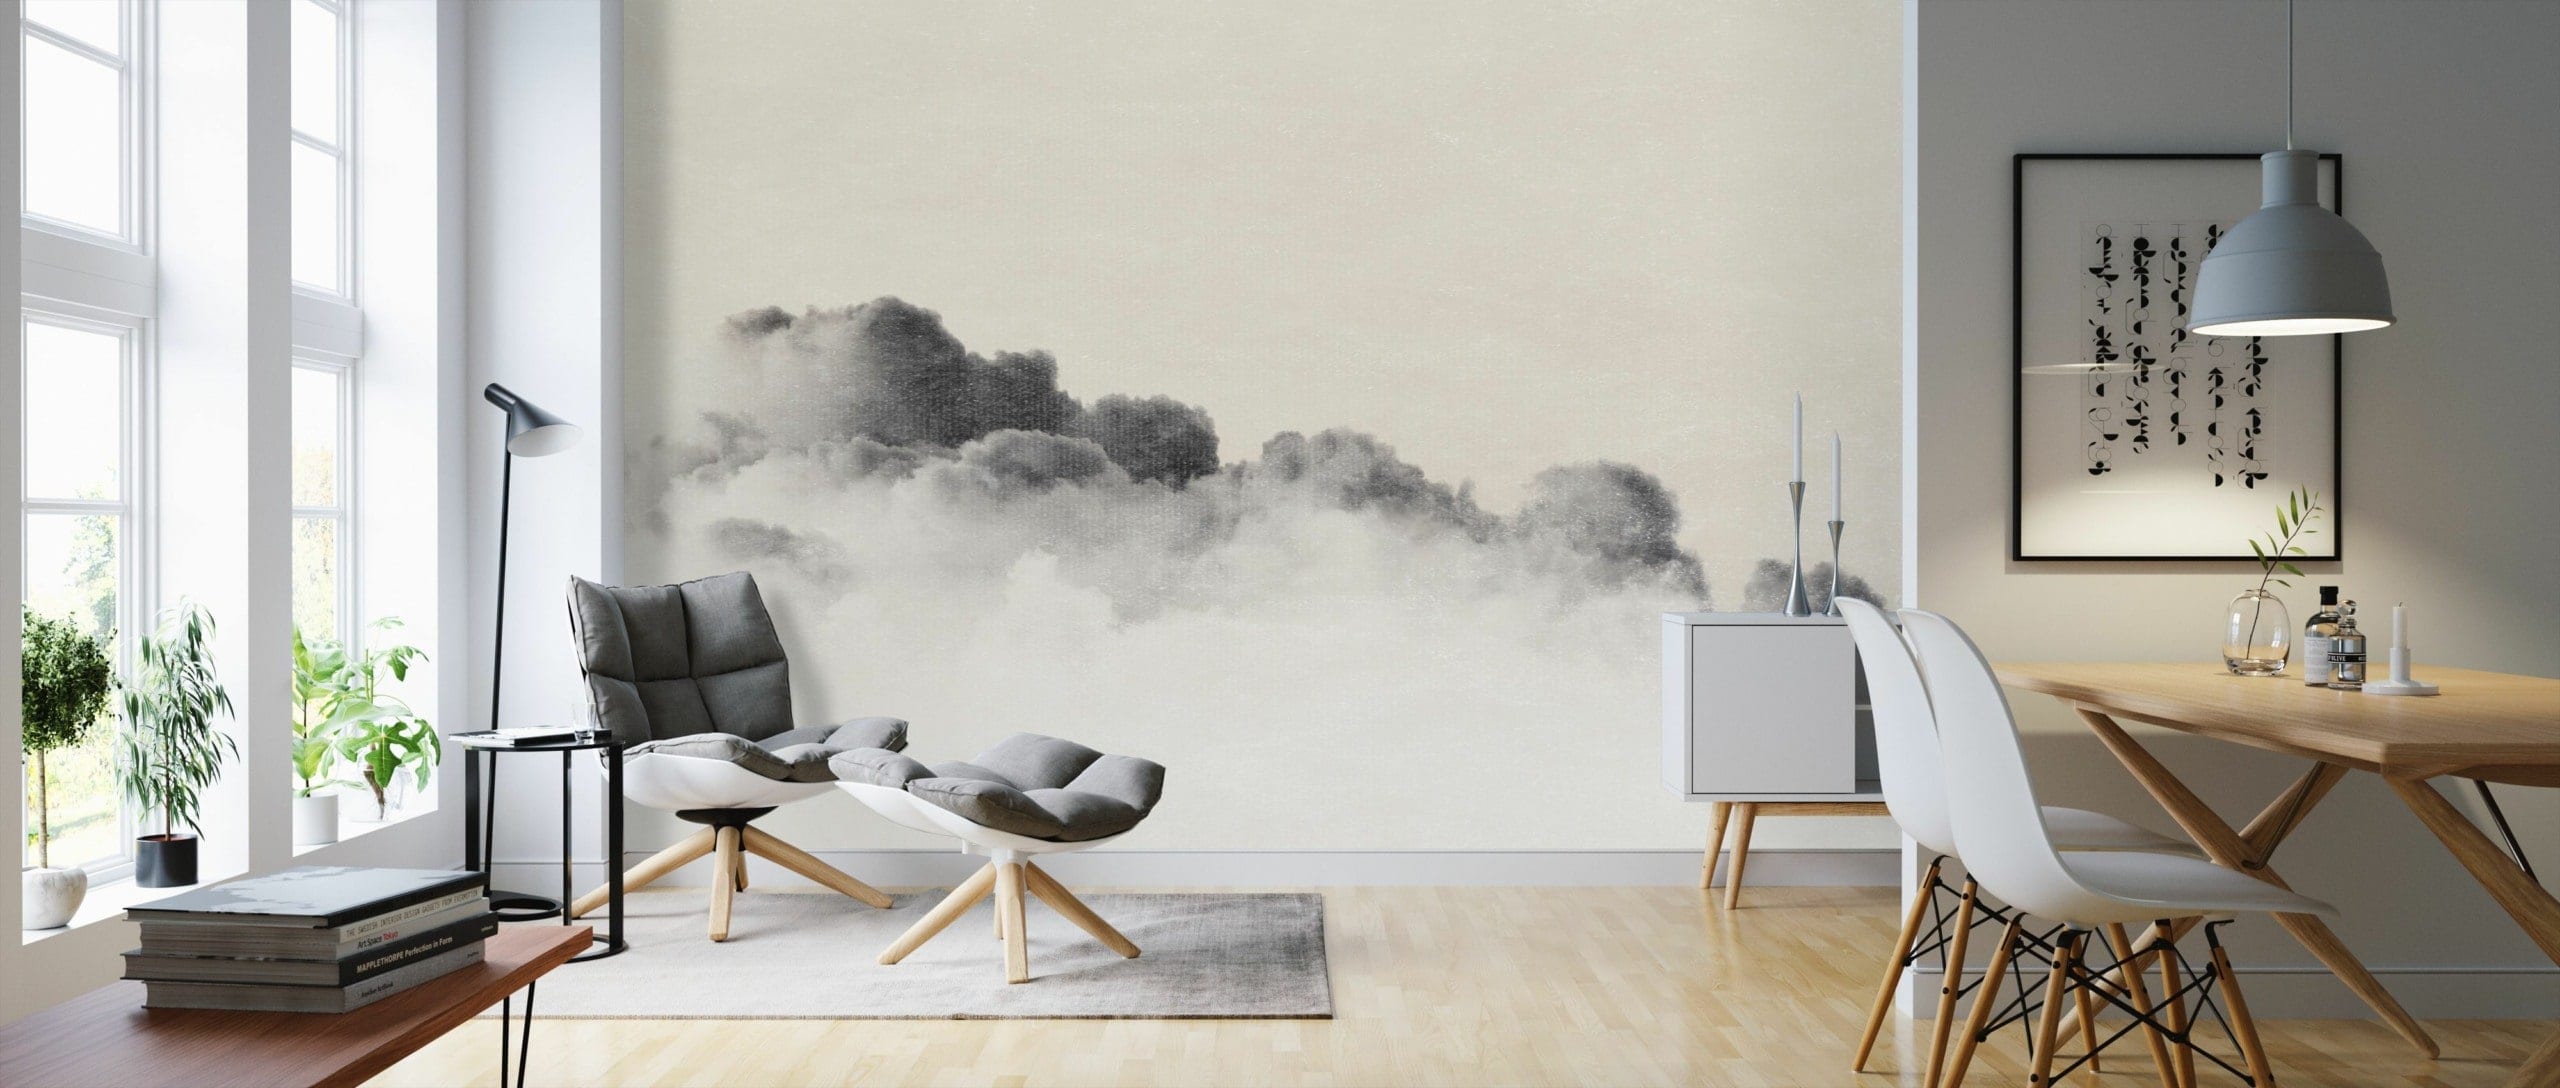
Photo via Photowall.com
I checked out lots of places online (even Minted sells wall murals these days) and I settled on the website Photowall.com. They have thousands of wall murals to choose from and the hardest part was narrowing it down to the one I wanted. After lots of perusing, I decided on this wall mural. I like that it wasn’t too bold and the coloring in the clouds would complement the dark blue paint on the built-ins. I measured my wall, typed in the dimensions (adding a few inches on each side just in case), and a few days later it arrived! P.S. Photowall created a code for 25% off that is good for the next month. Use “thediyplaybook2020” at checkout to redeem.
Here’s everything I learned about installing my new wall mural…
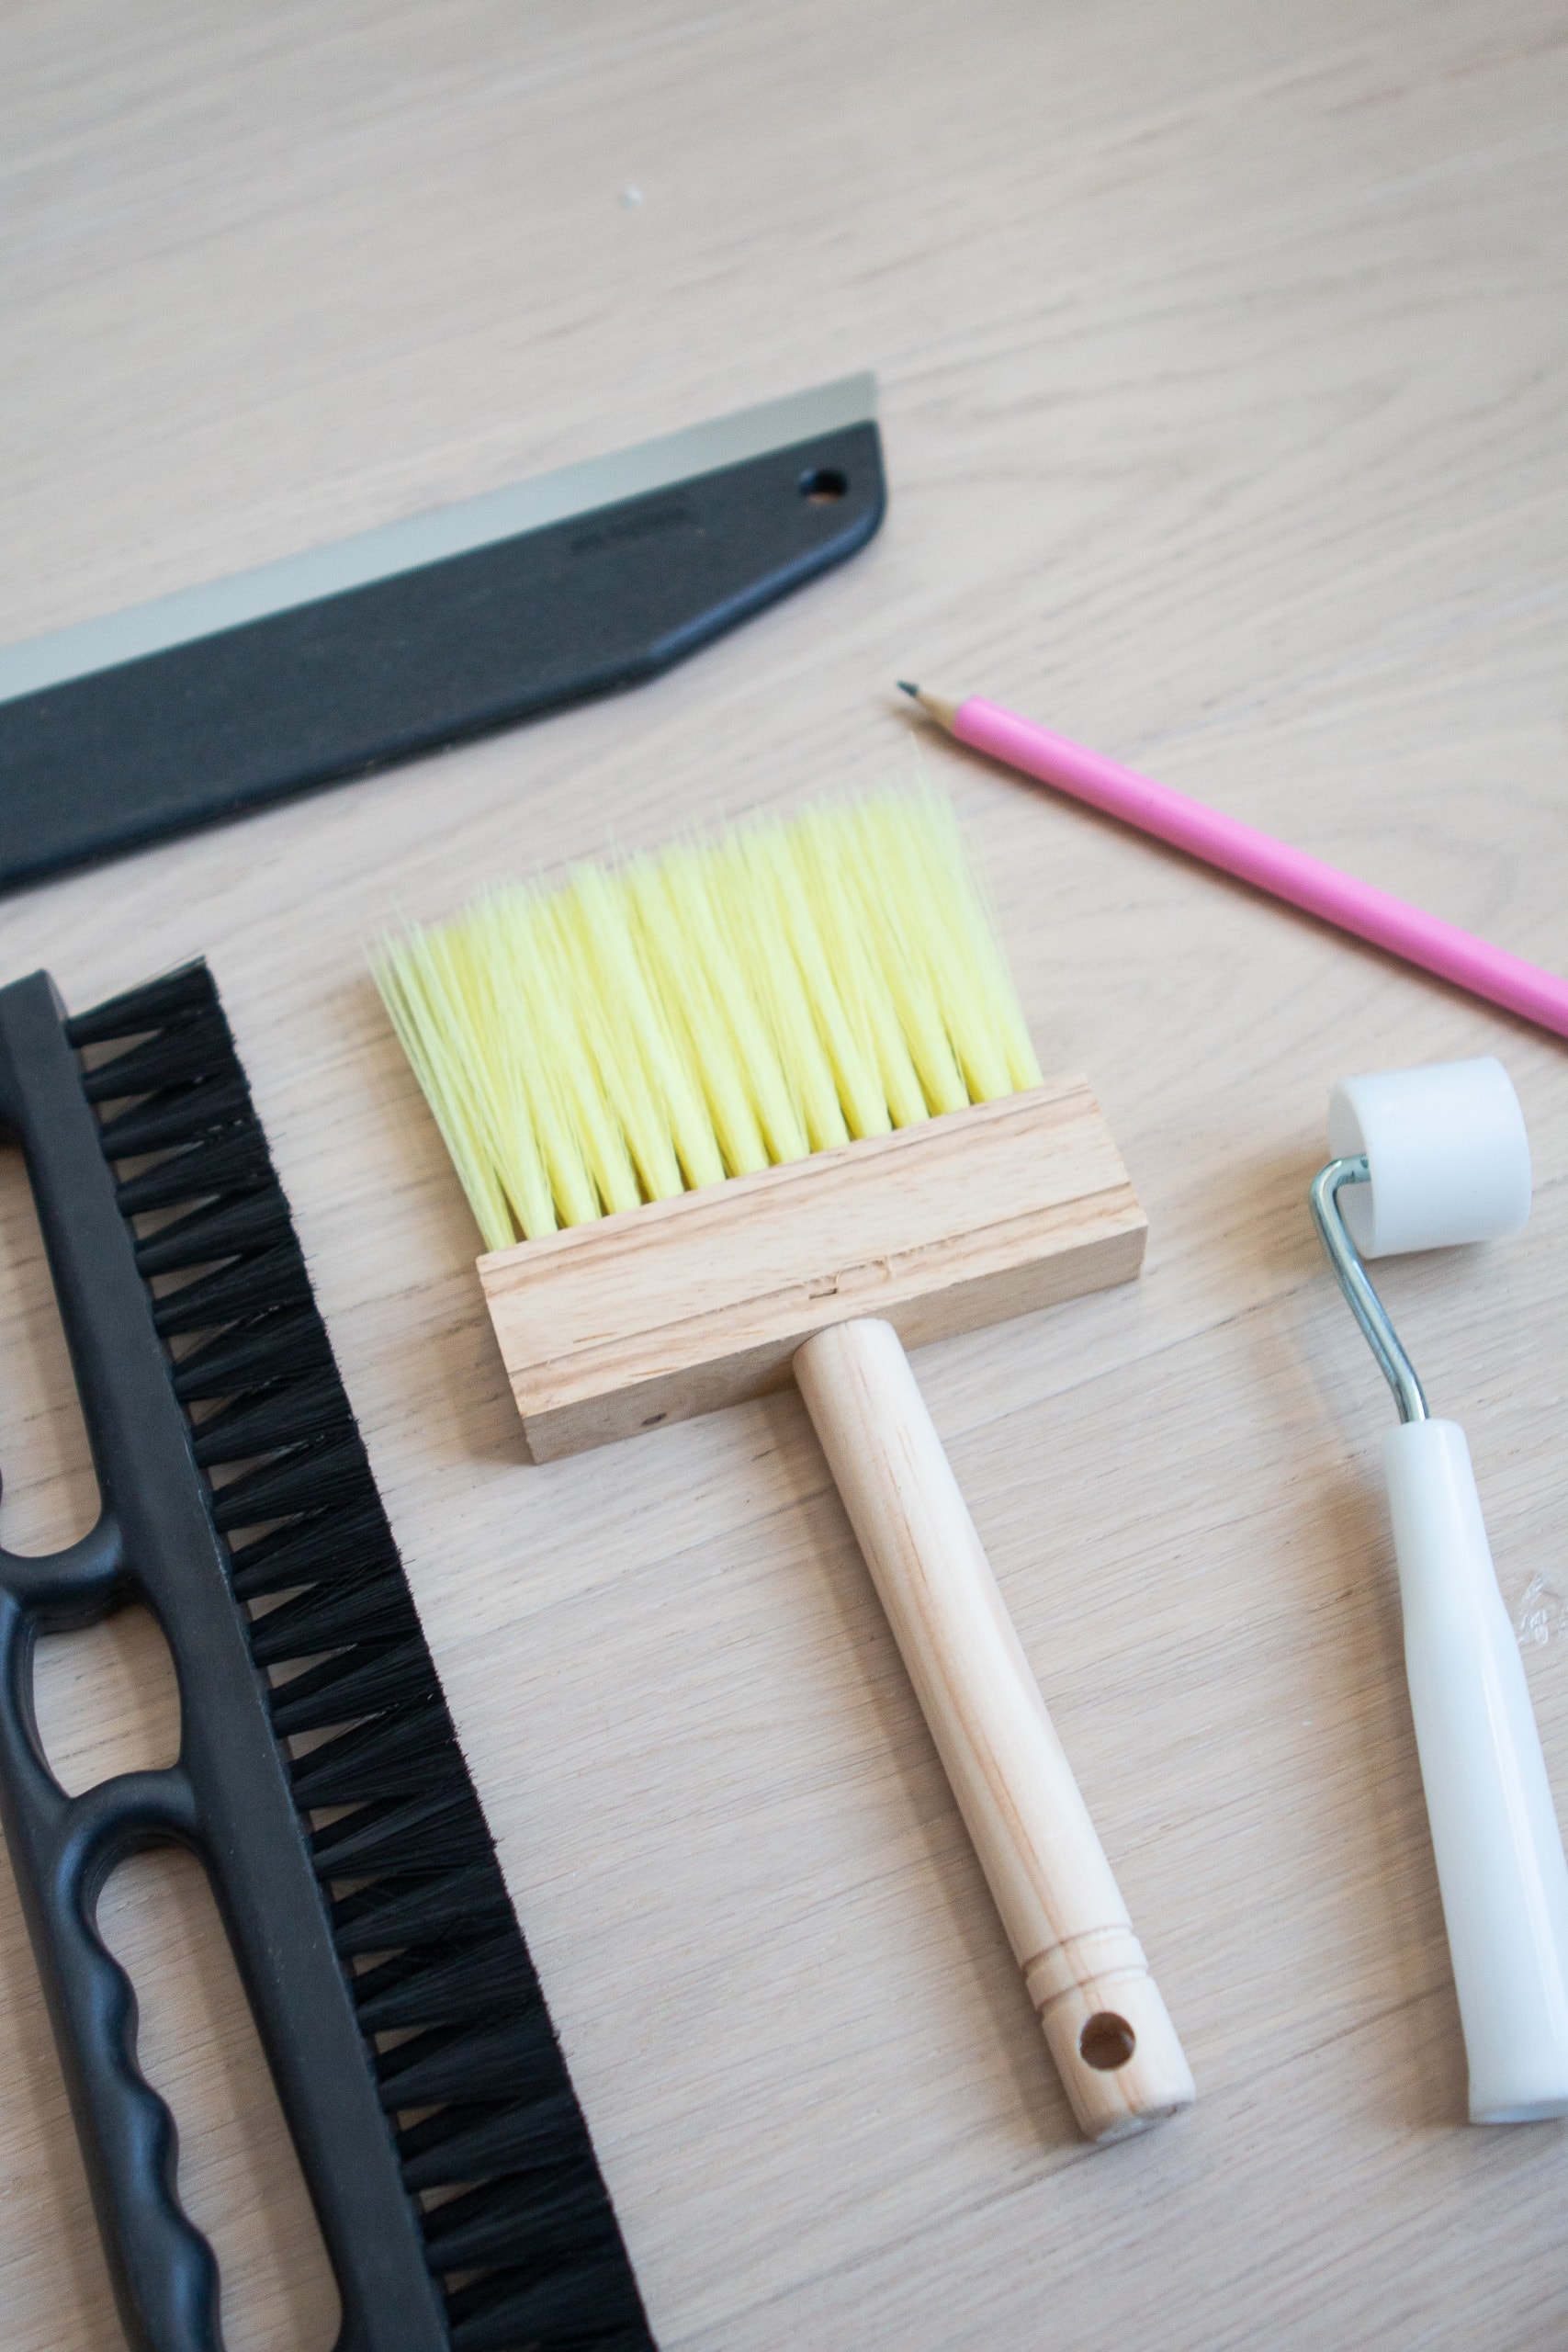
Wall Mural Install – Supplies

First, let me say that this was a very similar process to wallpapering the nursery closet. Cut, paste, smooth…over and over again. In fact, the supply list is just about the same. I ended up buying a kit from Photowall.com because it had everything they recommended for their particular product. The wall mural also comes with its own paste, which was helpful too.
- Wall Mural
- Scissors
- Bucket
- Paste
- Tape Measure & Pencil
- Level
- Brush
- Smoothing Tool
- Metal Smoothing Tool
- Snap-off Utility Knife
- Sponge & Bucket
- Seam Roller
- Step Ladder
How to Install a Wall Mural
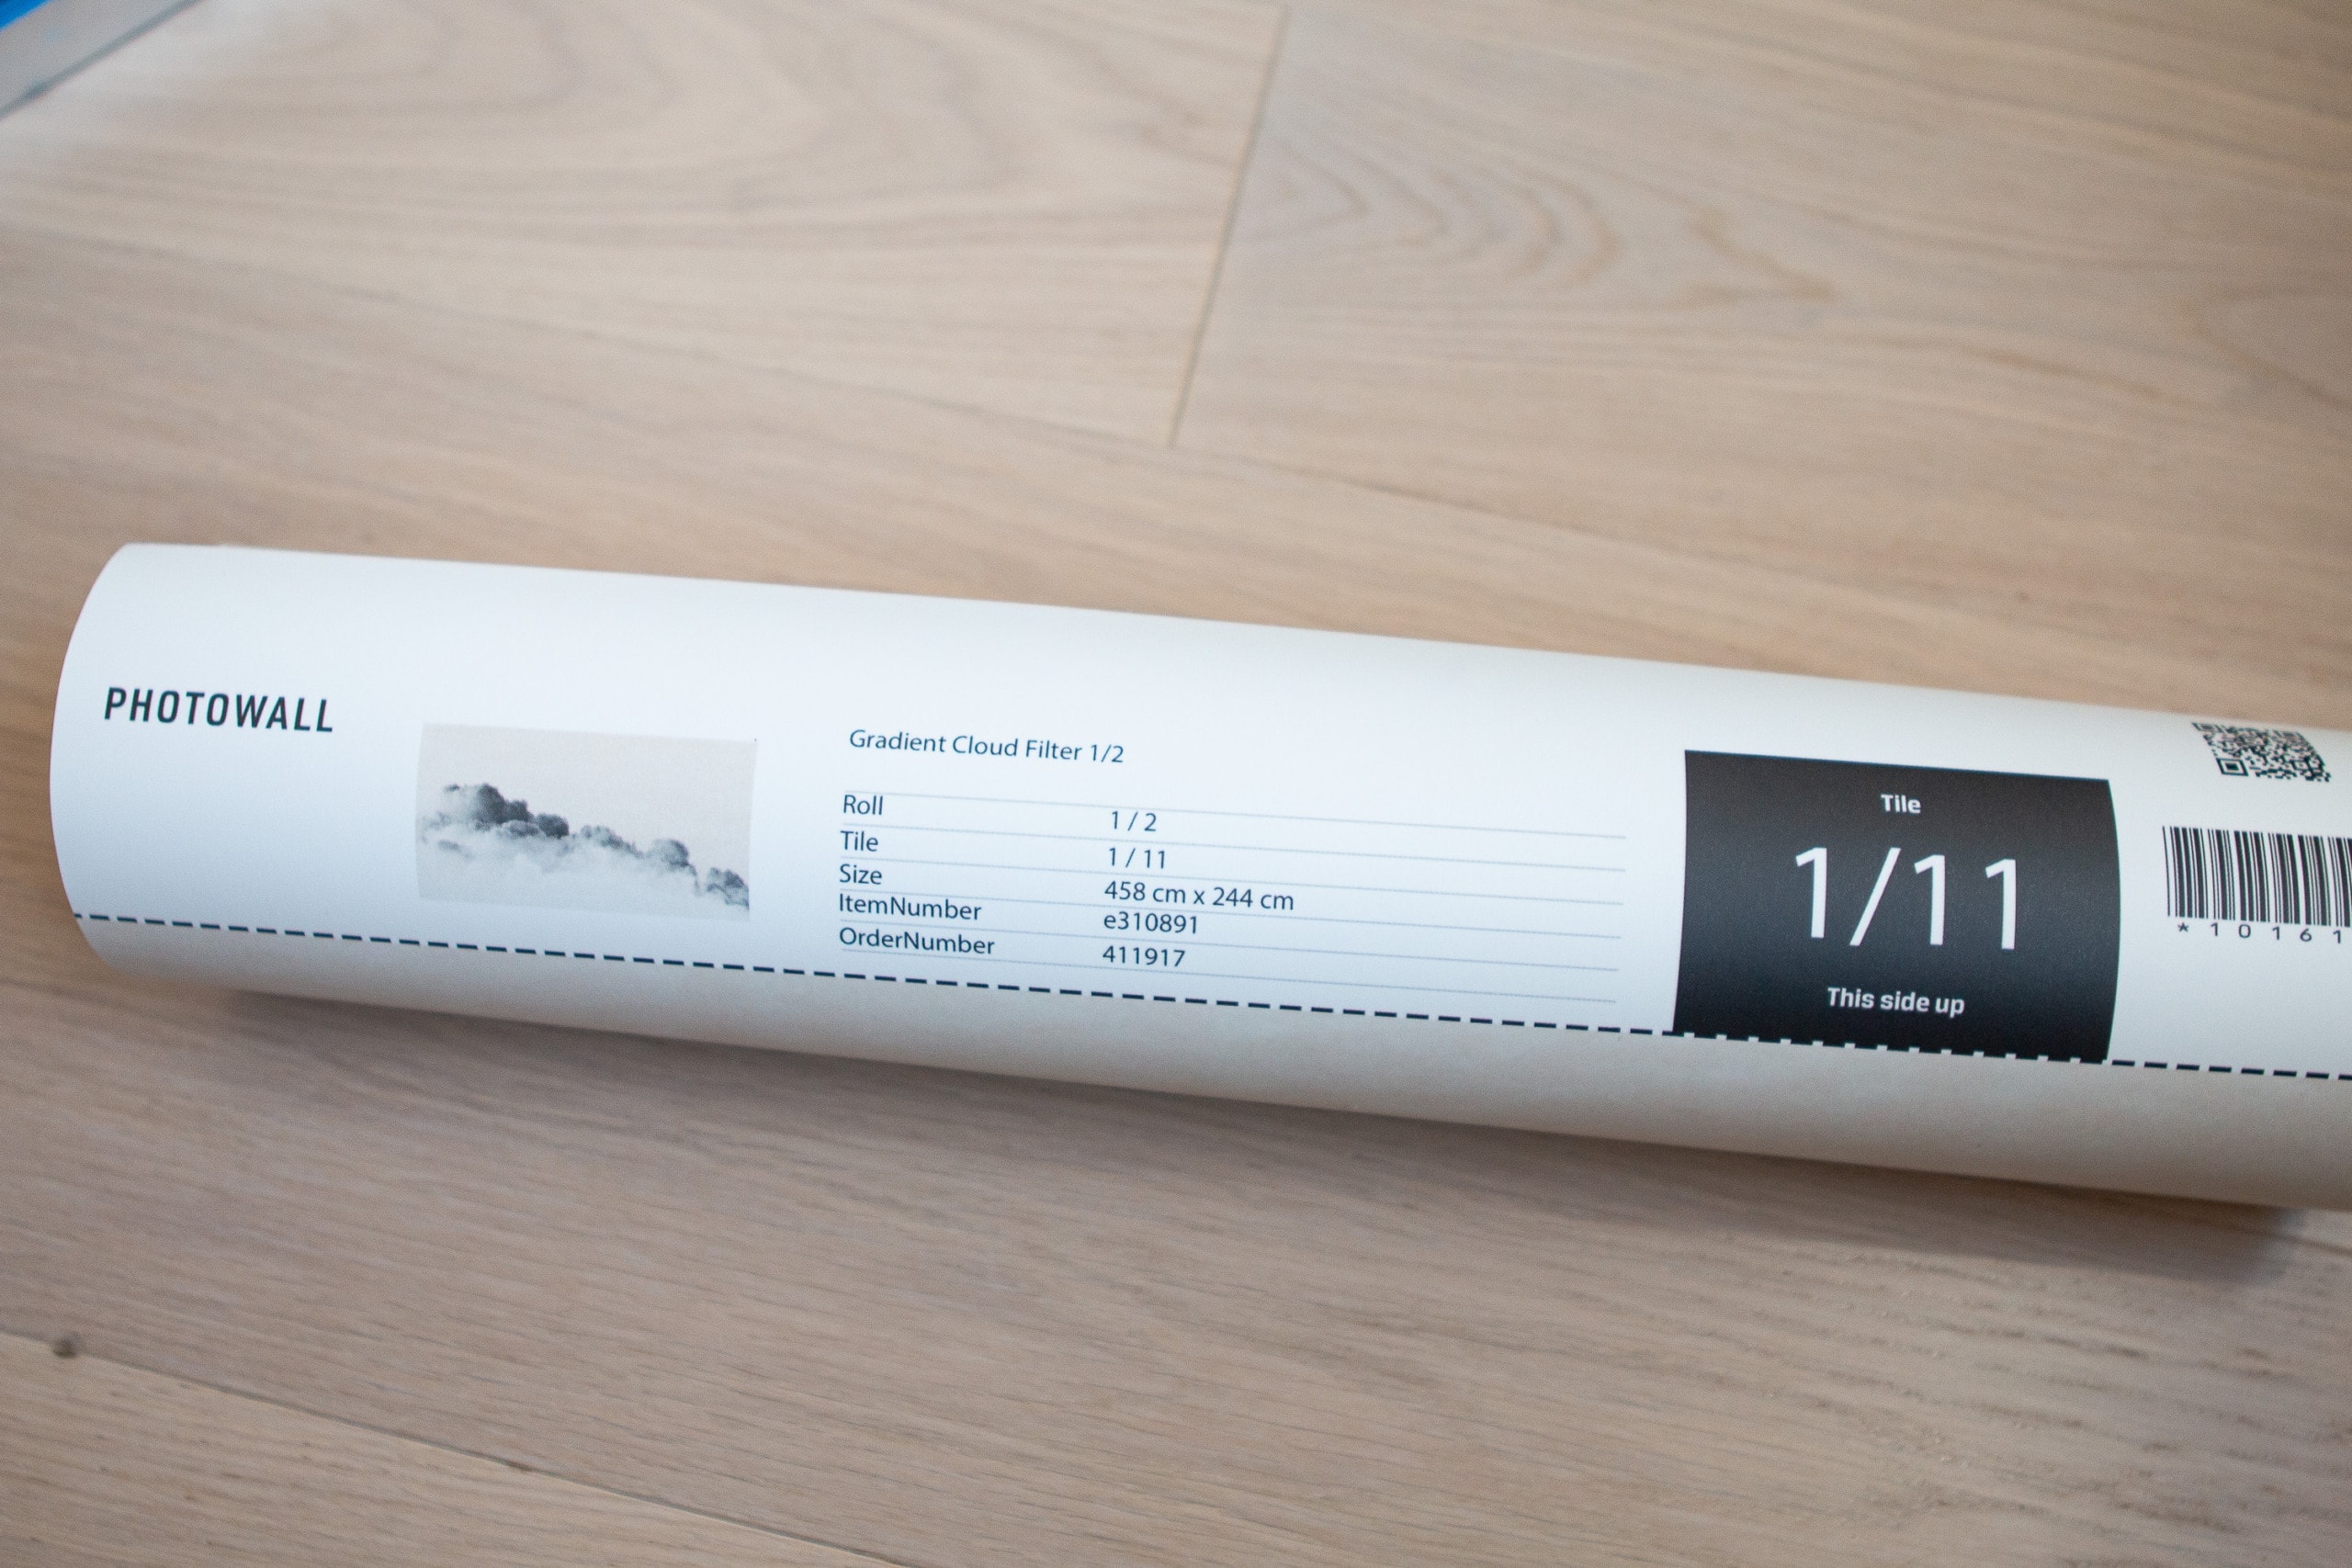
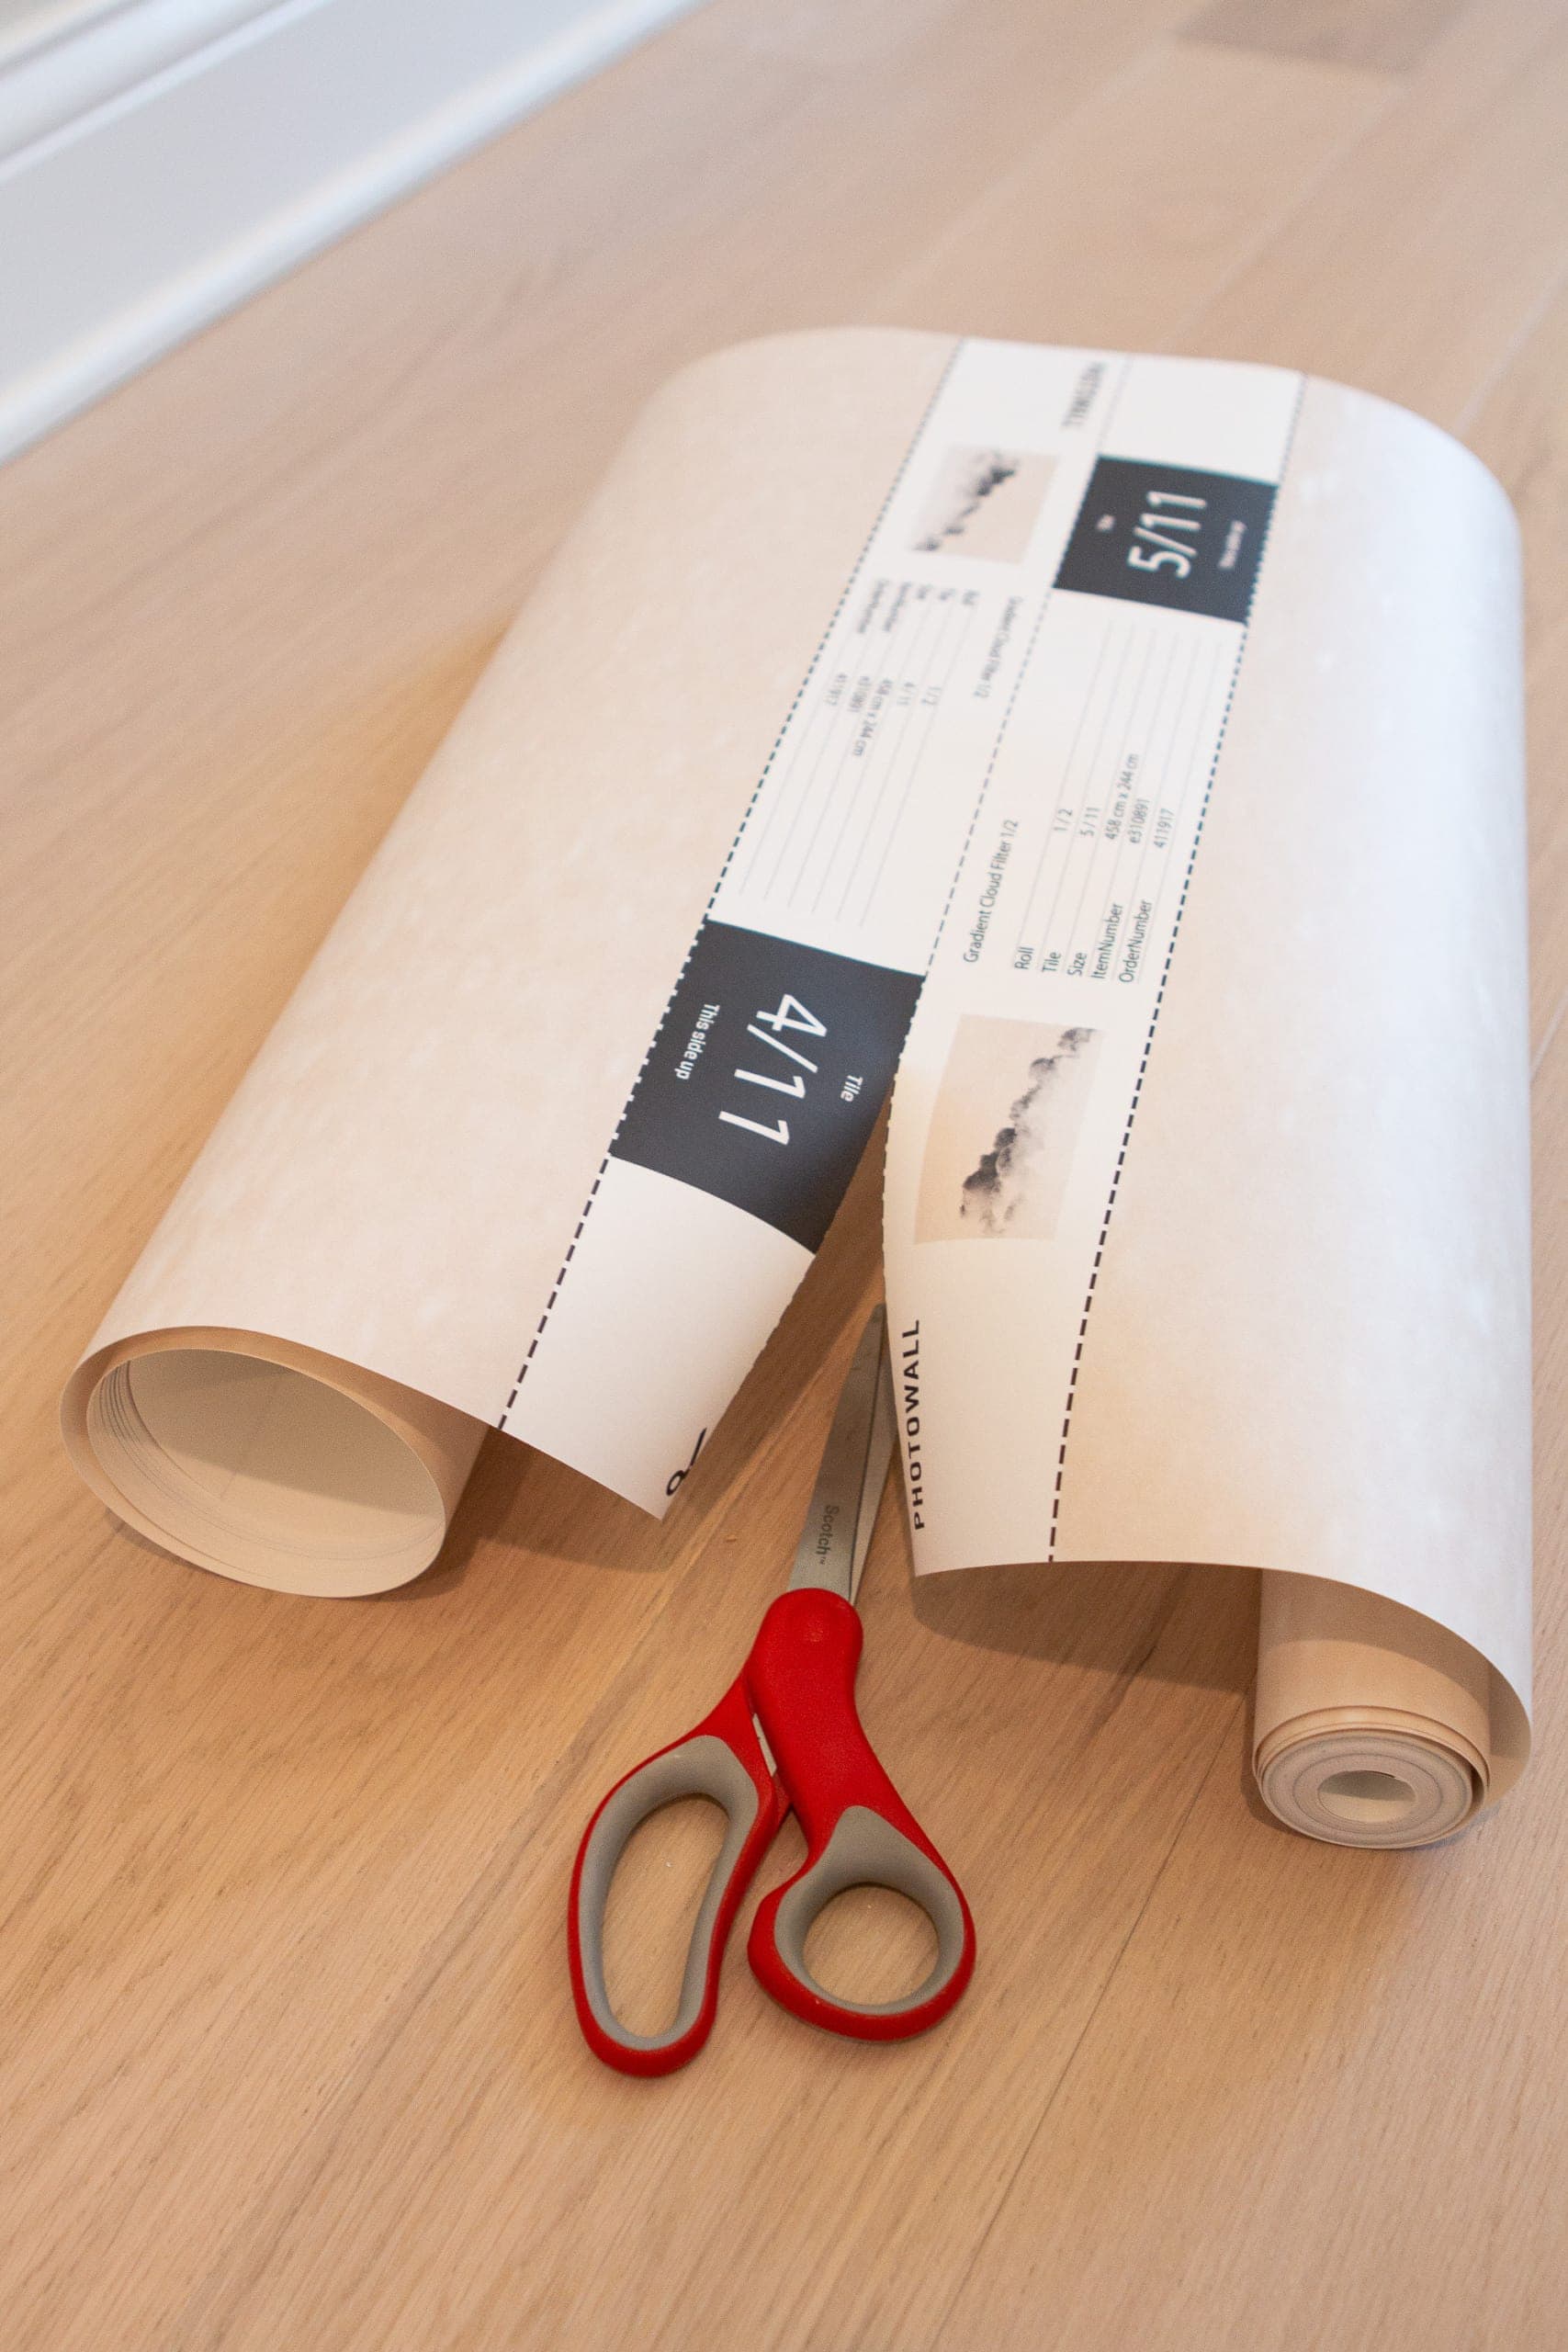
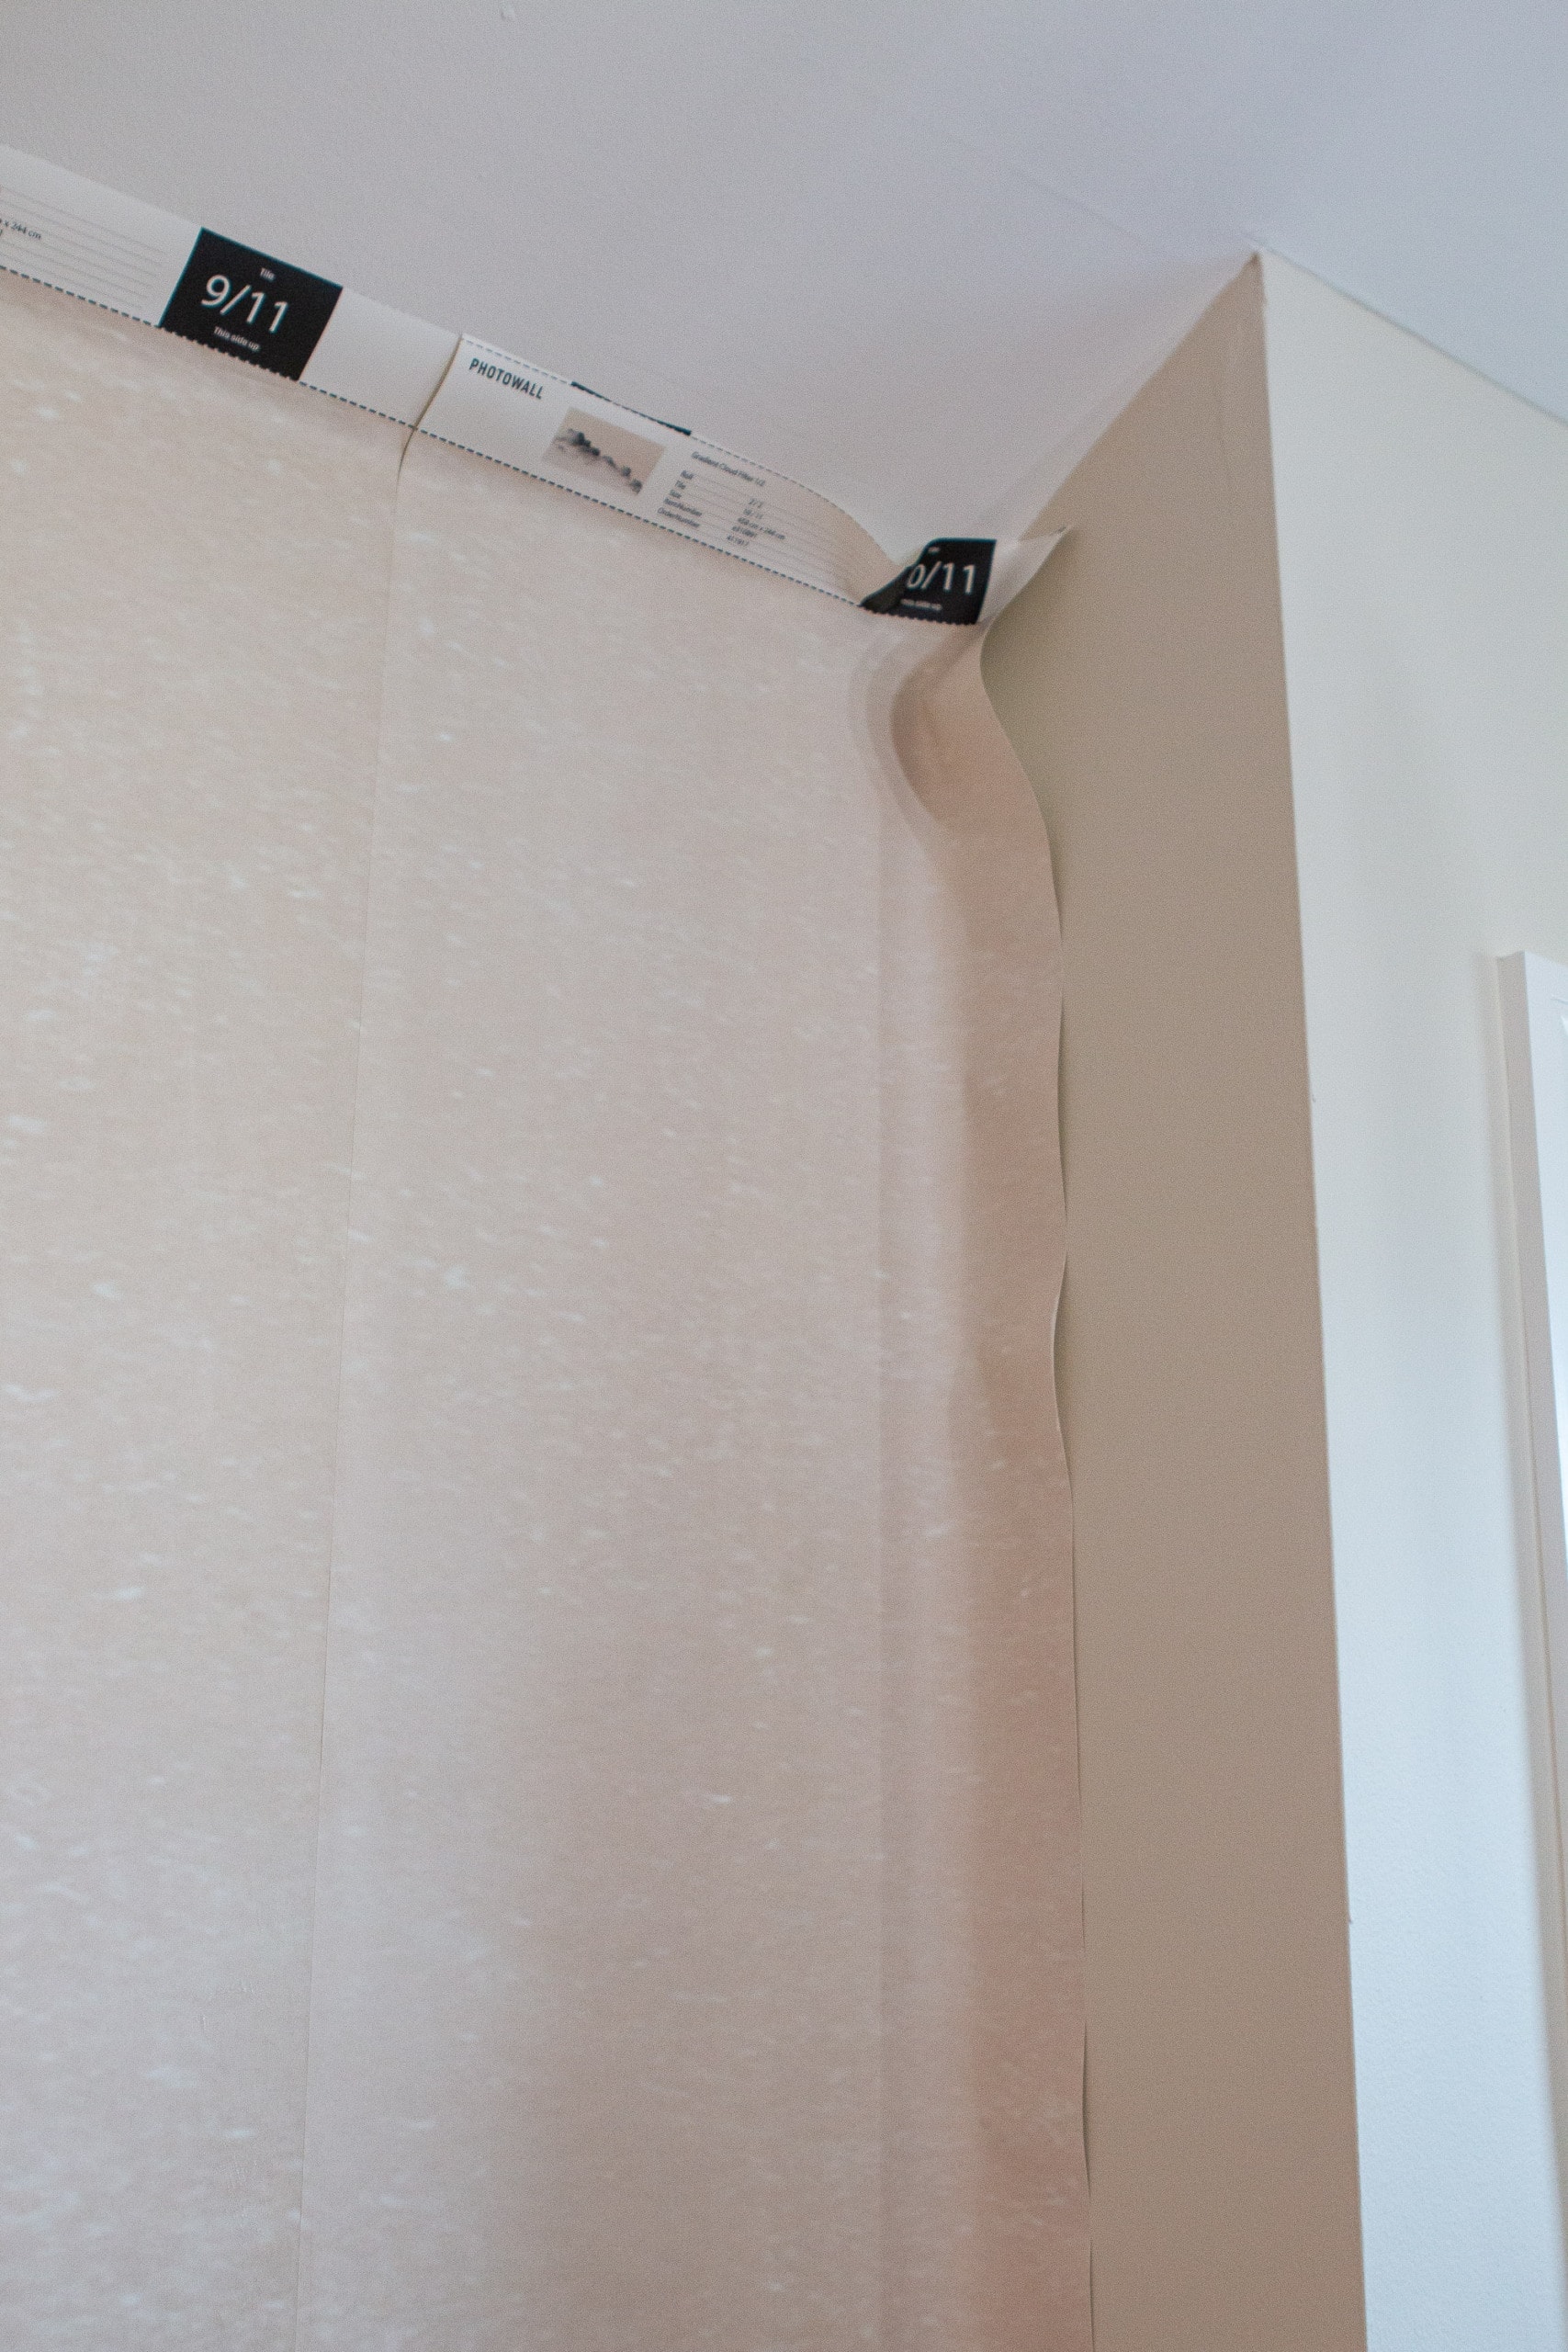
Again, the steps are very similar to any wallpaper job. My large wall mural came in two big rolls that were numbered one through eleven. They make it really easy because the number is printed at the top of each tab, so you can line them up accordingly.
Mix the Glue
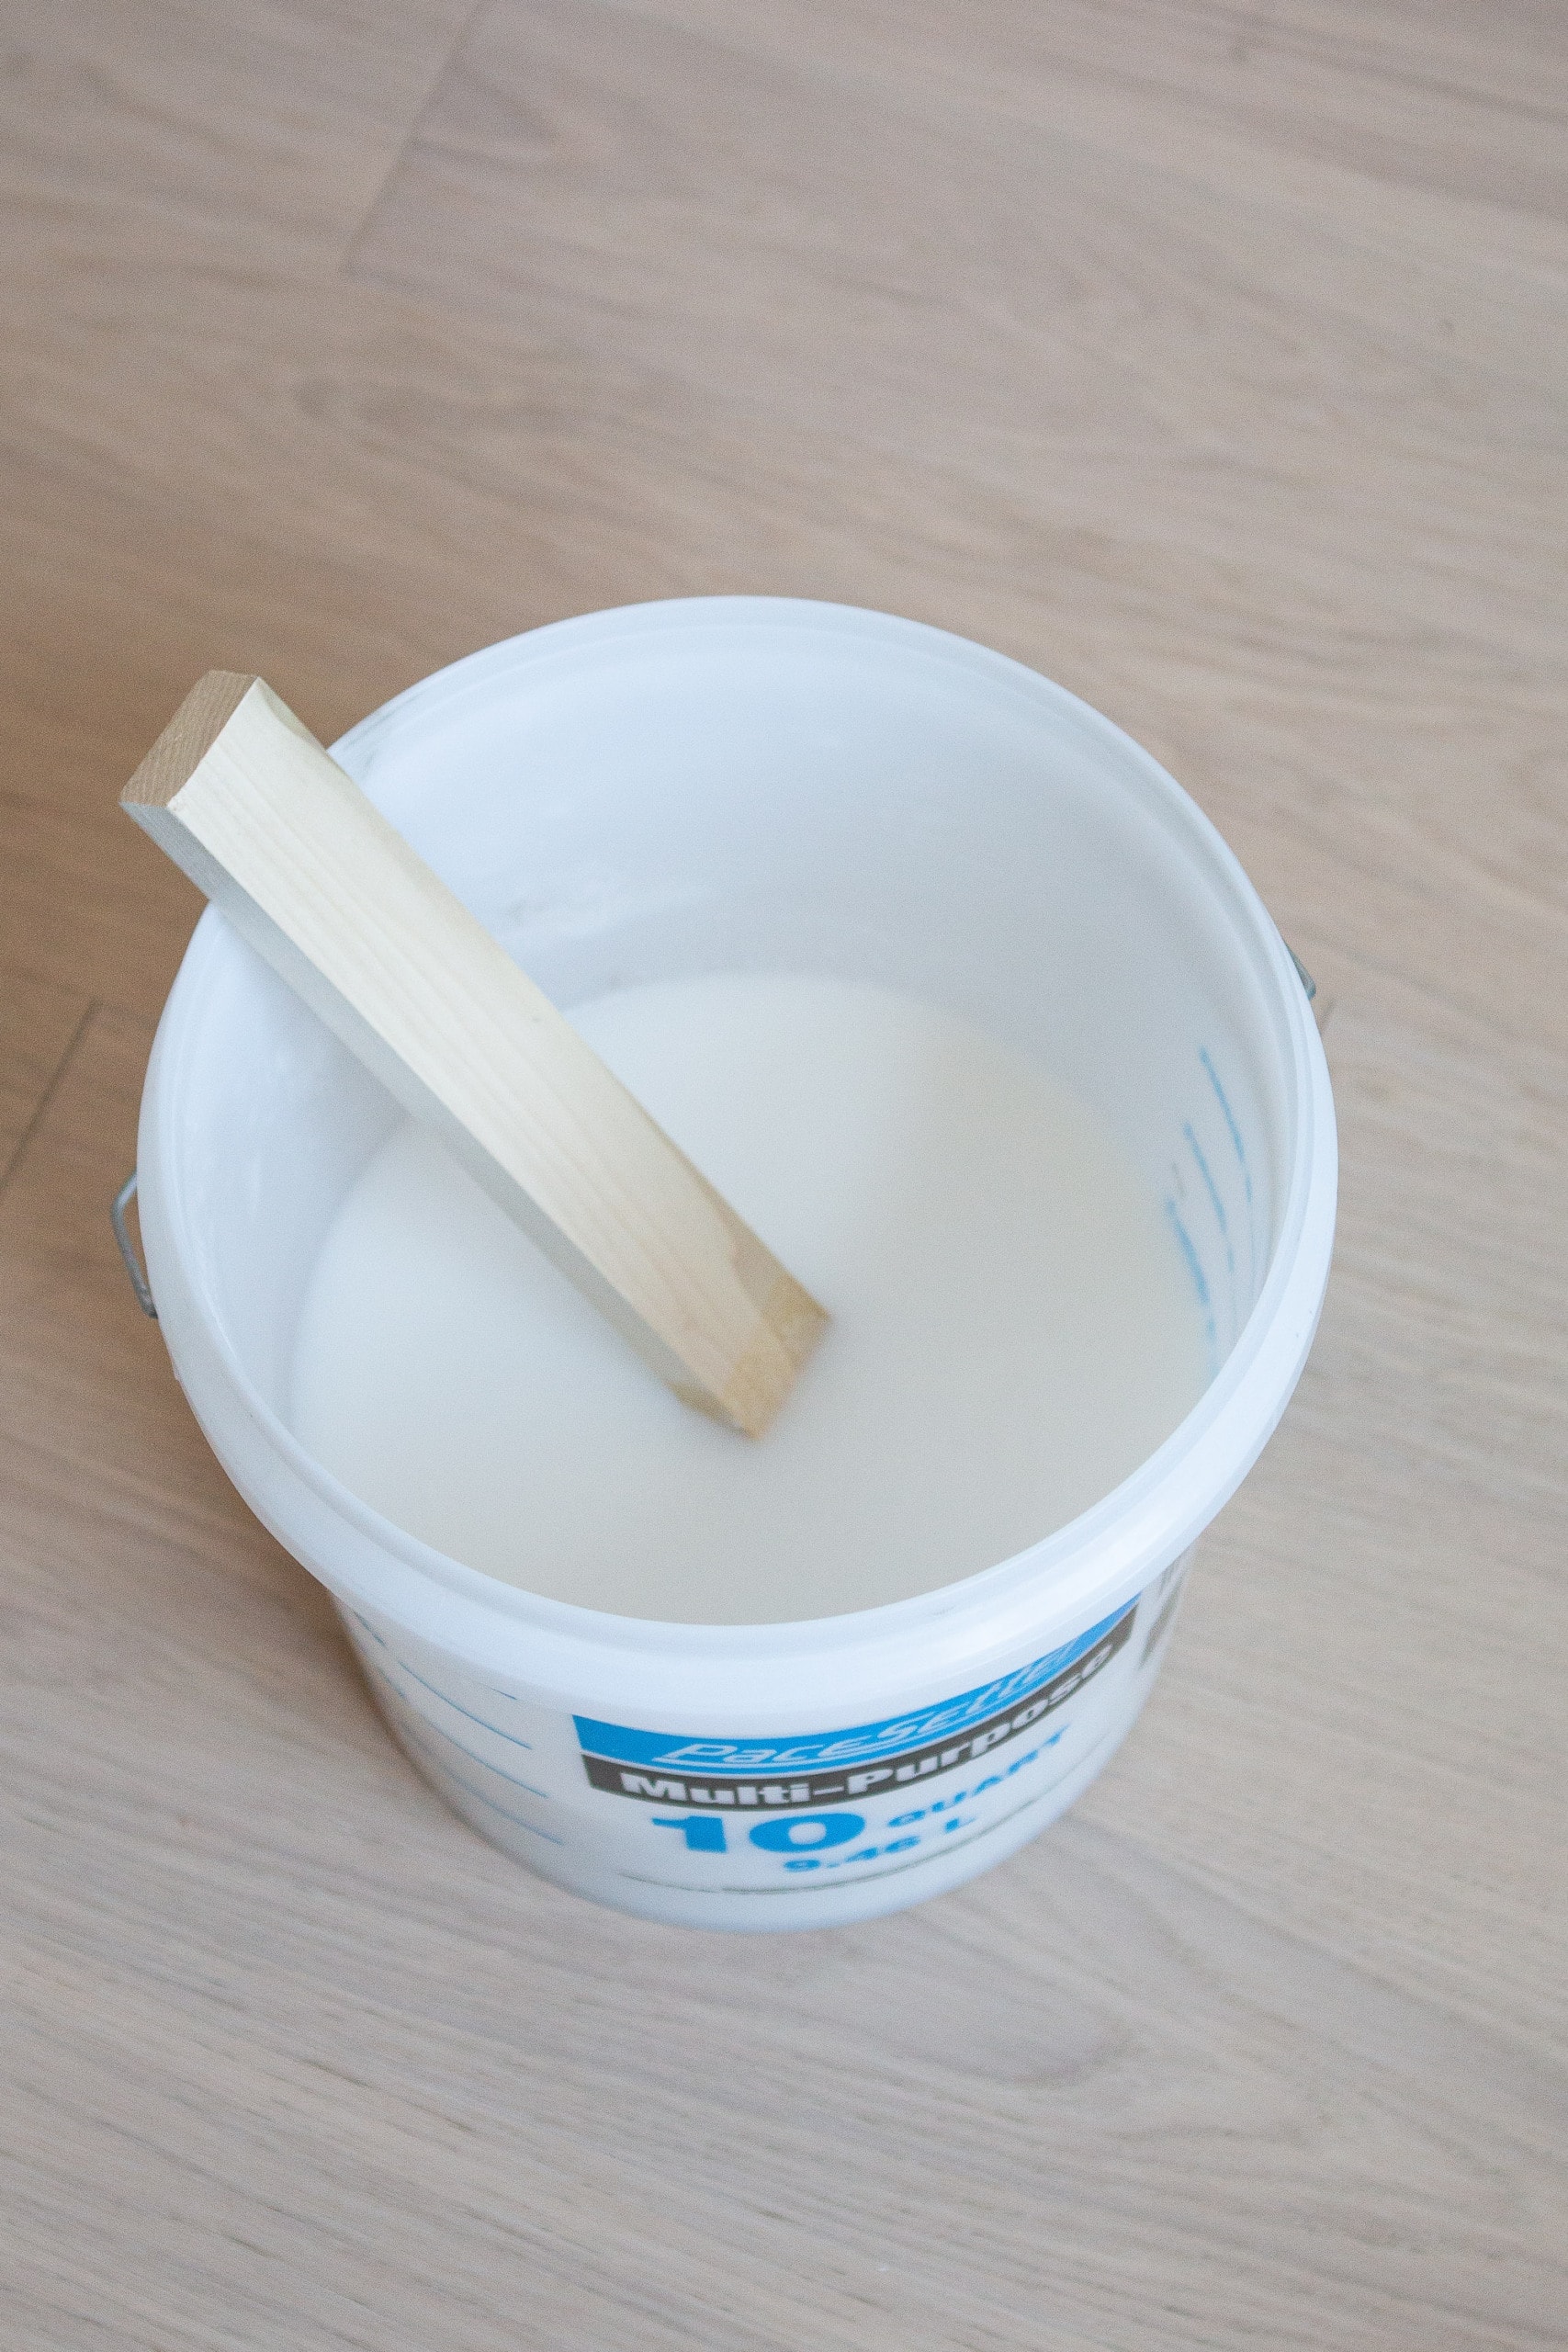
As I mentioned, the wall mural came with a powdered glue that you mix up at home. I used a clean bucket and a gallon of water and I stirred like crazy. At first, it was really really watery and I was afraid I didn’t get the ratio of water to powder right. Luckily, it firmed up after five minutes and I was good to go! Each roll came with paste, but I only ended up using one bag and had a lot leftover from that. So you definitely shouldn’t run out!
Draw a Straight Level Line
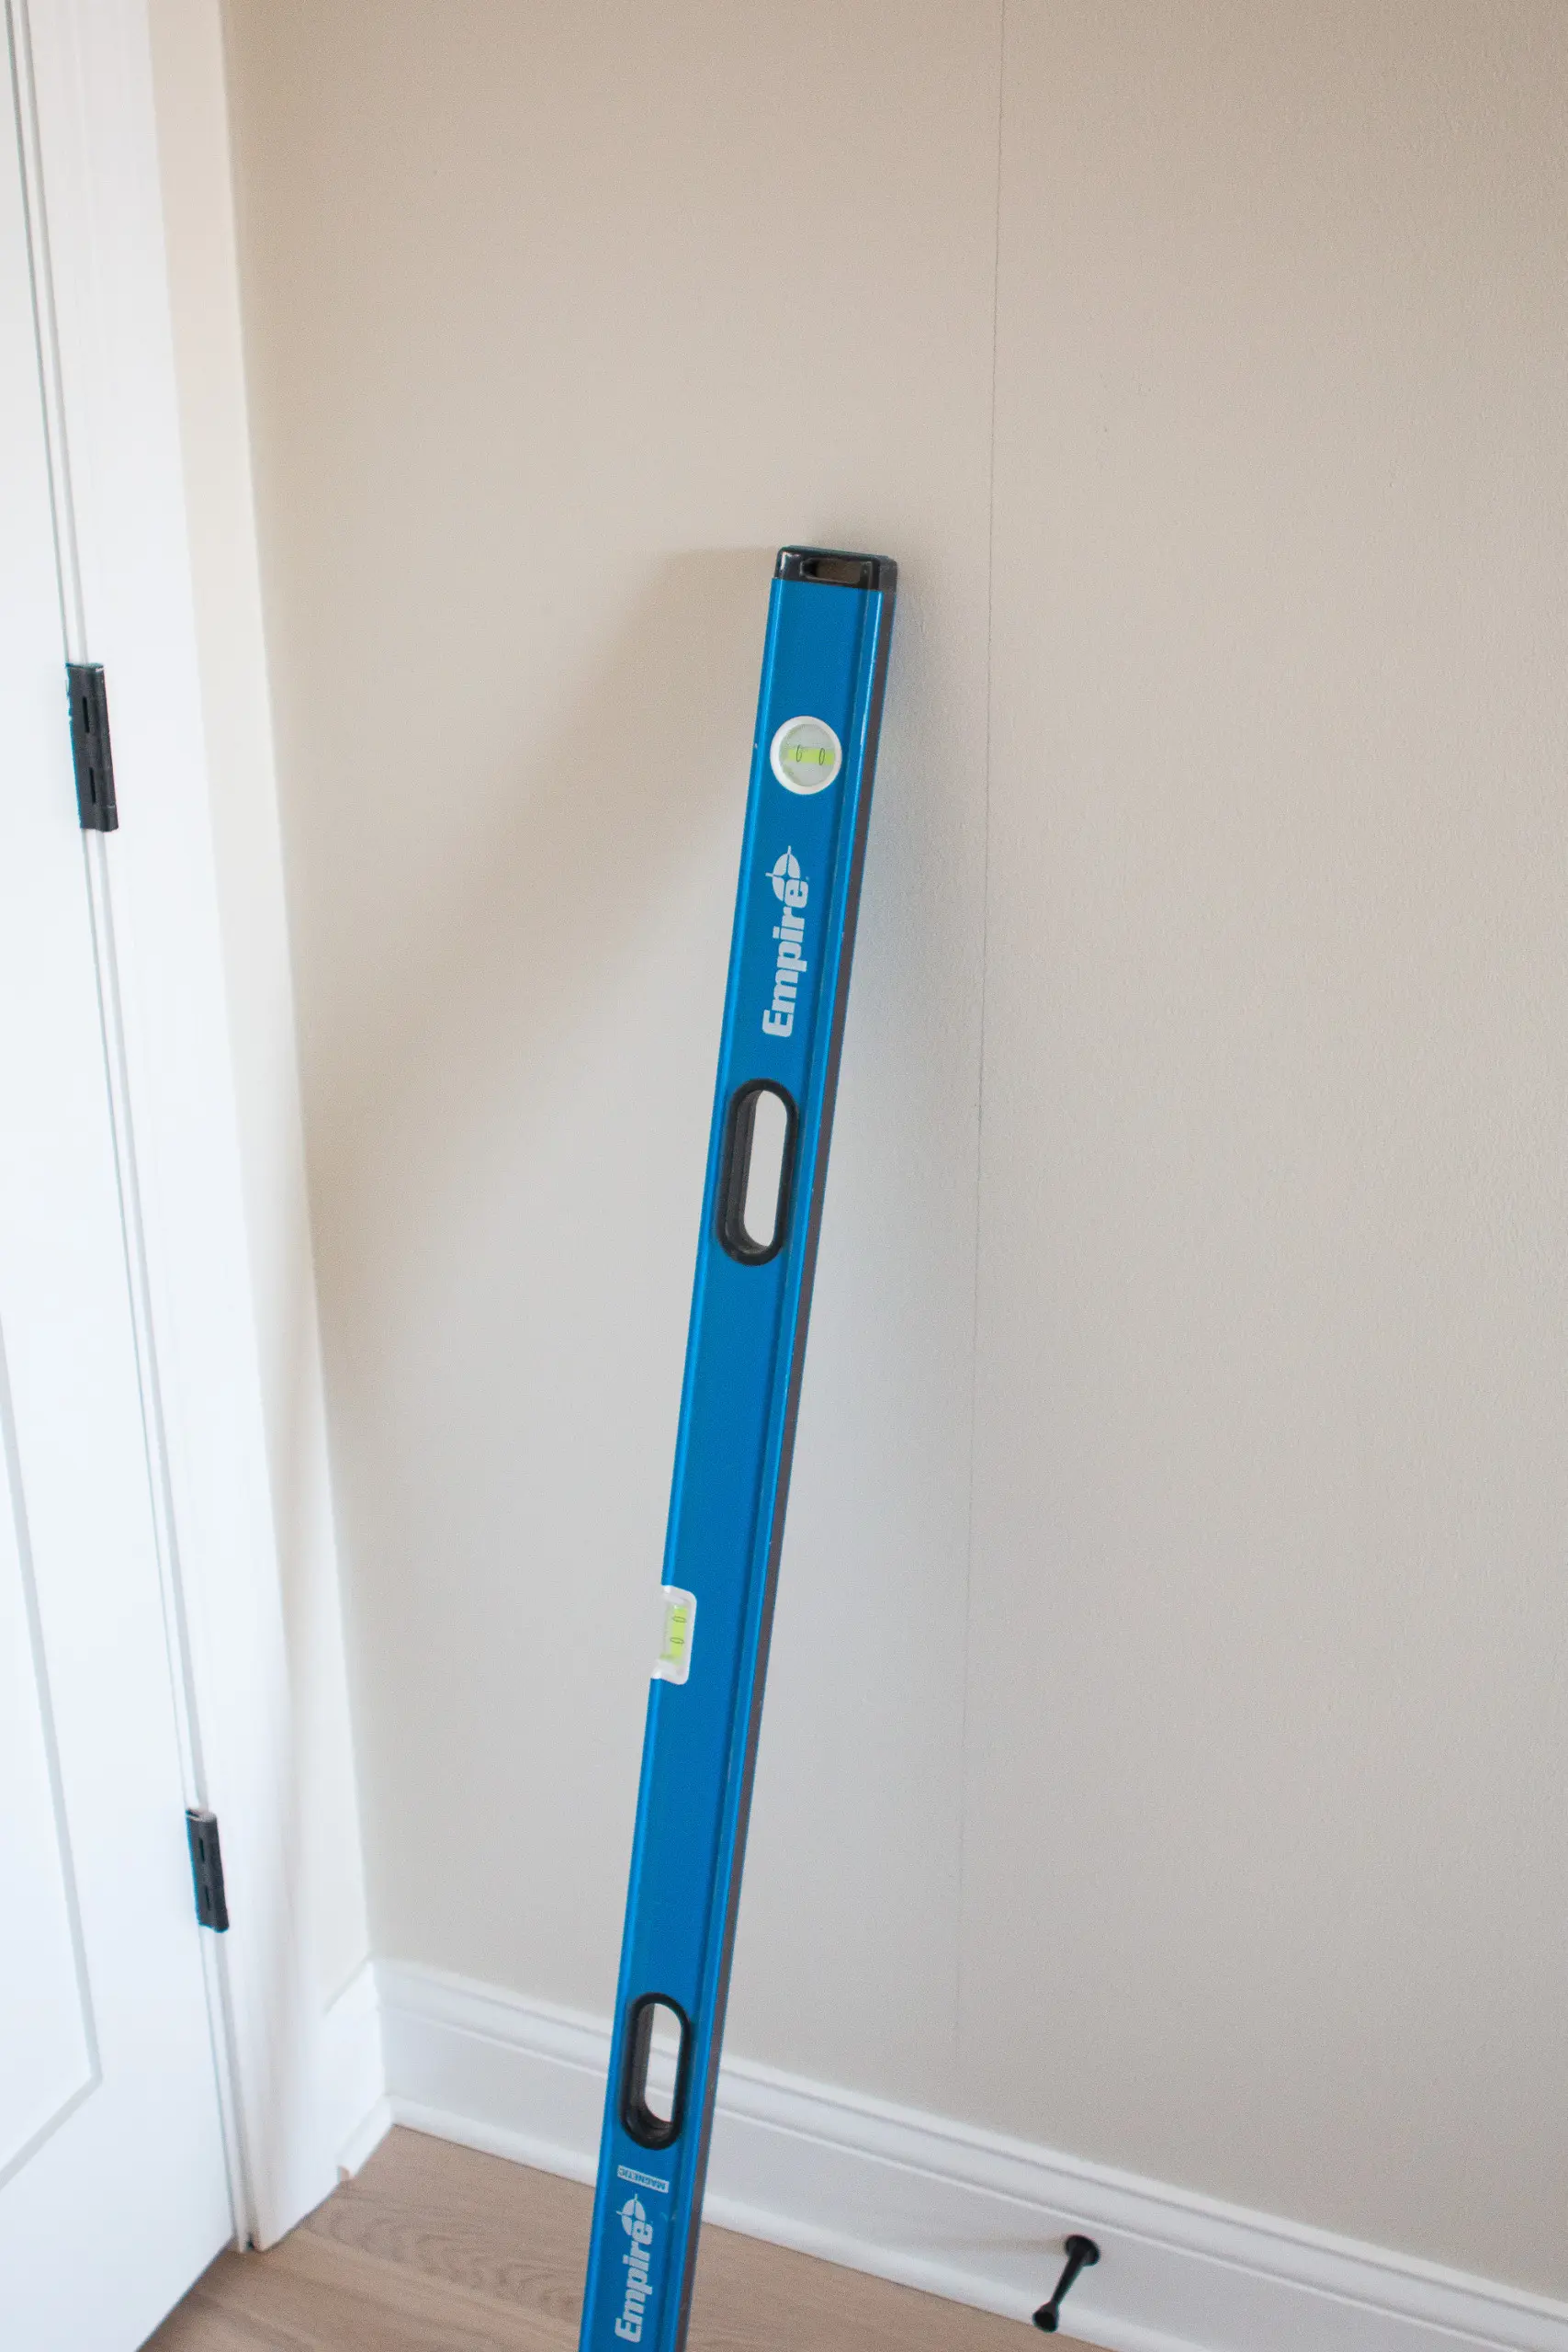
With the instructions, it tells you to move from left to right on your wall. Because the width of my paper was 17.75 inches, I marked a straight line 17.75 inches out from the corner. It’s so important that this line is perfectly level and straight because it dictates the entire wall mural. So take your time and draw a suuuuuper level line up and down from the ceiling to the floor.
Apply Paste
Using the brush, I applied the paste directly to the wall. I find that it’s better to use a lot so you can easily wiggle your wallpaper around and position it. If any oozes out and onto the paper, you can just wipe it off with a damp sponge. Apply the paste for that entire wall panel, plus an inch or two to the right so you know you covered the edges.

With my paste on, I took my first strip and applied it to the wall. You’ll want to leave extra room at the very top. 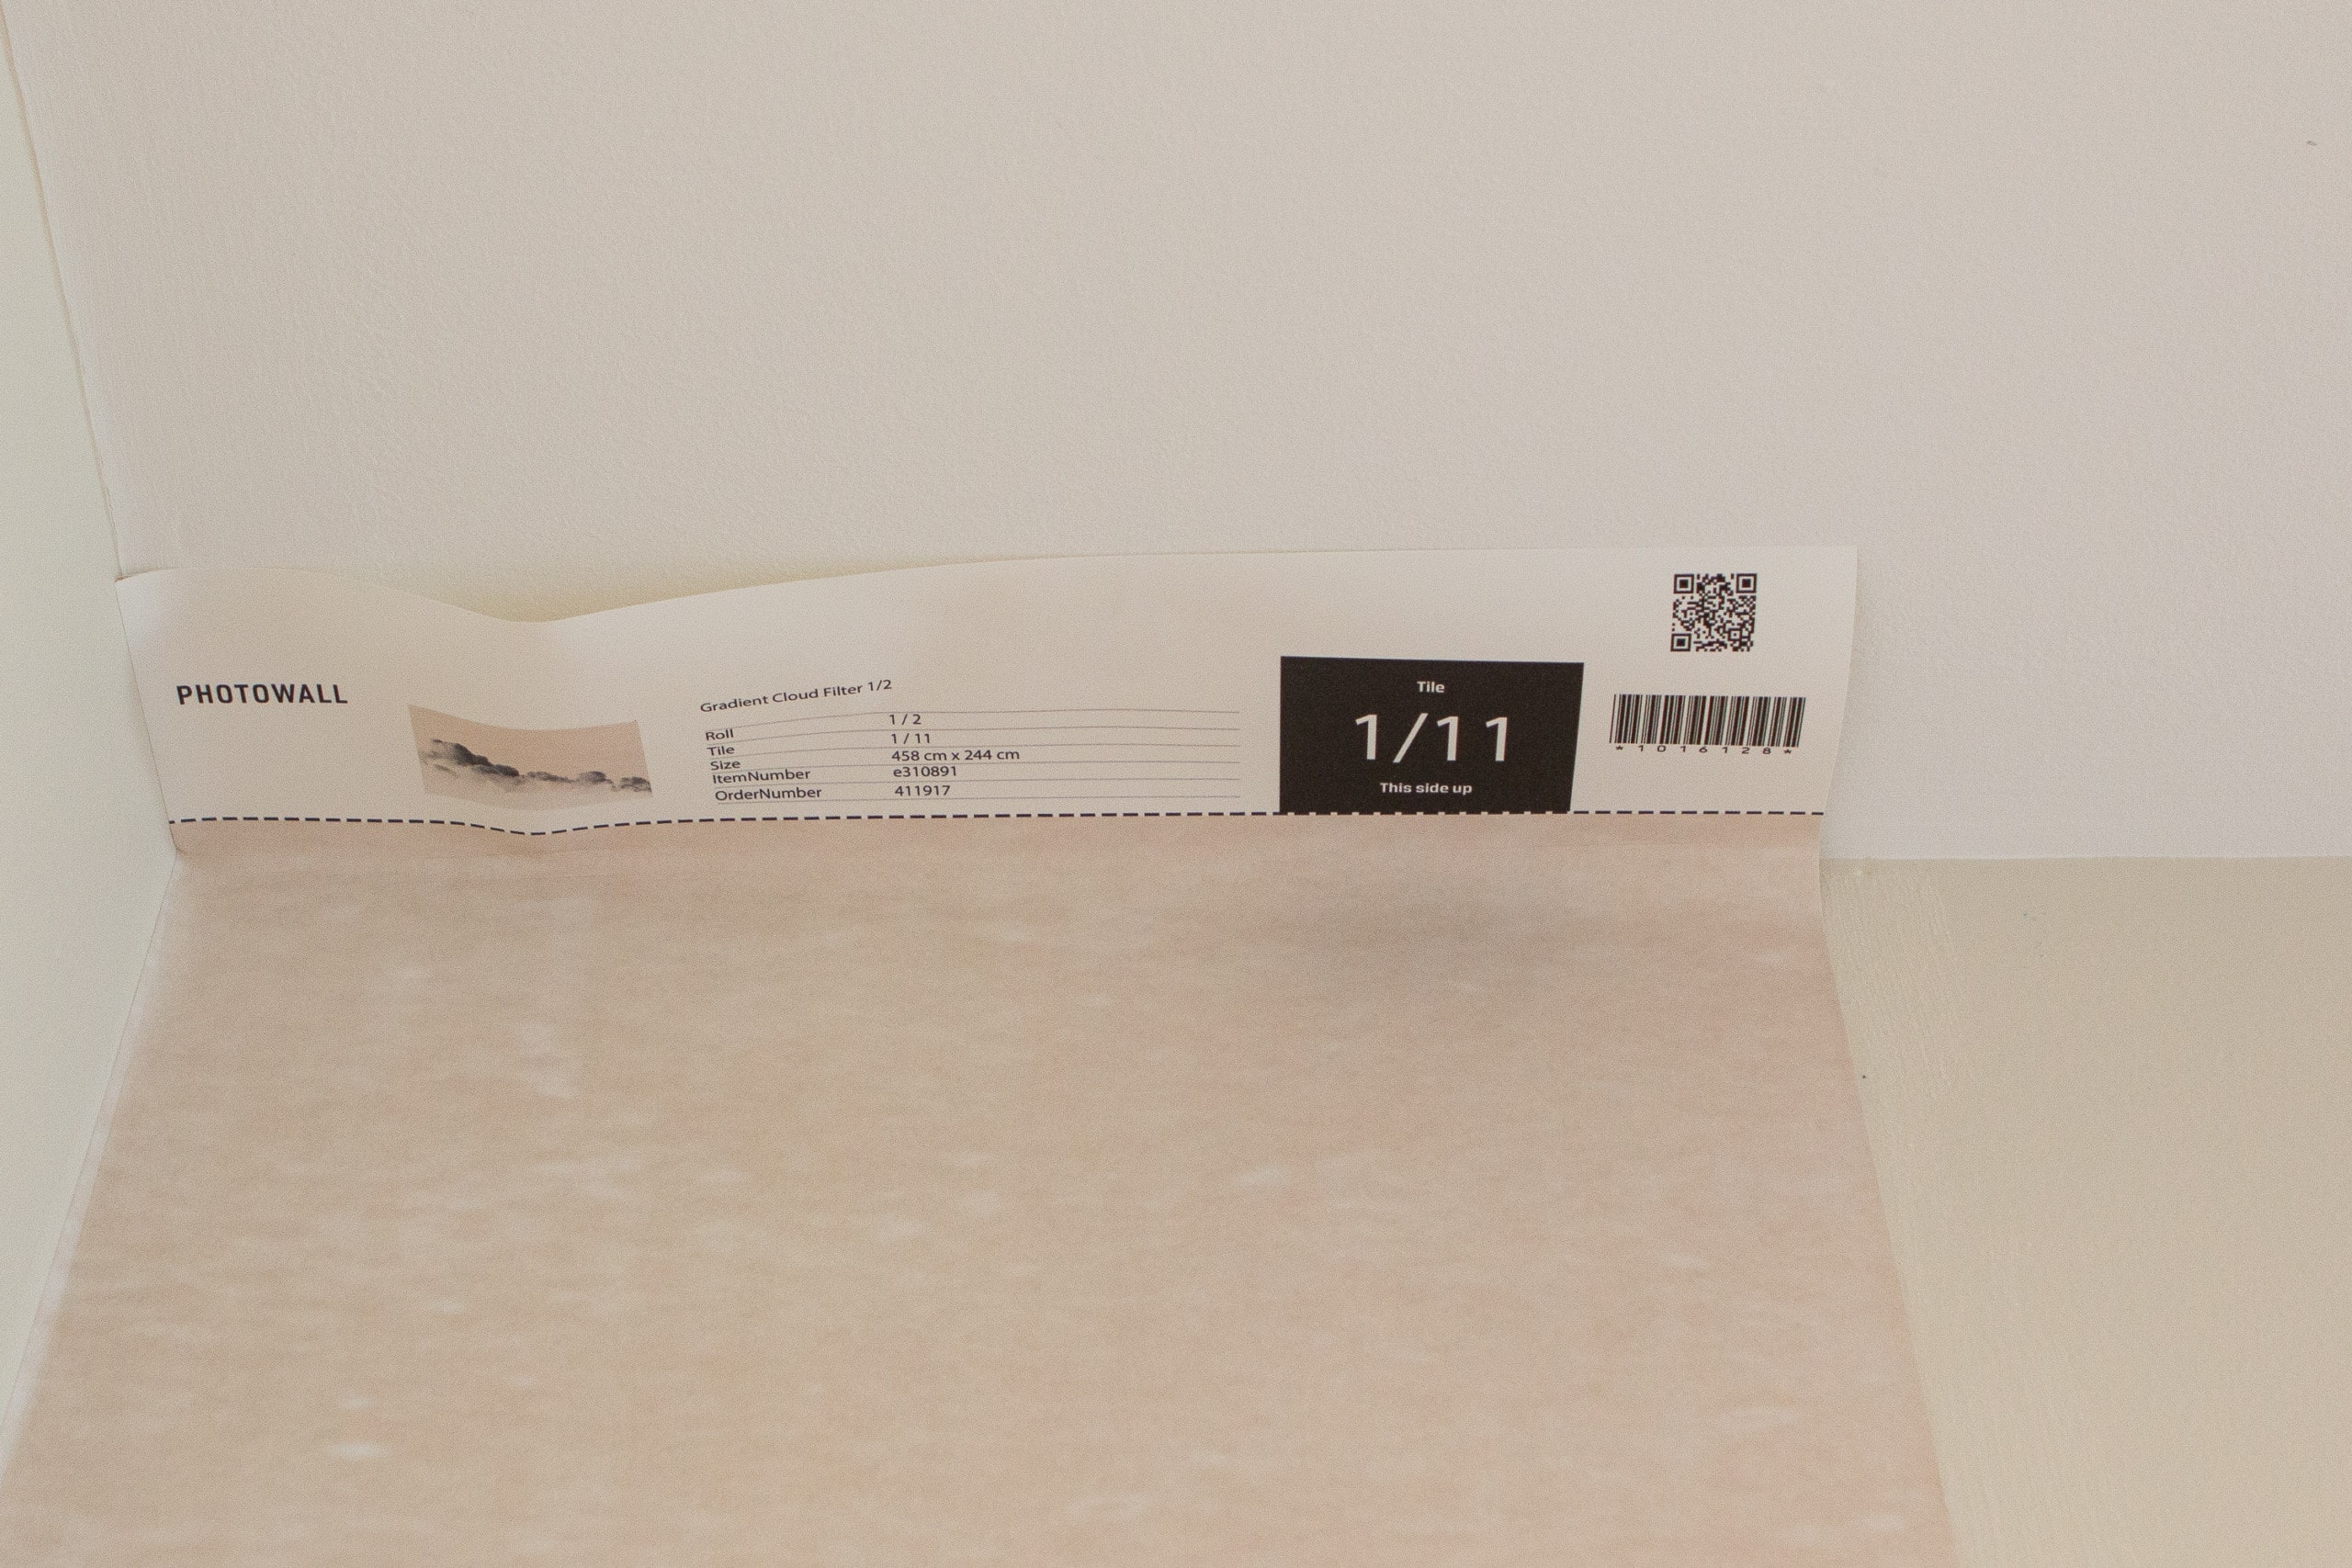 The wall mural comes with a built-in tab that you’ll cut off, but I would also bring it up about an inch or two higher than that just in case your ceiling gets taller as you go (no room is ever really square!).
  You don’t want to run out of mural at the top in order to keep your patterned aligned at the bottom, that would be bad! So give yourself some slack right from the start.
Smooth It Out
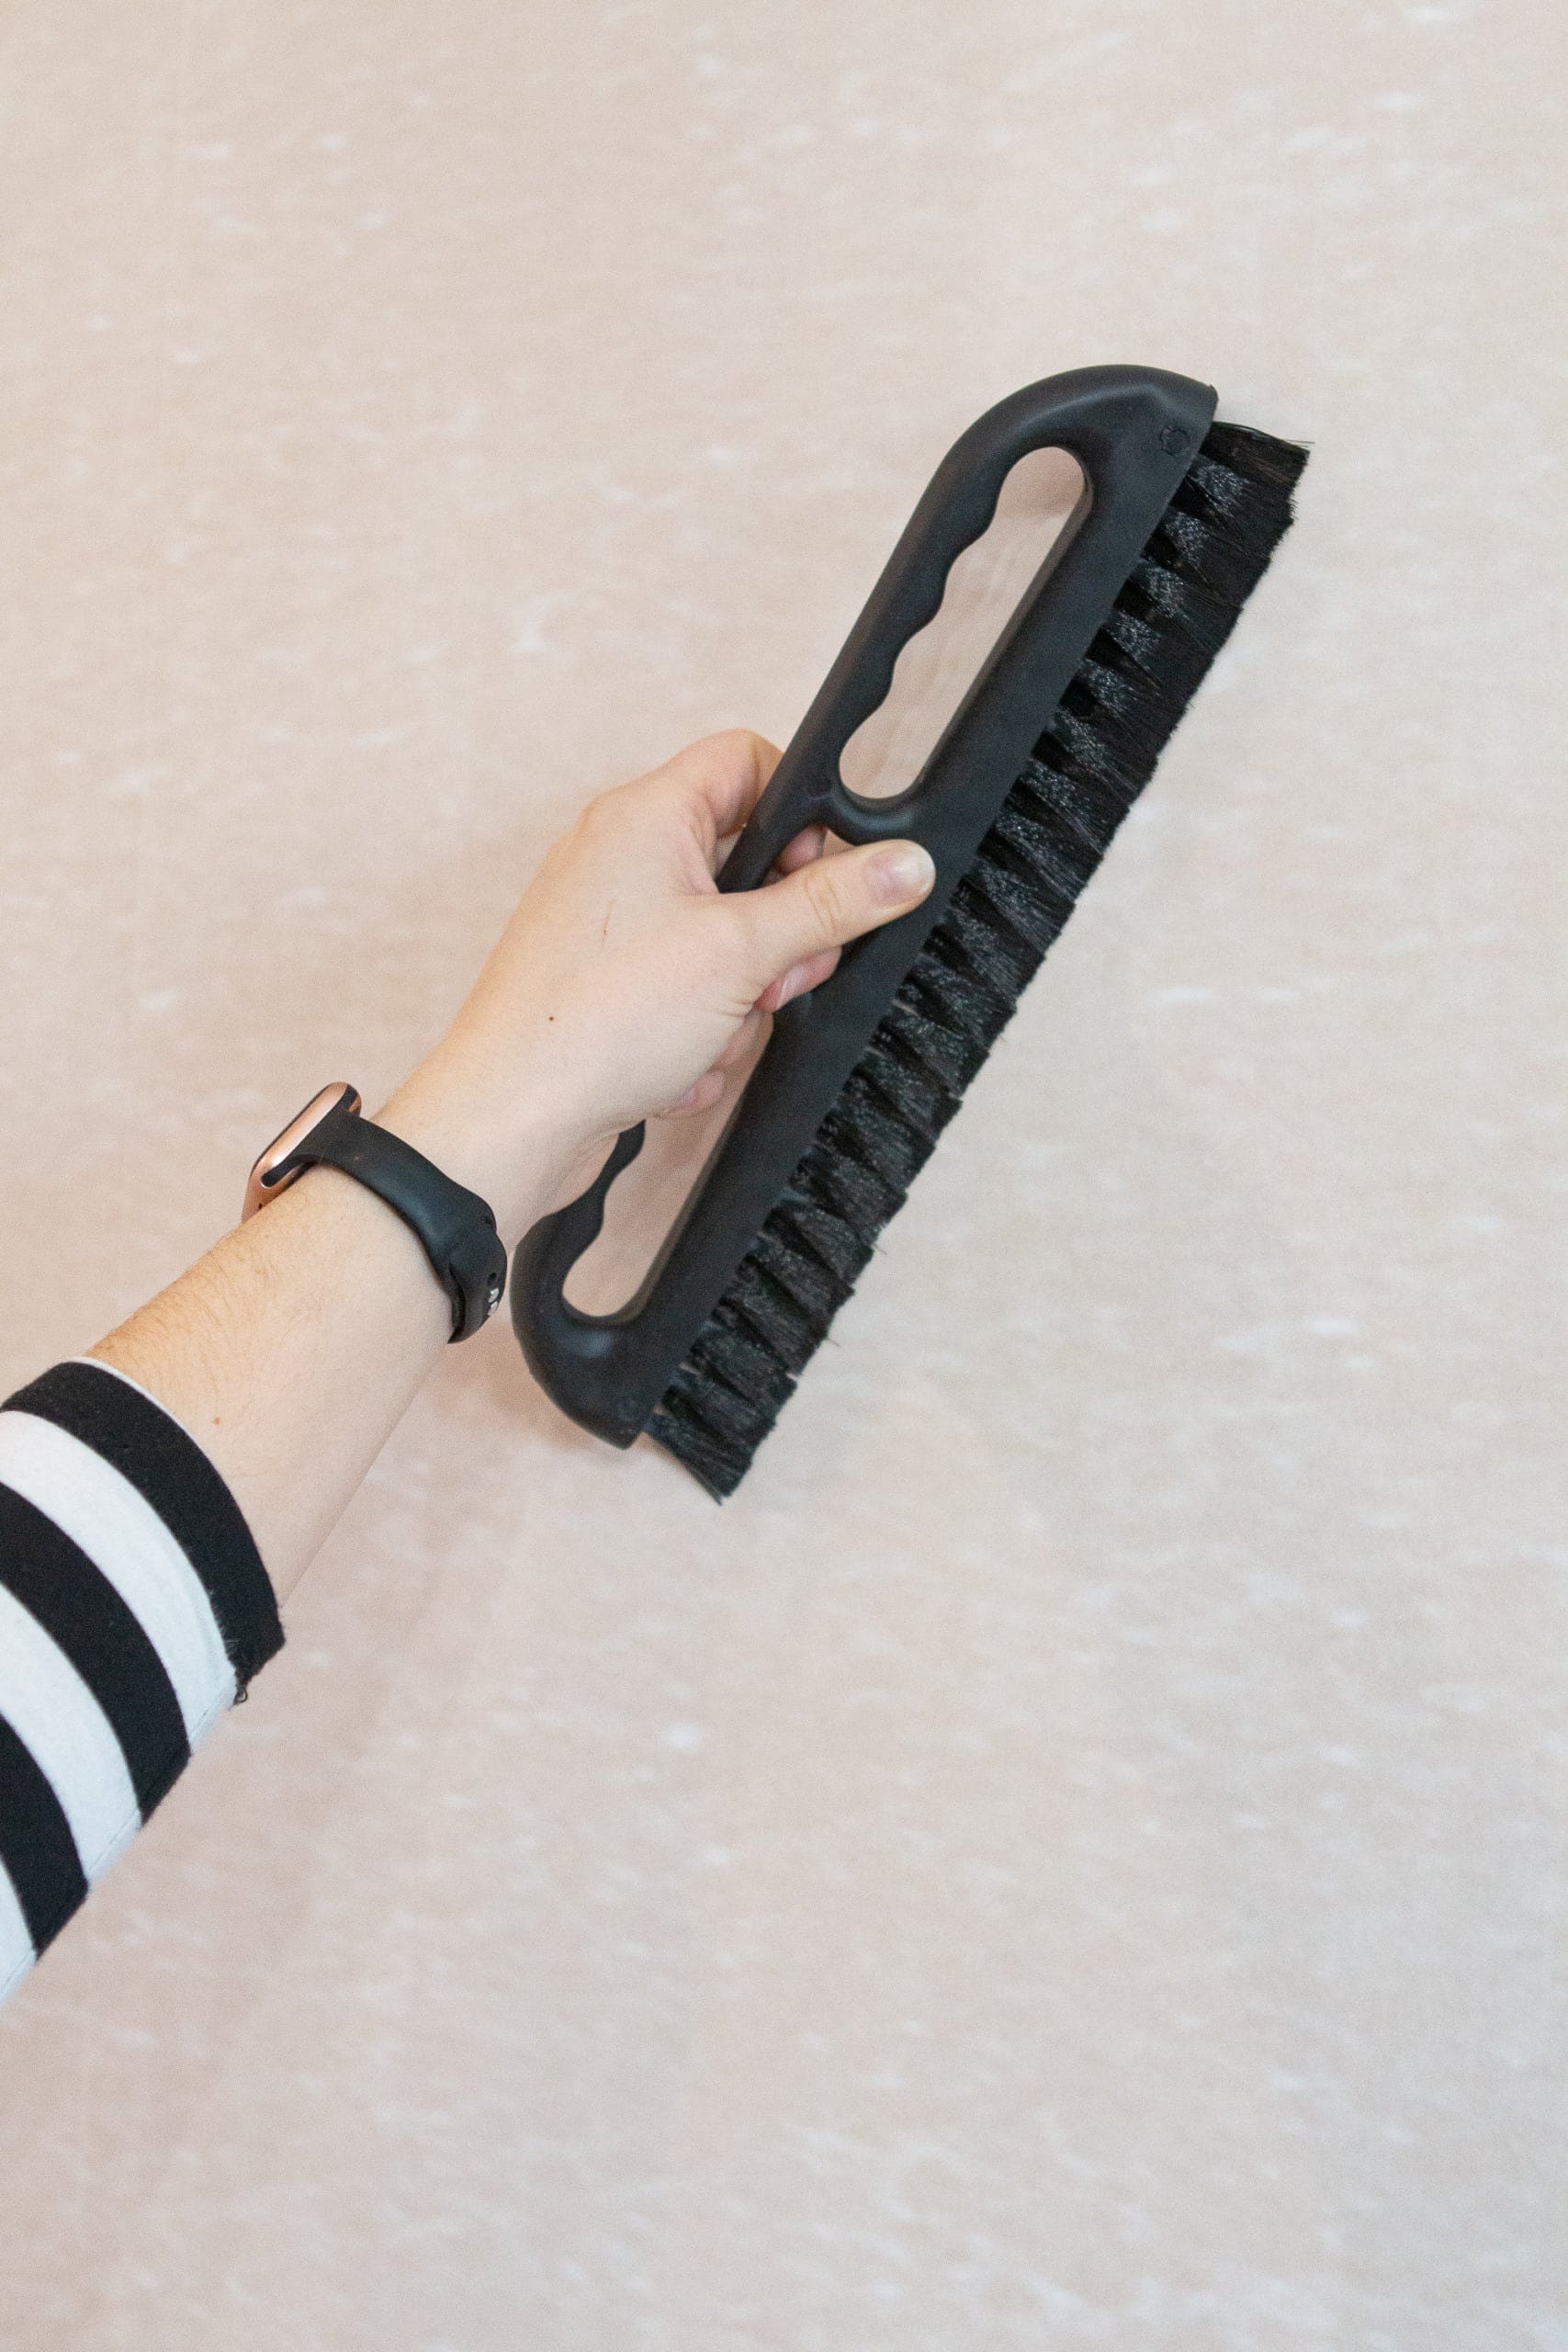
The kit came with a smoothing brush and it definitely came in handy when applying the wall mural. Start at the top and push any bubbles down and to the right. This will get it all flush and even so you don’t have any air bubbles.
Cut the Bottom
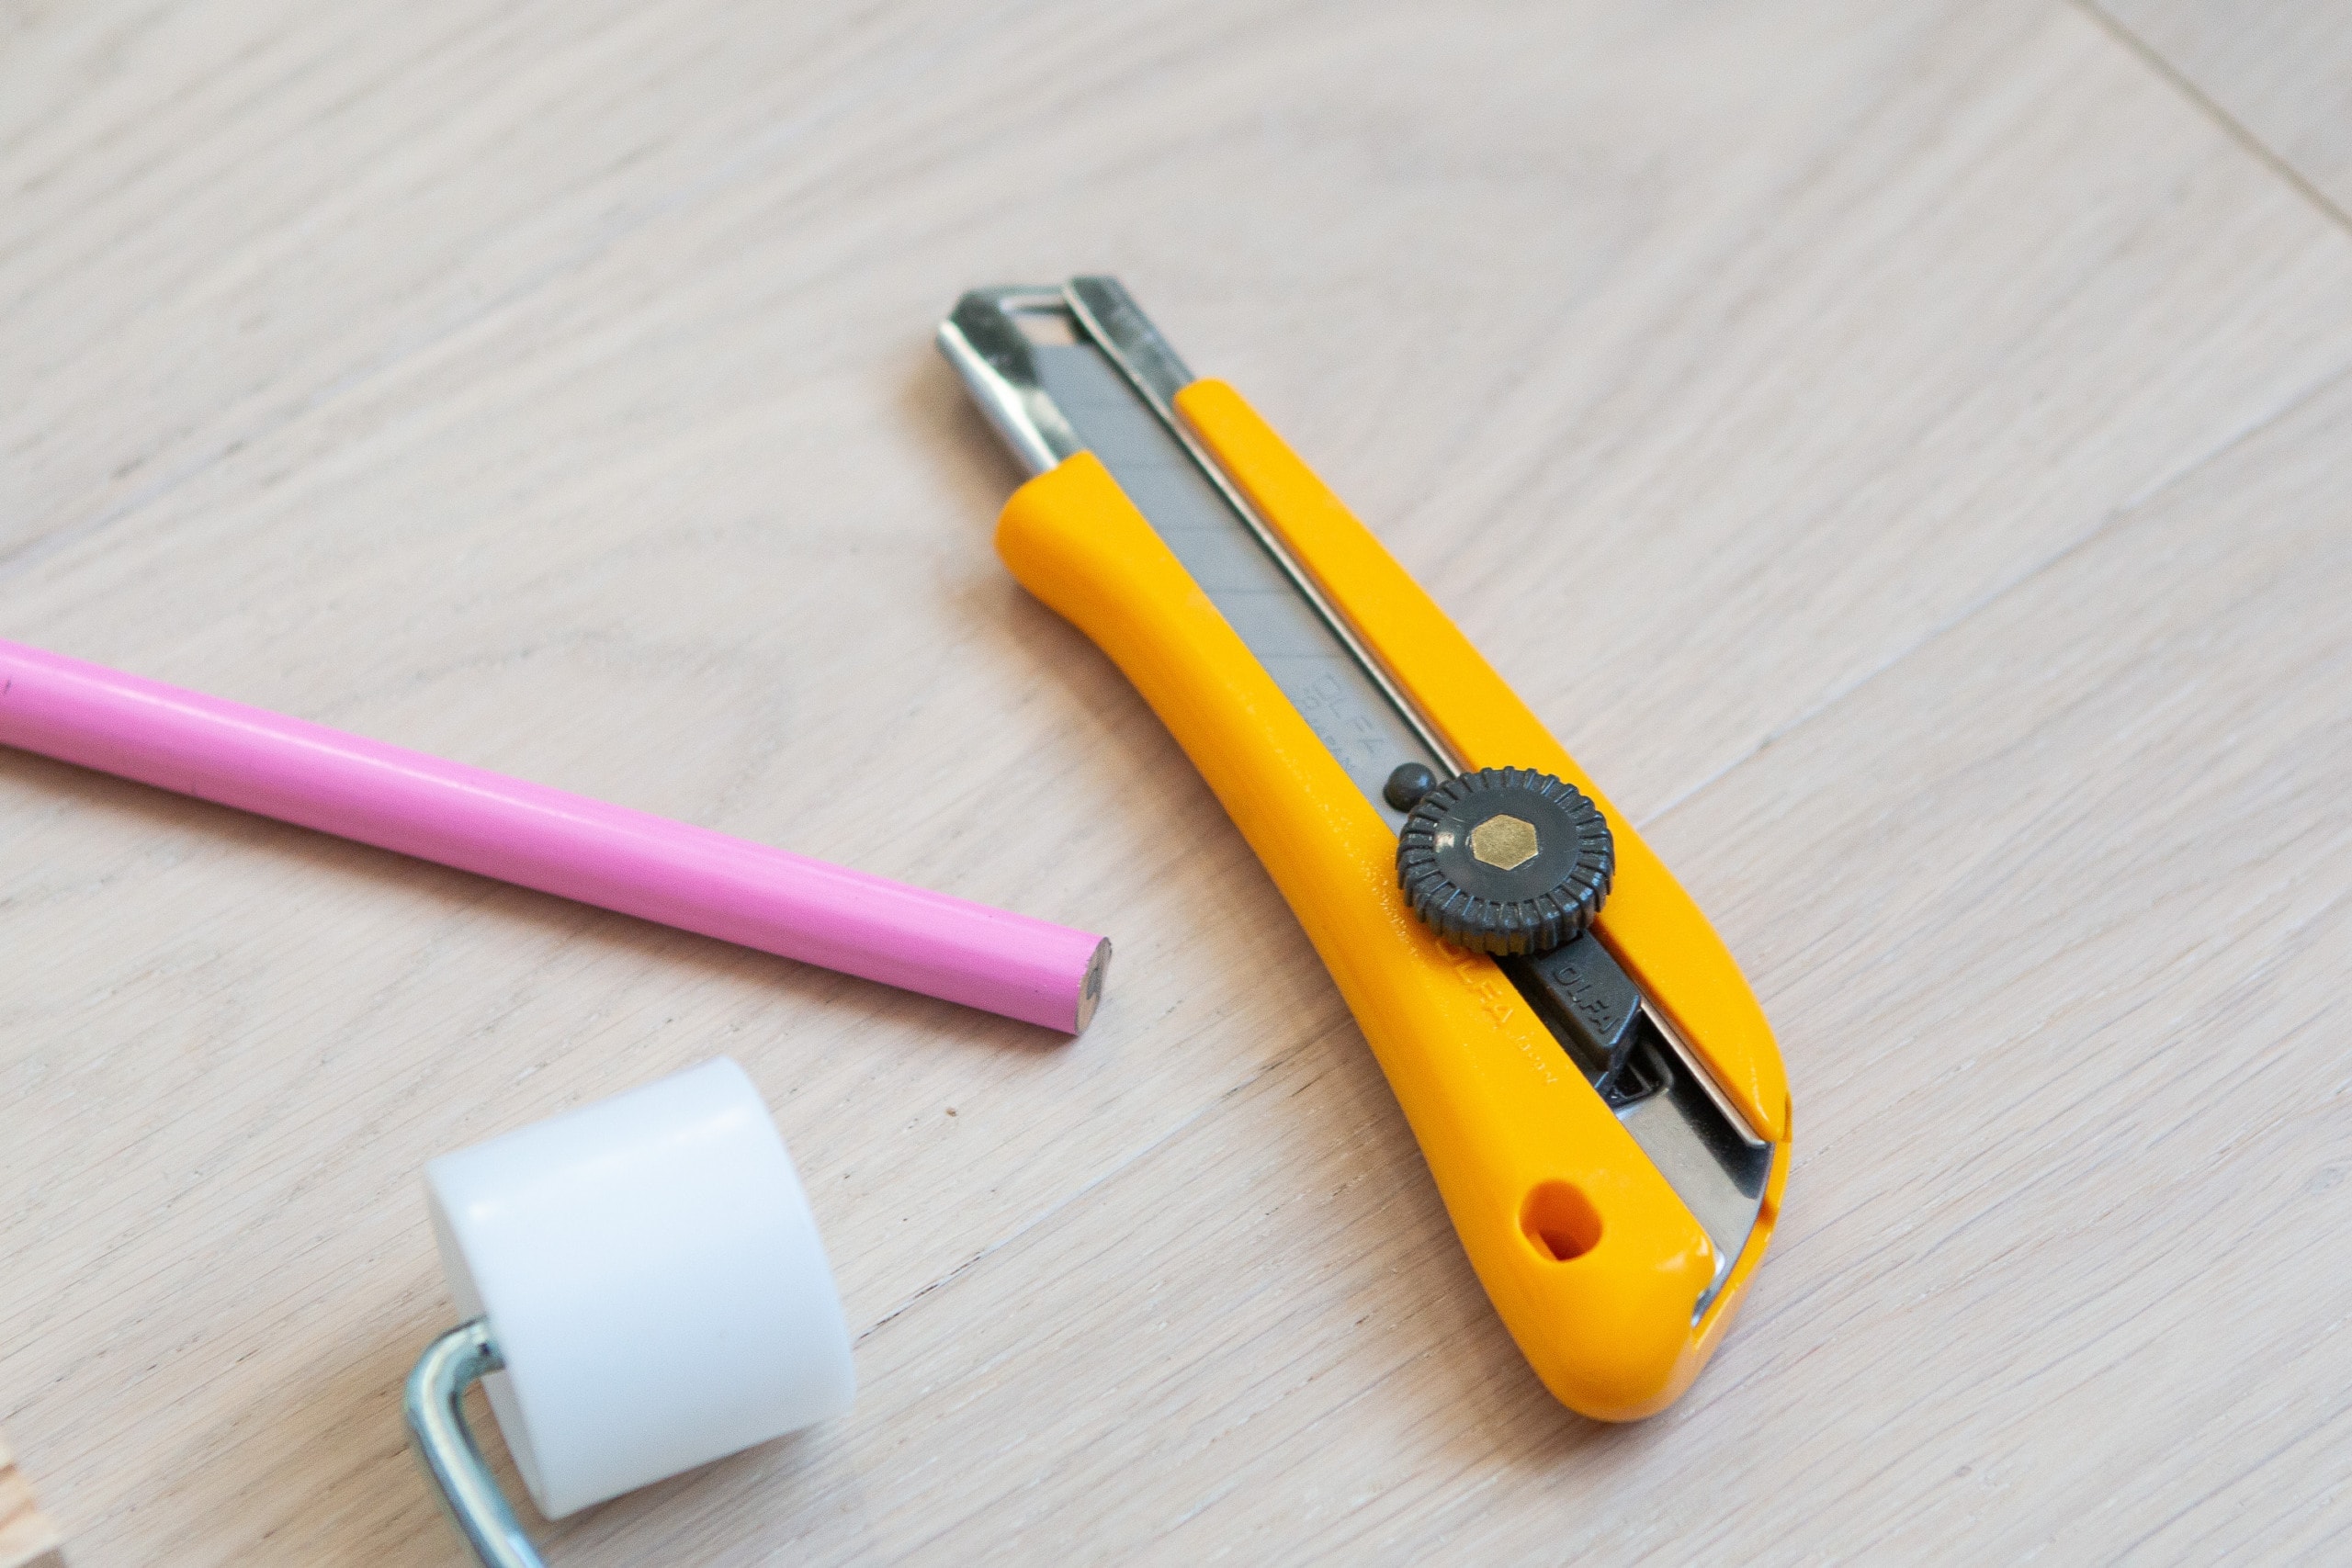
Back in this wallpaper post, I raved about a snap-off utility knife. It is a must for a project like this because you can easily clip off a razor and get a fresh one every few cuts. This ensures that you have crisp lines at the top and bottom. Once the mural was smoothed nicely on the wall, I took the metal straight edge tool and the knife and ran it across the bottom baseboard to cut it. Don’t cut the top at this point, because you’ll want to line up the top with the second strip in your mural.
Cut The Next Strip
The wall mural is pretty easy to figure out because it has designated cut lines for you to cut away! With my first piece installed, I cut my second one and followed the exact same instructions, lining it up at the top with my first one. You don’t want the pieces to overlap at all, just make sure you meet the lines up all the way from the ceiling to the floor.  Once it was all smooth, I cut the bottom and then I cut the top of the FIRST piece. Keep the top portion of the second piece up until you have your third strip lined up.
Use a Seam Roller

A seam roller will come in handy to push the edges together and make sure they bond well. I went over my seams with the roller many times to make sure they were all secure.
Sponge Off Excess Glue
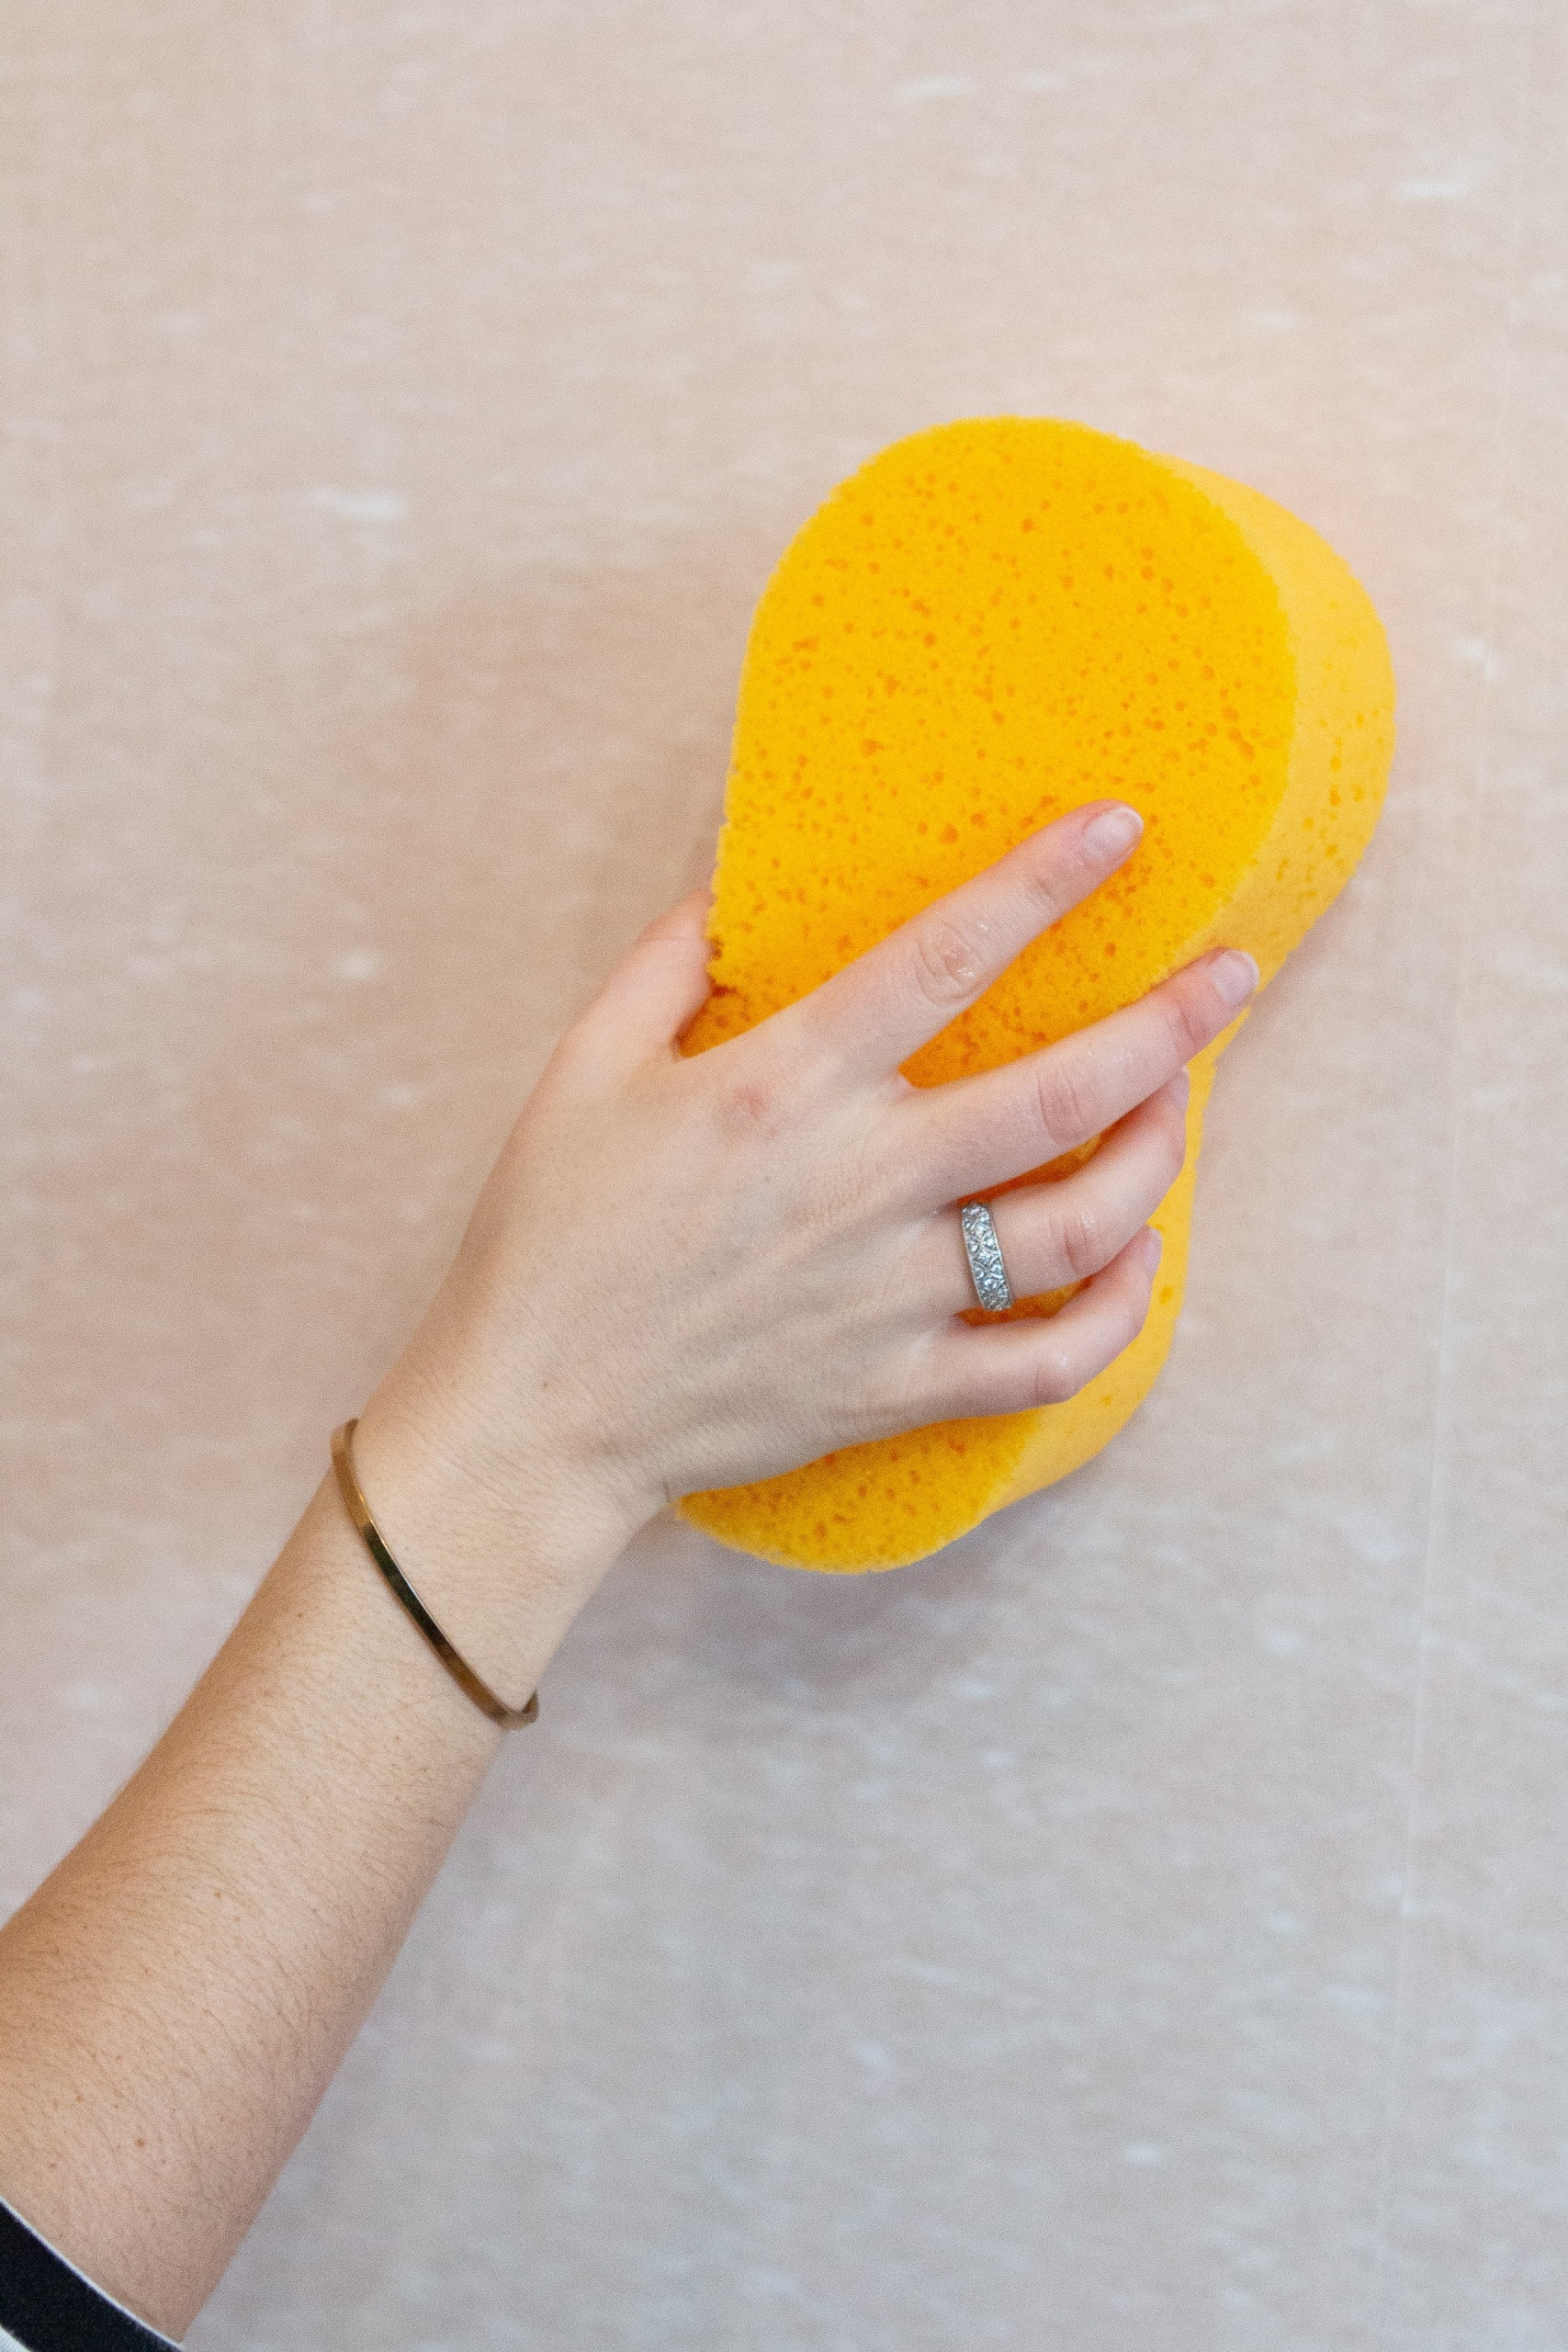
As you go, you may have some glue seep out the sides of the paper. Keep a damp sponge nearby so you can quickly wipe it down. You don’t want the glue to dry on the paper, so examine each strip before you move onto the next.
Cutting Around an Outlet
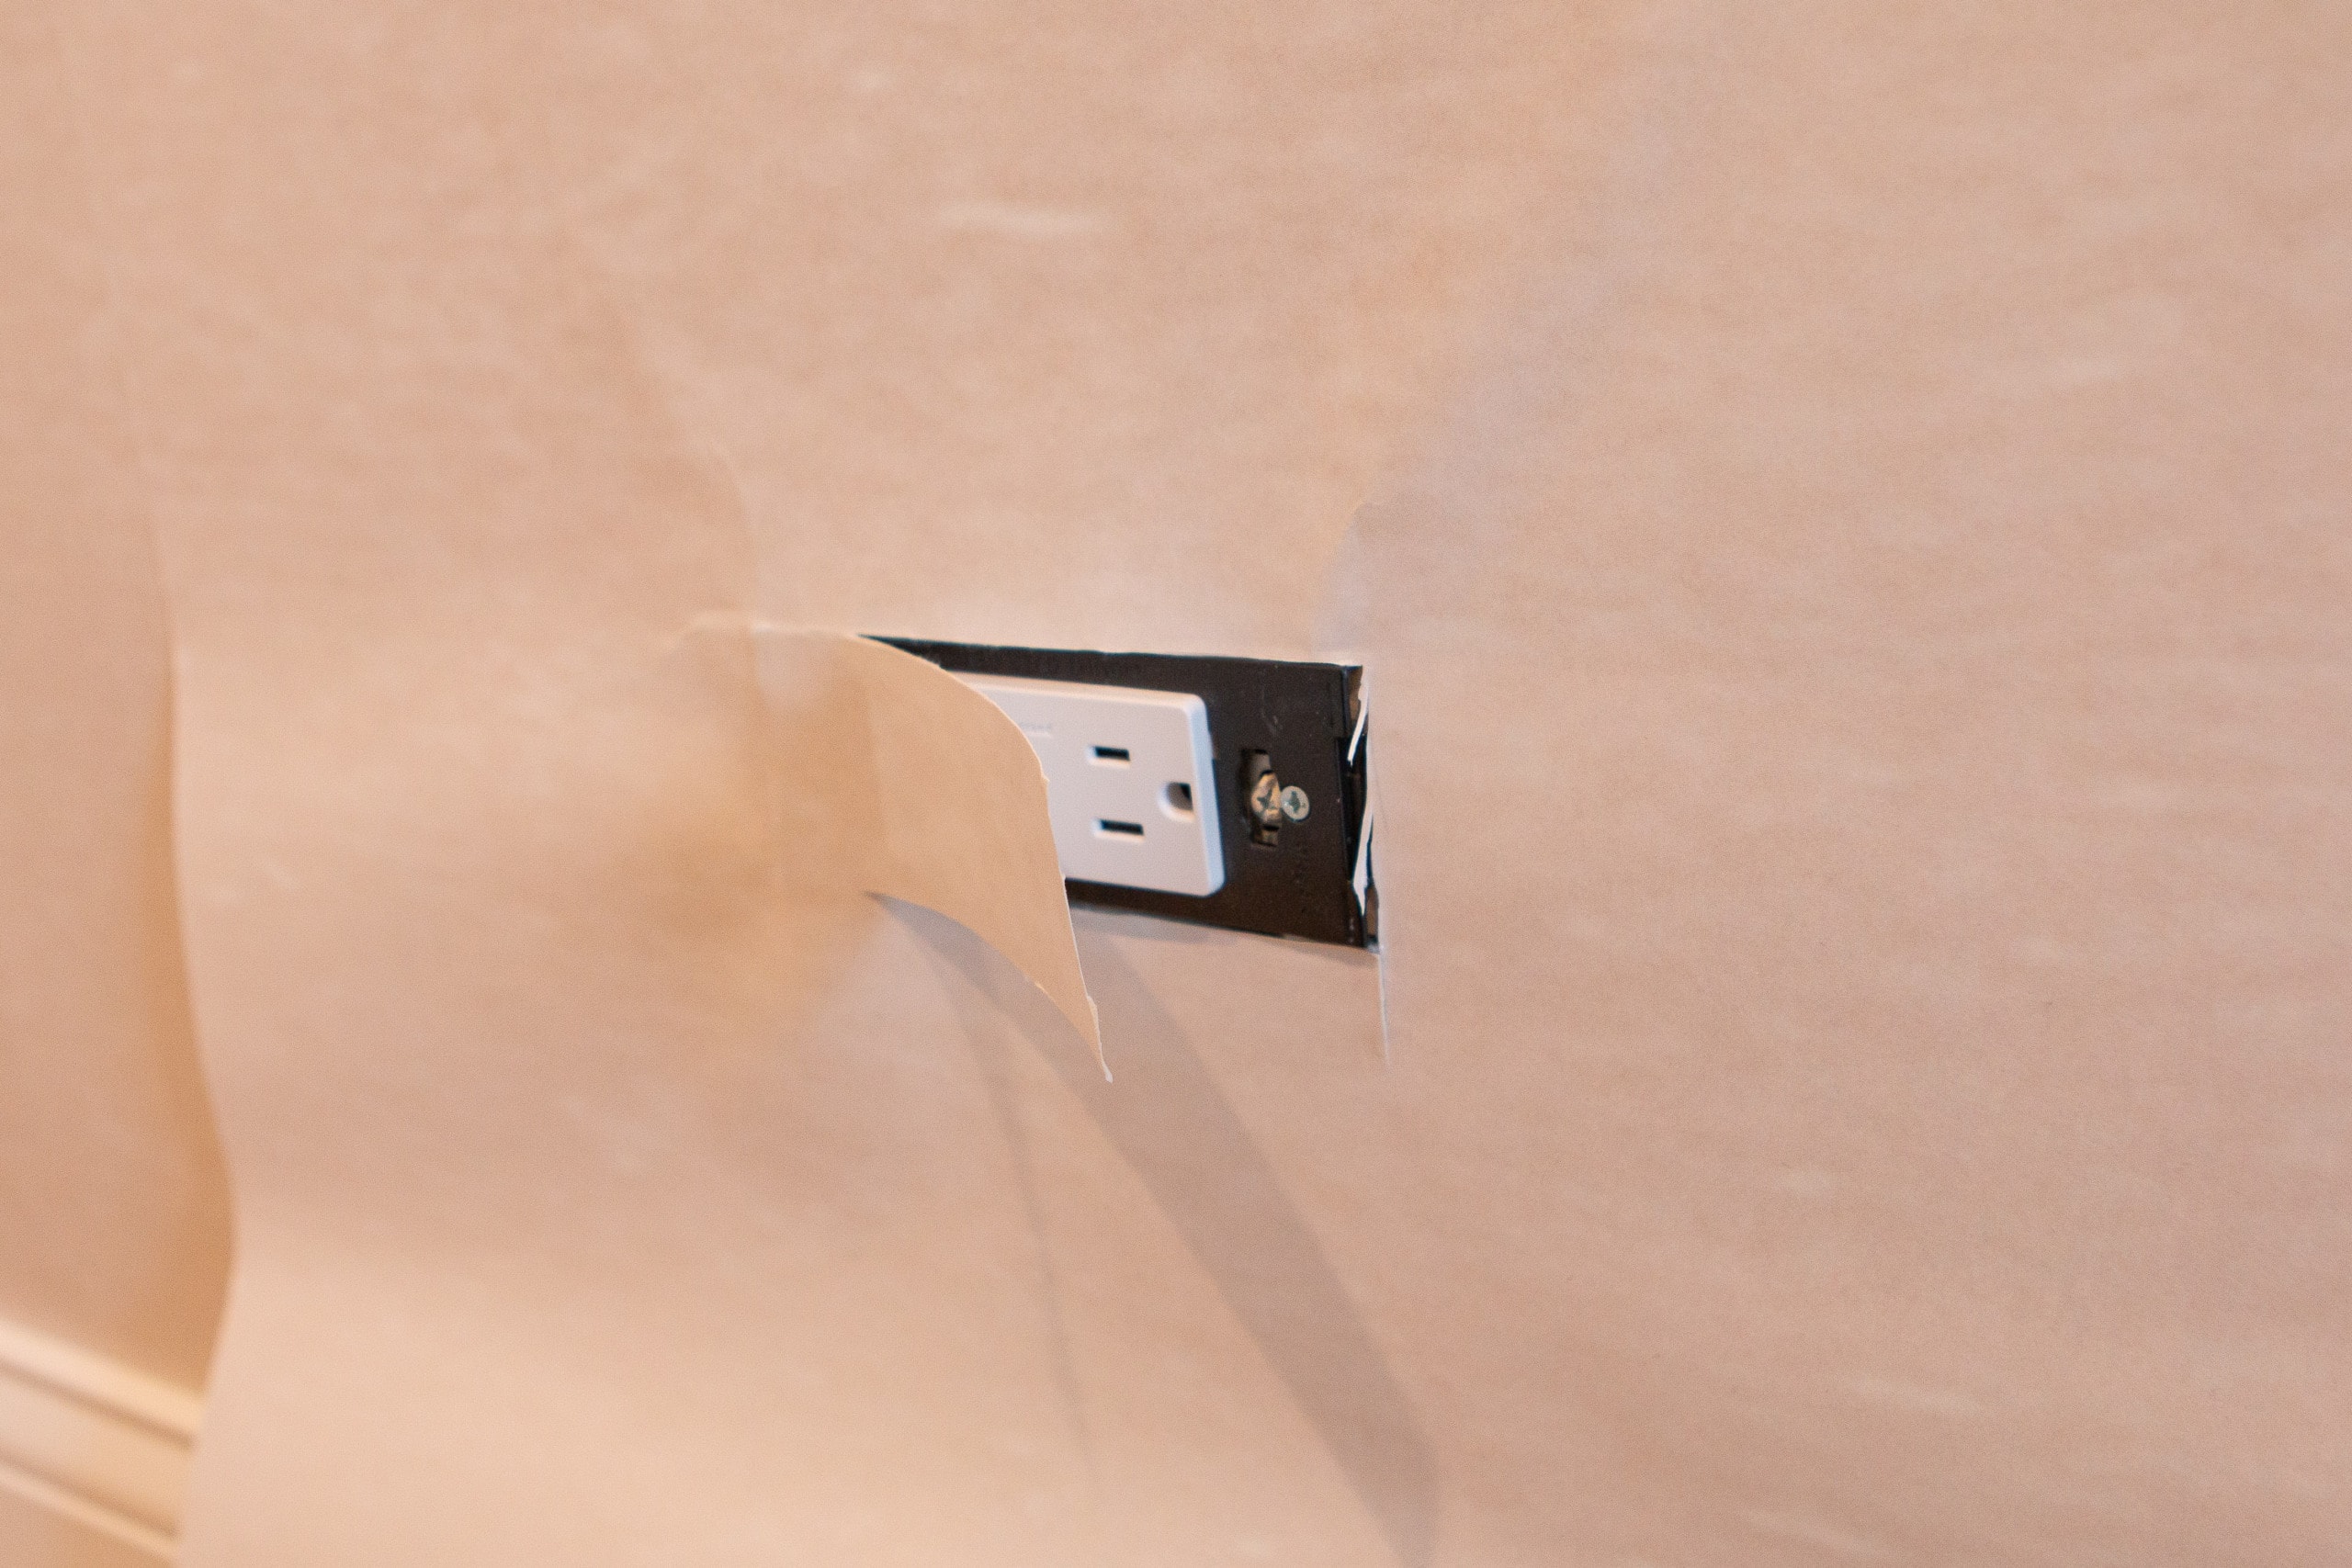
I have two outlets on this wall and I was a little worried about cutting around them, but luckily it was super easy. I just applied the strip as I normally would smoothing the bubbles down to where the outlet was. I then used my utility knife and the metal smoothing tool to feel for the outlet (you can tell because it will be bulging out from the paper). Once I had a good sense of where it was, I cut around it. 
When that paper is cut out, you can easily smooth down the rest of the paper so it’s secure on the sides and bottom of the outlet.  Be sure to take your outlet cover off for this, because you can then place the cover on top to hide any imperfections in your cut.
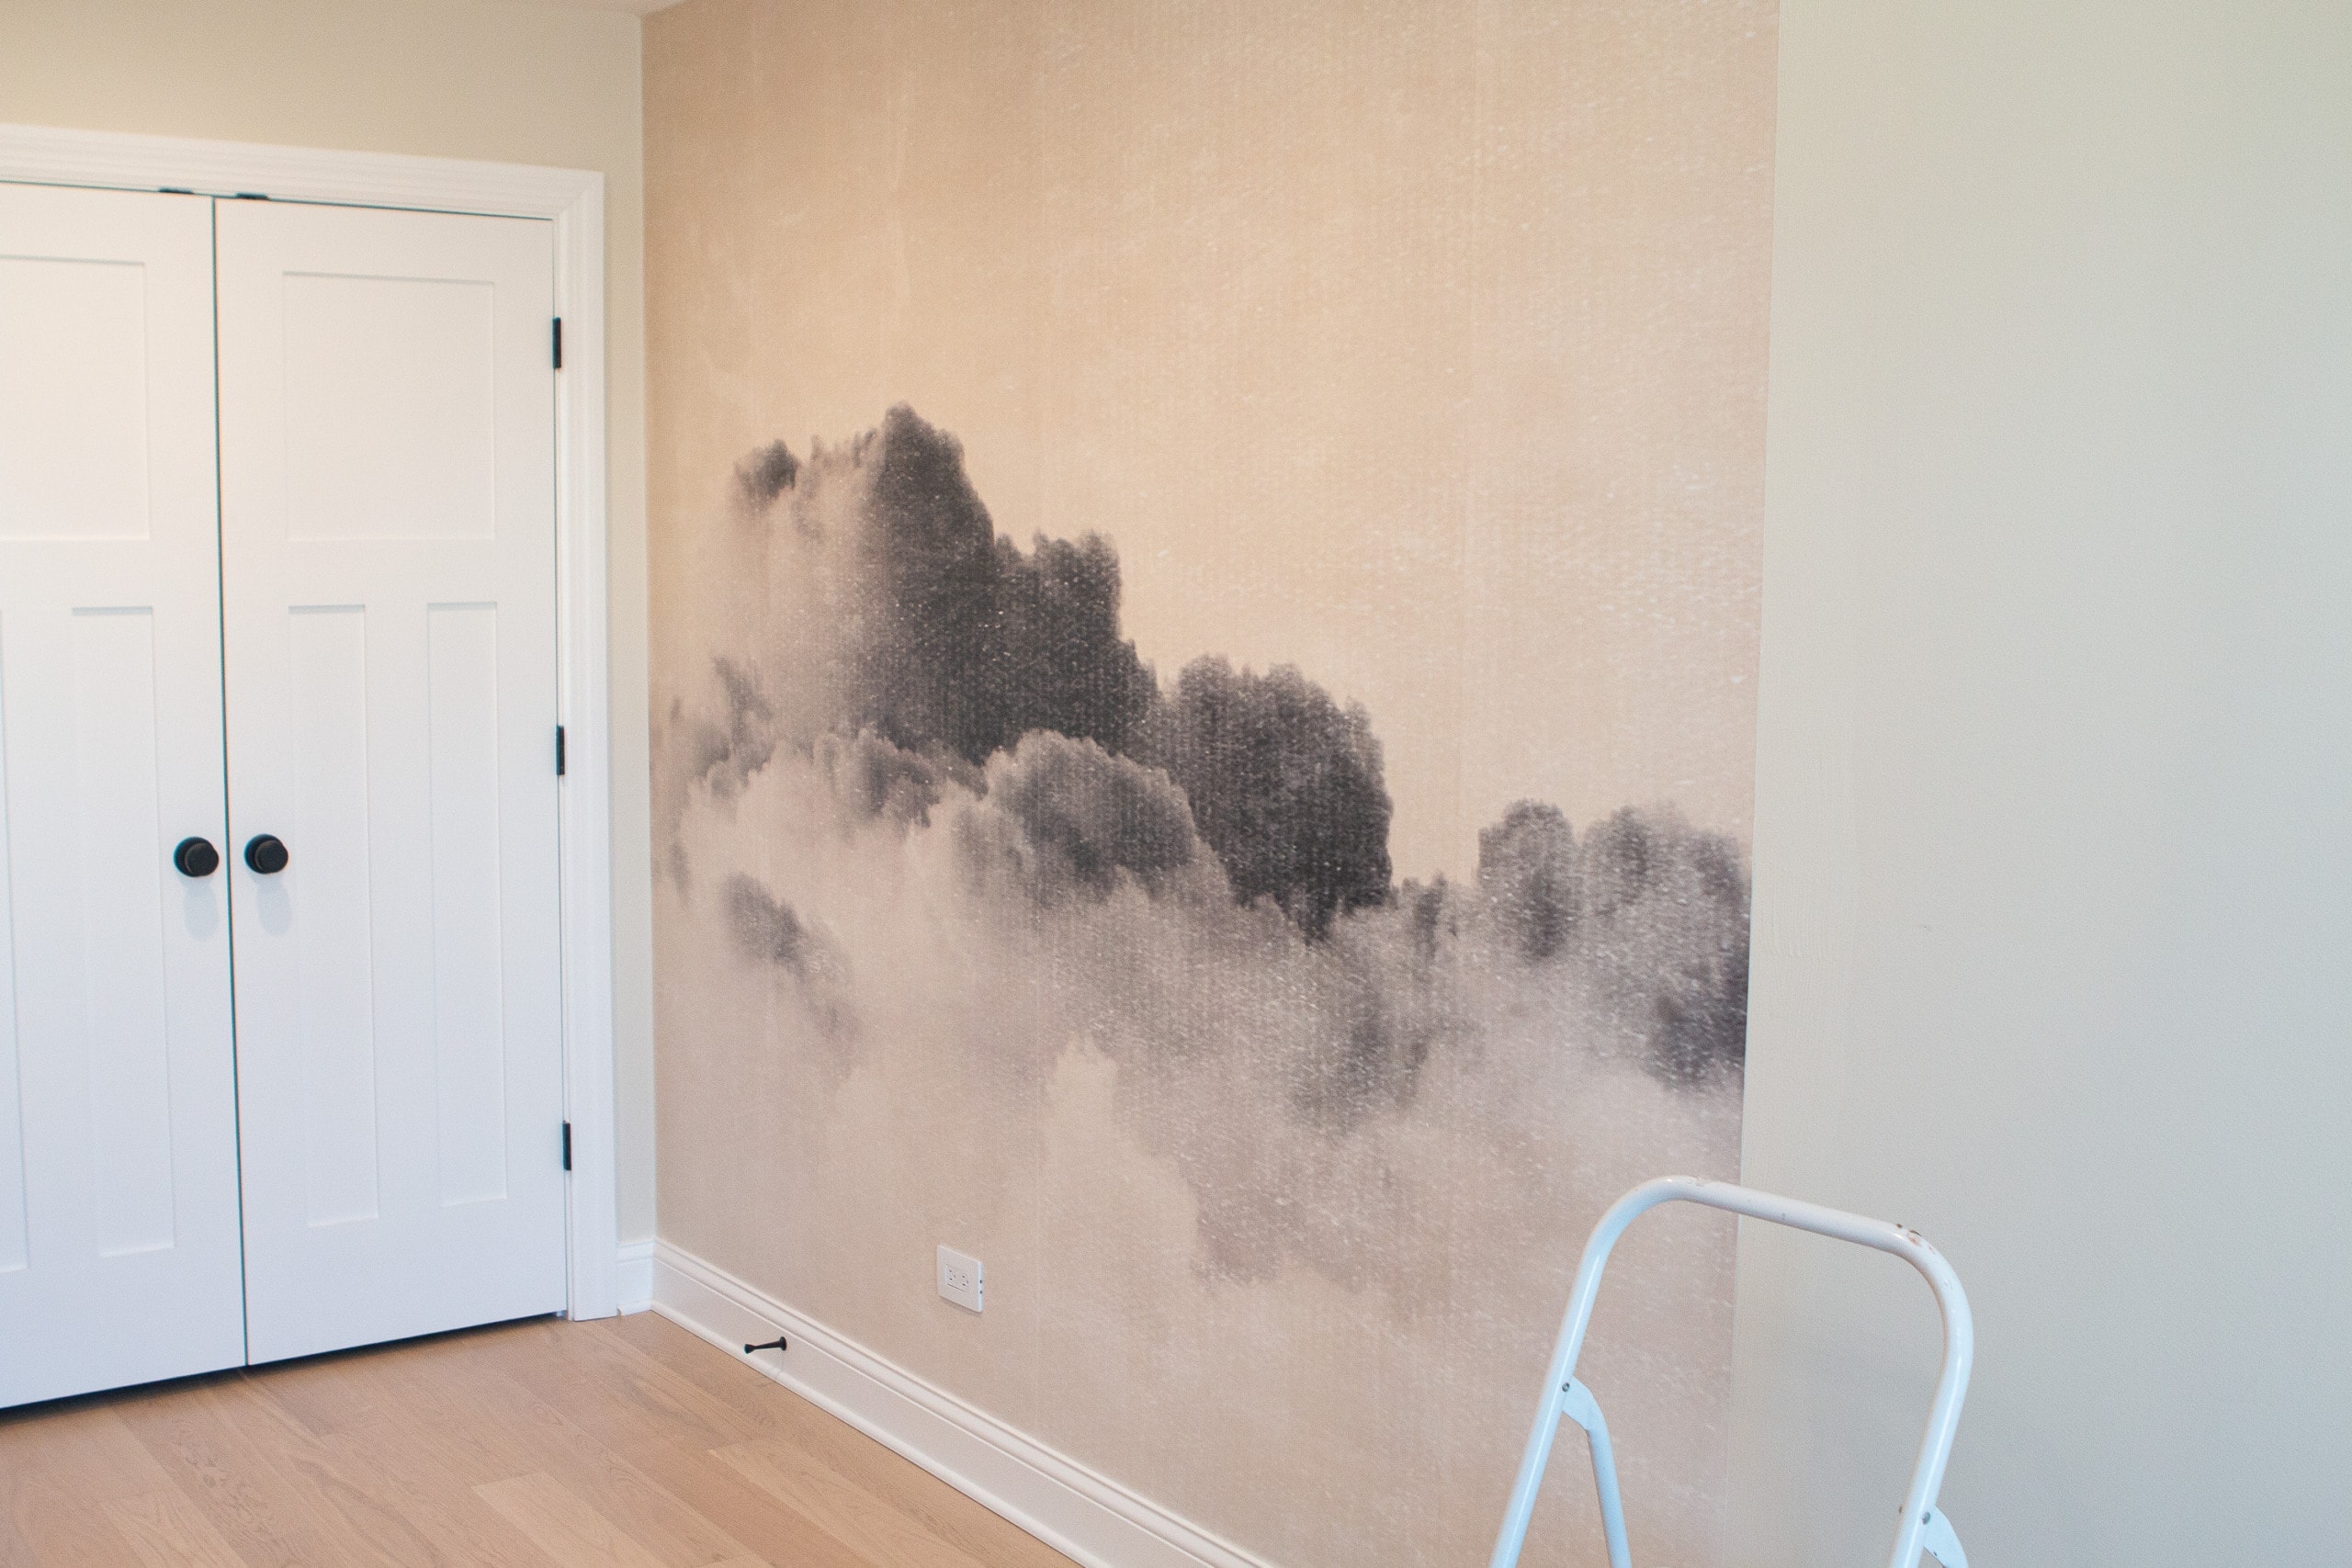
Keep following these same steps until you get to your last strip of paper. It’s monotonous, but not at all difficult. I just listened to podcasts and worked away.
Applying the Final Strip
Because I ordered the wall mural with some extra paper on the sides, I had some overage at the end (which is good!). That last strip will be tricky to get in place because of the extra paper on the top, side, and bottom. I found it easiest to cut the top and sides as I smoothed it down. I used my smoothing tool to really get the paper into the corner, and then I cut with my utility knife on that edge. I then stopped and smoothed down the wall, and did the same thing. This worked out great!
Office Wall – Before & After
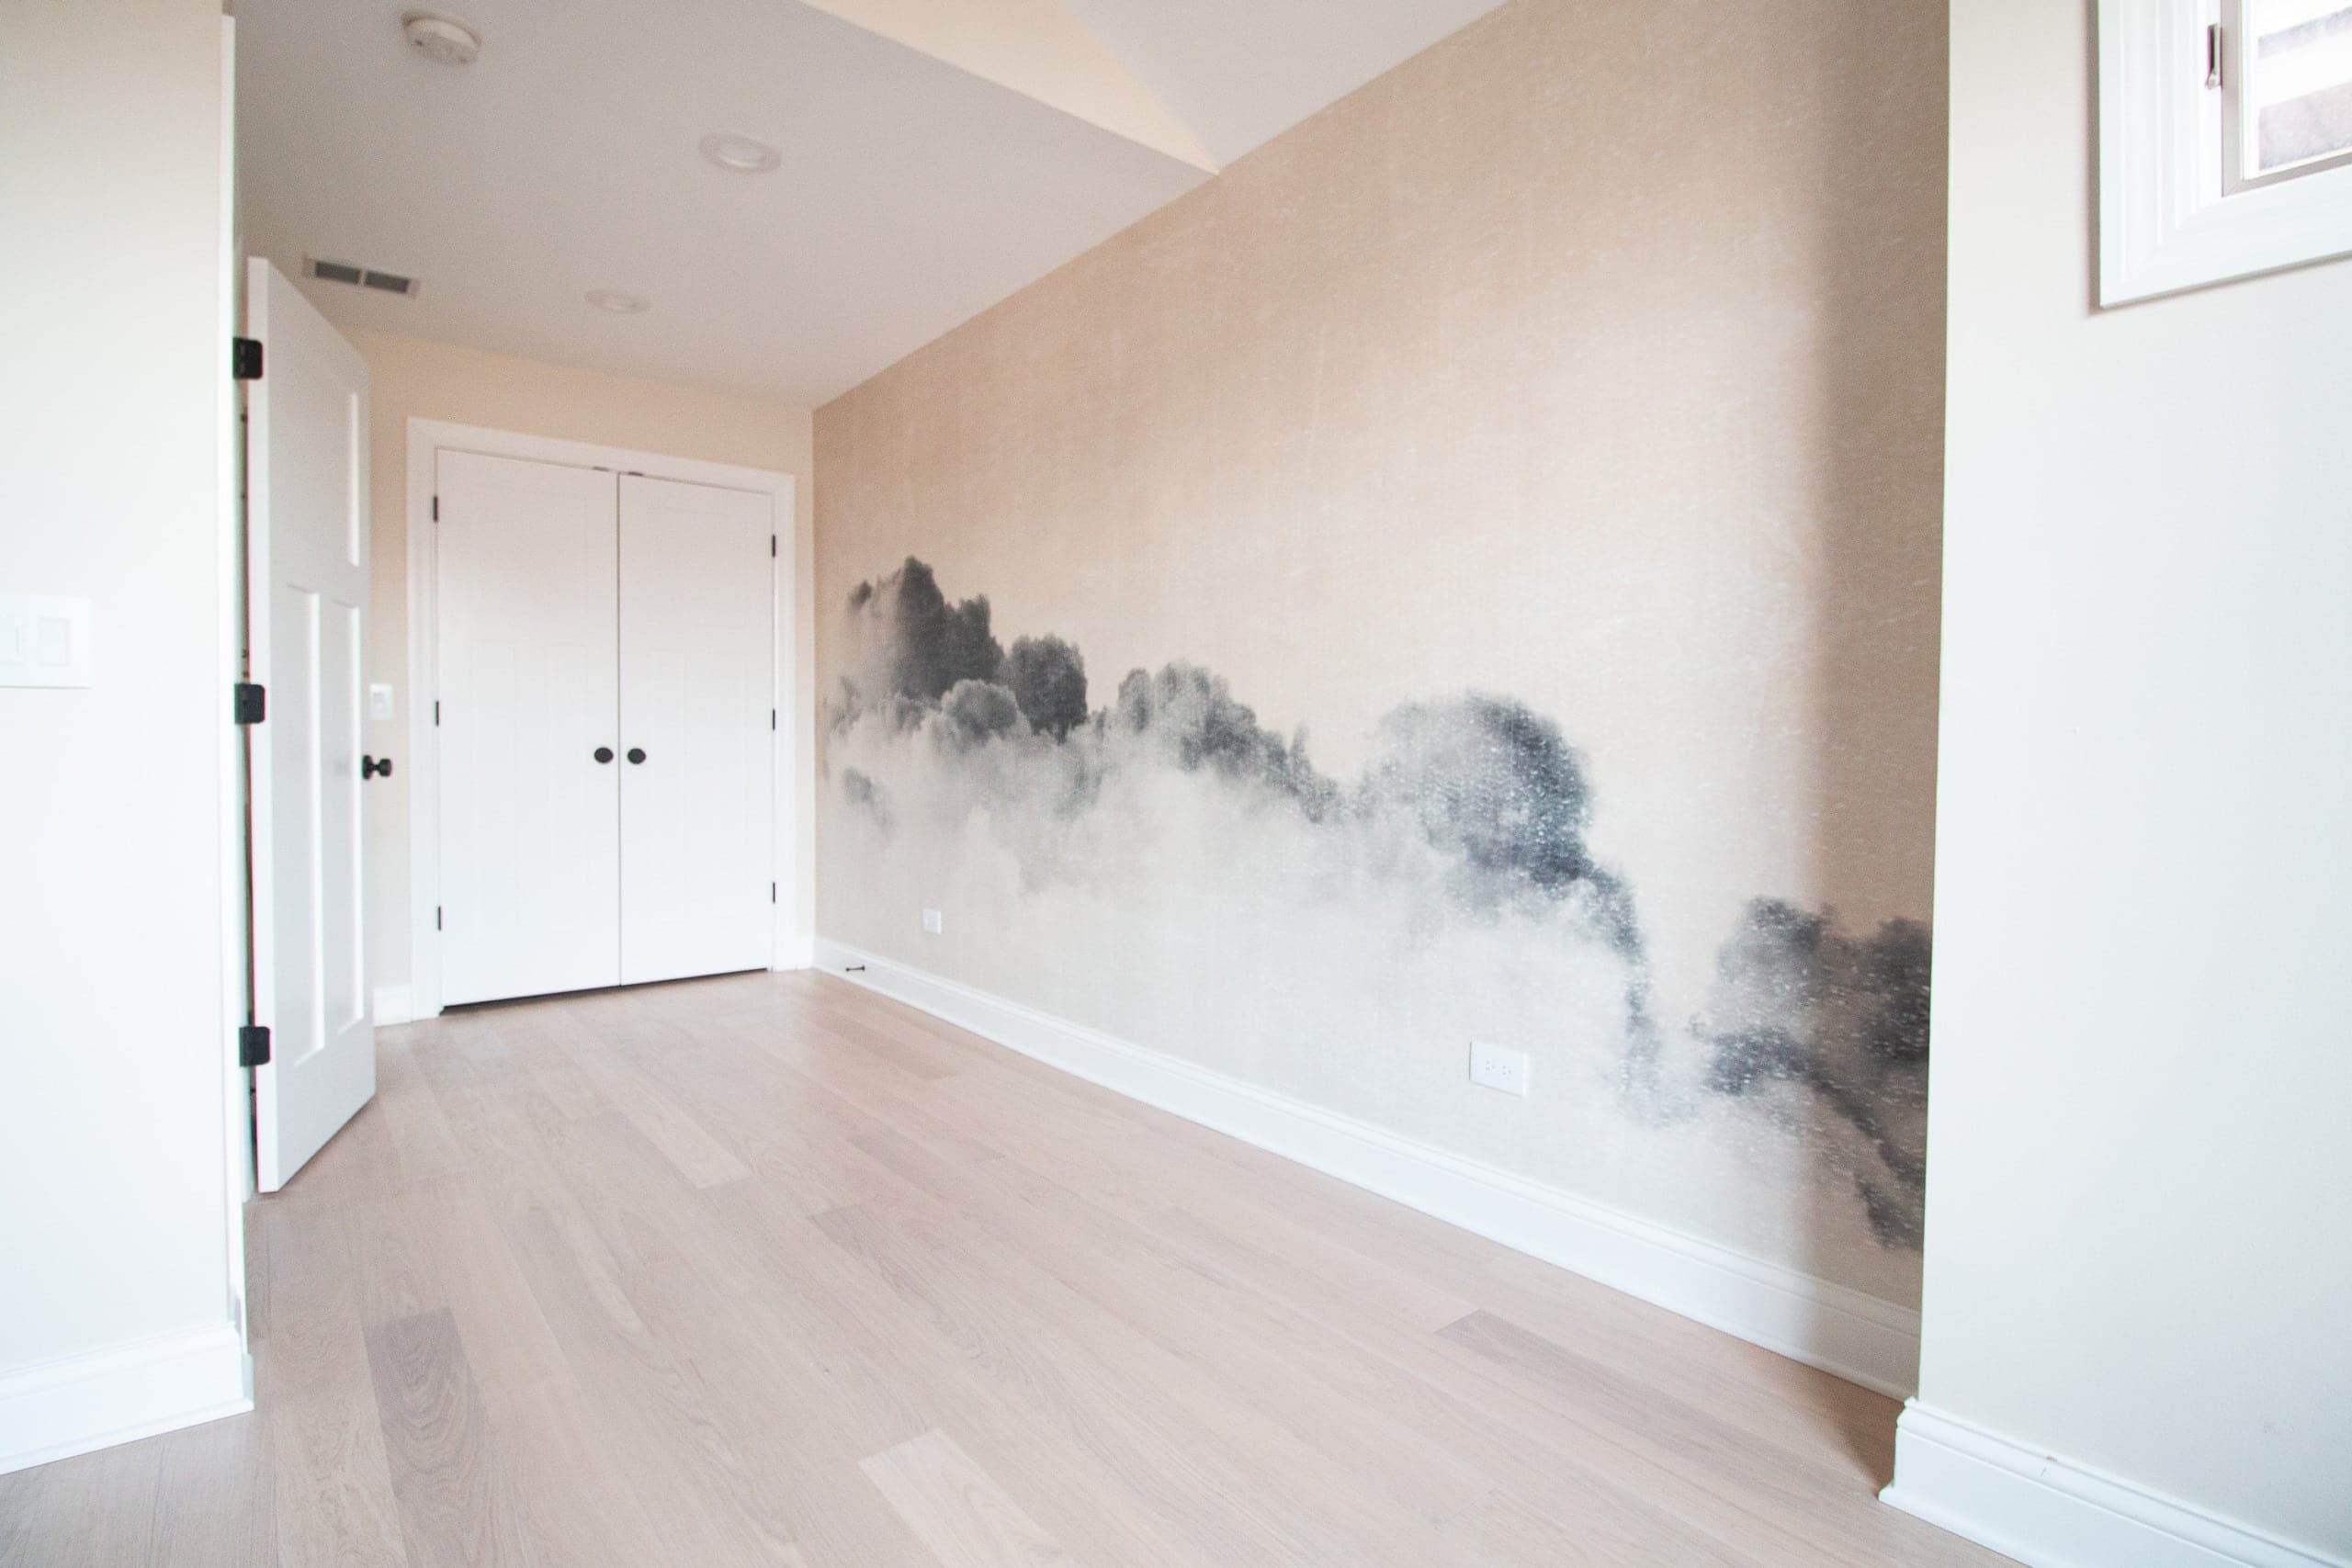

I love it so much. It adds the perfect amount of detailing to this space without overwhelming it. The colors are spot on and complement the soft white on the other walls and the blue built-ins. I couldn’t be happier with how this turned out! Plus, it only took me a few hours to get done on this big wall. If you have a smaller wall to do, you can get this done in an hour! 
As you can see, I’m one happy girl! My office is coming together nicely…
Casey


