My Design Plan for Our Main Bathroom
Okay friends, it’s finally time to talk about the main bathroom design plan. As you might know, we tackled both our kids’ bathroom and our main bathroom at the same time. And even though I’ve already been sharing the kids’ bathroom (reveal coming next week!), I haven’t shared much about the main bathroom just yet. That is, until today!
I’m so eager to dive headfirst into our main bathroom design so I can take you through my entire thought process for the new space. Even though the heavy lifting and renovation are already done in the room, I still have lots to finish up, so I’m excited to take you along for the ride!
The Main Bathroom Before
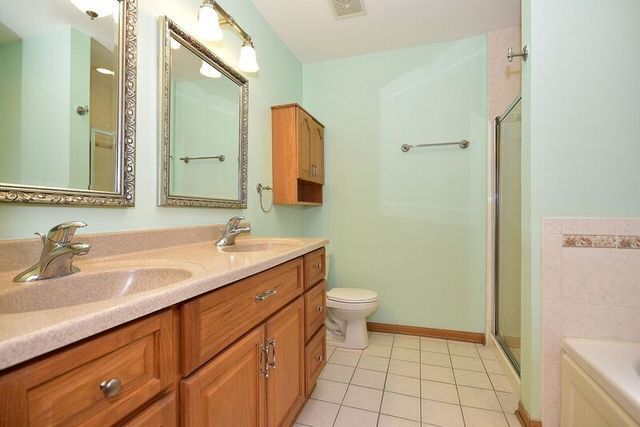
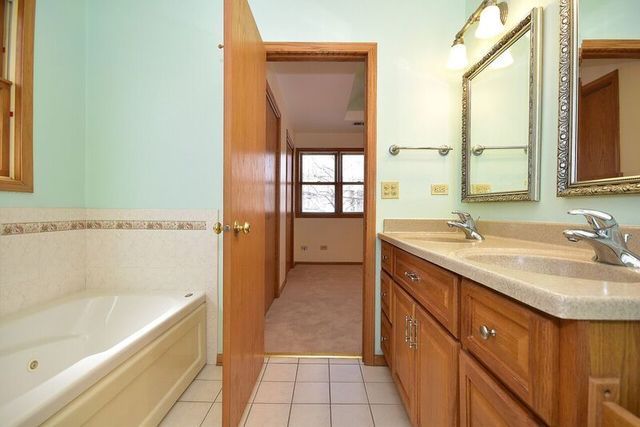
This is what the bathroom looked like back when we bought our home in 2019. Yes, it was wonderful to have a bathroom right off our bedroom but it was a tad outdated. The floral tile, the jetted tub, the teeny tiny shower – all of that meant that this space was not exactly my dream bathroom.
The Main Bathroom – Phase One Makeover
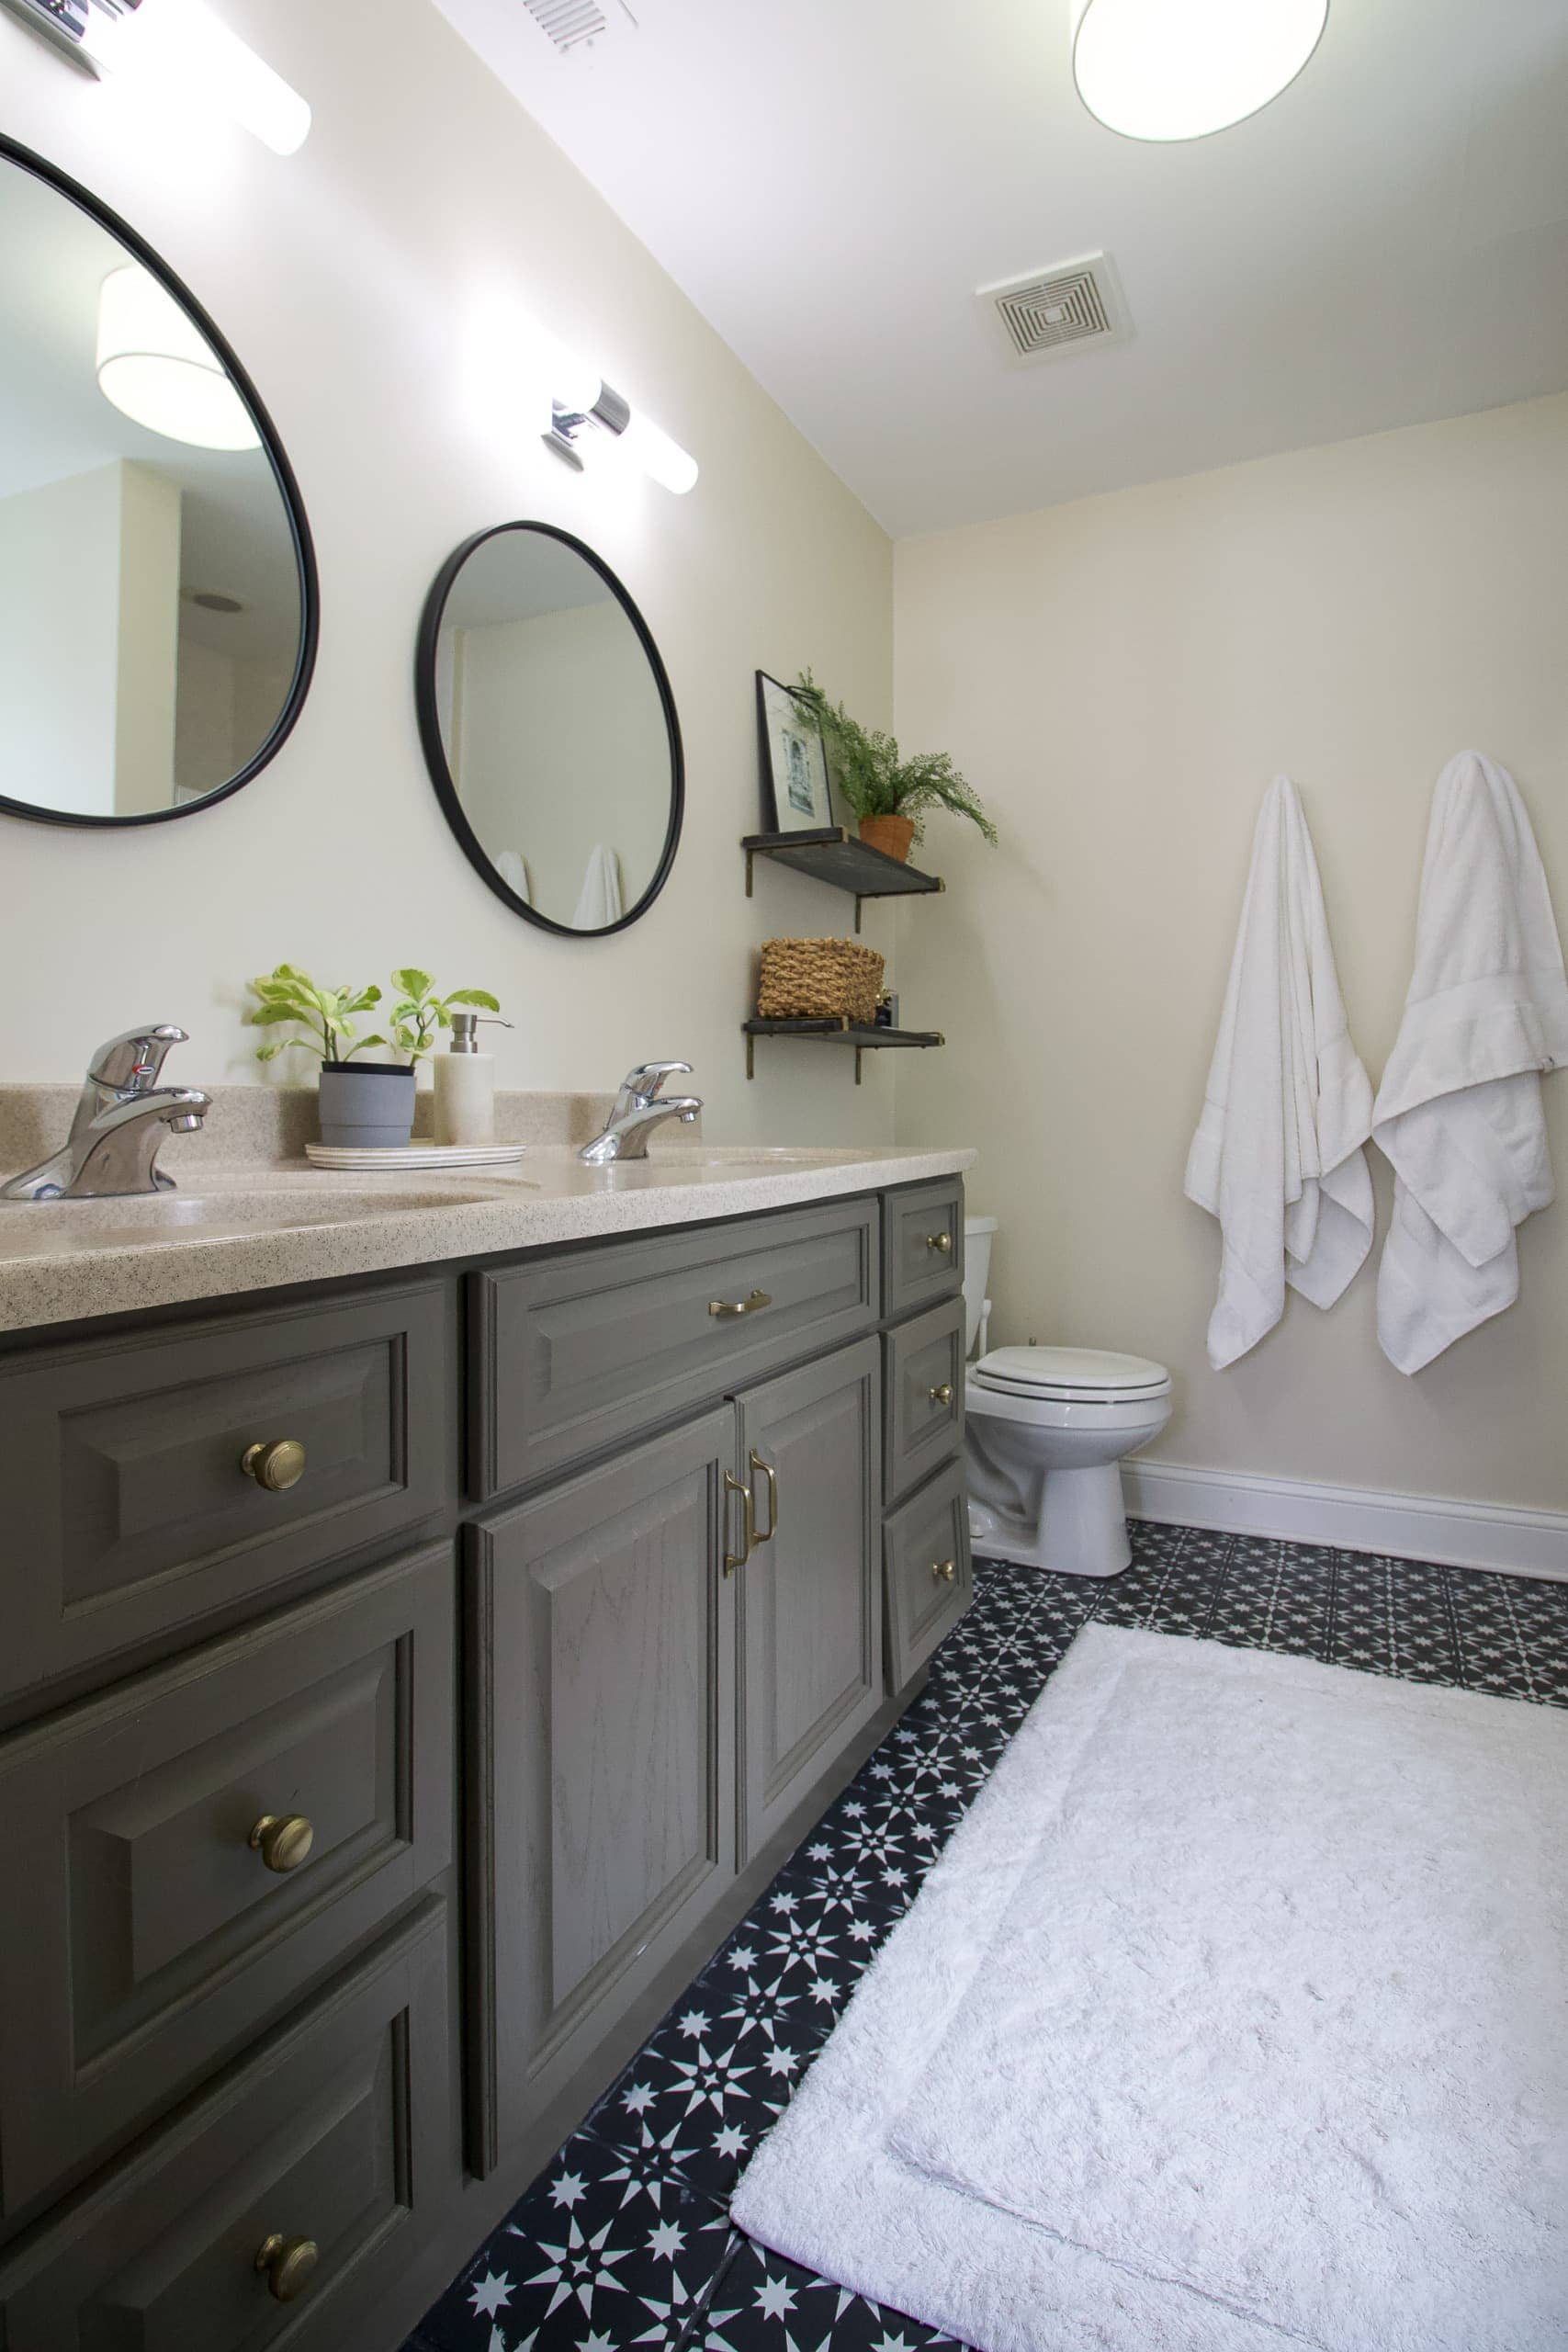
After living with the bathroom for a year or so, I got to work and gave it a Phase One makeover to tide me over until we could renovate the entire thing. I always recommend doing a nice cosmetic upgrade to a space you loathe. Plus, I feel like it can be a good opportunity to try out a new-to-you DIY project, knowing that you’ll eventually gut the entire thing! That’s what I did here.
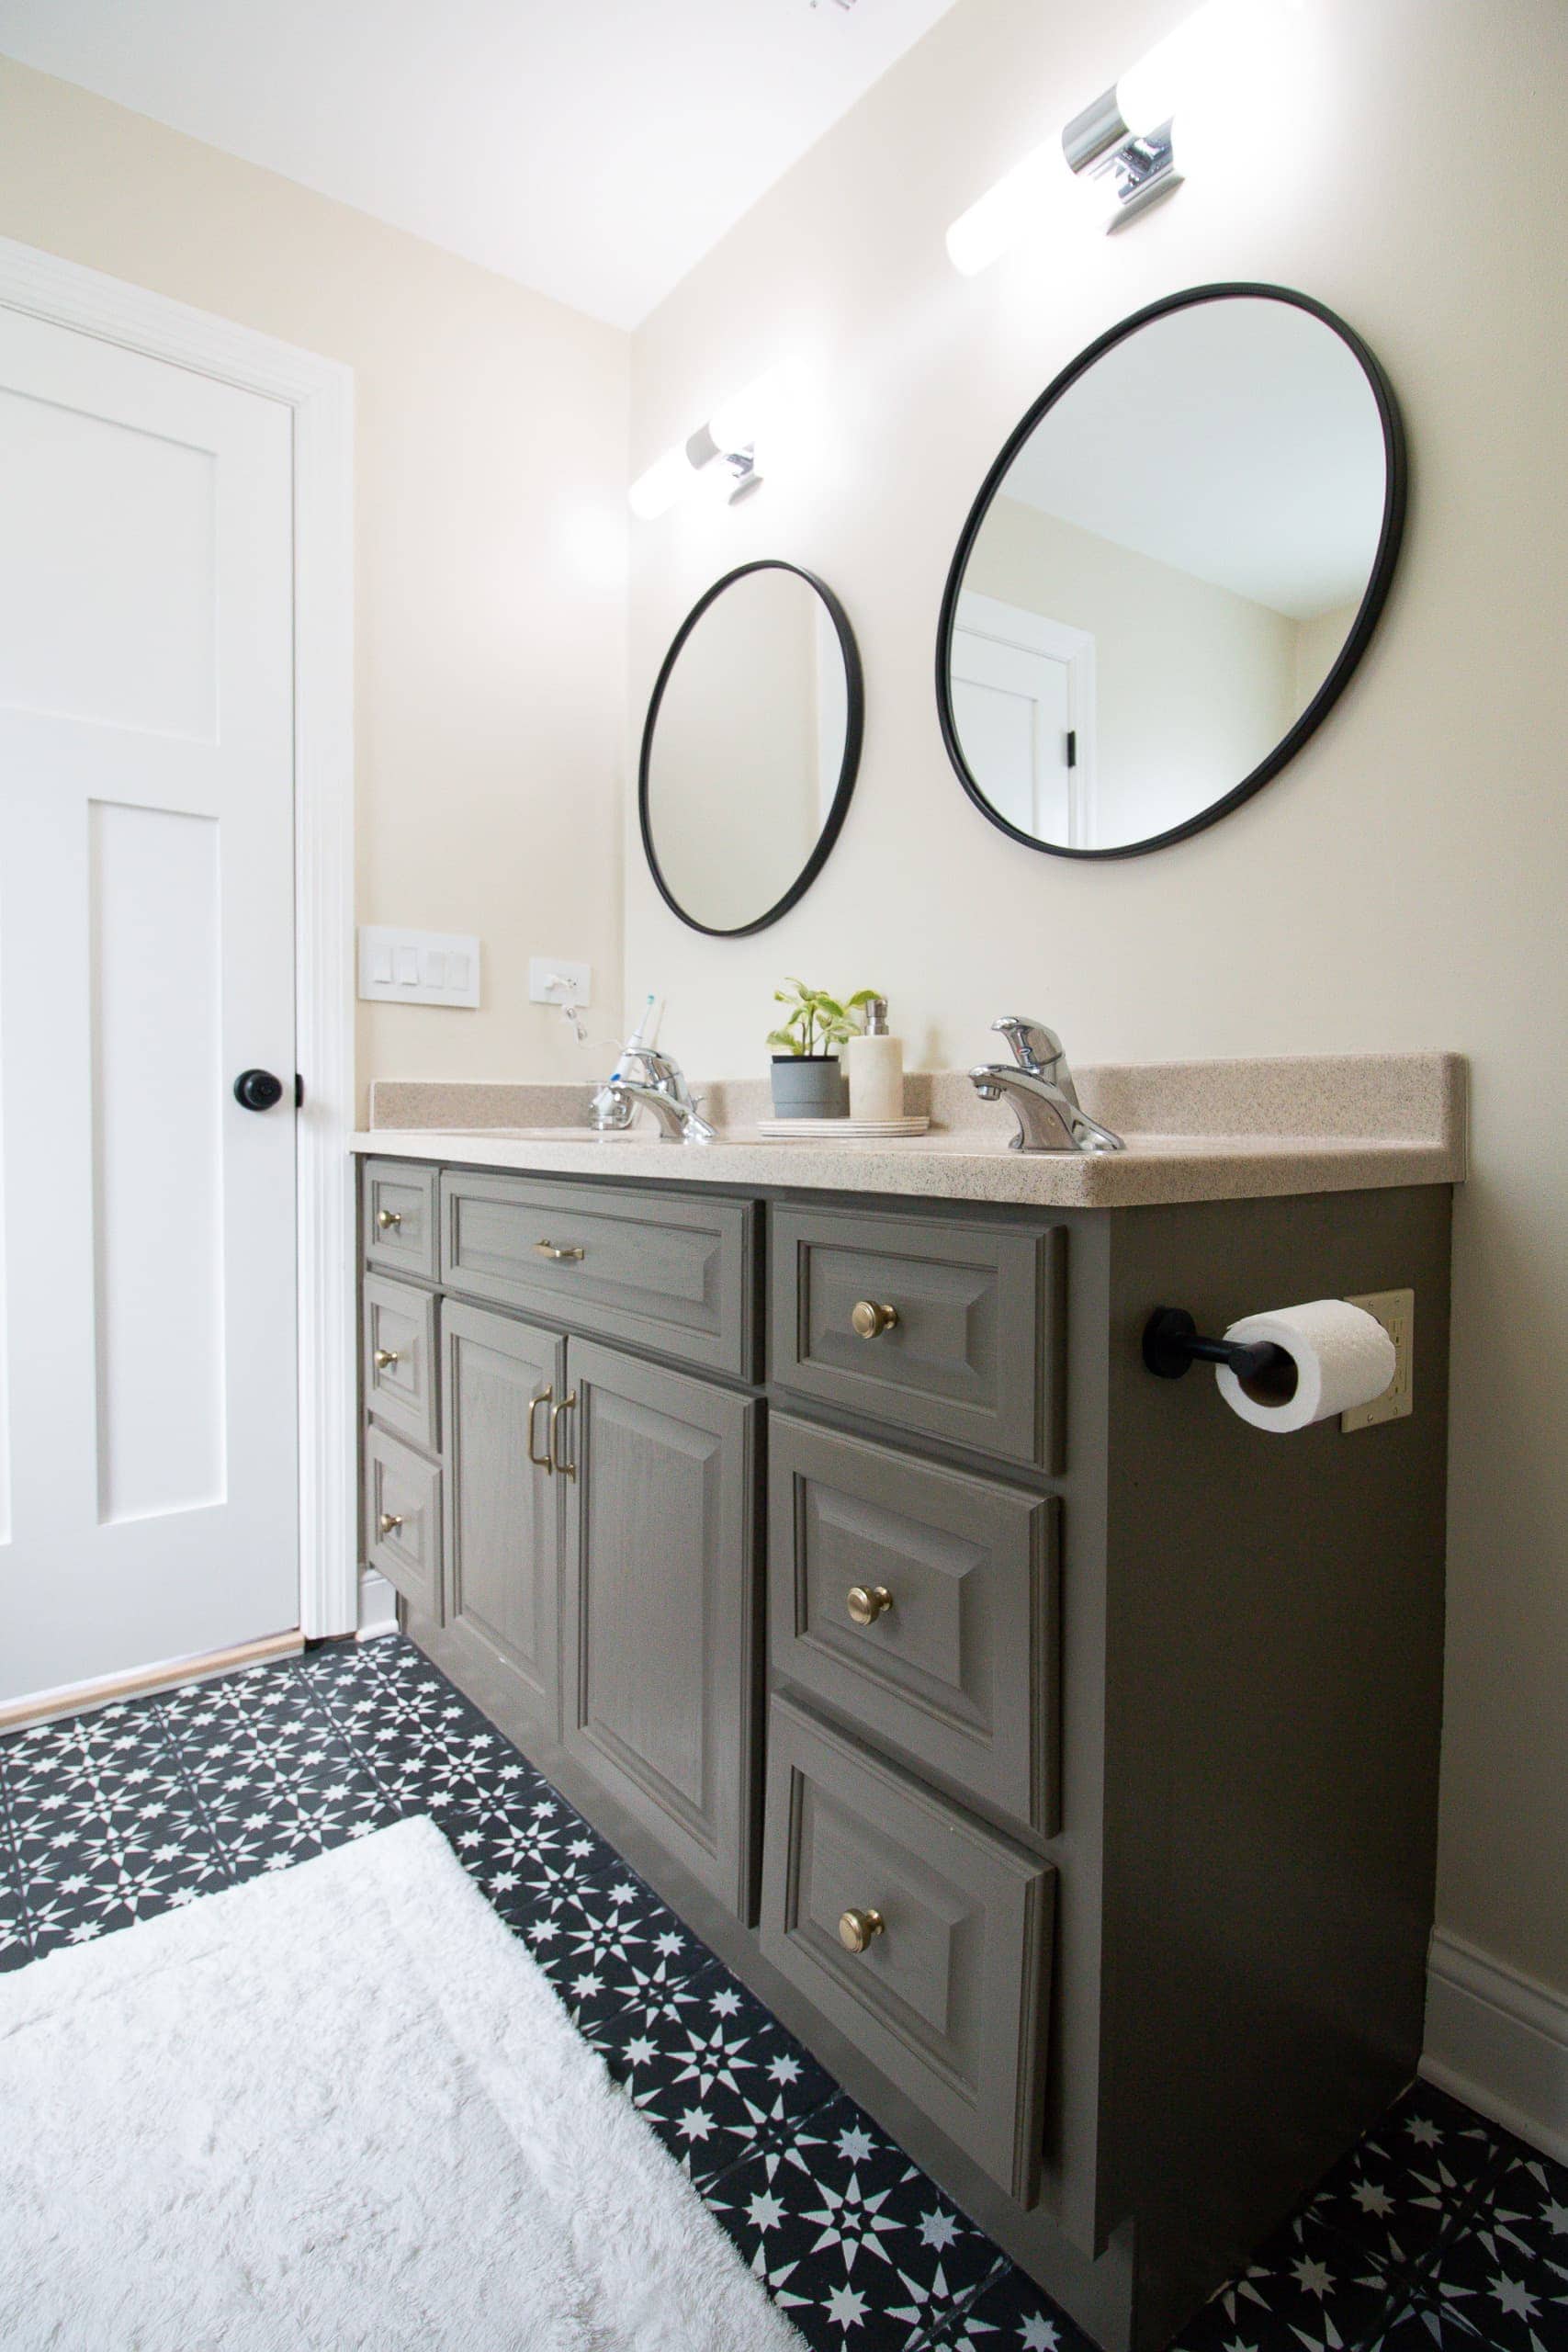
I replaced the mirrors and light fixtures, painted and stenciled the floors, painted the vanity, and added shelving. Those inexpensive touches really helped. Was it my dream bathroom? No, but it certainly looked a lot better and I could live with it for three years, while we saved up and planned our bathroom renovations.
My Pain Points
Okay, so let’s talk about the biggest pain points for me with this bathroom and the problems I’m rectifying with the remodel.
Toilet Placement
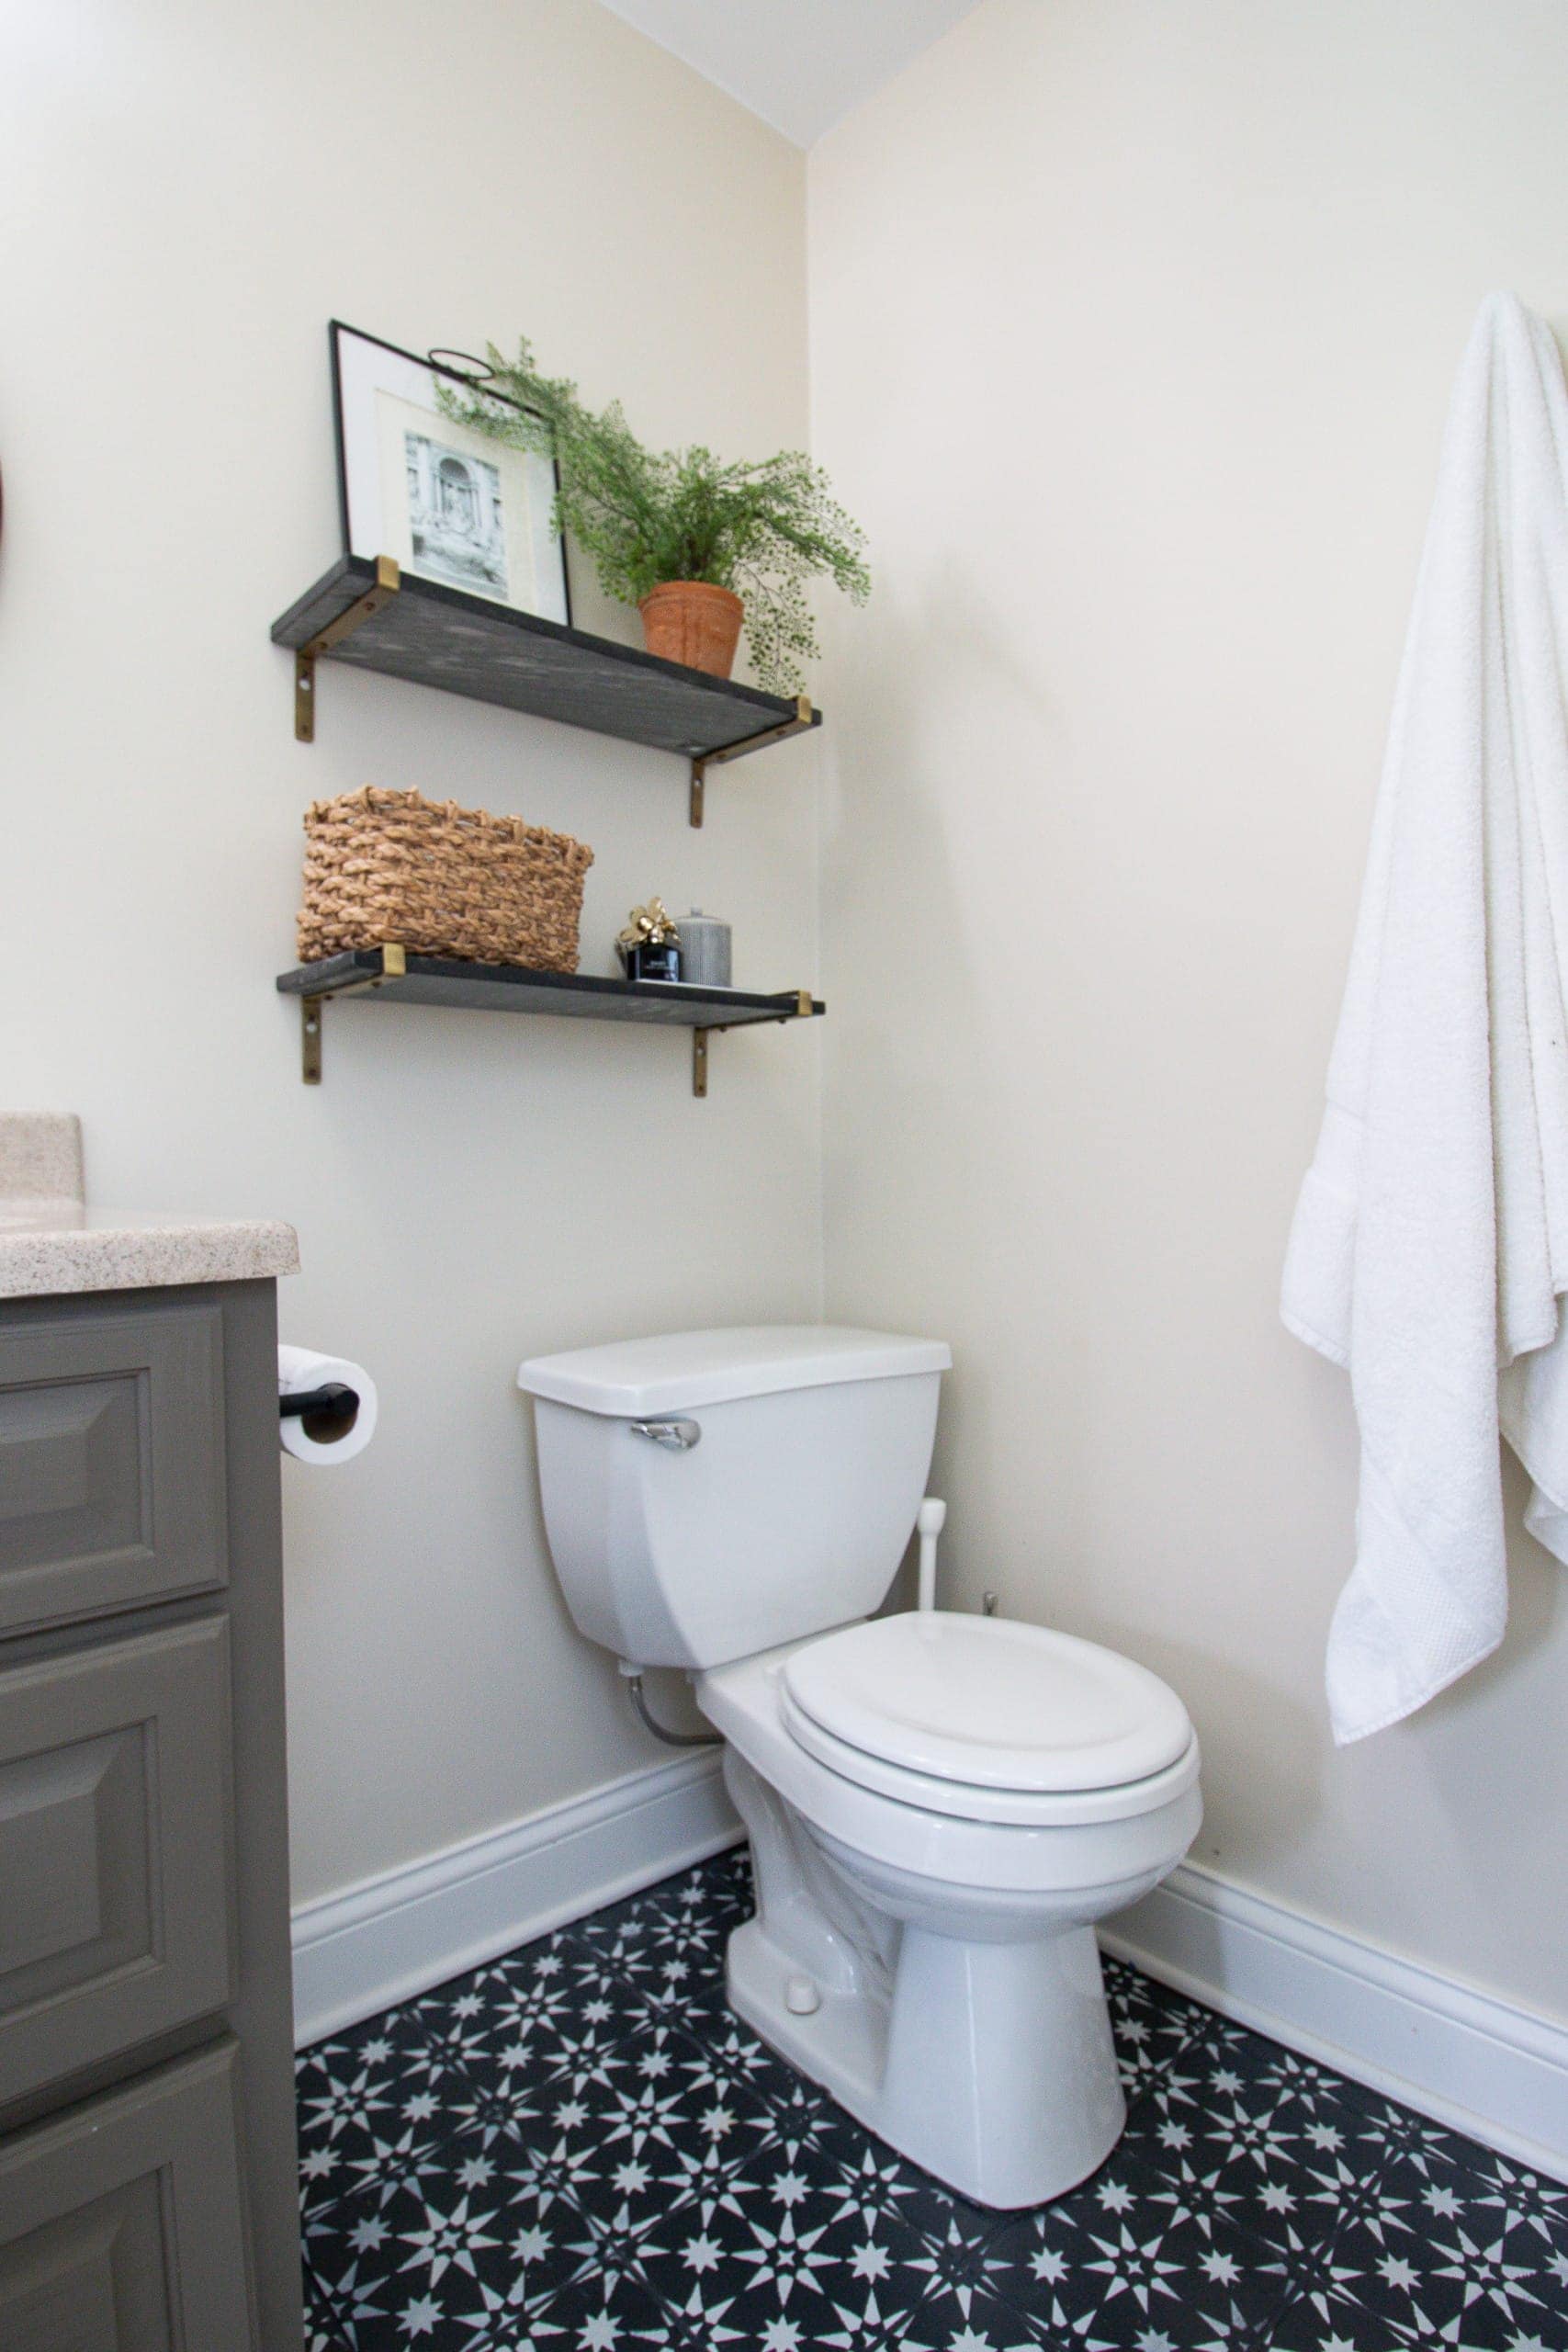
Just like the kids’ bathroom, the toilet is placed ridiculously close to the wall. If you’re sitting on the toilet, you’re basically elbowing the wall, no matter how small you are! Plus, it wasn’t even up to code. My contractor was able to move the toilet stack to nudge the toilet farther away from the wall. Heck yes!
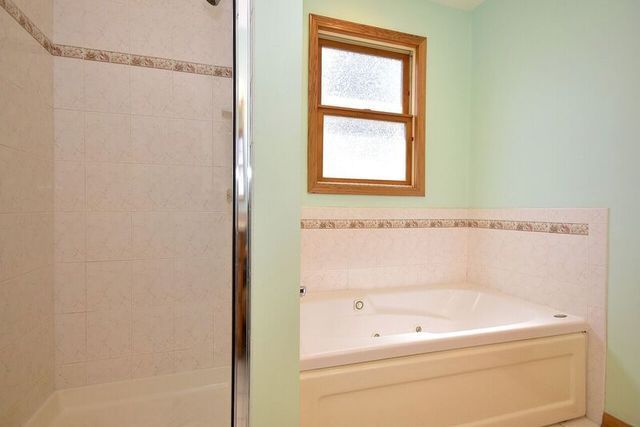
Teeny Tiny Shower
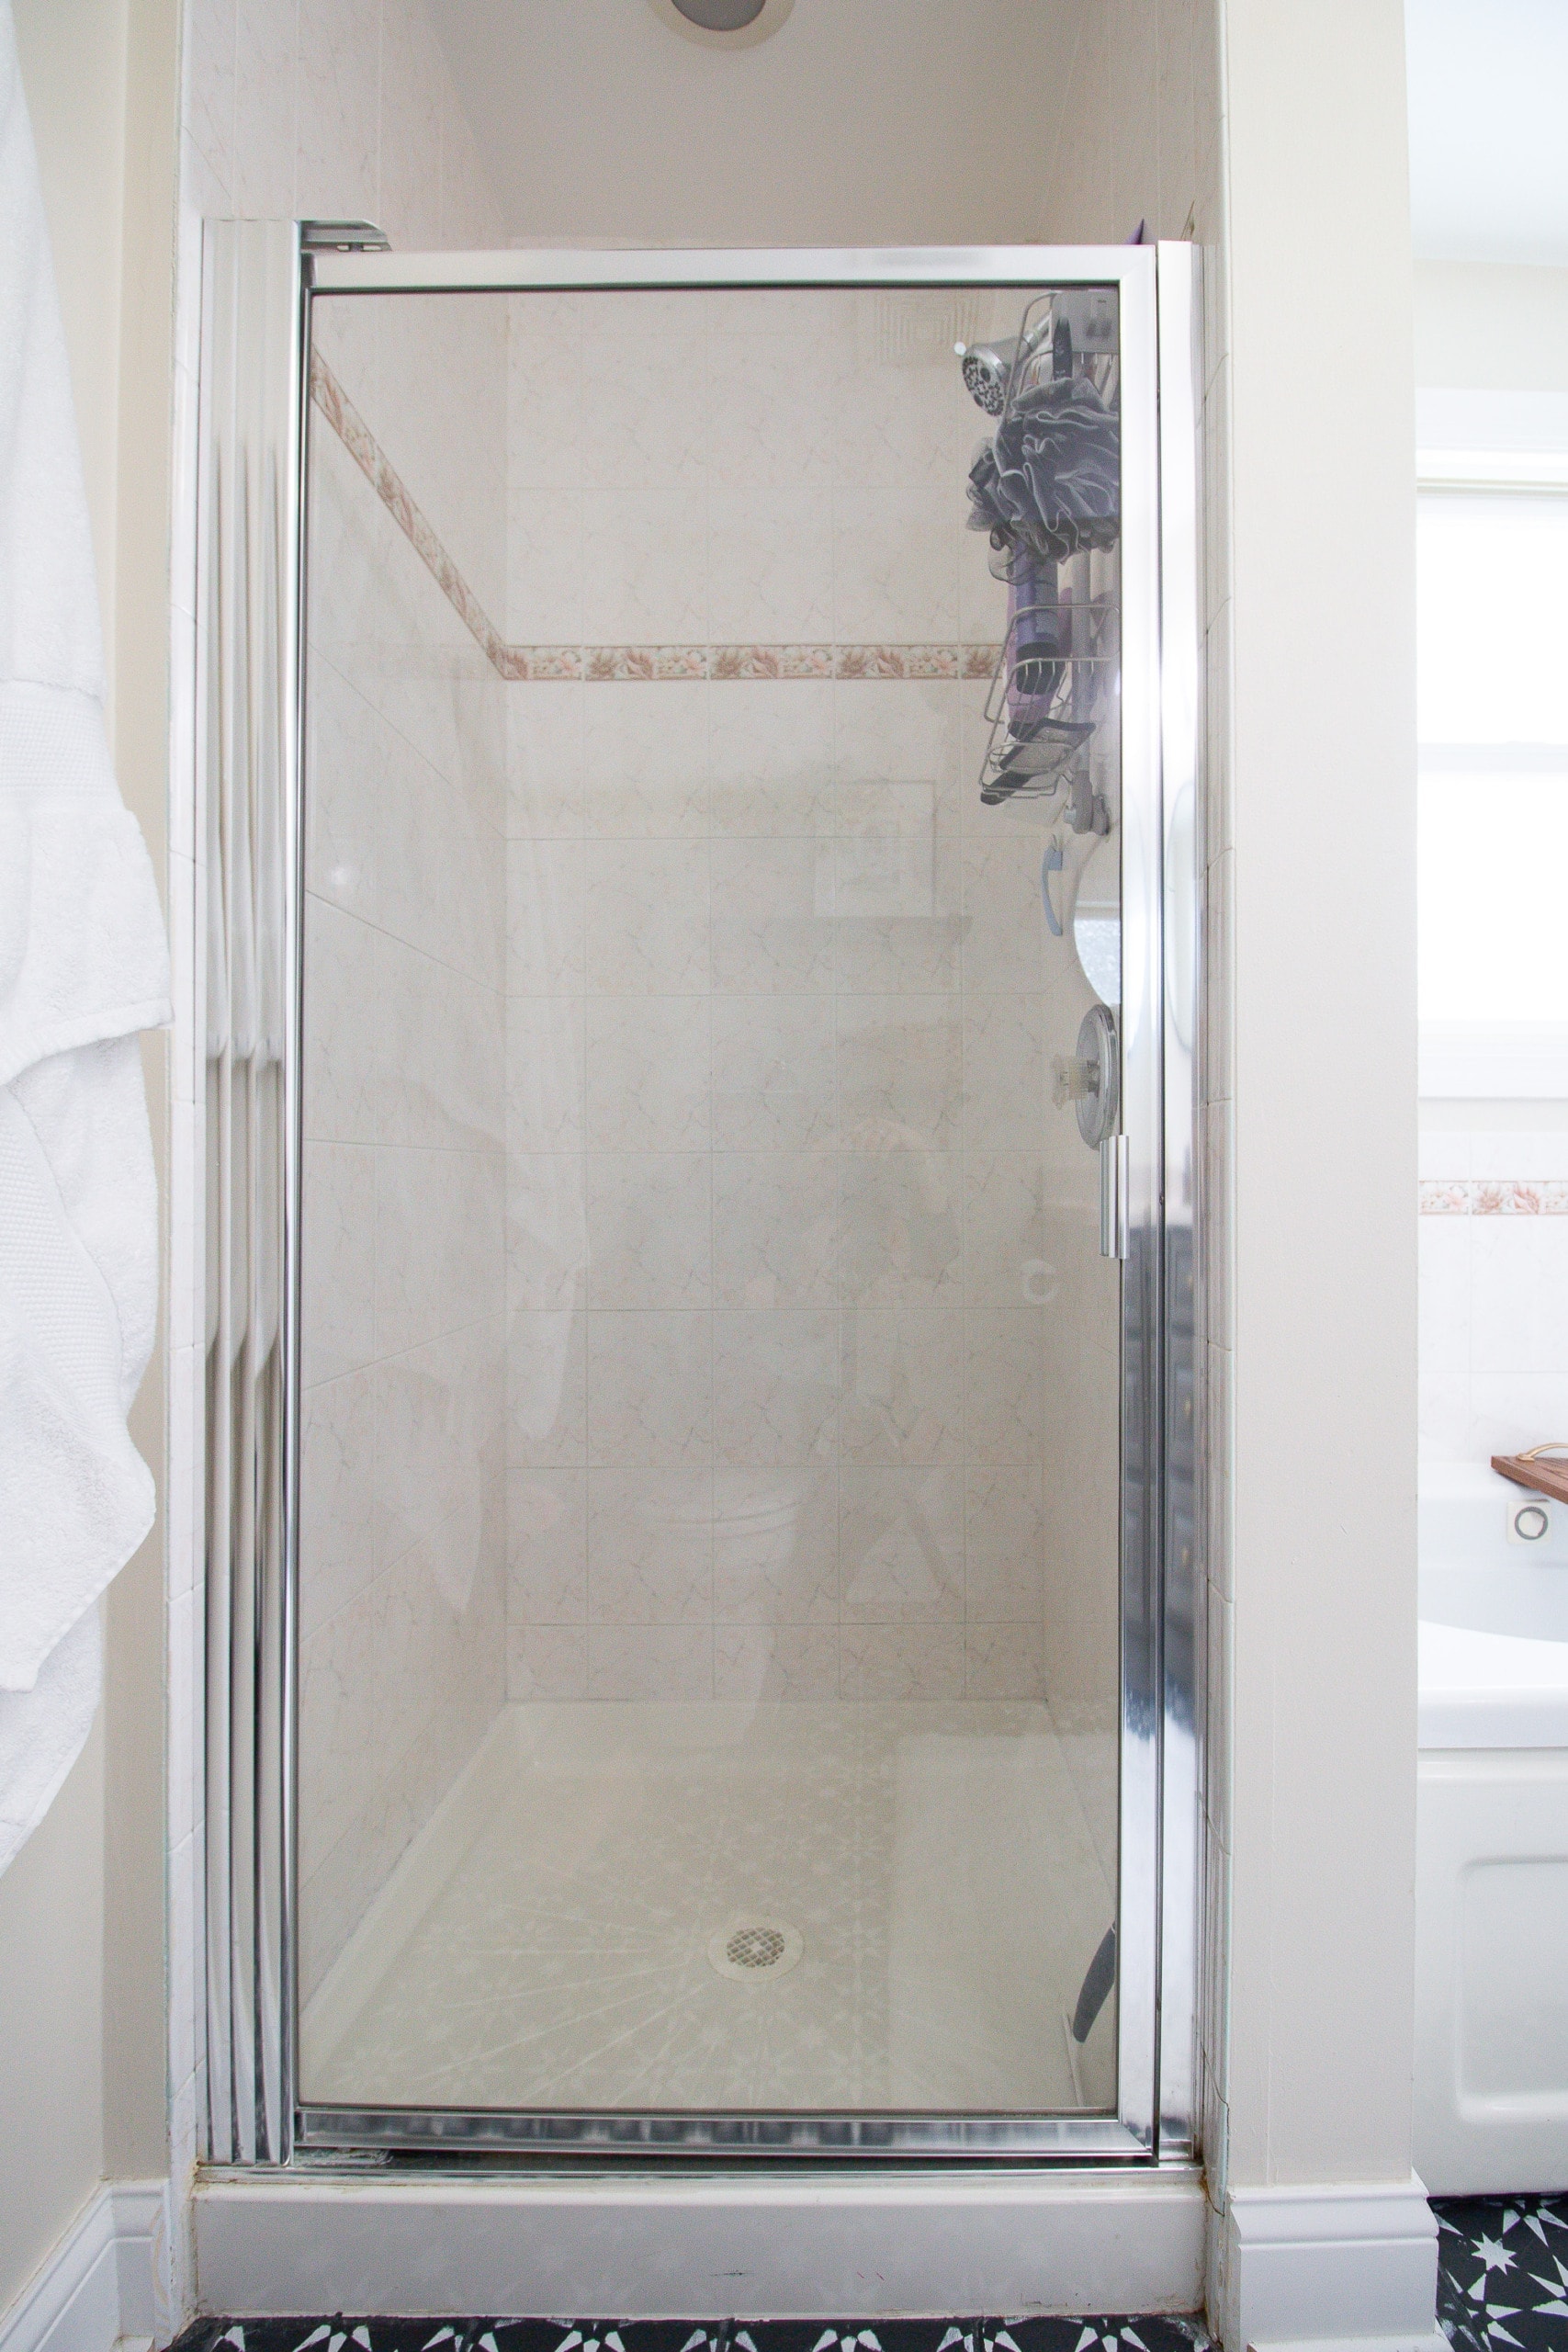
Yeesh, this shower has been the worst for the past three years. Shaving legs in this thing should be an Olympic sport. You should have seen me doing it while I was pregnant. Not a pretty sight! Finn refused to even use this shower. Instead, he has used the other bathrooms in the house during the entire time we have lived here.
Outdated Jet Tub
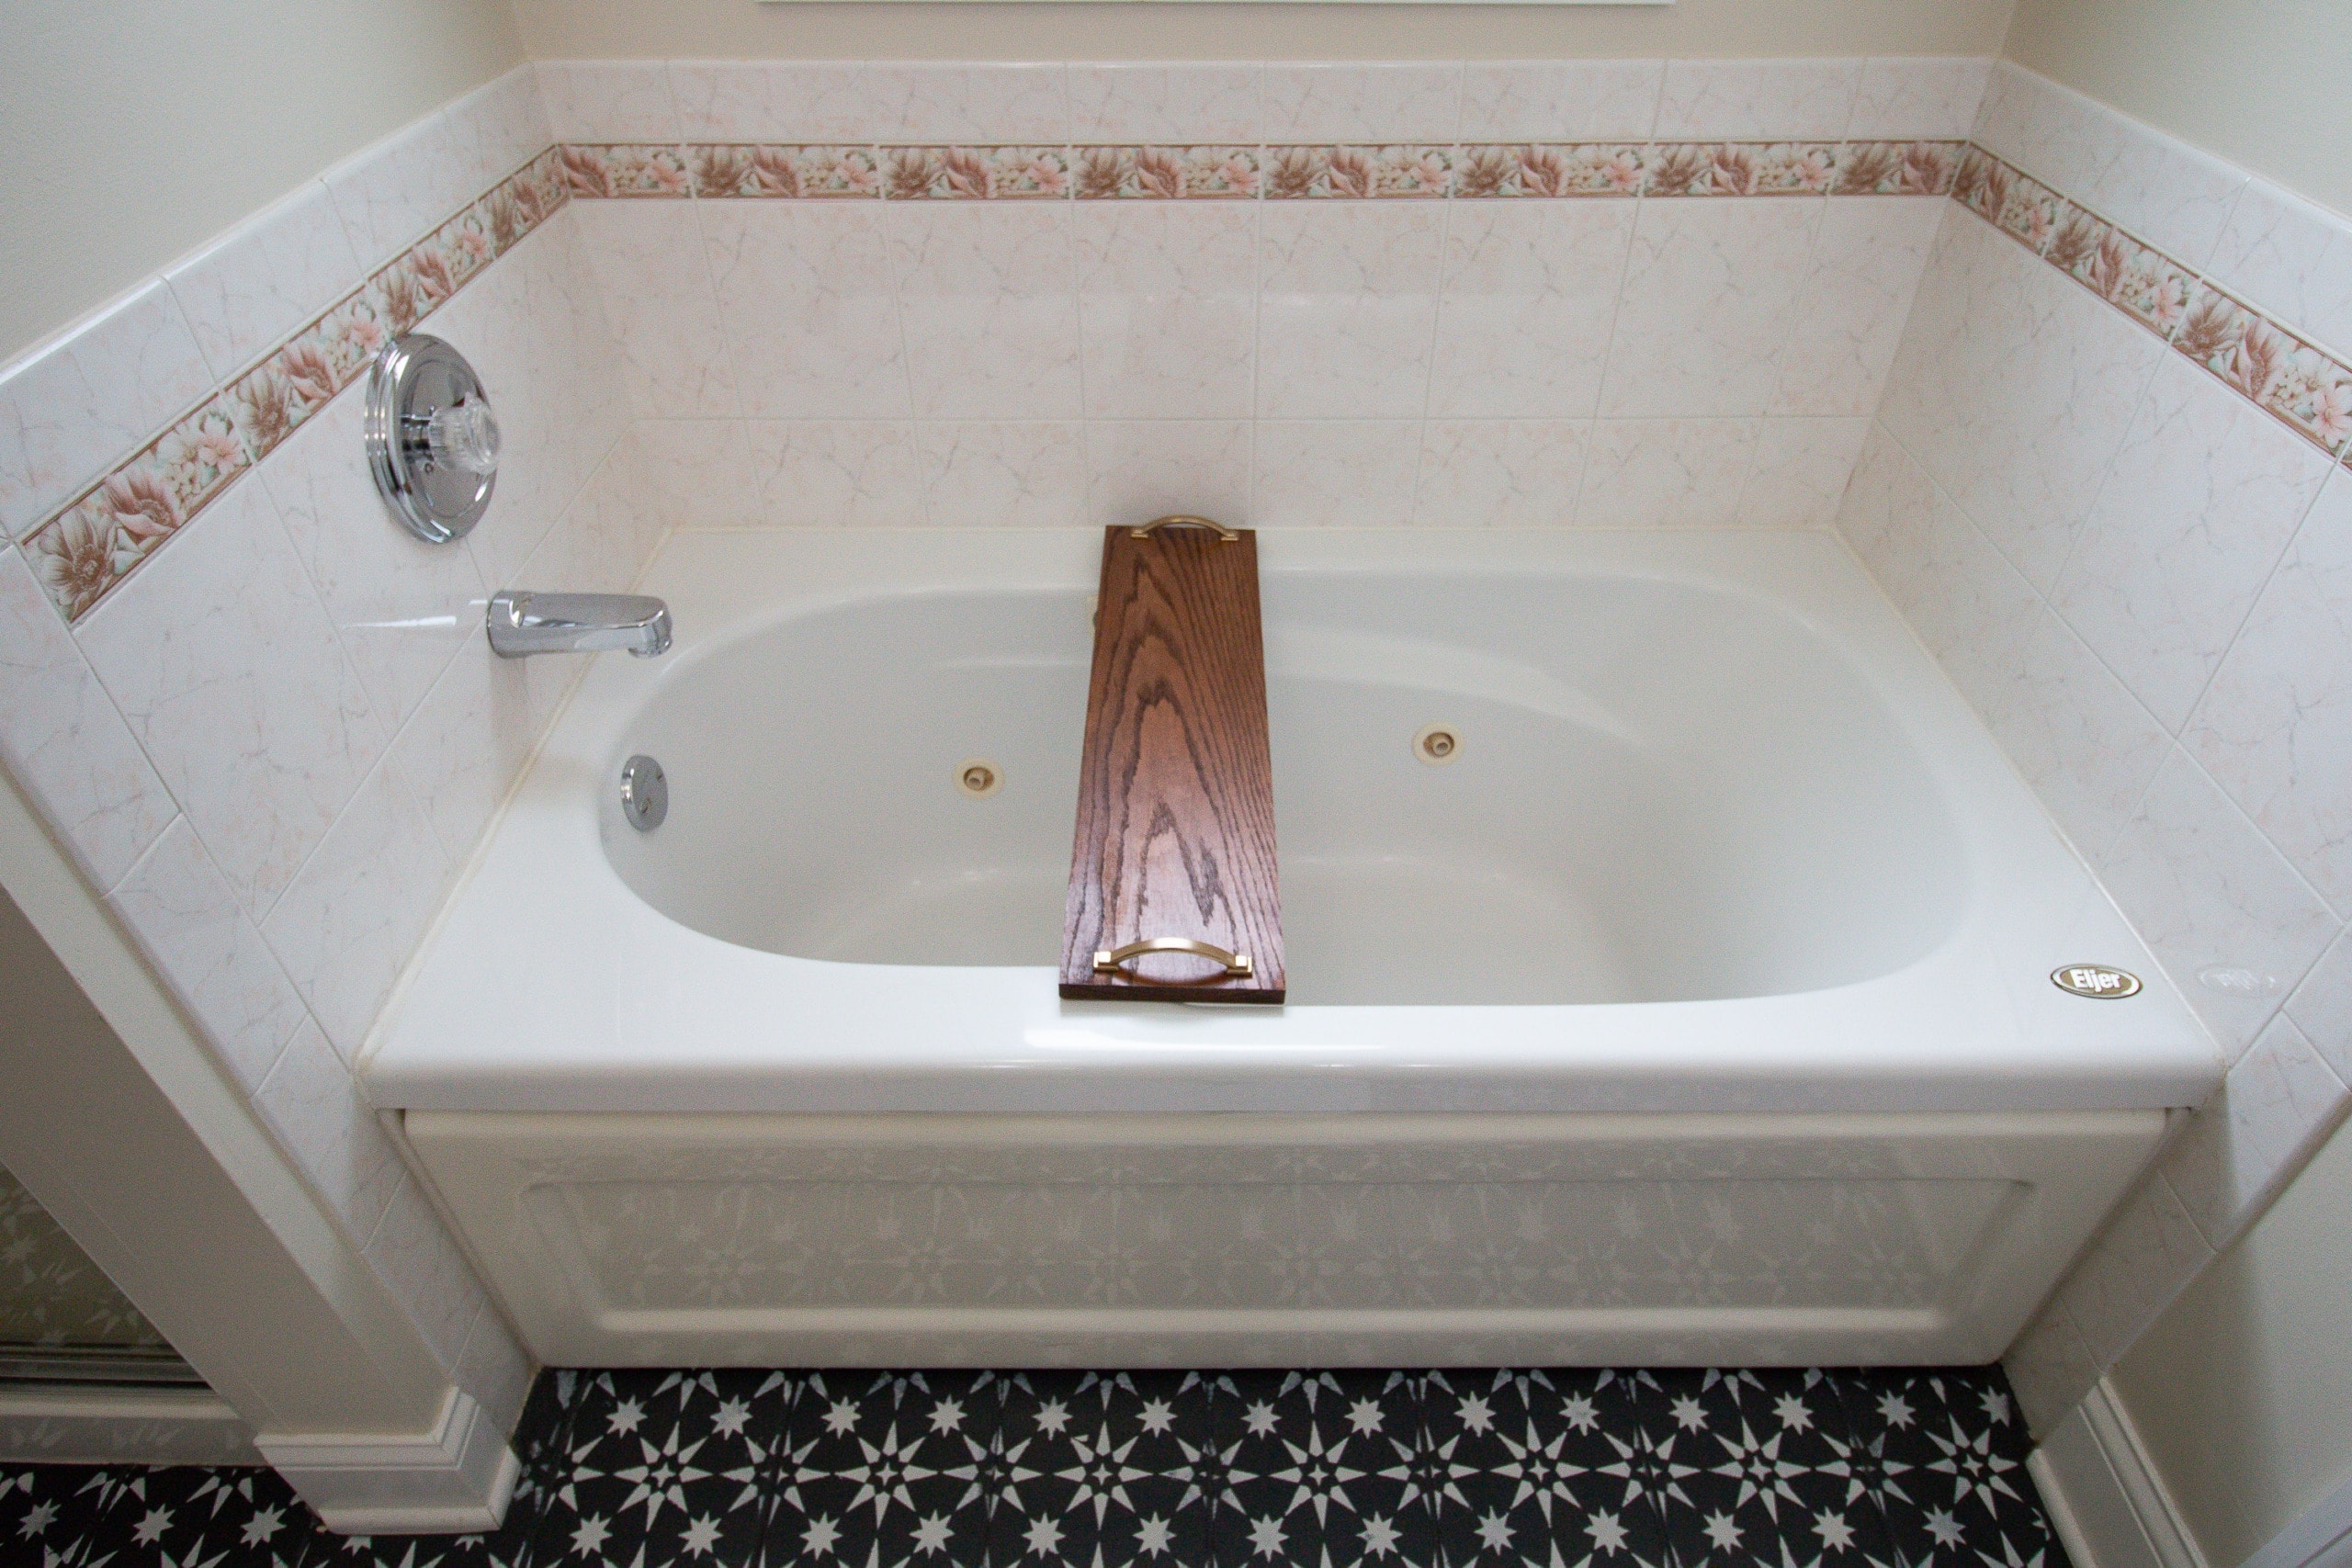
While I like a good soak in the tub, this jetted tub had seen better days. The jets were gross and I never dared to turn them on, out of fear of what might squirt out! Also, it was taking up precious real estate in this small bathroom.
Lack of Storage

Since Finn will be moving into this bathroom, I will no longer have the entire vanity to myself. Bummer. Because of that, our new layout will have lots of storage…which you’ll soon see!
The Old Layout
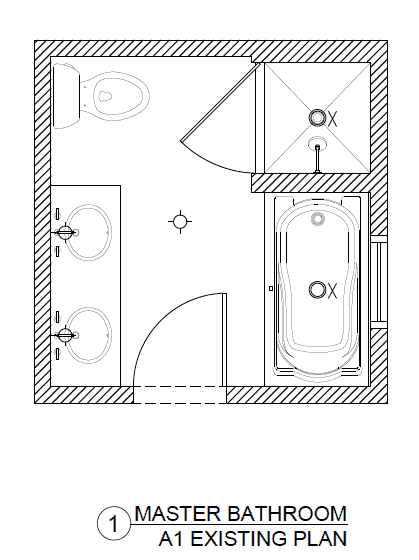
Okay, let’s take a look at the old layout of this bathroom. We have a door that swings in and lands right in front of the tub, which was not the best planning. We also have a toilet scrunched up to the wall, a large jacuzzi, and a teeny tiny shower.
The Potential Layouts
If you’re ever dramatically changing the layout of a space, and moving plumbing/electrical/walls/etc., I highly recommend hiring a professional designer to draw up blueprints. (More on that process here.) I wasn’t 100% sure what I wanted to do, so I ended up hiring a designer to help me figure out the possibilities for this bathroom layout. She measured everything and came back to me with a few potential new layouts. I’ll share them here and then reveal the “winning” layout.
Option 1 – Makeup Vanity Area

This option included adding a dedicated spot for a chair and mirror to apply makeup. While I like the idea of sitting to get ready in the morning, I didn’t love the idea of being tucked away without natural light. So she also proposed this…

Option 2 – Barn Door & Freestanding Cabinet
It’s important to note, that with any new layout, the current swing-in door was not going to work. So, I had to choose from either a pocket door or a barn door to fix this issue. In this option, she presented a barn door, so the plumbing could be installed on the wall for the shower head. This would then make the encasement all glass, with no wall in the middle, and would add a freestanding furniture piece for storage. While I liked the shower, I didn’t love the idea of a barn door, because it doesn’t really work with the style of the rest of my home.
Option 3 – Large Shower & Built-In Linen Cabinet

With this layout, we would install a built-in linen cabinet on the wall, closest to the new pocket door. Then, the large shower would be on the far wall. This was our plan until I got my contractor and the window subcontractor in.
This plan involved moving the window, which wouldn’t be a problem but would cost an additional $2-3k. Eek. My contractor also said the labor would be quite a bit to move the plumbing stack a few feet.
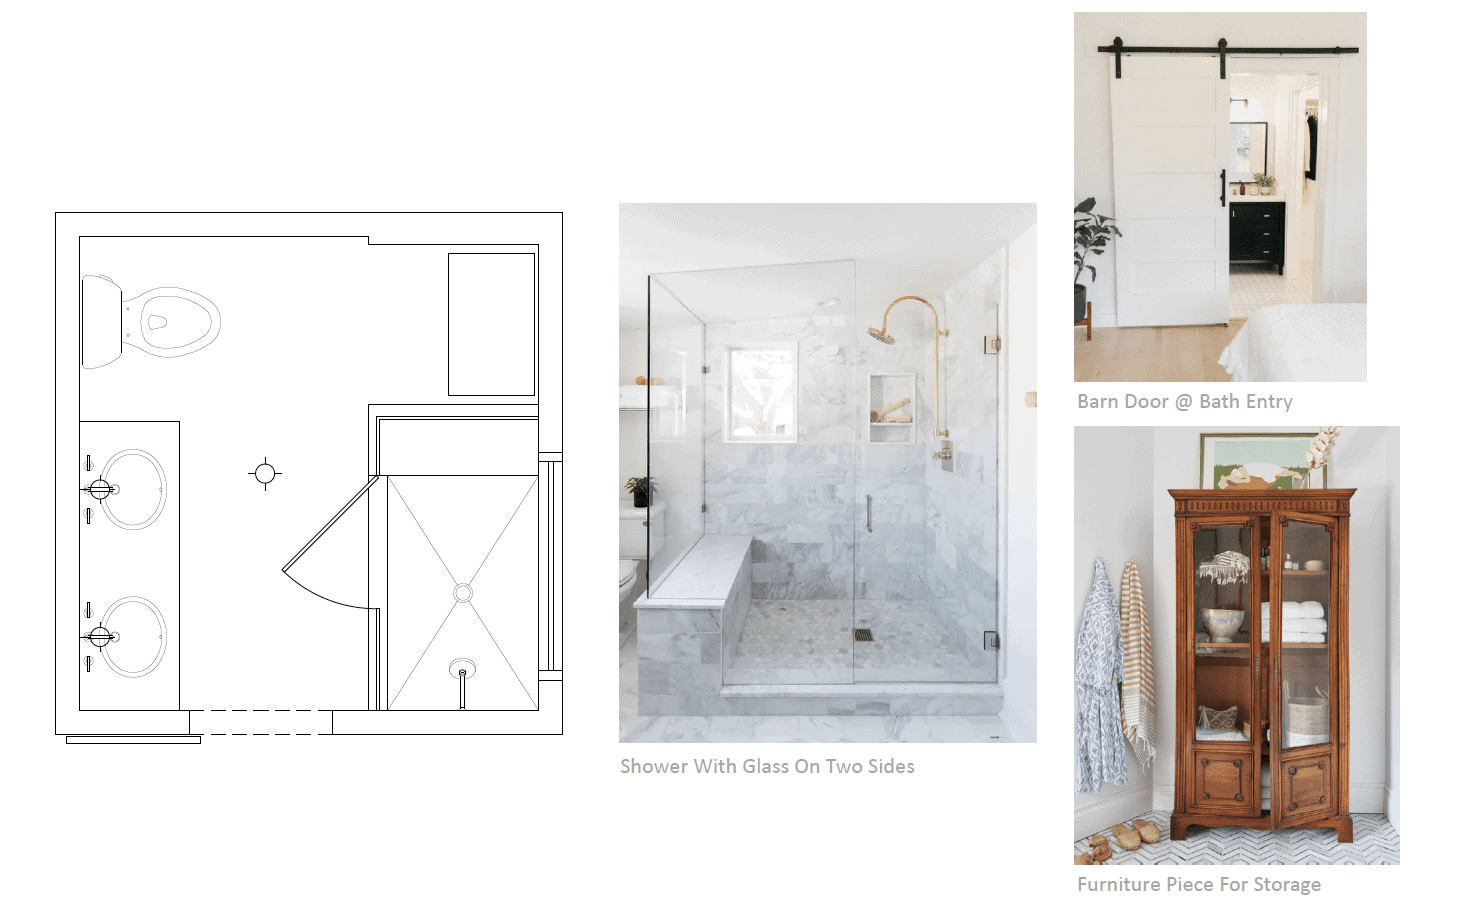
The Winning Layout – Pocket Door, Built-In Linen Cabinet, & Shower in Former Tub Area

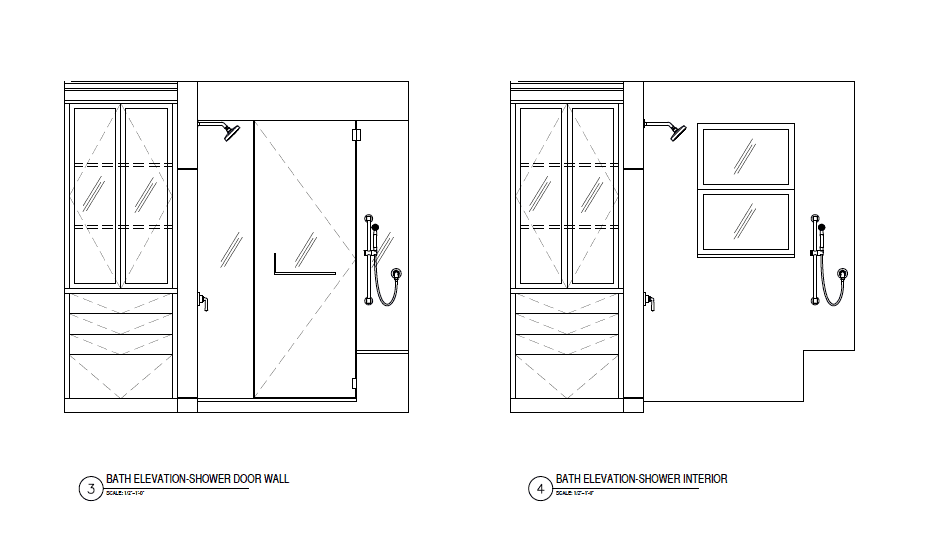
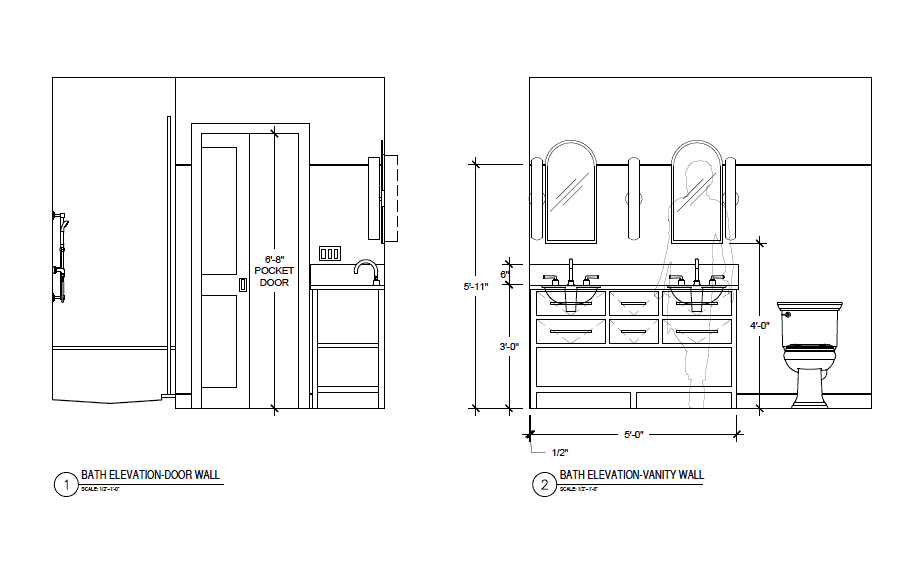
In the end, this is what we went with – a pocket door at the entrance, a shower where the bathtub was, and a built-in linen cabinet where the former shower was. This will give us lots of storage, save money by keeping the window placement (but replacing it with a water-safe window), and save time/labor by keeping the plumbing in the same wall.
With the layout finally settled, I got busy figuring out what the heck I wanted it all to look like!
The Main Bathroom Design Plan
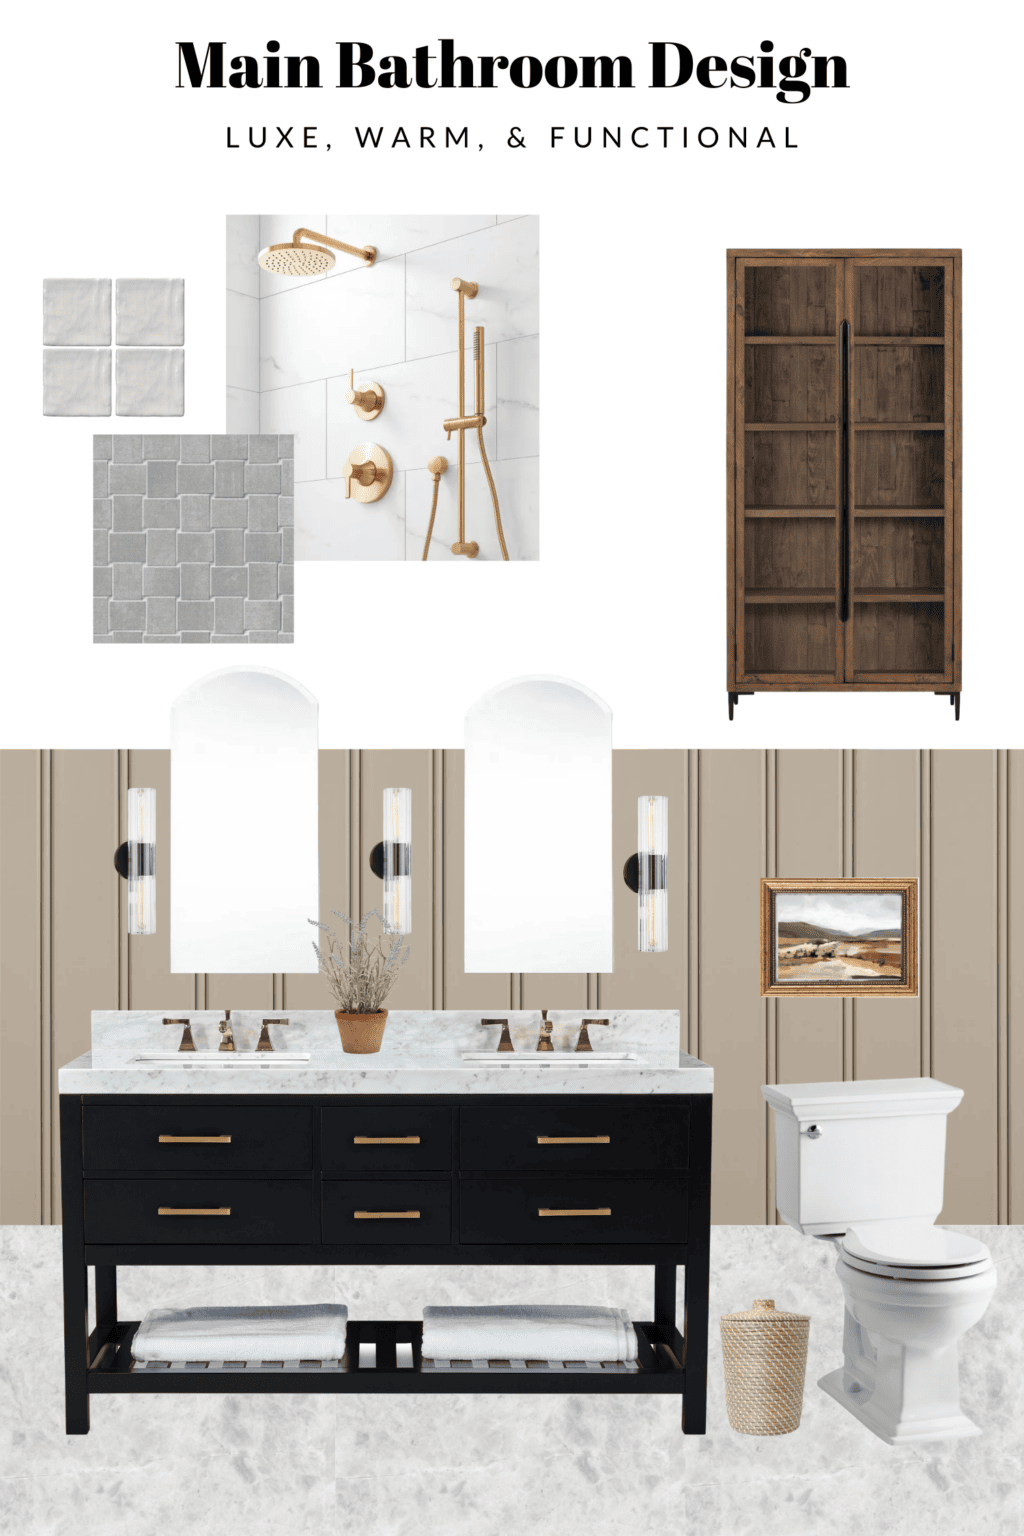
Shower Wall Tile // Shower Floor Tile // Shower Hardware // Medicine Cabinet Mirrors // Sconces // Black Vanity // Marble Floor Tile // Gold Faucets // Toilet // Trash Can
Okay, so here’s a look at my design plan for this room. I think it looks high-end and sophisticated, but still warm and cozy, just like the rest of our home. We’ll have beadboard on the walls, painted a taupey color, a gorgeous black vanity, and recessed medicine cabinet mirrors. Plus, there will be warm tiles in the shower, with gold shower hardware and a warm gray mosaic floor. Oh, and the linen cabinet in that above photo is just a placeholder to showcase the vibes we’ll use for the custom built-in we’re going to DIY. I like the idea of using stained wood for that, but we’ll see what happens!
What’s Next?
Well, as you already know, the renovation work is done, but the bathroom isn’t quite finished yet. Finn and I will be adding the built-in linen closet ourselves and I’ll be sharing those plans next!
Casey
If you need to catch up on all of our bathroom renovations, here are all of the blog posts I’ve published so far…


