How To Wallpaper Inside Picture Frame Molding
If you’ve ever wanted that custom, high-end accent wall look, this is it. I’m breaking down exactly how I added wallpaper inside picture frame molding in my office, plus all the layout and design tips to help it turn out just right.
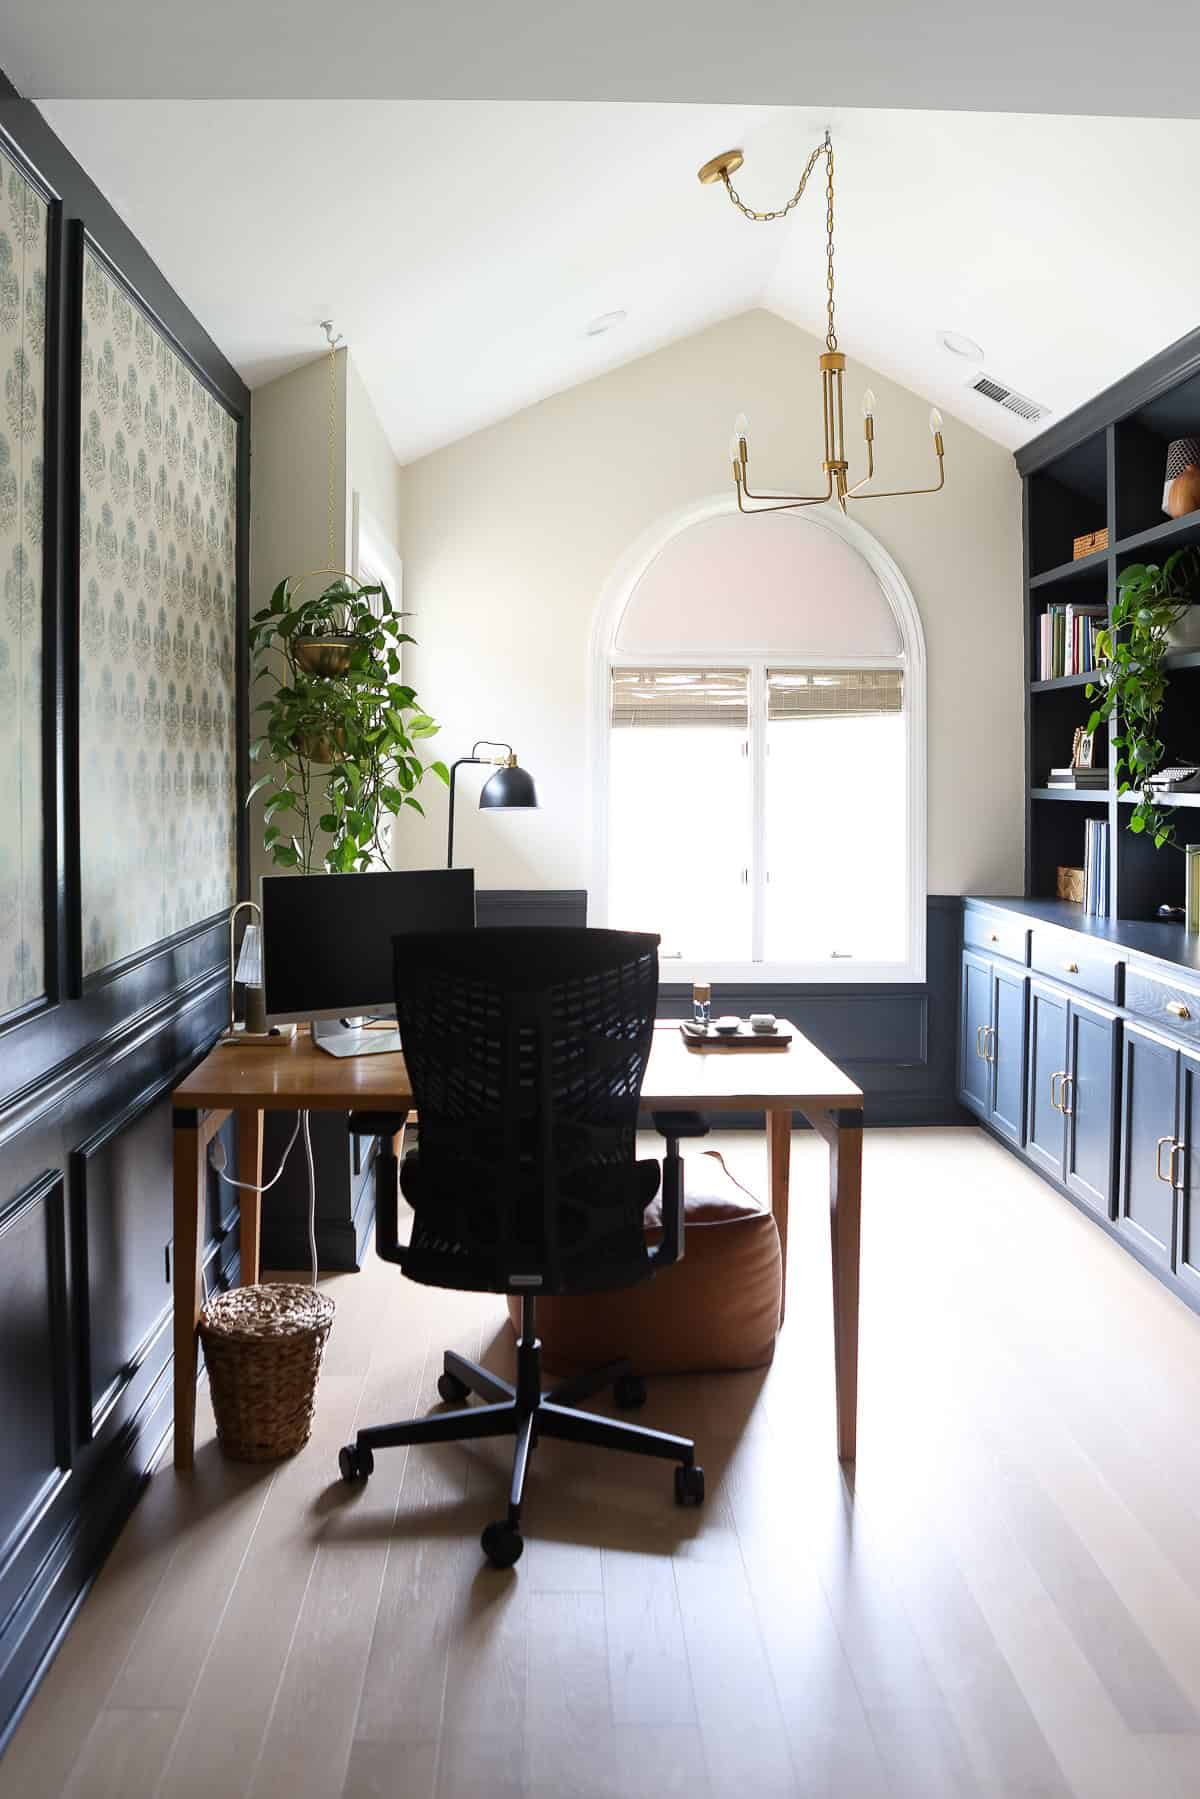
I recently added chair rail and picture frame molding to this wall in my office, and while I loved how it turned out, I knew it still needed something.
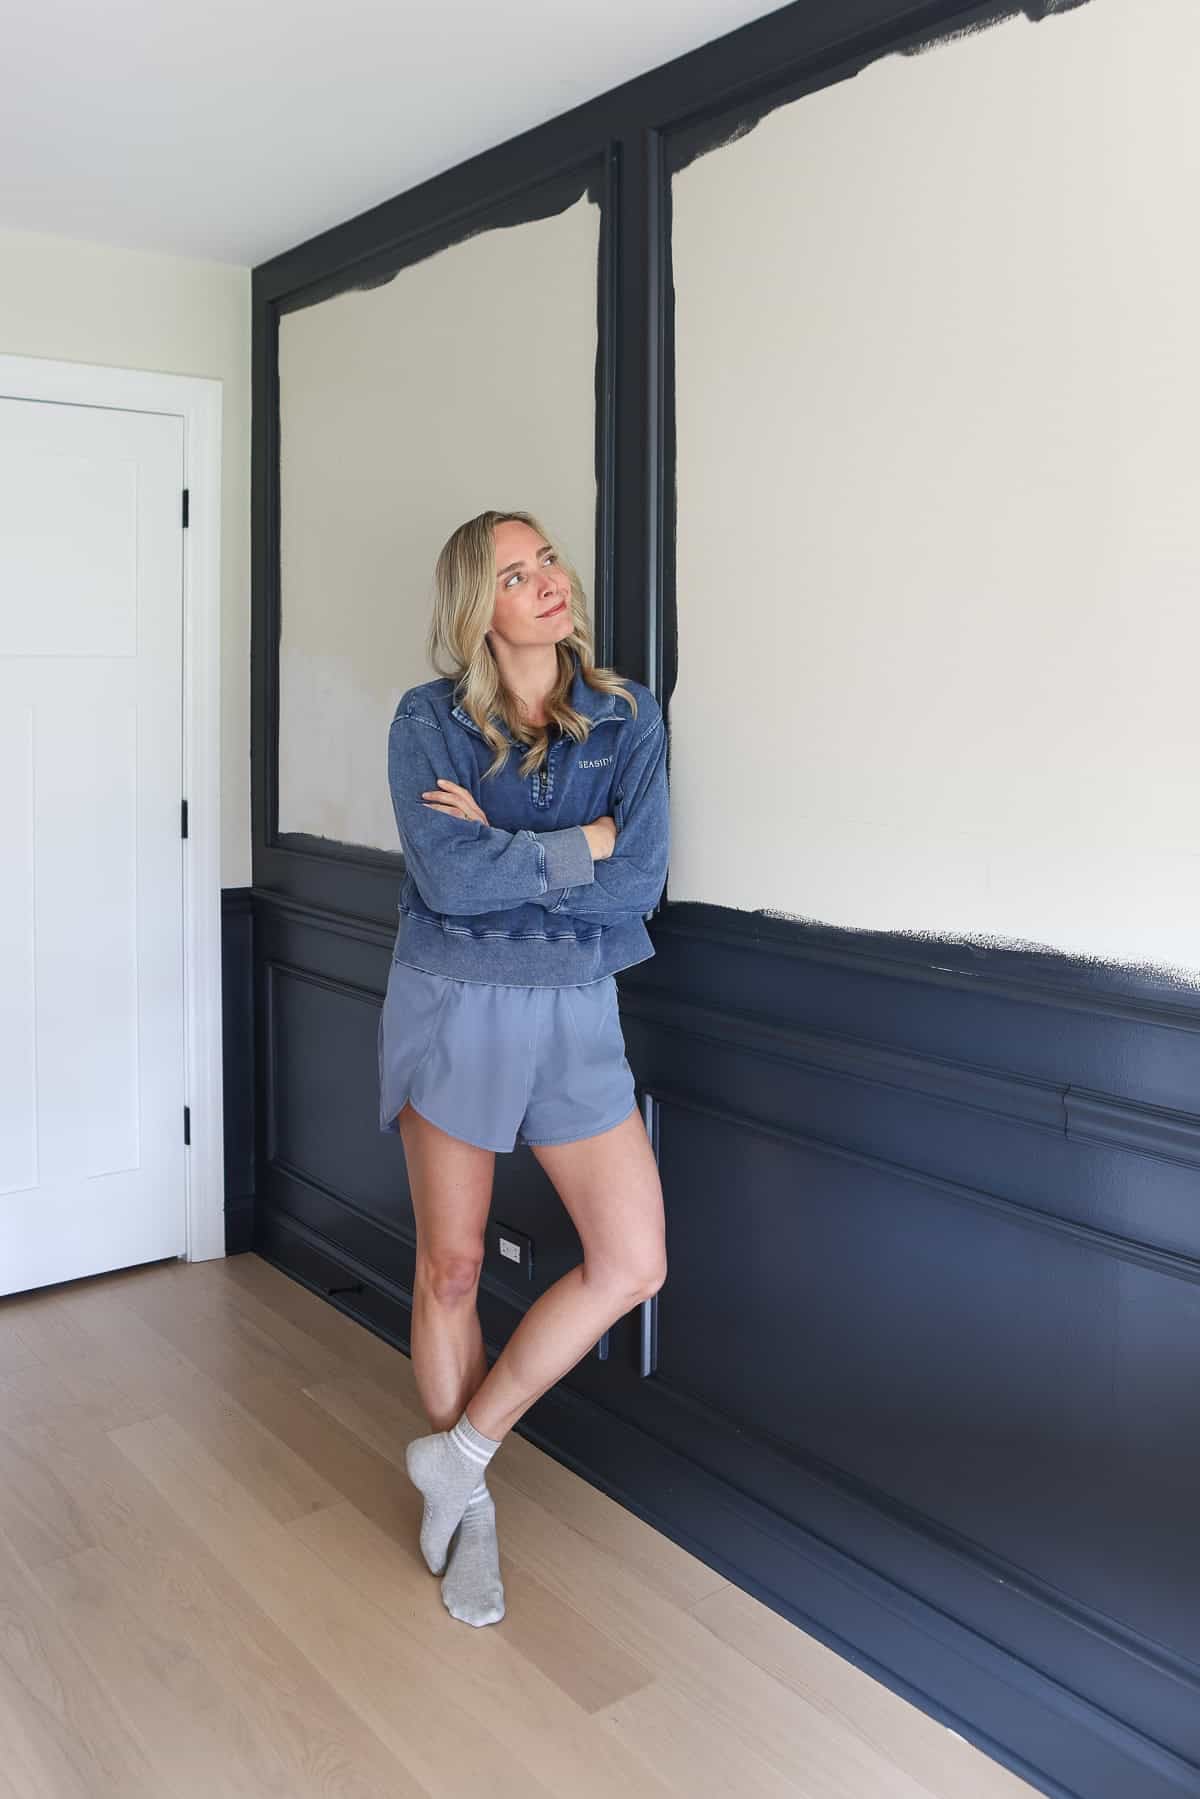
I’ve used molding in a few rooms throughout our house, and typically I keep things pretty classic and simple. But this wall is big, and I wanted it to feel a little more special – like a true focal point in the room.
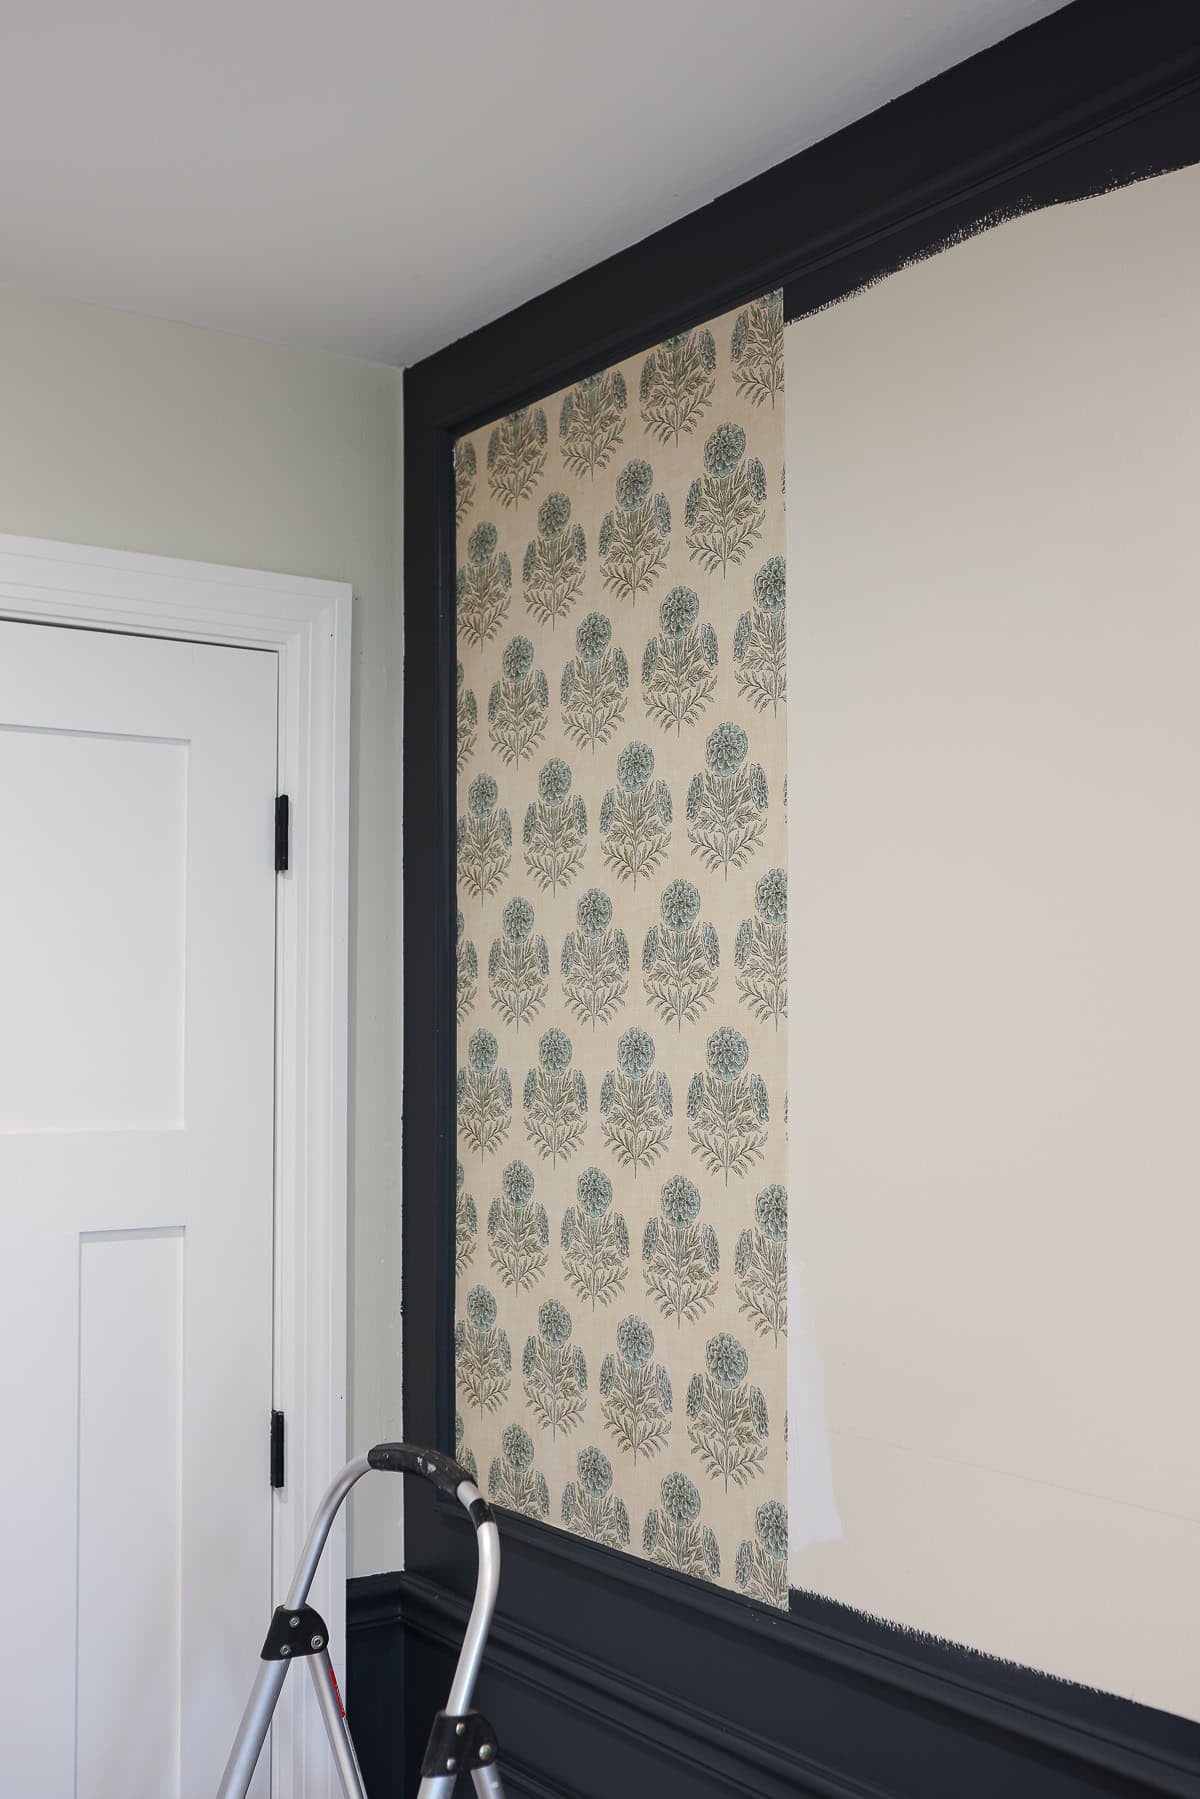
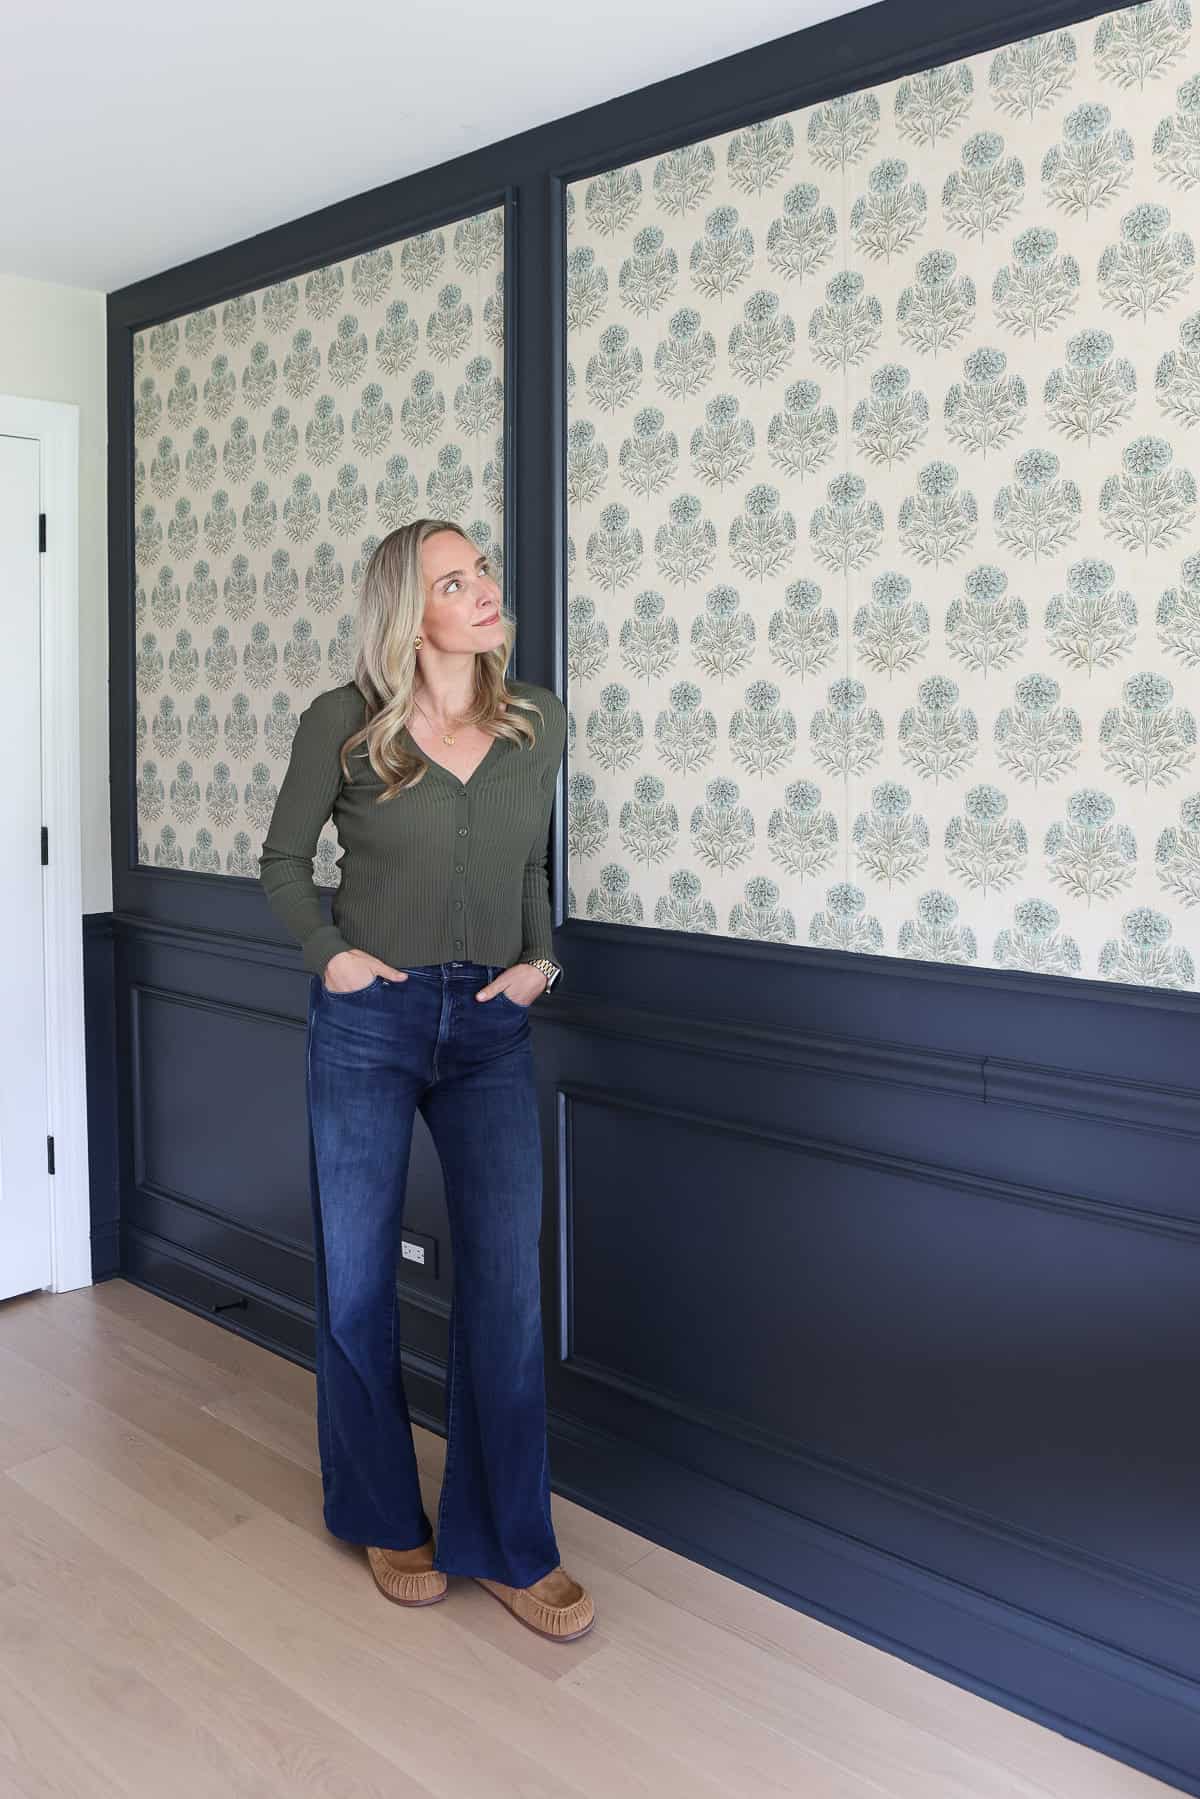
So instead of leaving all of the boxes painted, I decided to do something different and add wallpaper inside the top frames only. It felt like the perfect balance. I get the pattern and visual interest I was craving, but it still feels clean and not too busy.

I’ve wallpapered quite a few spaces in our home over the years, so I’ll link some of those tutorials below if you want a full step-by-step on the basics.
- How to Wallpaper (Simple Beginner’s Guide)
- Why I Always Choose Paste the Wall Wallpaper
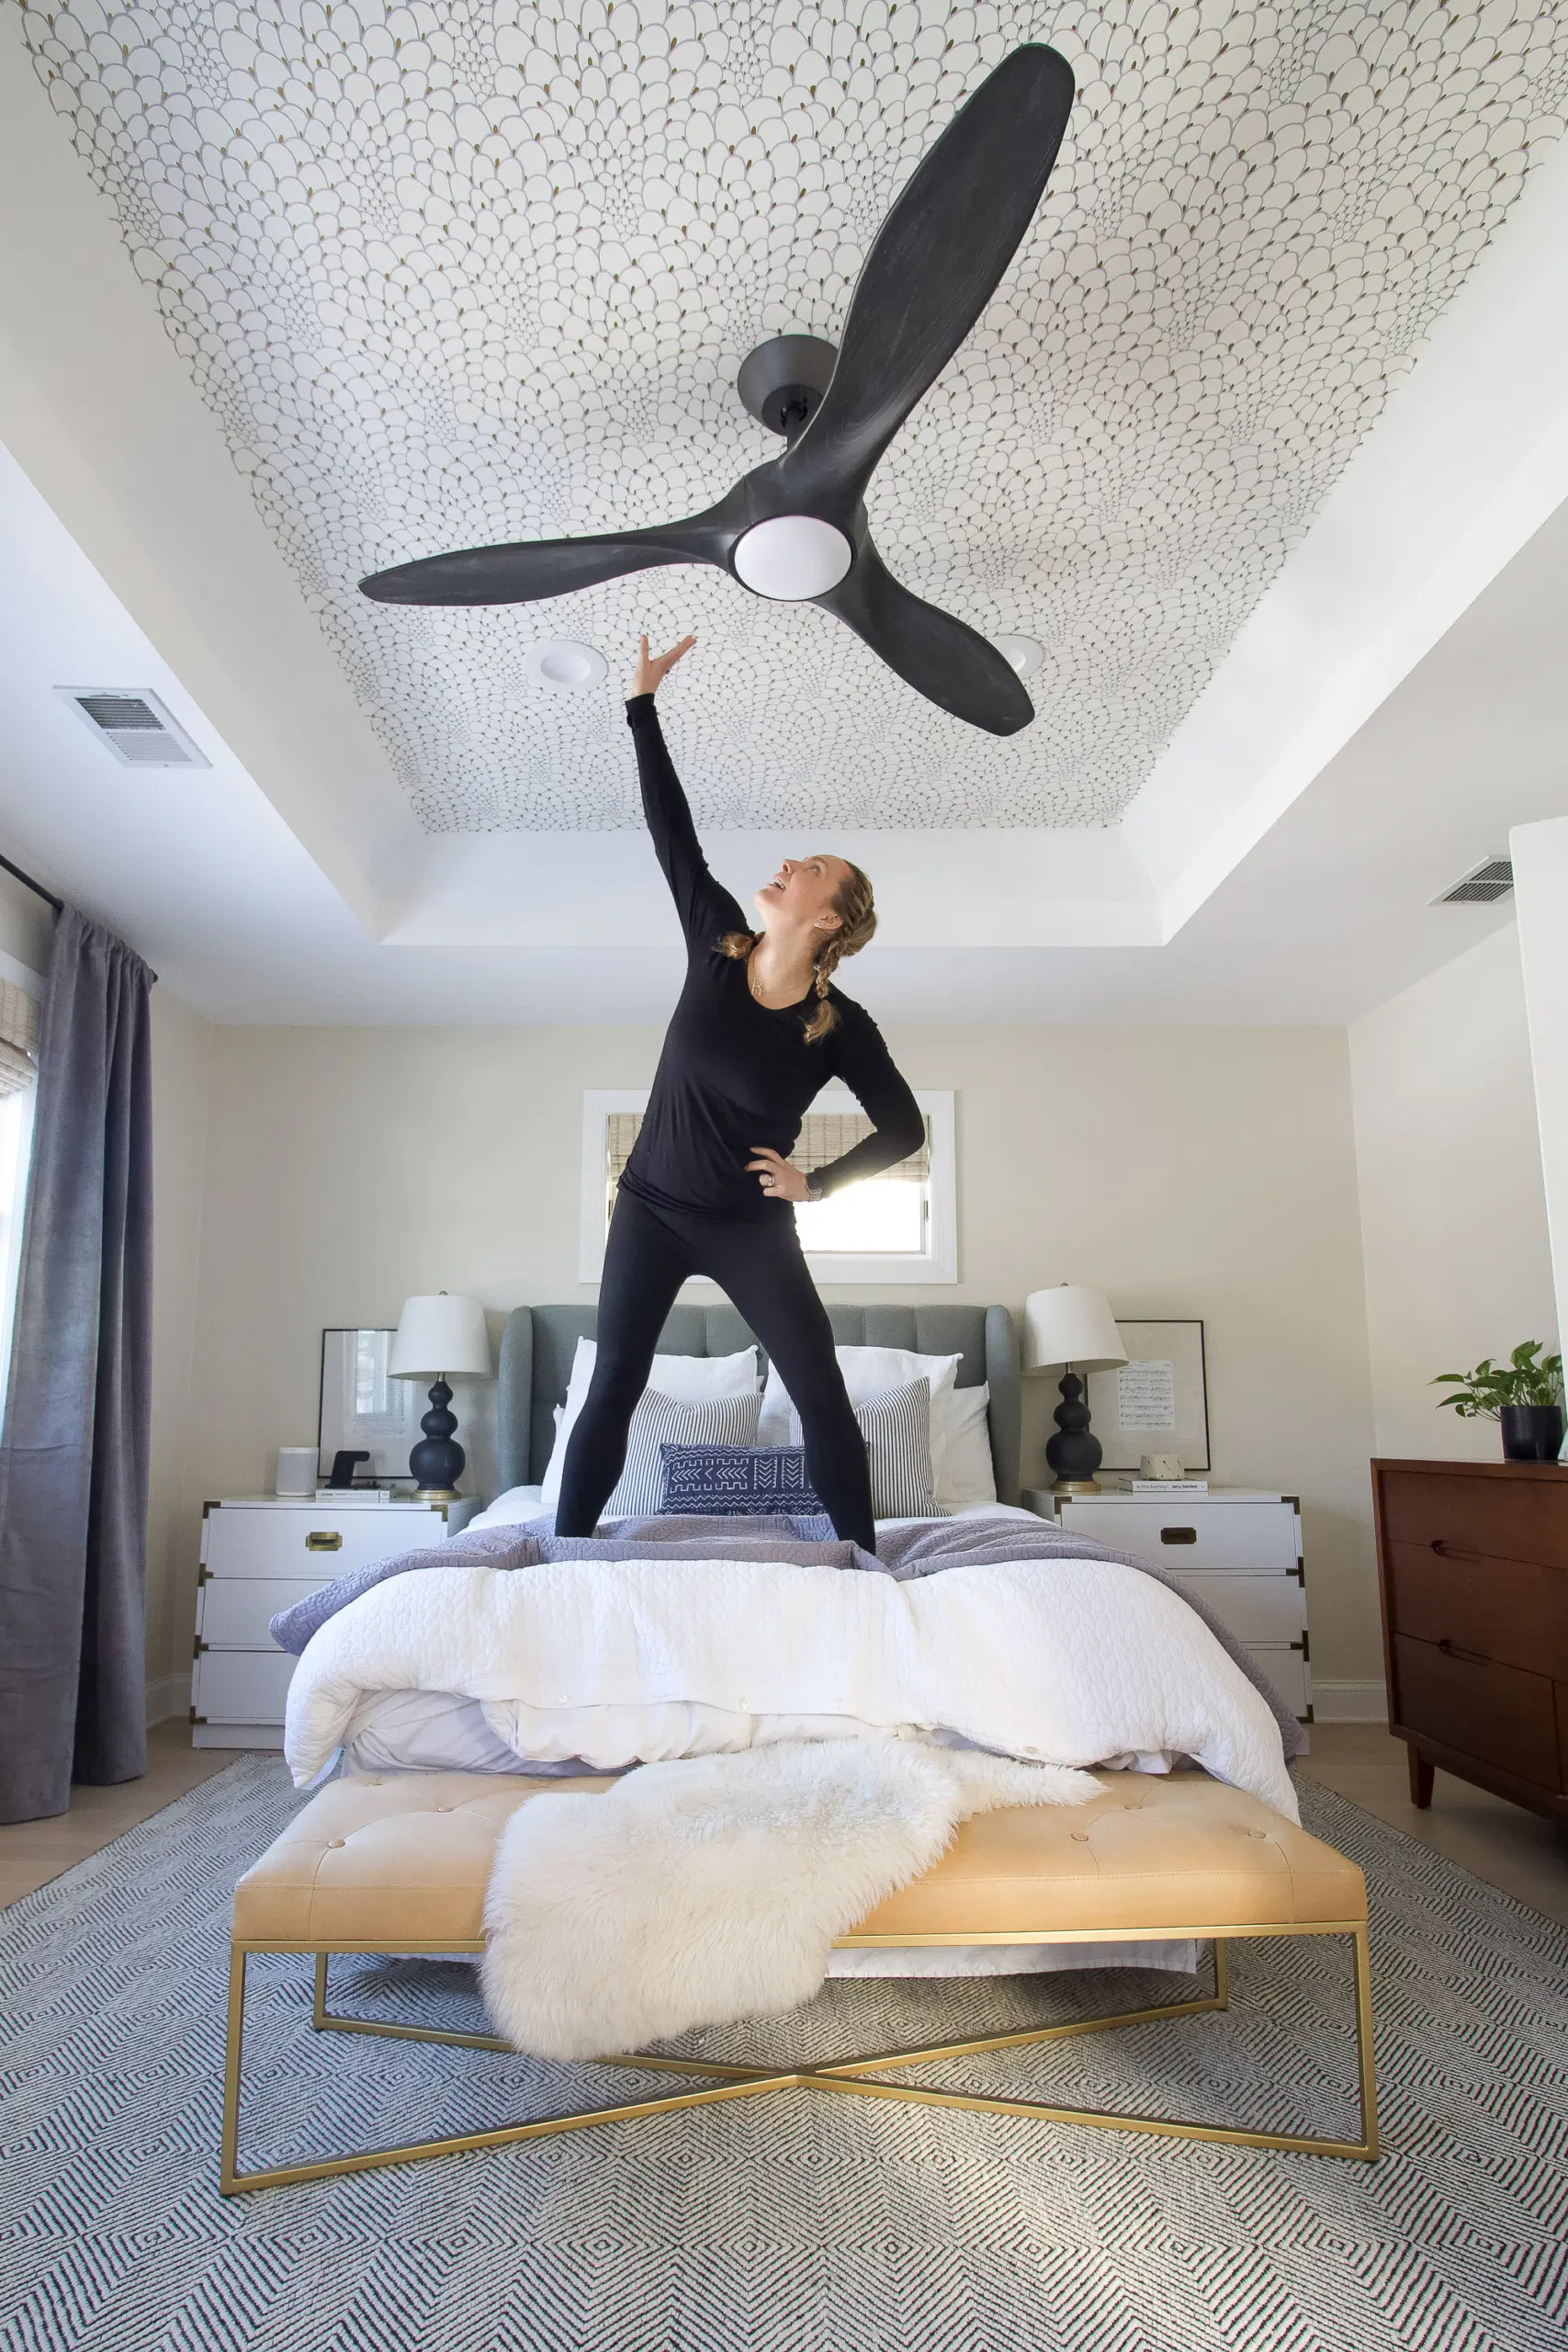
- How to Wallpaper Your Ceiling (Advanced Project)
- My Best Tips to Remove Wallpaper
But this post is going to focus specifically on how to install wallpaper inside picture frame molding, because it’s a little bit different than doing a full wall.
Project At A Glance:
| Difficulty: ⭐️ ⭐️ ⭐️ of 5 | Time: 3-5 hours (depending on wall size) |
| Supplies needed: Wallpaper Wallpaper paste Wallpaper primer Paint roller + tray Paint brush Bucket + sponge Clean cloth | Tools needed: Smoothing brush Seam roller Sharp utility knife Metal drywall taping knife Scissors Measuring tape Level Pencil Step stool or ladder |
Before You Start
There are a few things I did ahead of time that made a big difference in how this project turned out.
Prime Your Walls First
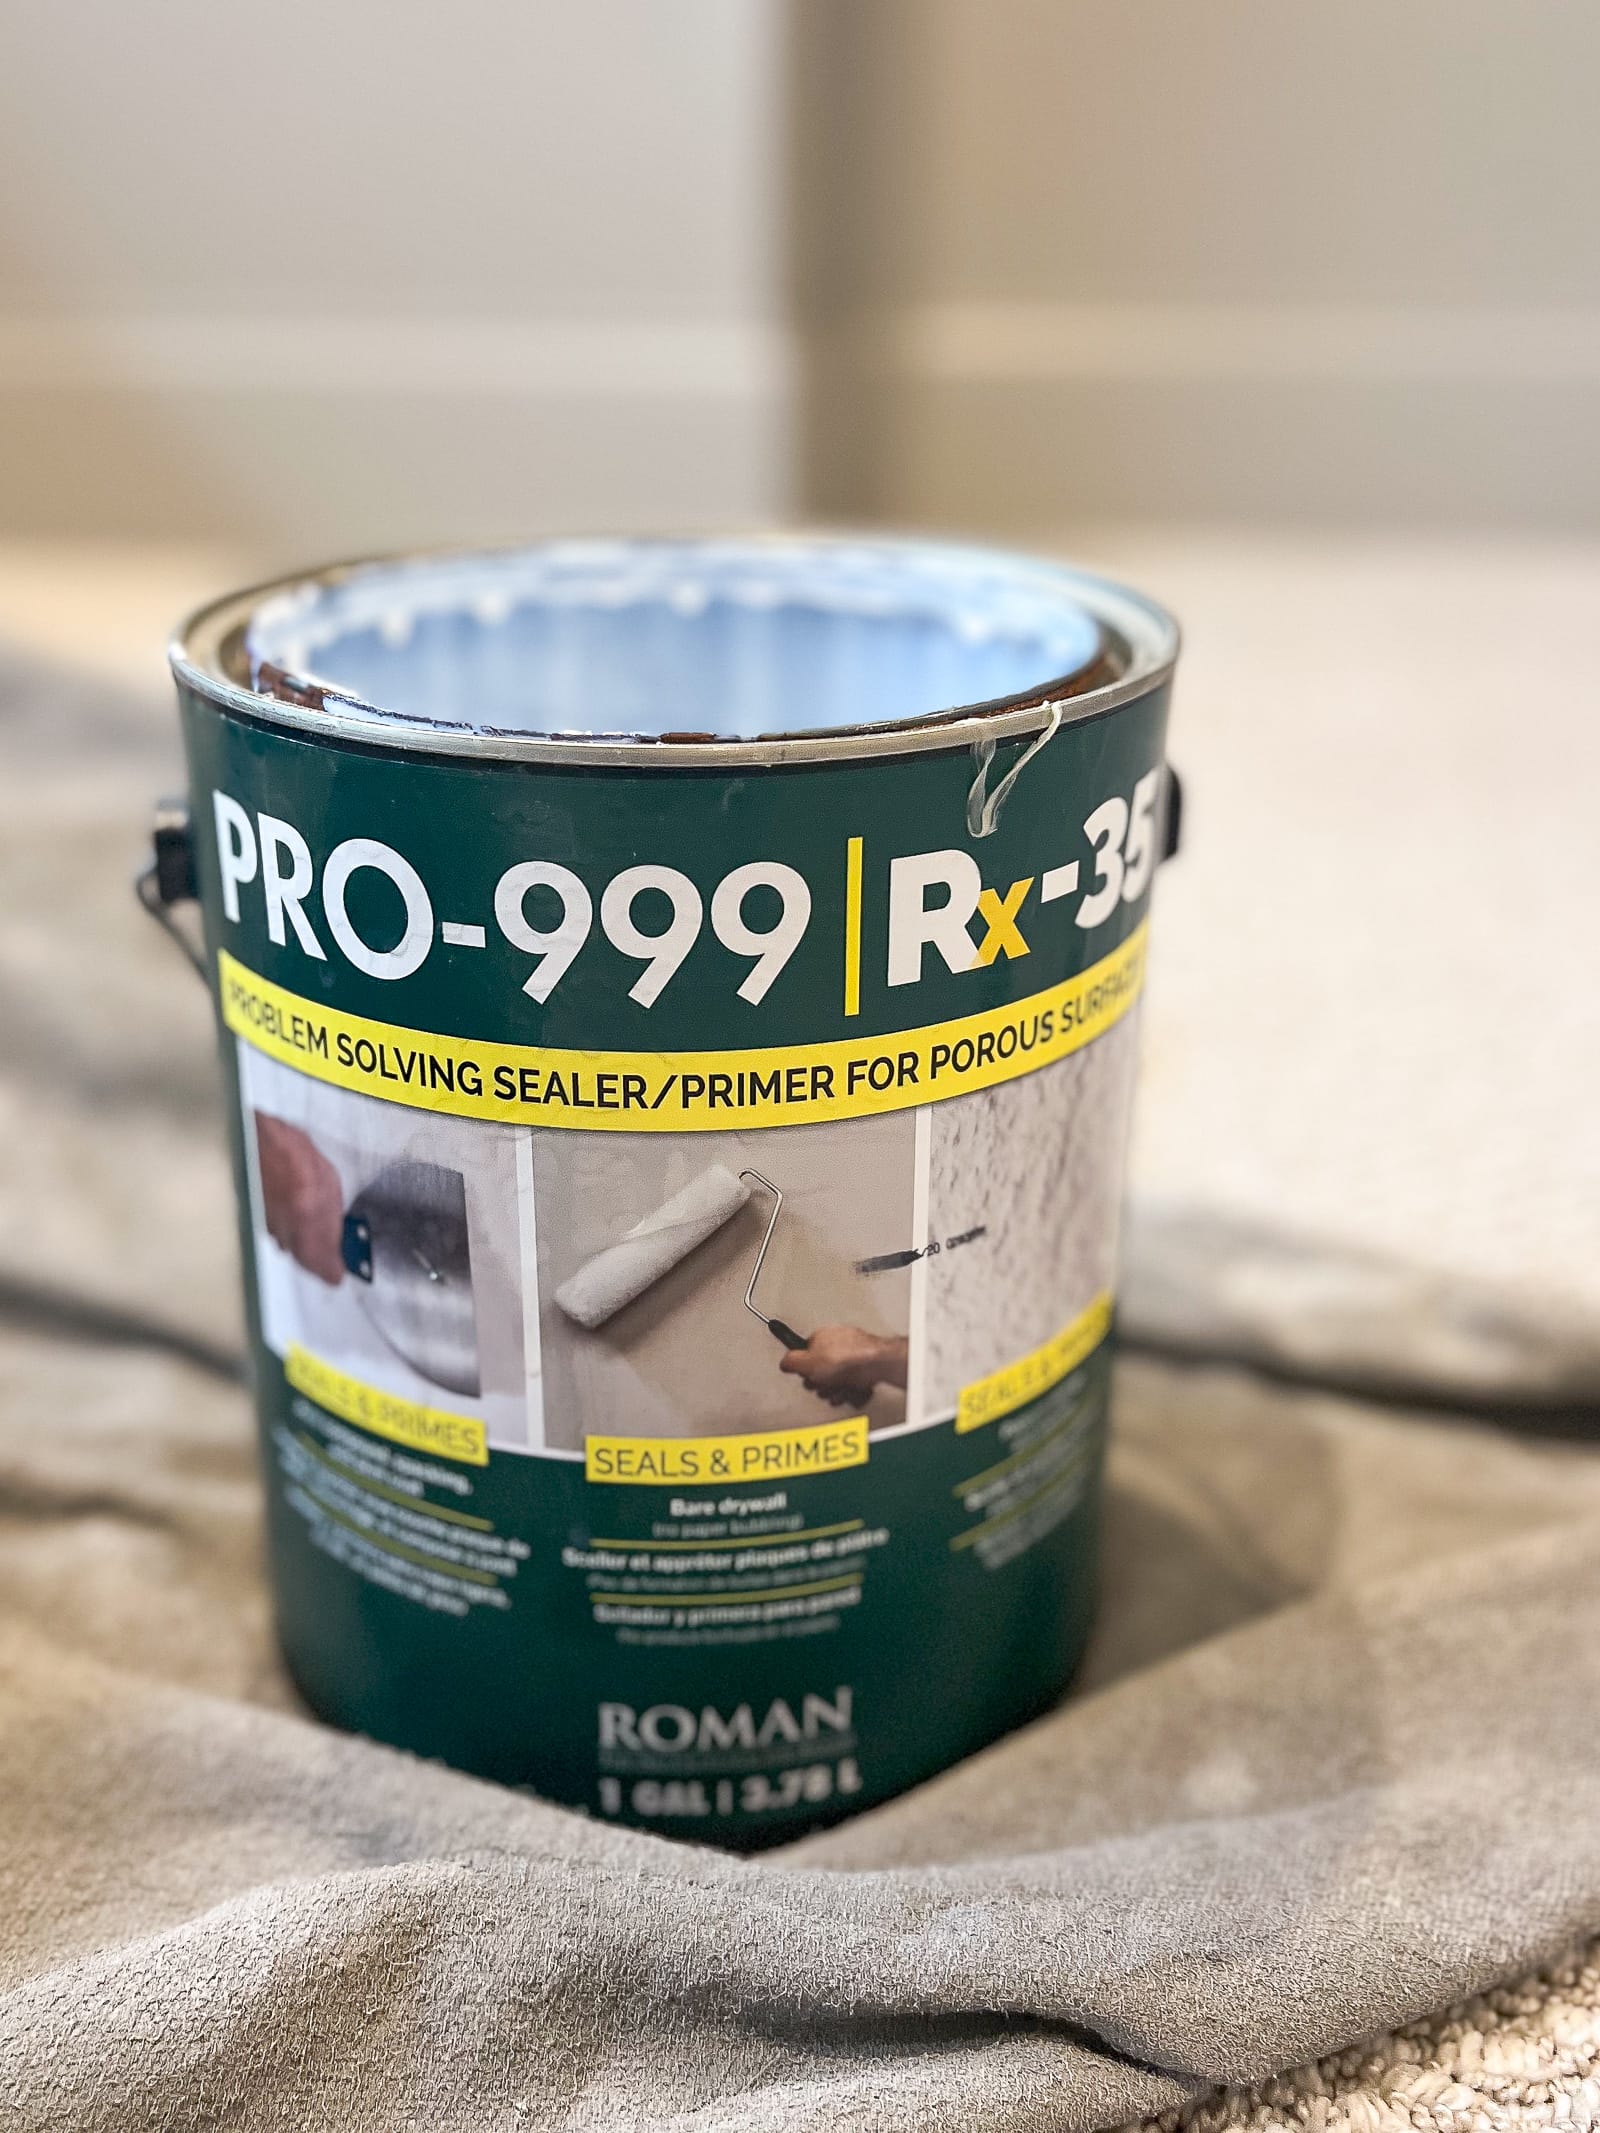
About 24 hours before I began the installation, I primed the wall, using a wallpaper primer, and I would definitely recommend doing the same.
This helps the wallpaper adhere better, gives you a smoother finish, and makes removal easier down the road. Since this wall had wallpaper on it previously, I wanted to make sure everything went on as cleanly as possible.
Install Molding First, Then Wallpaper
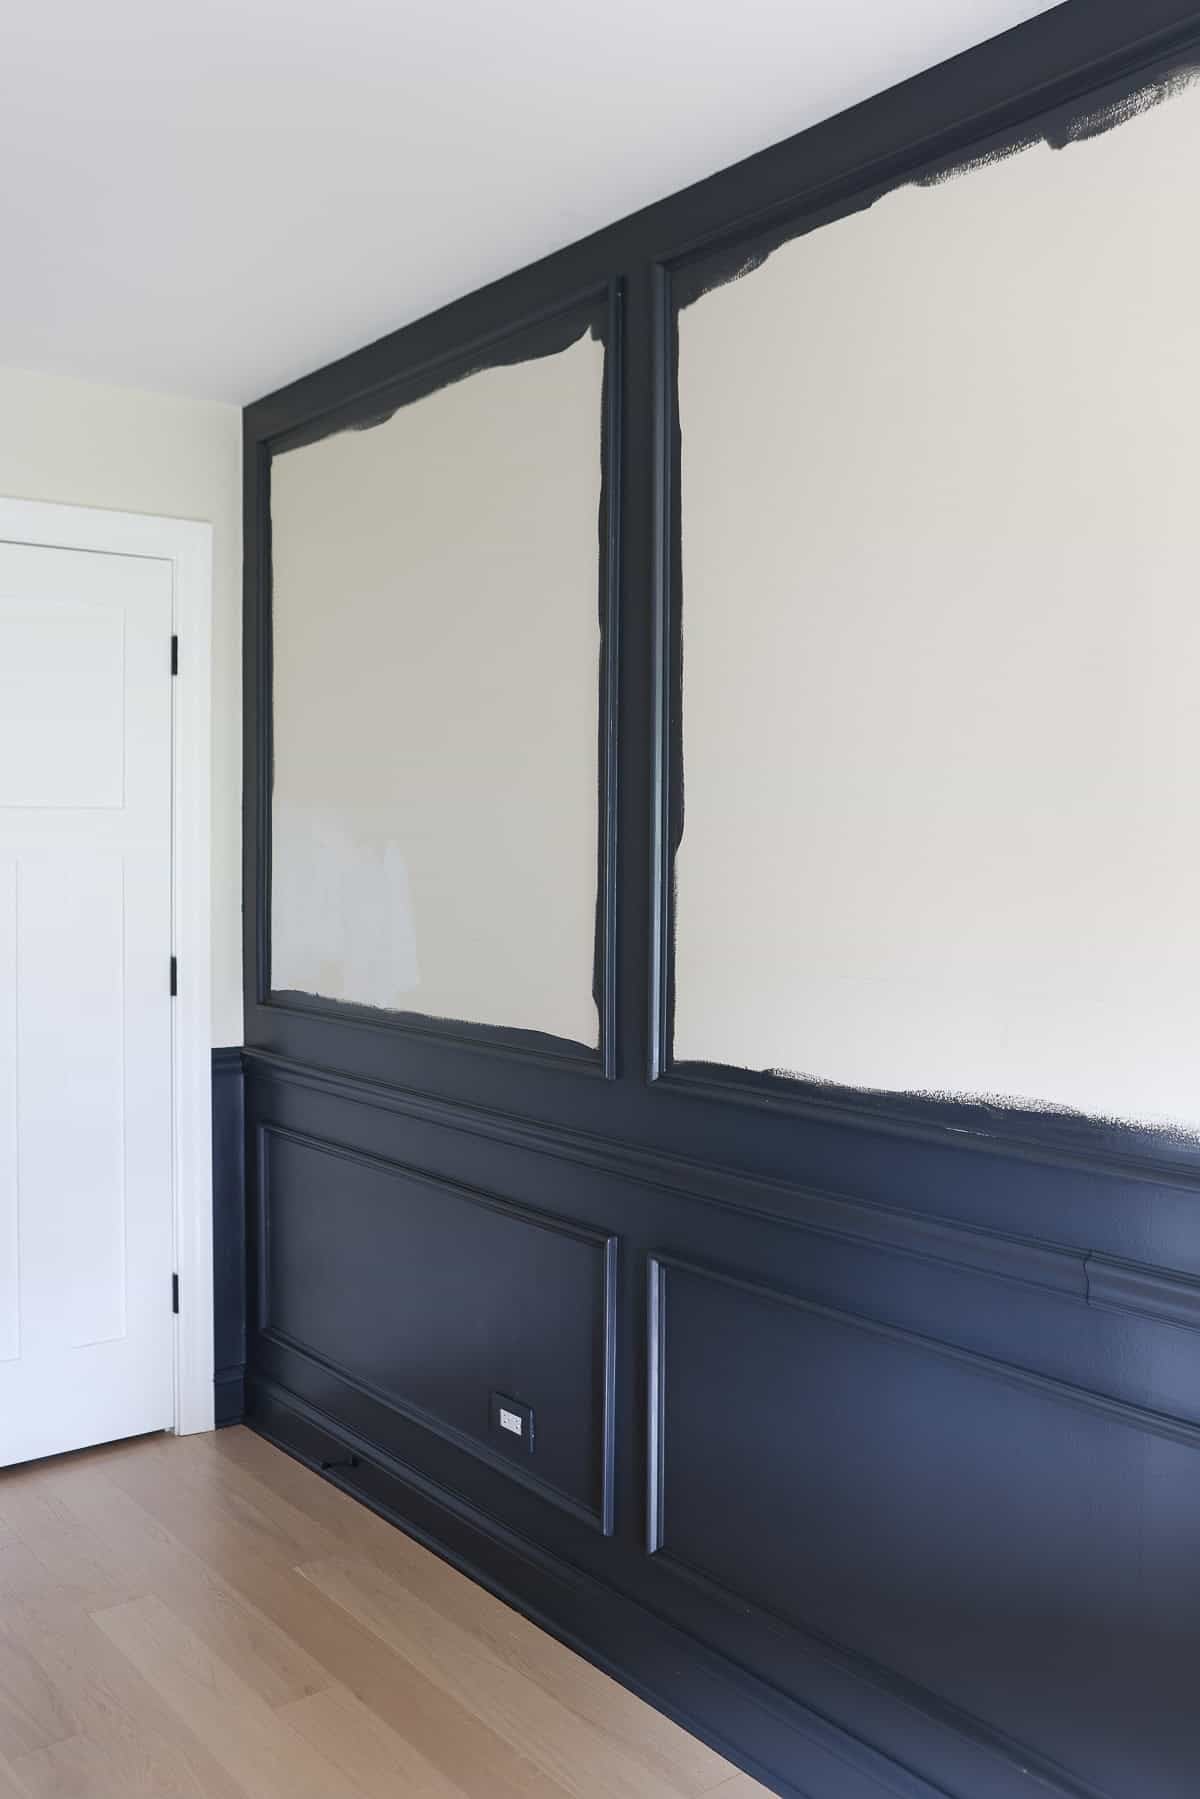
I added all of the picture frame molding first, caulked the seams, painted everything, and then wallpapered inside the boxes after it was fully finished.
You could technically do it the other way around, but this gave me way more control. It’s much easier to trim wallpaper precisely than it is to try to install wood molding perfectly over wallpaper.
Decide Where to Add Wallpaper
I chose to wallpaper just the top boxes and leave the bottom ones painted. That was totally a personal preference, but for this wall, doing both felt too busy. This still gives that layered, custom look without overwhelming the space.
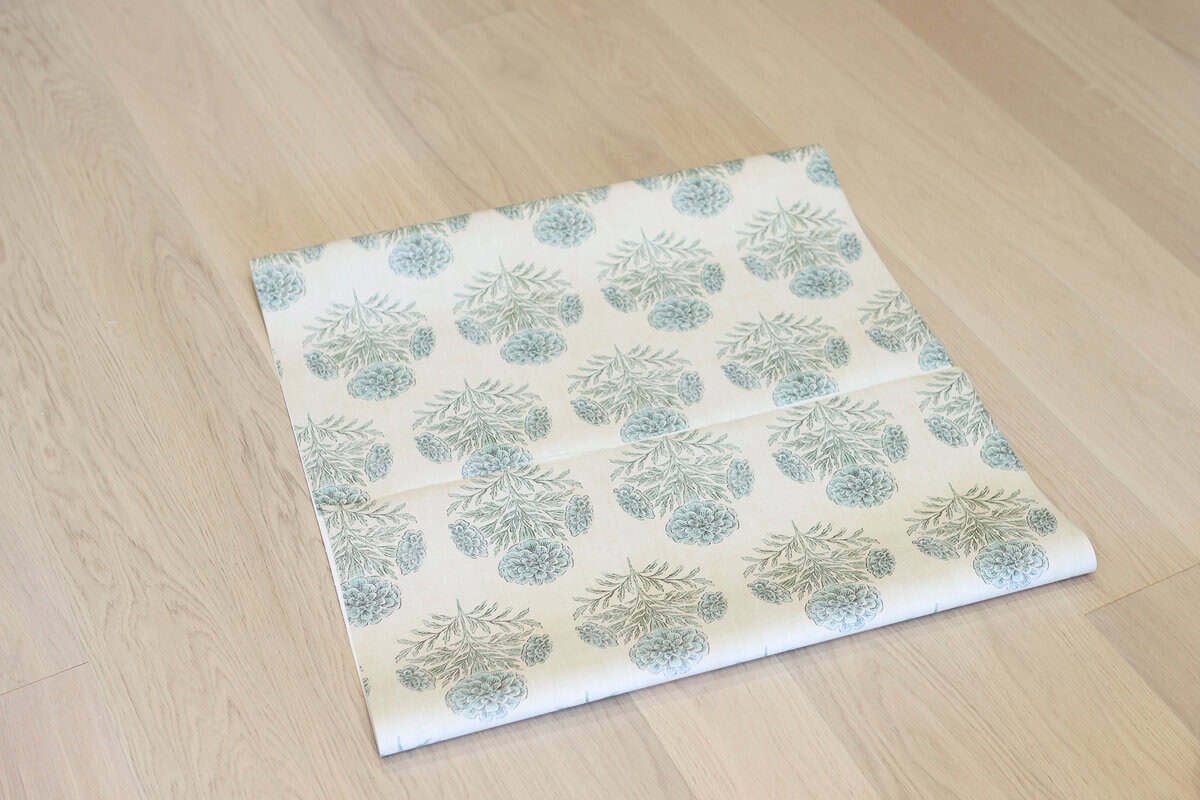
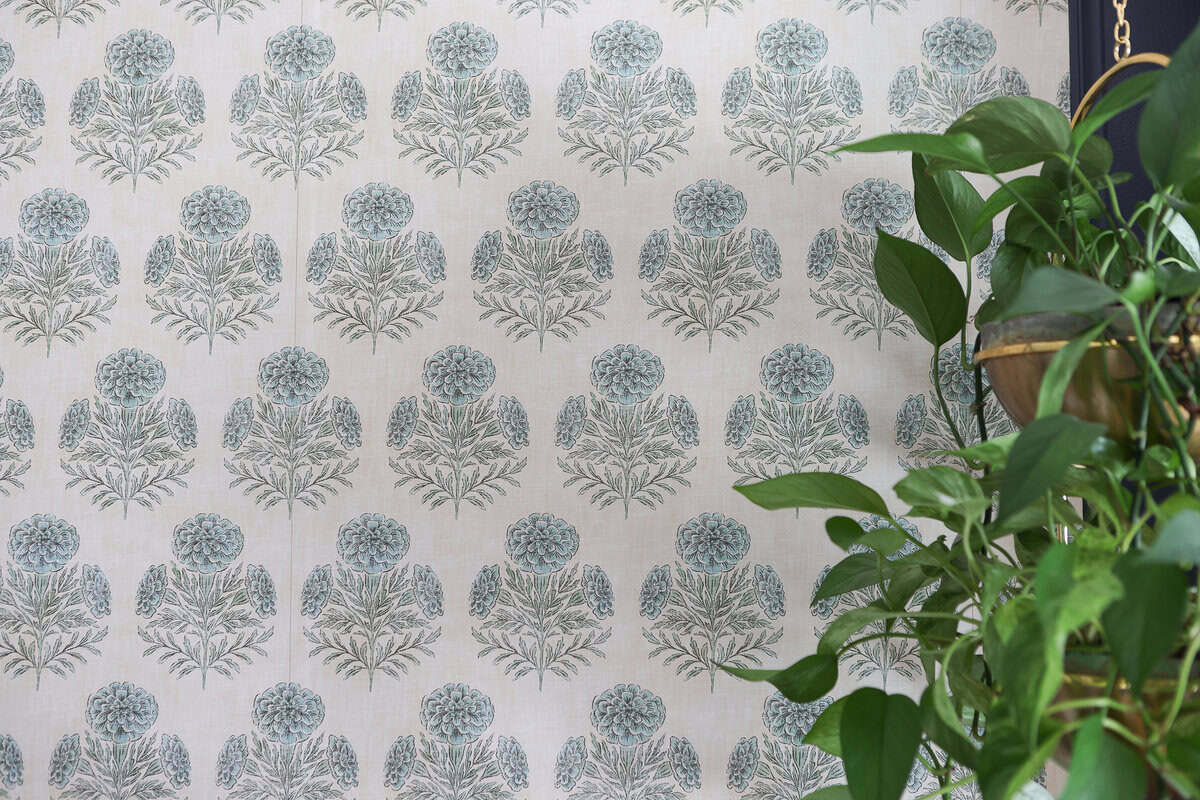
The Wallpaper I Chose (and What I Almost Picked)
Before landing on the final wallpaper, I ordered a few different wallpaper samples from Spoonflower so I could see them in the space.
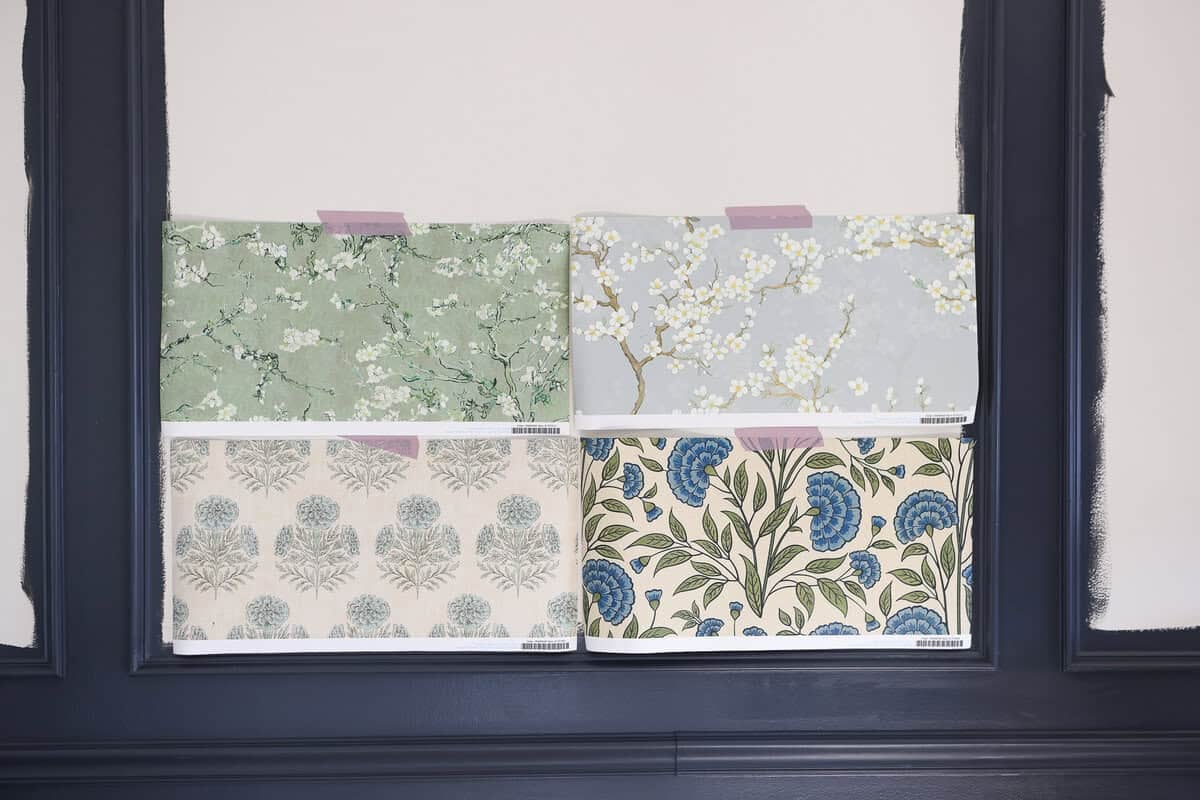
Green Flowers // Blue & White Florals // Blue Hydrangeas // Blue Modern
I always think this is worth doing, especially for a project like this. The scale, color, and overall feel can look totally different once it’s actually on your wall.
After seeing them in person, I ended up going with the bottom left wallpaper, and I’m so happy with how it looks. It adds just enough pattern without overwhelming the space, which was exactly what I was going for.
One Thing That Surprised Me…
I thought I was ordering a paste-the-wall wallpaper (which is always my preference), but when it arrived, it actually required booking.
We get into that more in the tutorial below, but here’s my quick take:
- If you can, choose paste-the-wall wallpaper
- It’s easier to work with and less messy
- It’s especially great if you’re newer to wallpaper
Booking definitely works (and clearly I made it work here), but it’s not my favorite method.
And just to say it—I’m still not a peel-and-stick wallpaper fan. I know it’s popular, but for something like this where you’re lining up patterns across multiple sections, I don’t find it as forgiving.
How To Wallpaper Inside Picture Frame Molding
Step 1: Start in the First Box + Create a Guide Line
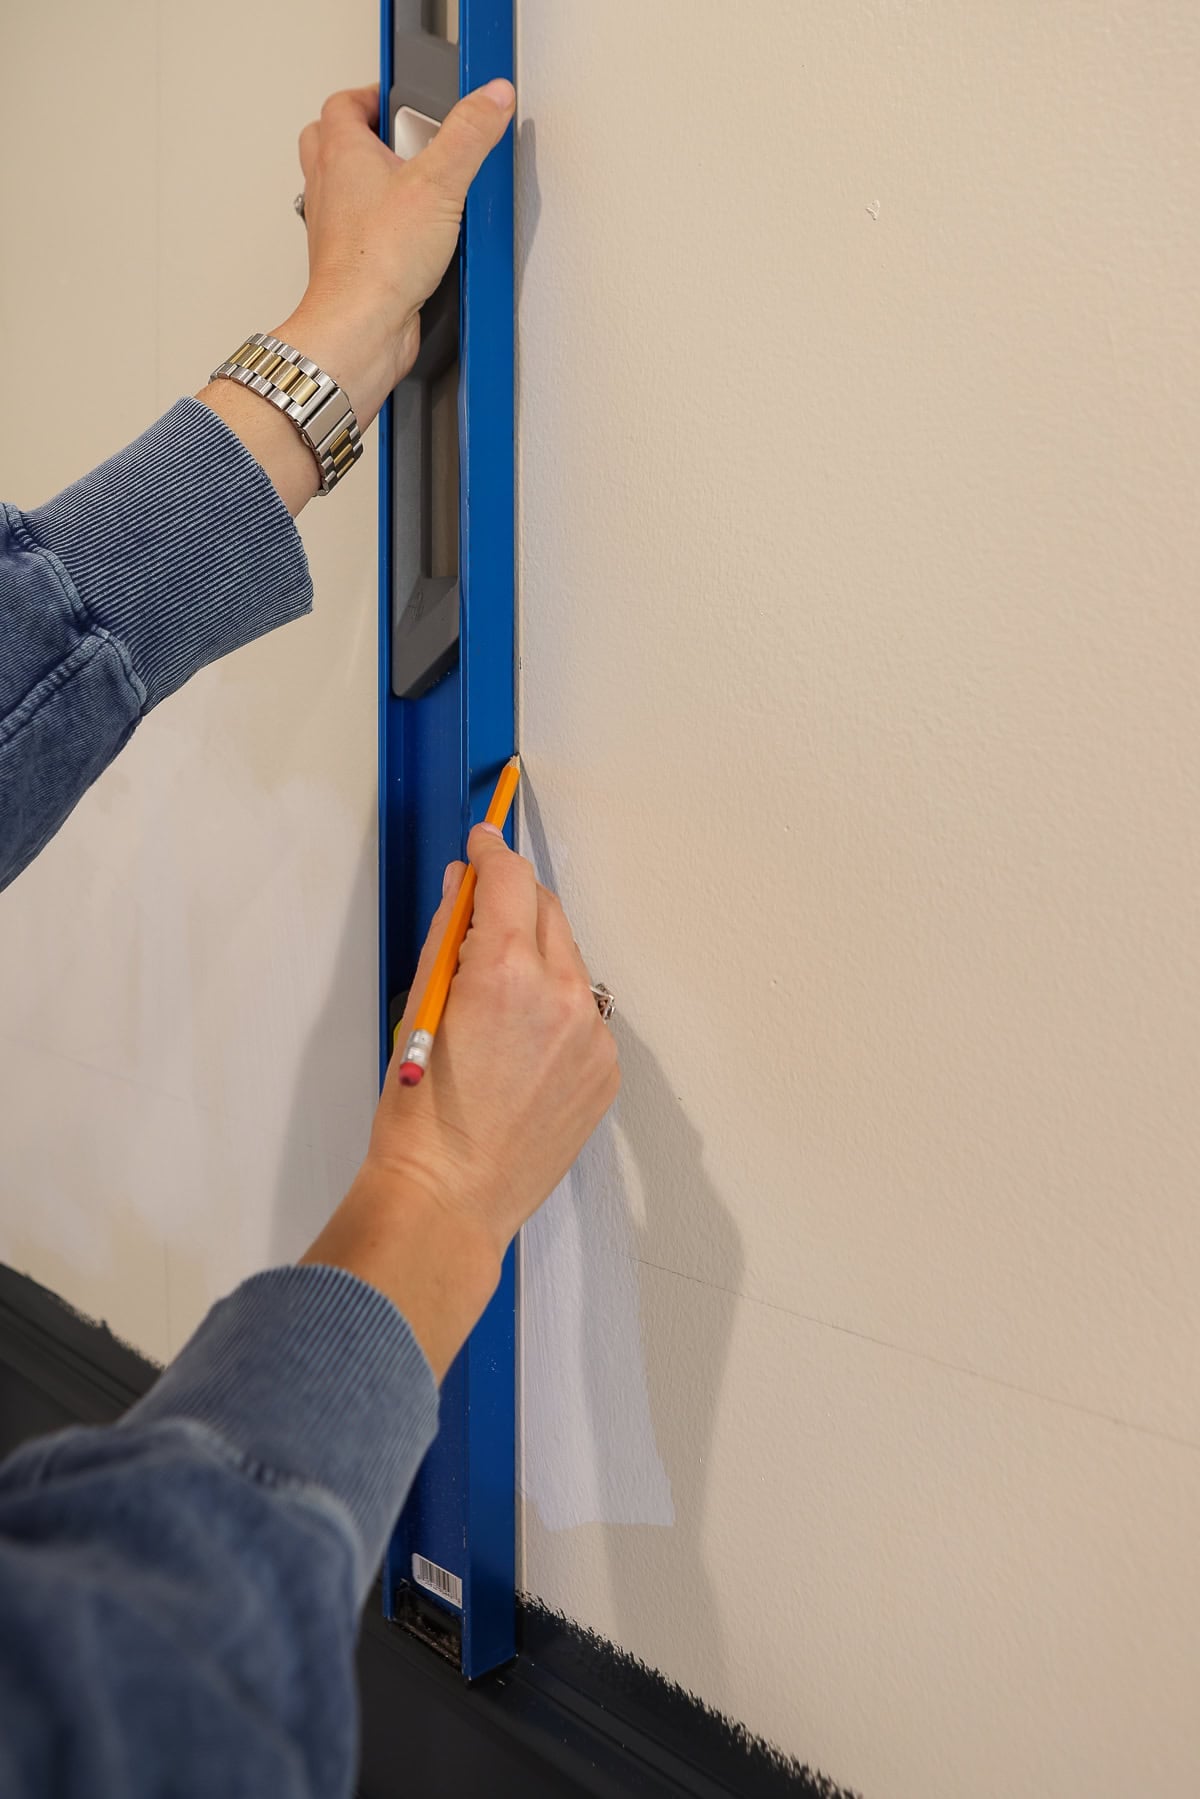
I started all the way on the left side of the wall and worked my way across, one box at a time.
The first thing I did was measure the width of my wallpaper (mine was about 24.5 inches), and then I marked a vertical pencil line slightly inside that measurement—around 23.5 to 24 inches out from the molding. This gave me a straight, plumb line to follow, allowing everything to stay aligned, as I moved across the wall.
Step 2: Cut Your First Panel
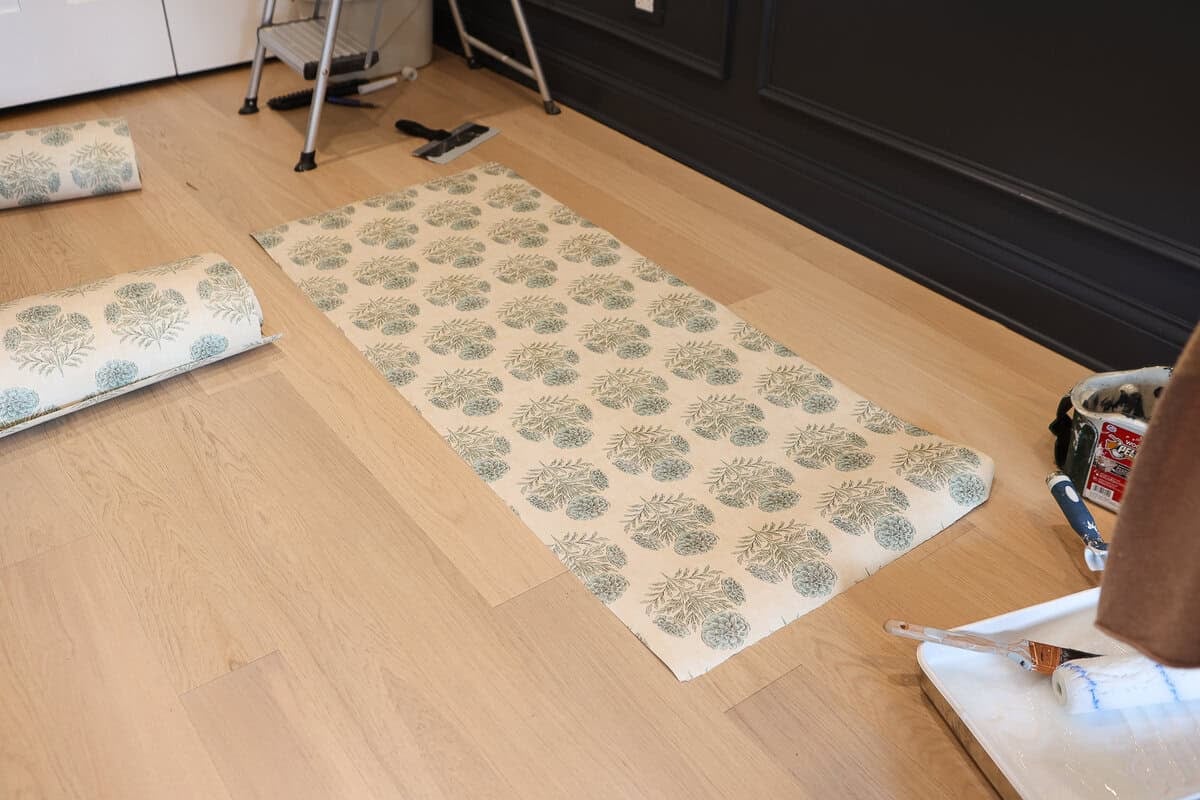
Next, I cut my first piece of wallpaper, making sure to leave a little extra on the top, bottom, and sides. You want that overhang so you can trim everything down once it’s on the wall and get a really clean, precise fit along the molding.
Step 3: Apply Paste + Book the Wallpaper
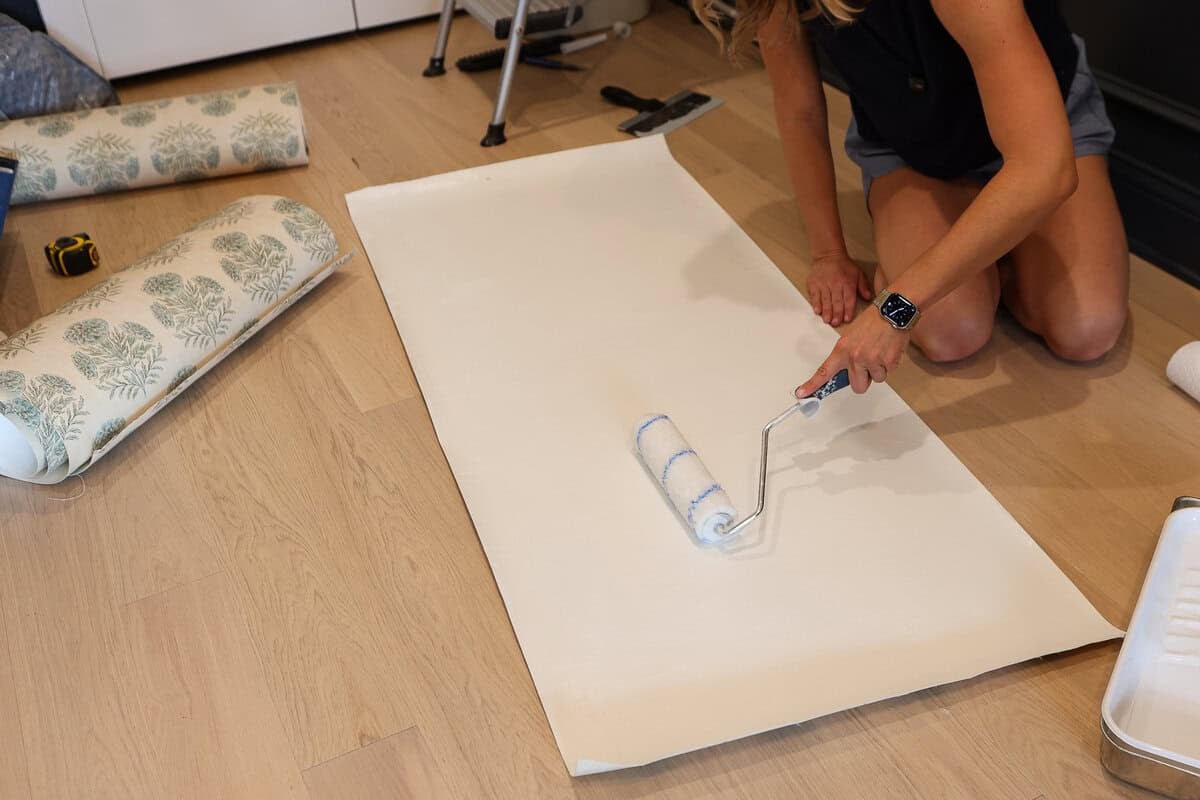
I rolled paste onto the entire back of the paper, making sure to fully coat the edges (I used a brush for that part), and then folded each end inward so they met in the middle—kind of like closing a book. That’s actually where the term “booking” comes from.
It’s the process of applying paste to the back of the wallpaper, then folding it in on itself and letting it sit for a few minutes before hanging. This gives the paste time to absorb into the paper, which makes it more flexible and easier to work with.
Then I let it sit for about 10 minutes. I literally set a timer on my watch, and once I got into a rhythm, I would have one piece booking while I was hanging the previous one to keep things moving.
Step 4: Hang the First Panel
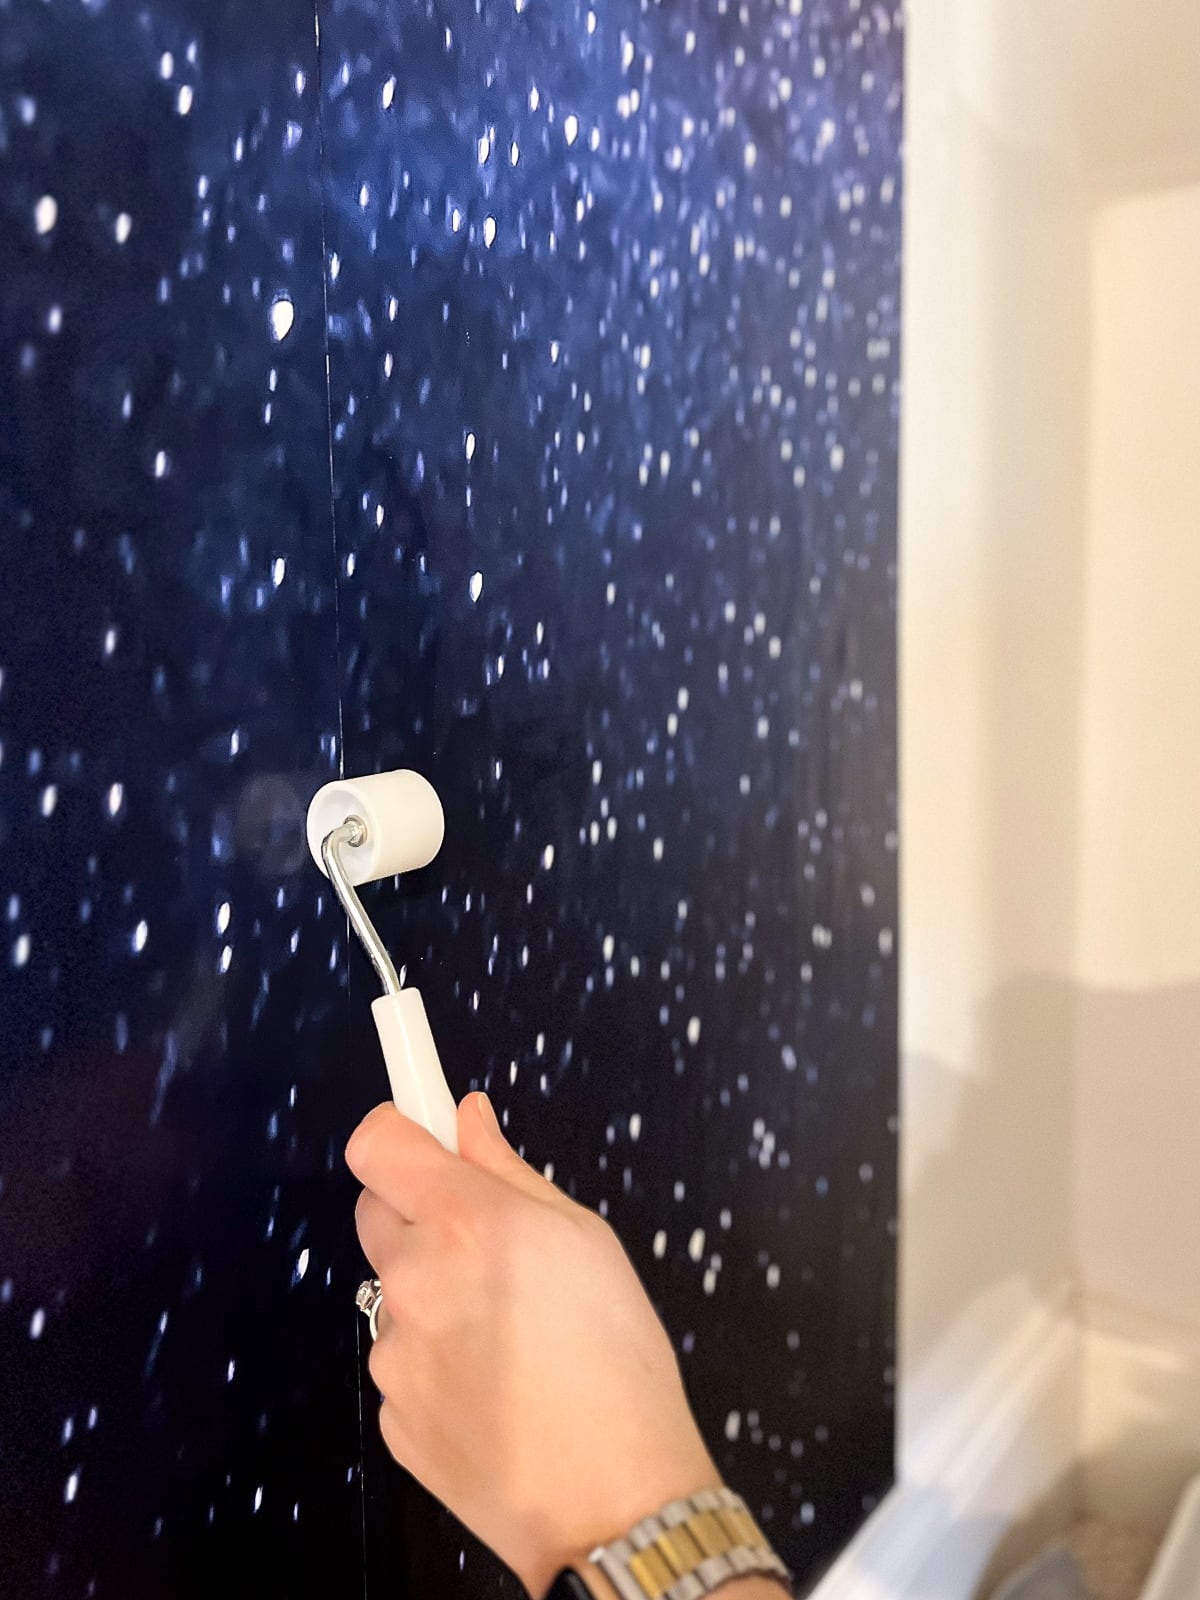
Once the wallpaper was ready, I lined it up with that vertical pencil line and pressed it onto the wall. I used a smoothing tool to work out any air bubbles and make sure everything adhered evenly.
Step 5: Trim Along the Molding
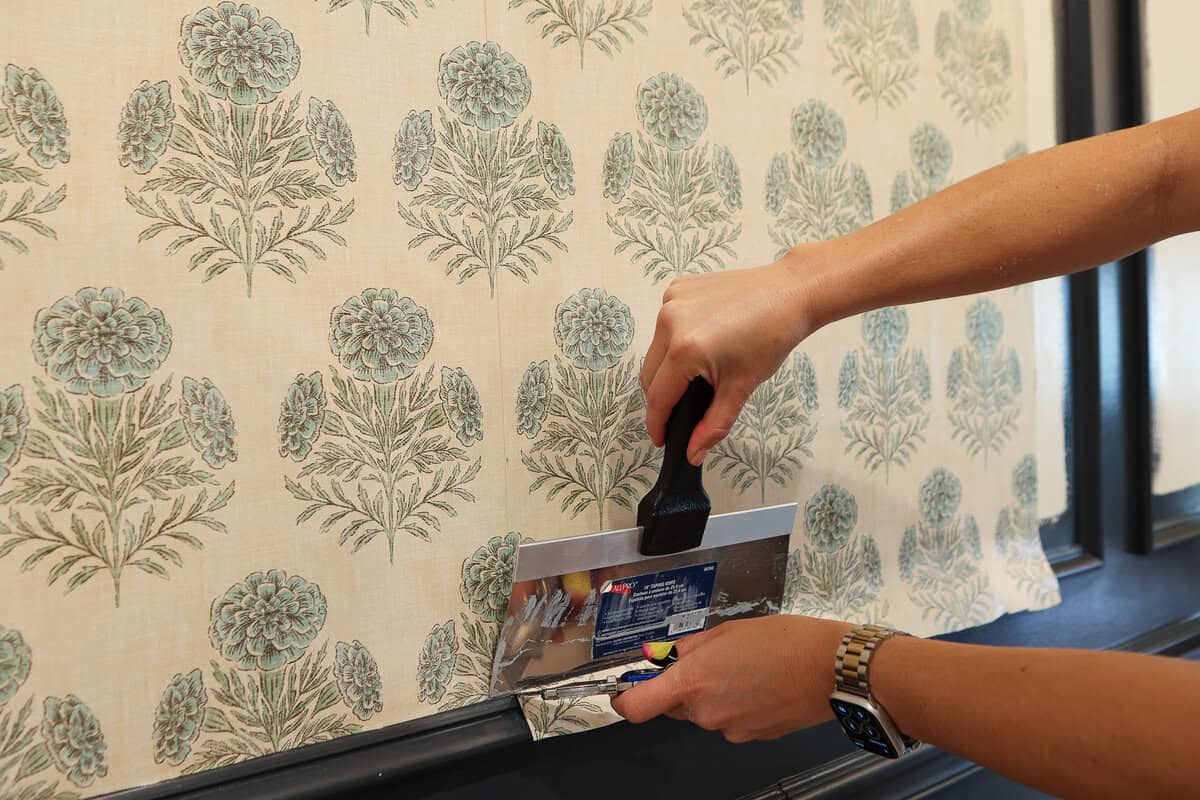
After the panel was in place, I used a very sharp utility knife and a metal taping knife to carefully trim along the edges of the molding. A fresh blade makes a huge difference here if you want clean lines. I would opt for a snap-off utility knife if you can. But, be careful! I cut my thumb during this project, and let’s just say wallpaper and blood don’t go well together…
Step 6: Wipe Down Excess Glue
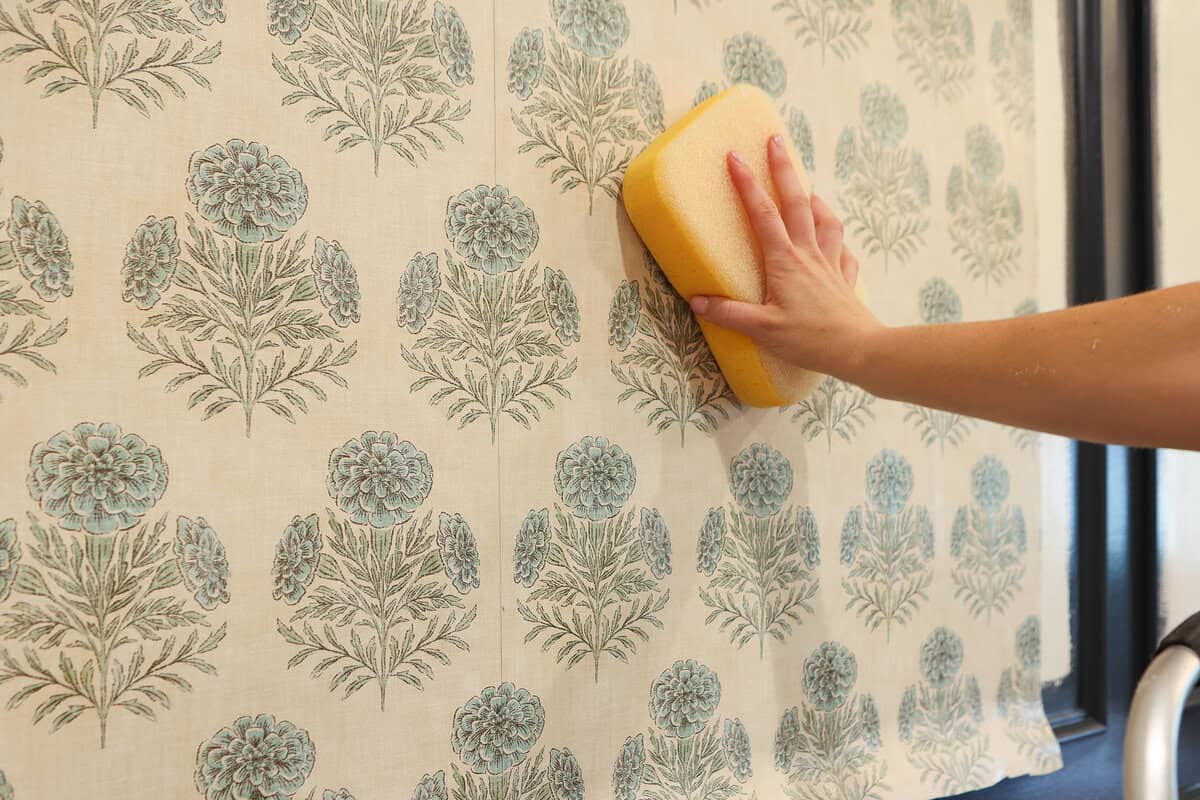
As I worked, I kept a damp sponge nearby and wiped away any excess glue. This helps keep everything looking clean and prevents any residue from building up on the surface.
Step 7: Move to the Next Box + Match the Pattern
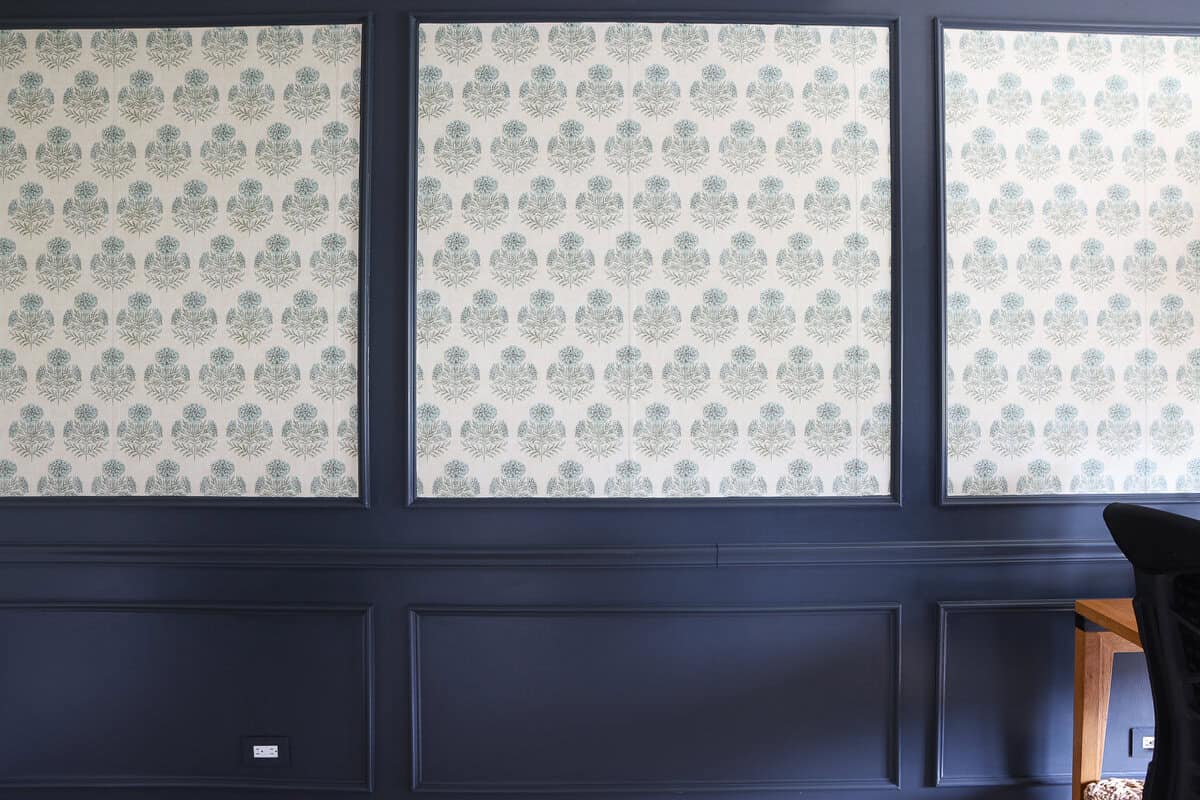
As I moved to the next section, the biggest thing I focused on was lining up the pattern.
Before cutting each new piece, I made sure it matched up with the previous panel so the design flowed seamlessly across all of the boxes. That meant sometimes holding it up, adjusting, and giving myself a little extra paper to work with.
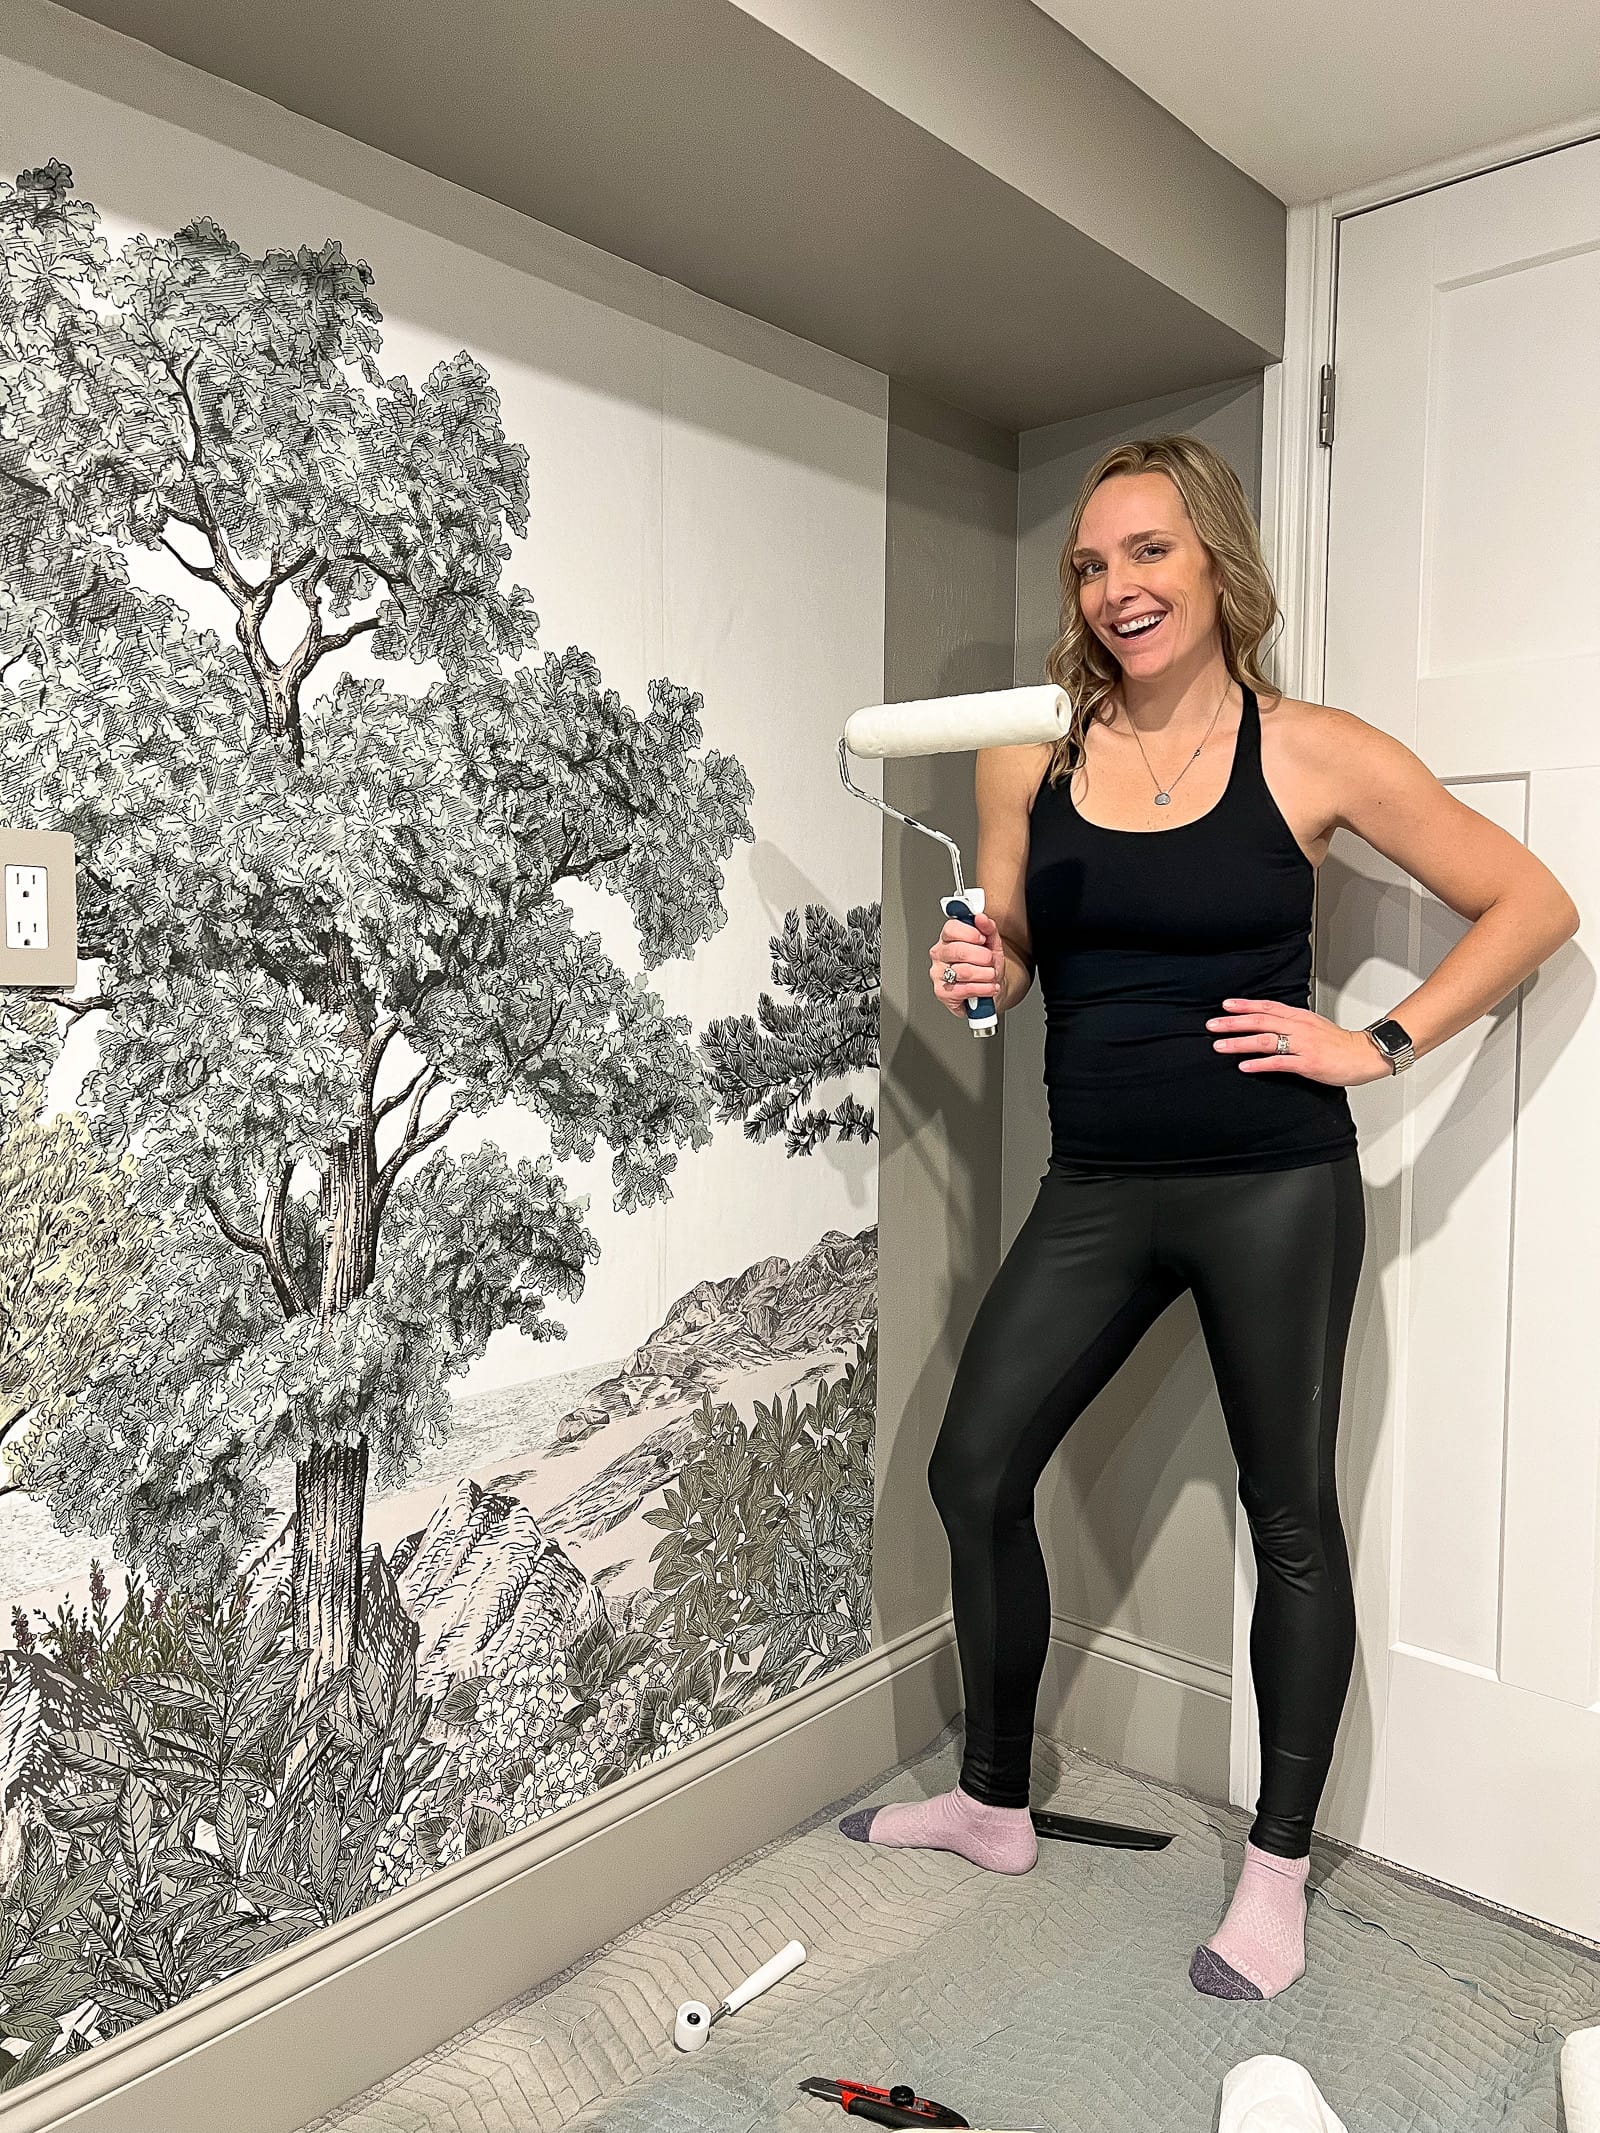
Step 8: Roll the Seams
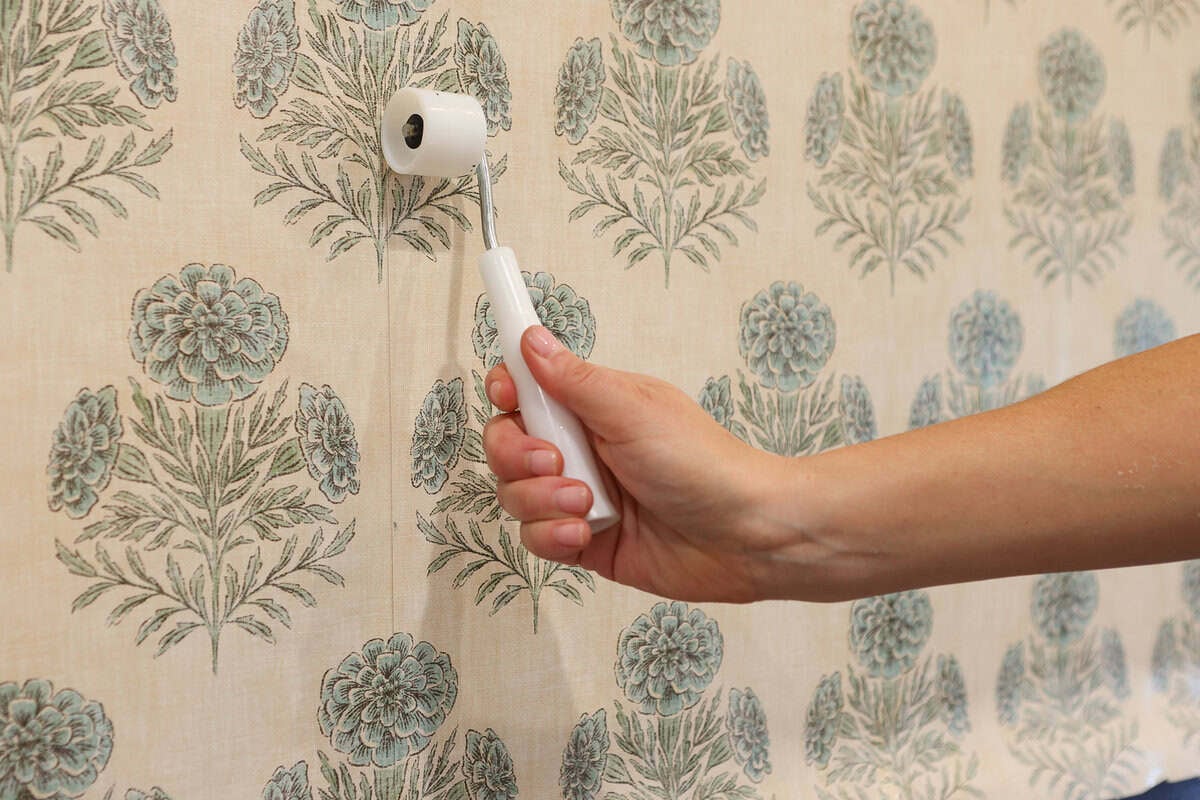
Once everything was in place, I went back over the edges with a seam roller to make sure everything was fully adhered and laying flat.
I would say each box took about an hour, so I was able to get the full wall done in a half day of hard work!
FAQ: Answering Your Common Wallpaper Questions
Do you install wallpaper before or after picture frame molding?
I installed the wallpaper after the picture frame molding, and I would definitely do it that way again. It gives you way more control. It’s much easier to trim wallpaper cleanly along the edges of the molding than it is to try to install wood trim perfectly over wallpaper.
Can you use peel-and-stick wallpaper inside picture frame molding?
You can—but I personally wouldn’t. I know peel-and-stick is popular, but I don’t find it as easy to work with or as forgiving, especially for a project like this where you’re trying to line up patterns across multiple sections.
What is booking wallpaper?
Booking is the process of applying paste to the back of the wallpaper, then folding it inward (like a book) and letting it sit for a few minutes before hanging.
This allows the paste to absorb into the paper and makes it more flexible and easier to work with. It’s effective, but I’ll be honest, it’s not my favorite method. If you can, I always recommend going with paste-the-wall wallpaper instead.
How do you measure wallpaper for each box?
Start by measuring each individual box to get the square footage, then use that to estimate how much wallpaper you’ll need overall. When you’re actually cutting each piece, make sure to leave a little extra on all sides so you can trim it down once it’s on the wall.
Do you line up the wallpaper pattern across each box?
Yes, and this is what really makes it look high-end. I made sure the pattern flowed continuously across all of the boxes by using a level and starting from the same reference point each time. It takes a little more planning, but it makes a big difference in the final result.
What type of wallpaper is best for this project?
If you have the option, I recommend paste-the-wall wallpaper. It’s easier to work with, less messy, and more beginner-friendly overall.
Is wallpaper inside picture frame molding beginner-friendly?
It’s doable, but I wouldn’t start here if you’ve never wallpapered before.
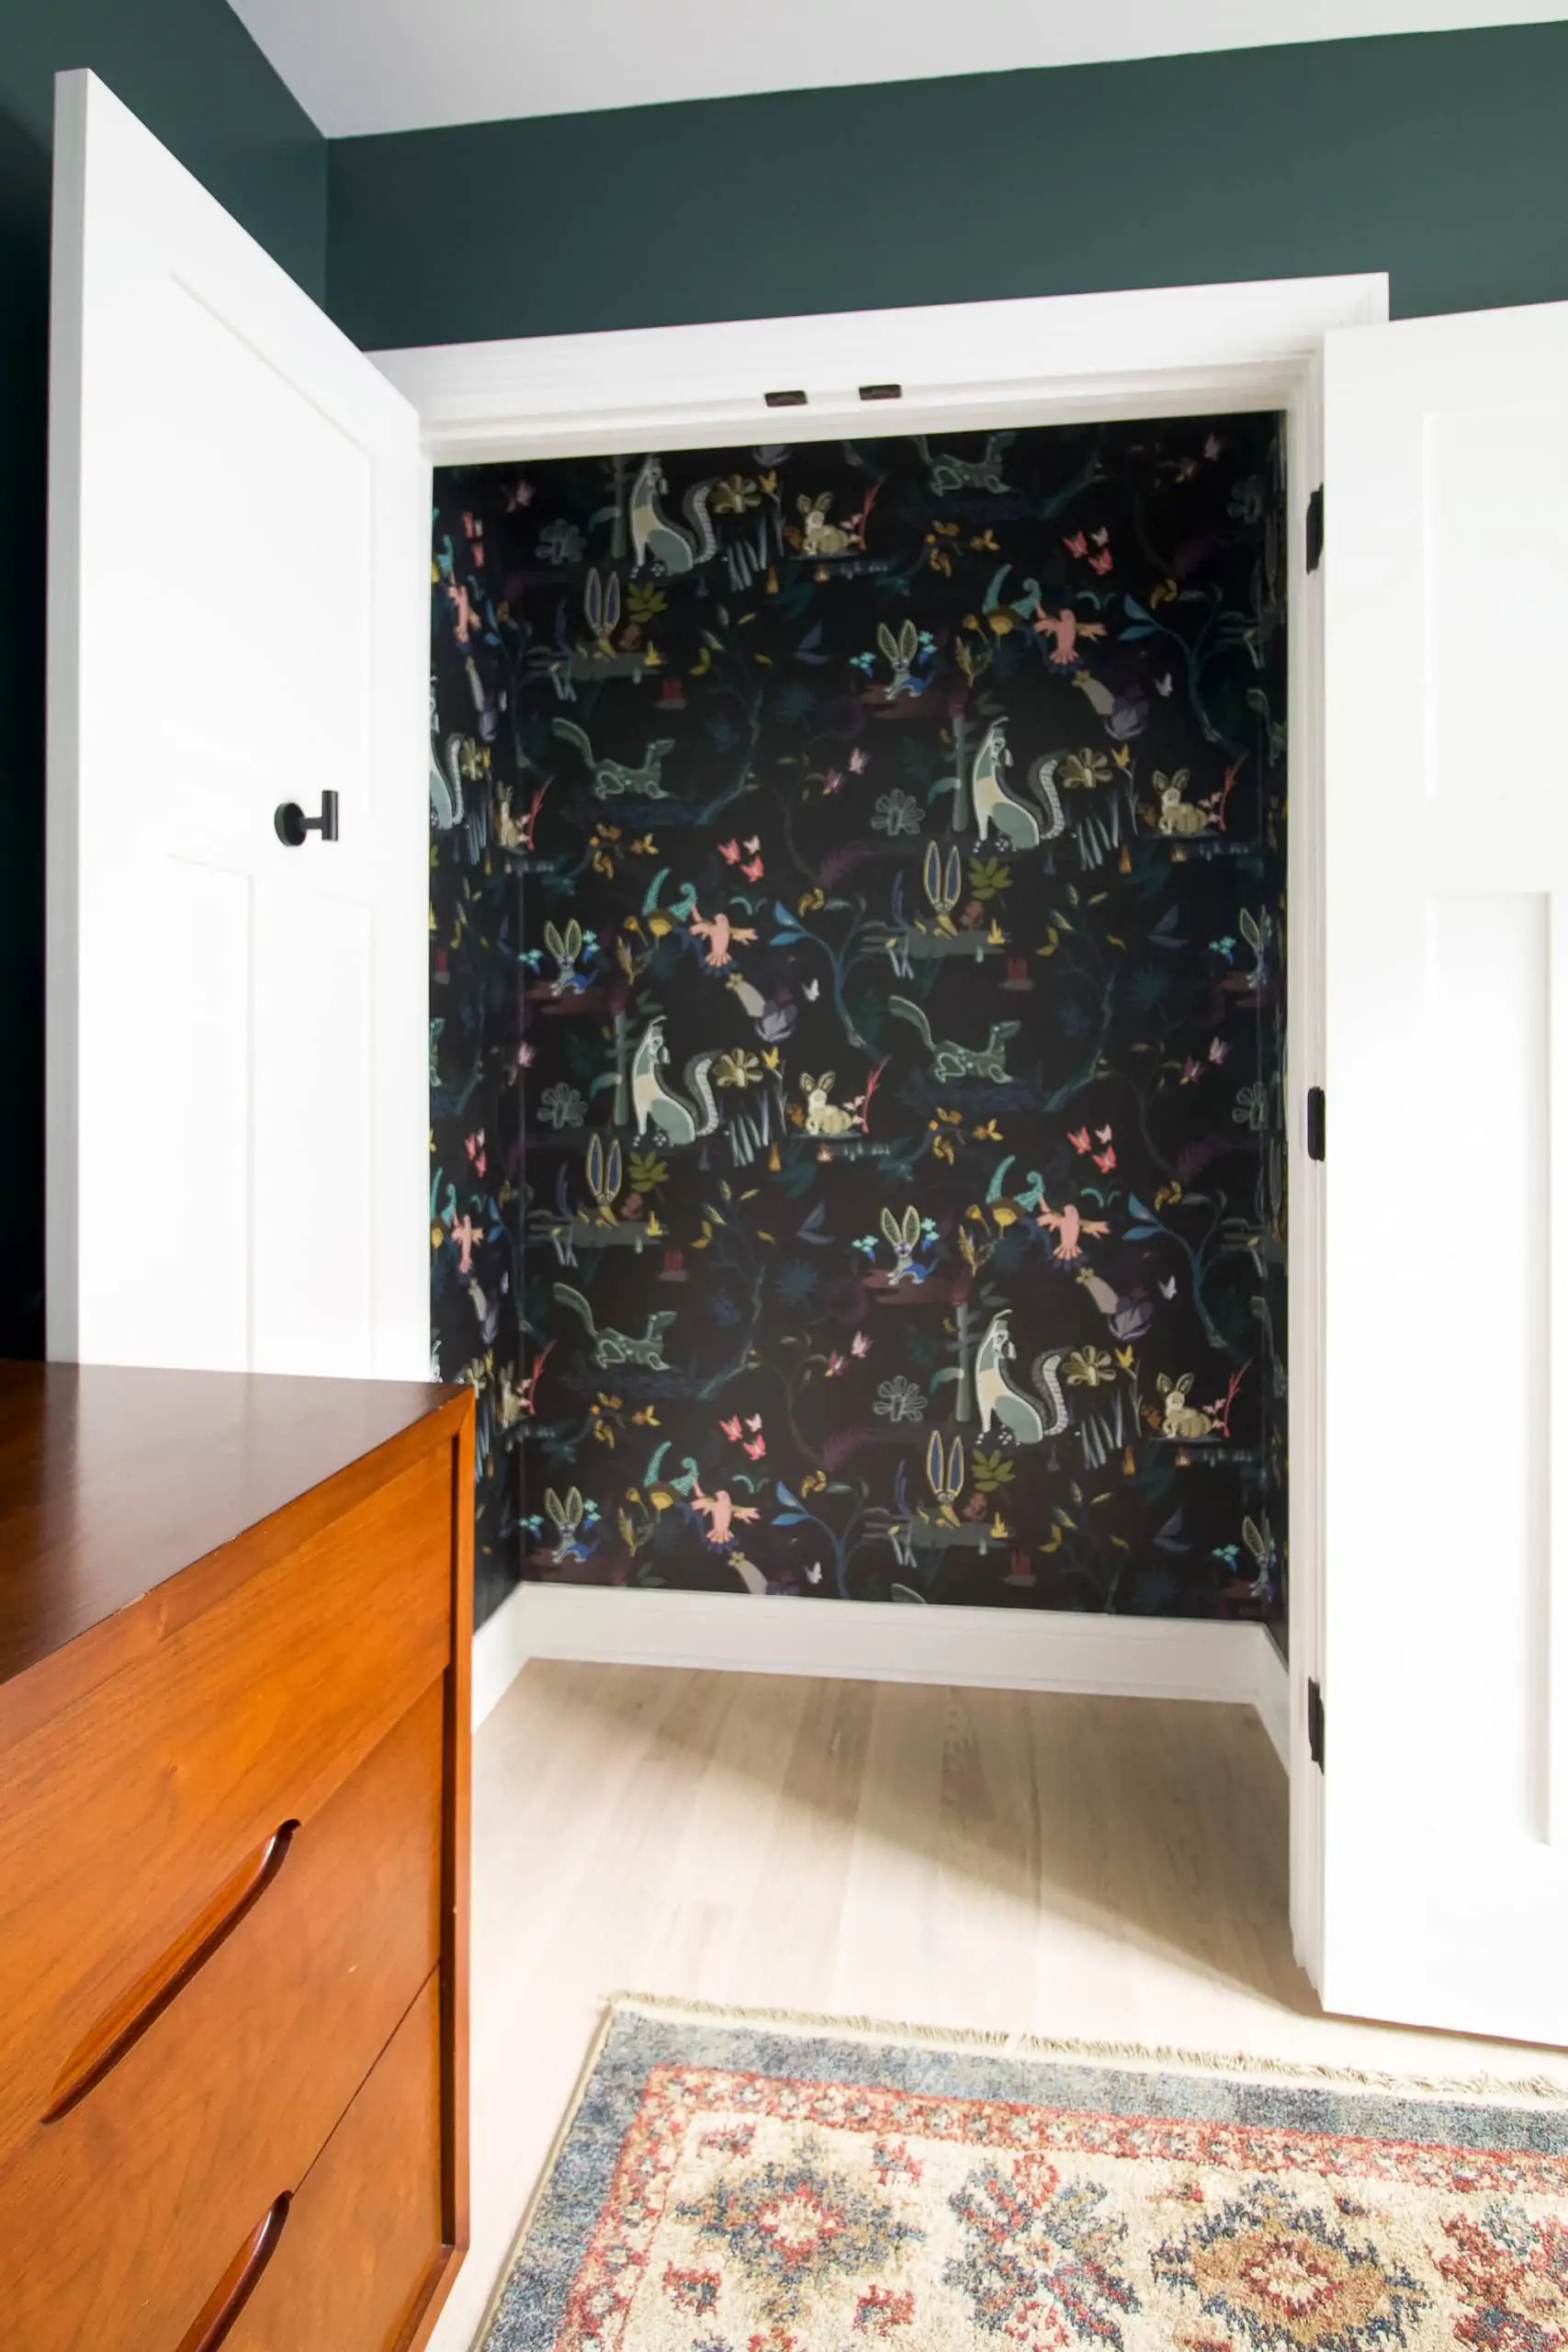
There’s more cutting and detail work compared to doing a full wall. I usually recommend starting in a smaller space—like a closet—to get comfortable, then trying a full wall, and then working your way up to something like this.
Can you do this on just one wall?
Yes! That’s exactly what I did here. But I also think this would look really beautiful in a full room, especially in a dining room or bedroom.
Can you remove wallpaper easily after doing this?
Yes, especially if you prep your walls properly. Using a wallpaper primer beforehand makes a big difference. I share my step-by-step guide to removing wallpaper right here.
Final Thoughts
I’m honestly so happy with how this wall turned out.
Adding wallpaper inside the picture frame molding brought in this really subtle, traditional element that I wasn’t necessarily expecting—but now that it’s in here, it just works. It makes the space feel more custom and layered, while still keeping things bright and not too heavy.
I love the pattern I chose, and I love this approach in general. It feels elevated without being over-the-top, which is always the goal.
If you’ve been thinking about trying wallpaper or adding molding somewhere in your home, this is such a fun way to combine the two. It takes a little planning, but the end result is 100% worth it.
Next up, new office furniture. We’re inching to the finish line with my office refresh…