Deciding On Our New Kitchen Layout
Last week, I shared the before photos of our kitchen and all of the challenges we are hoping to overcome. I’ve spent over a year staring at this large space, trying to picture a new kitchen layout and flow for this area. I just couldn’t quite figure out how we were going to maximize the space and make it flow well for our family.
I’m happy to say that we finally landed on a new kitchen layout that really makes sense for this space. But before we dive into those details, let’s take a look at the blueprints of the current layout.
The Current Kitchen Layout

Here’s an overhead view of our current kitchen setup. You see the island in the middle, the sink all the way on the right, the door on the bottom, and the range up top. 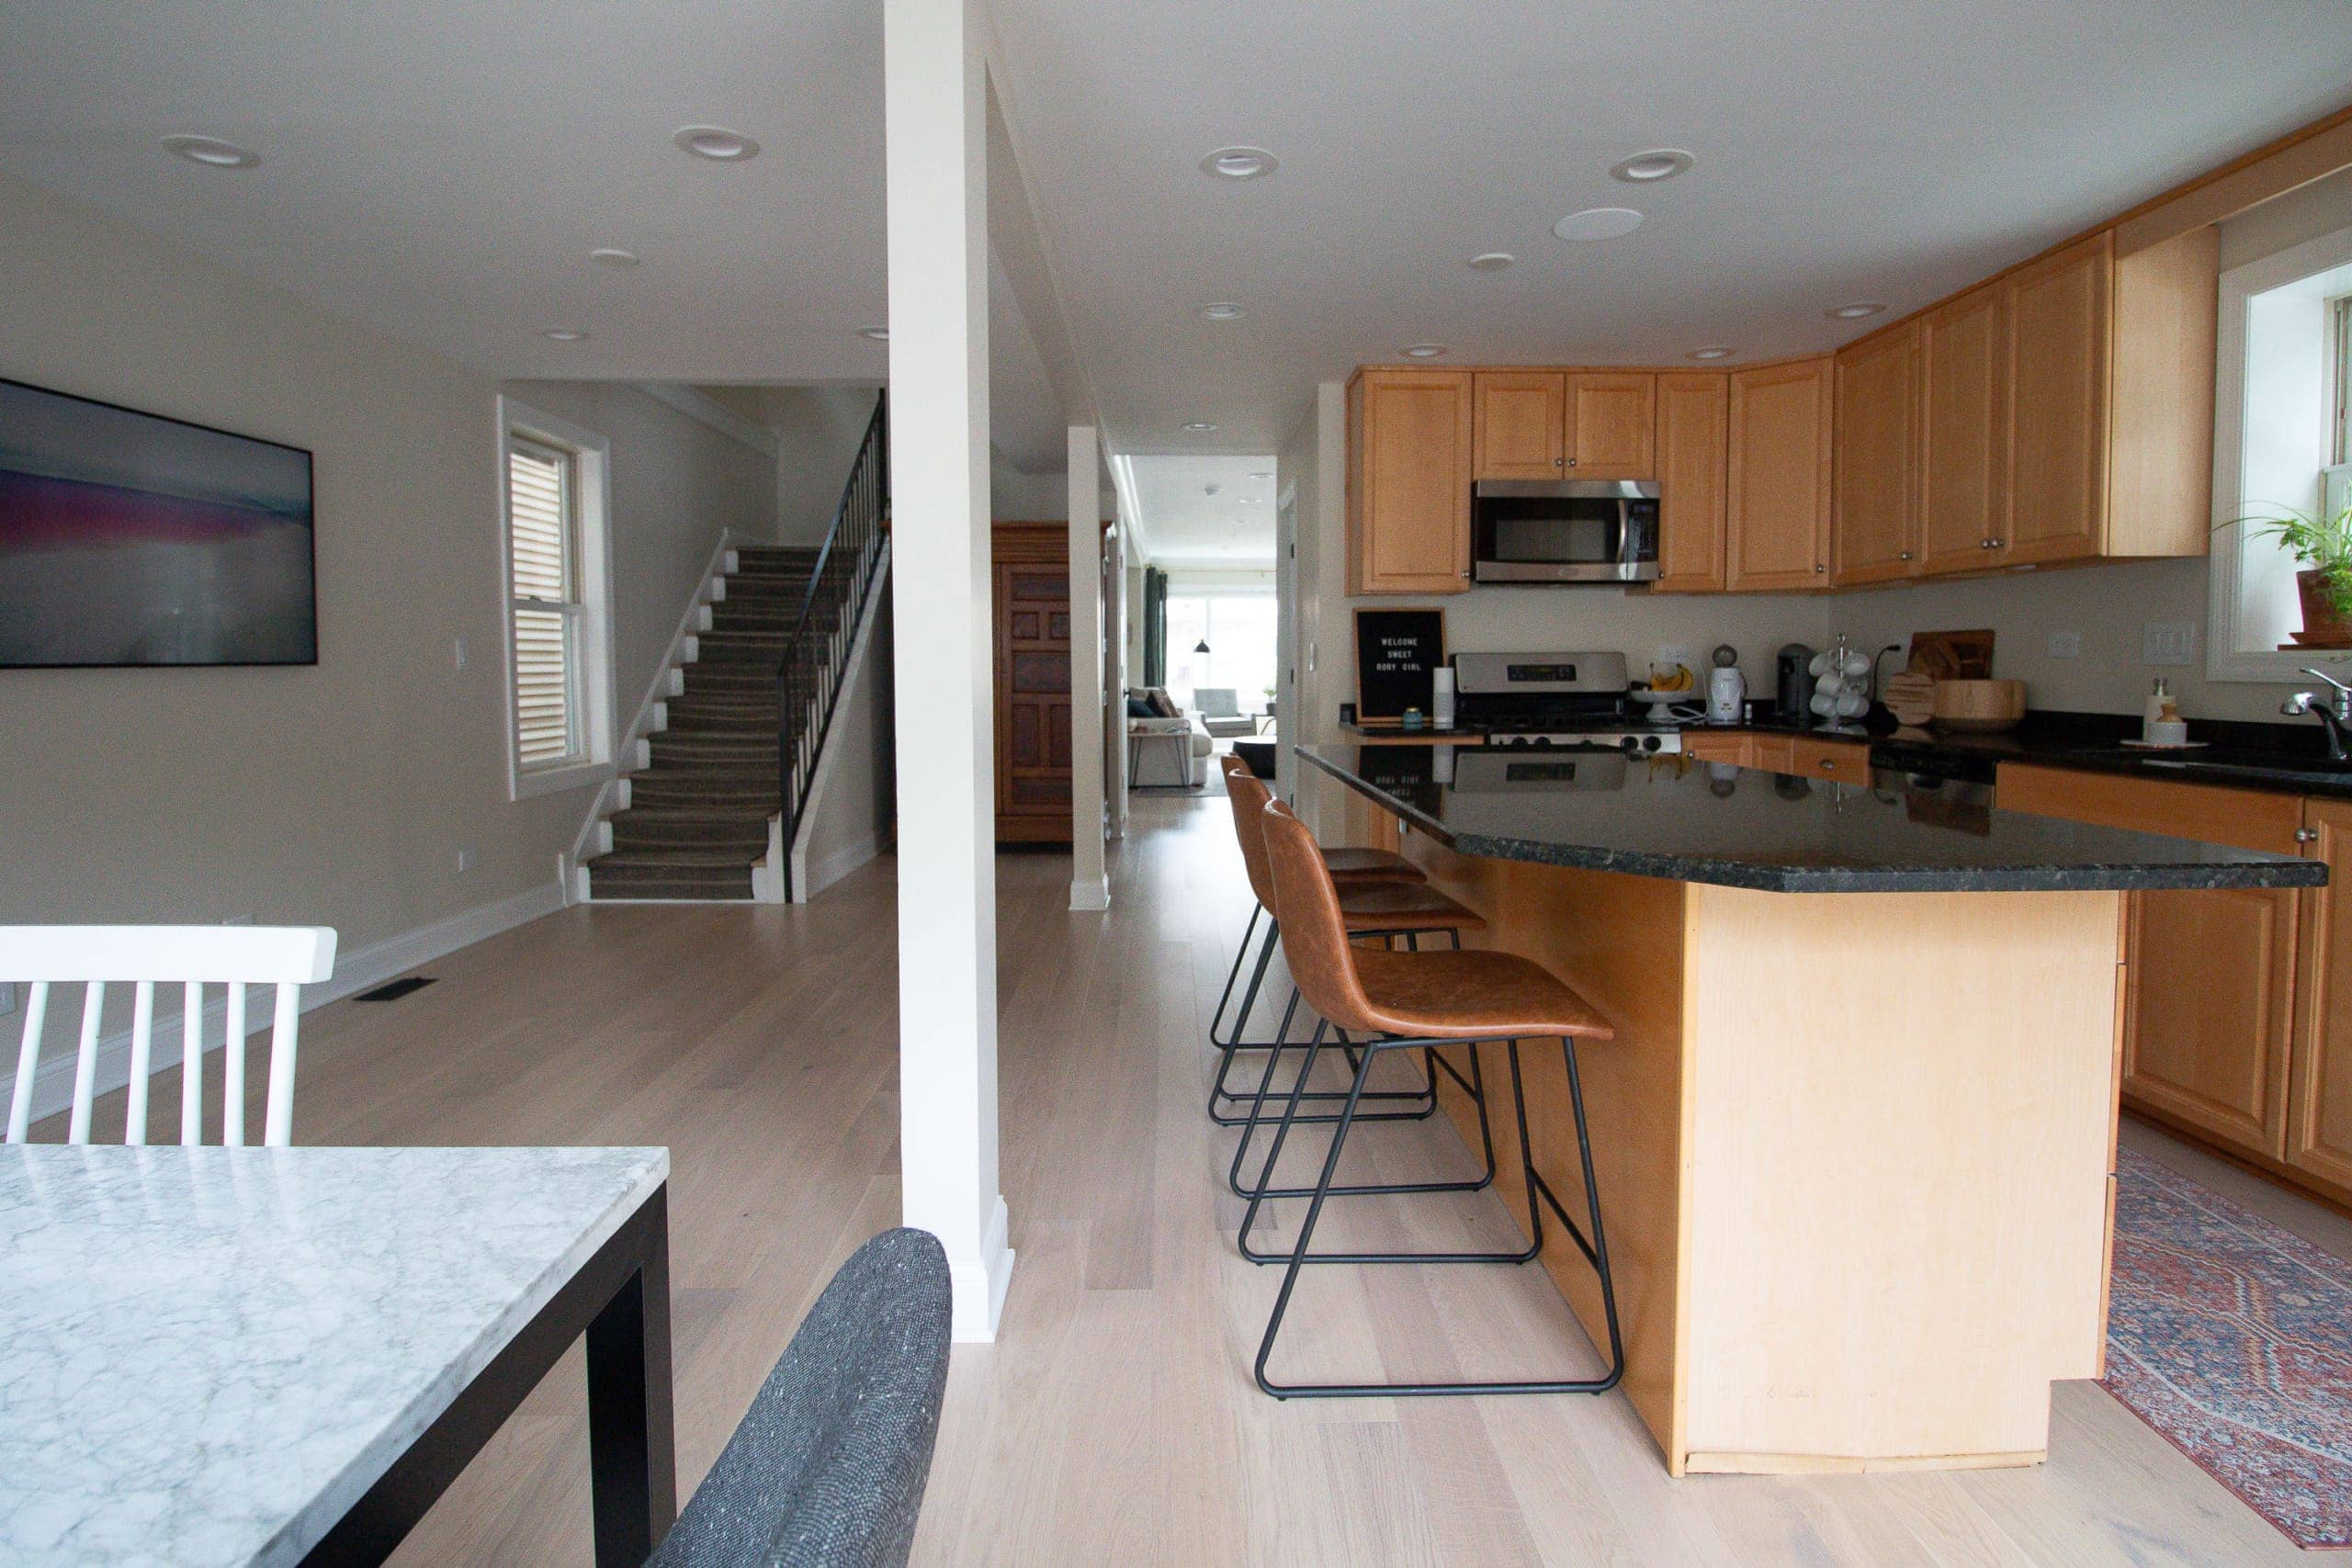
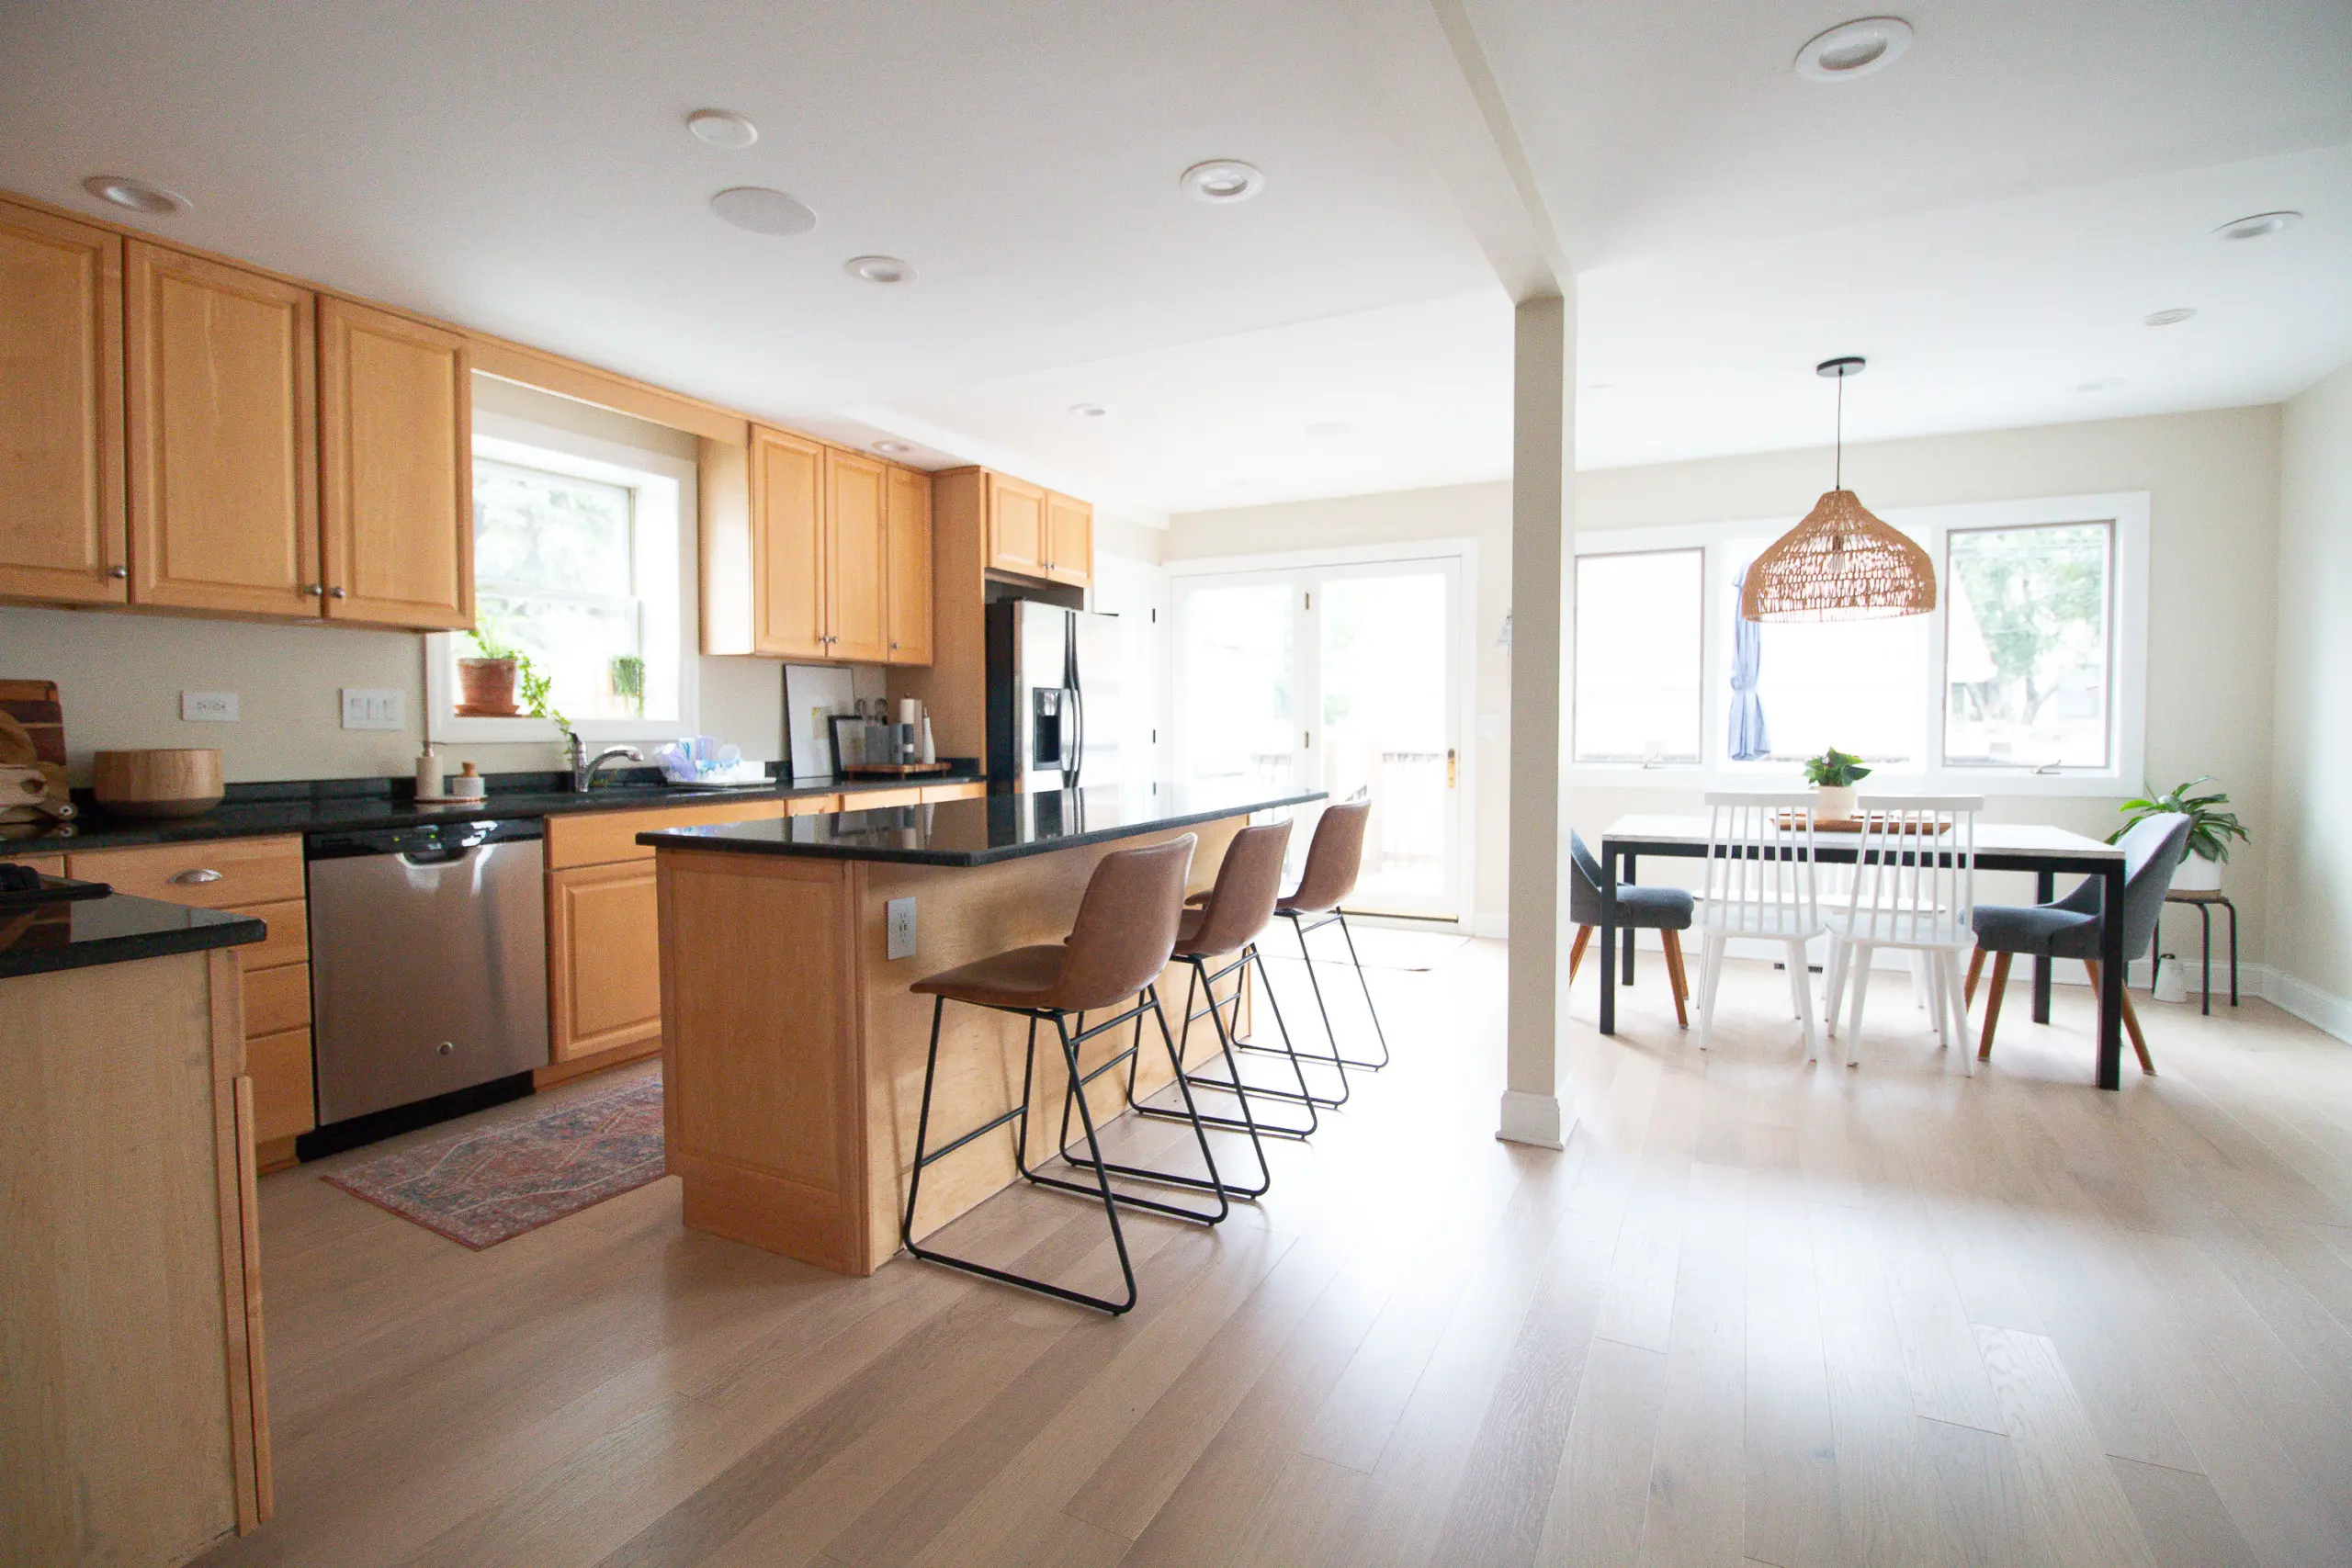
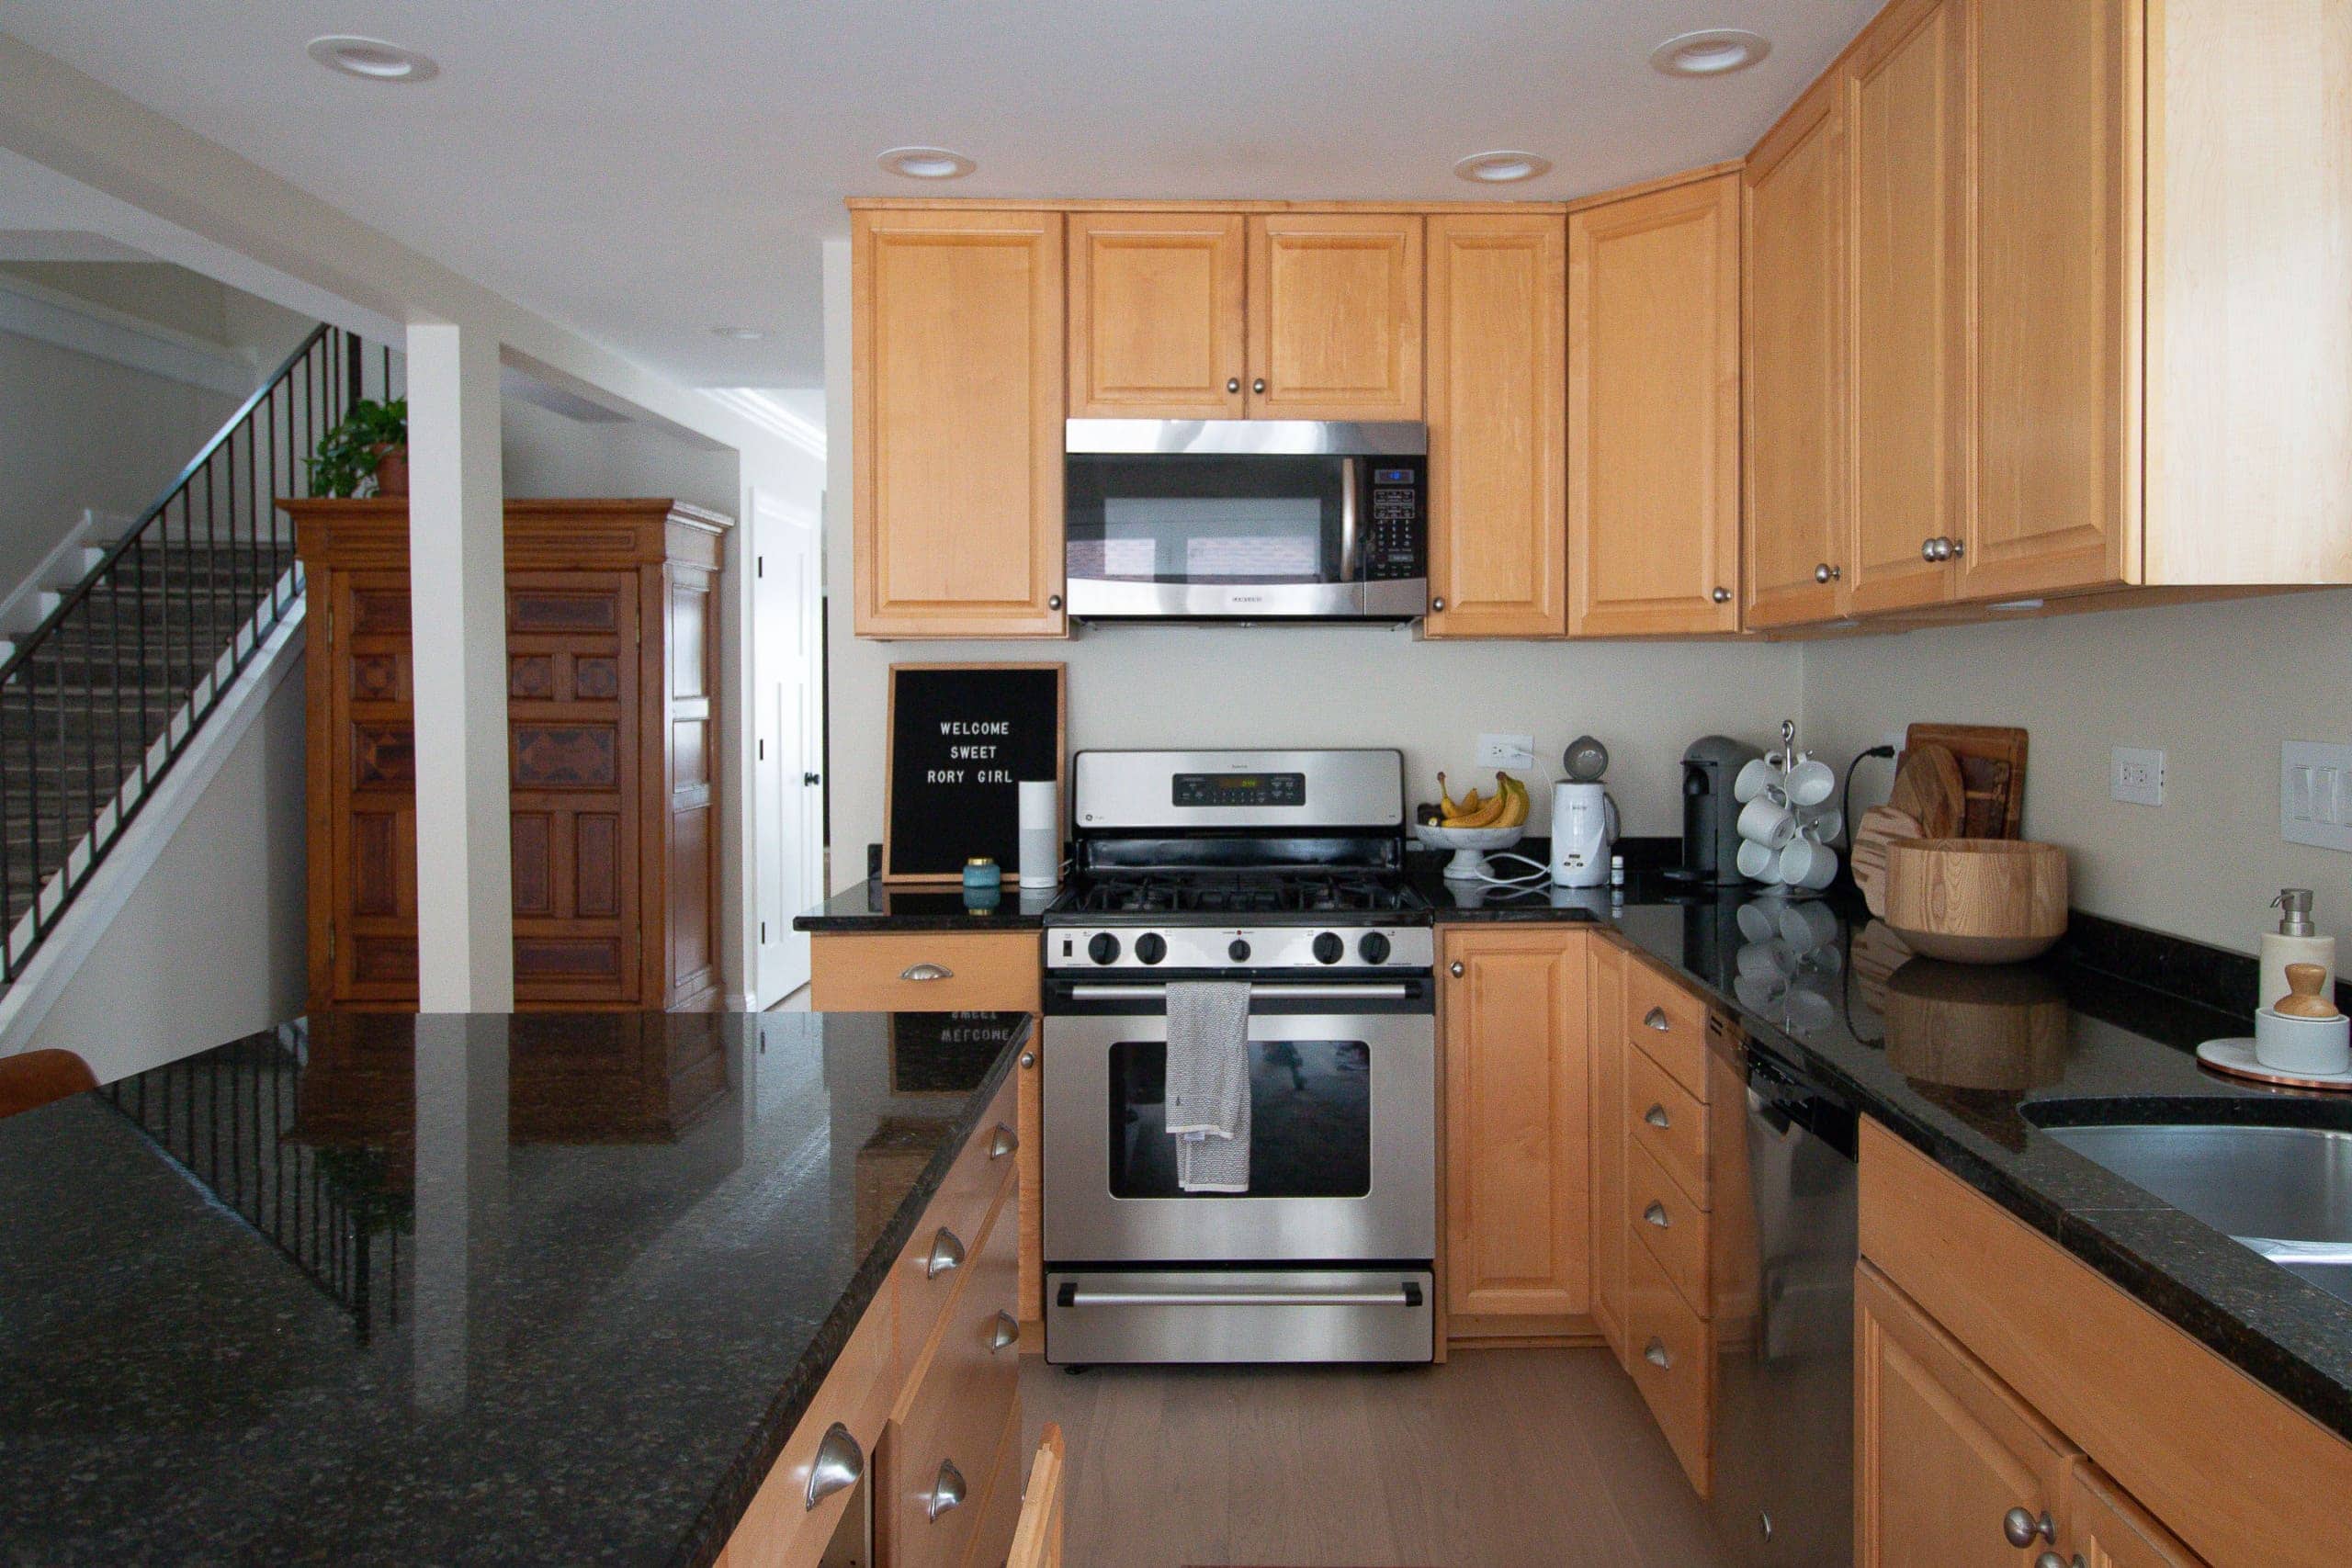
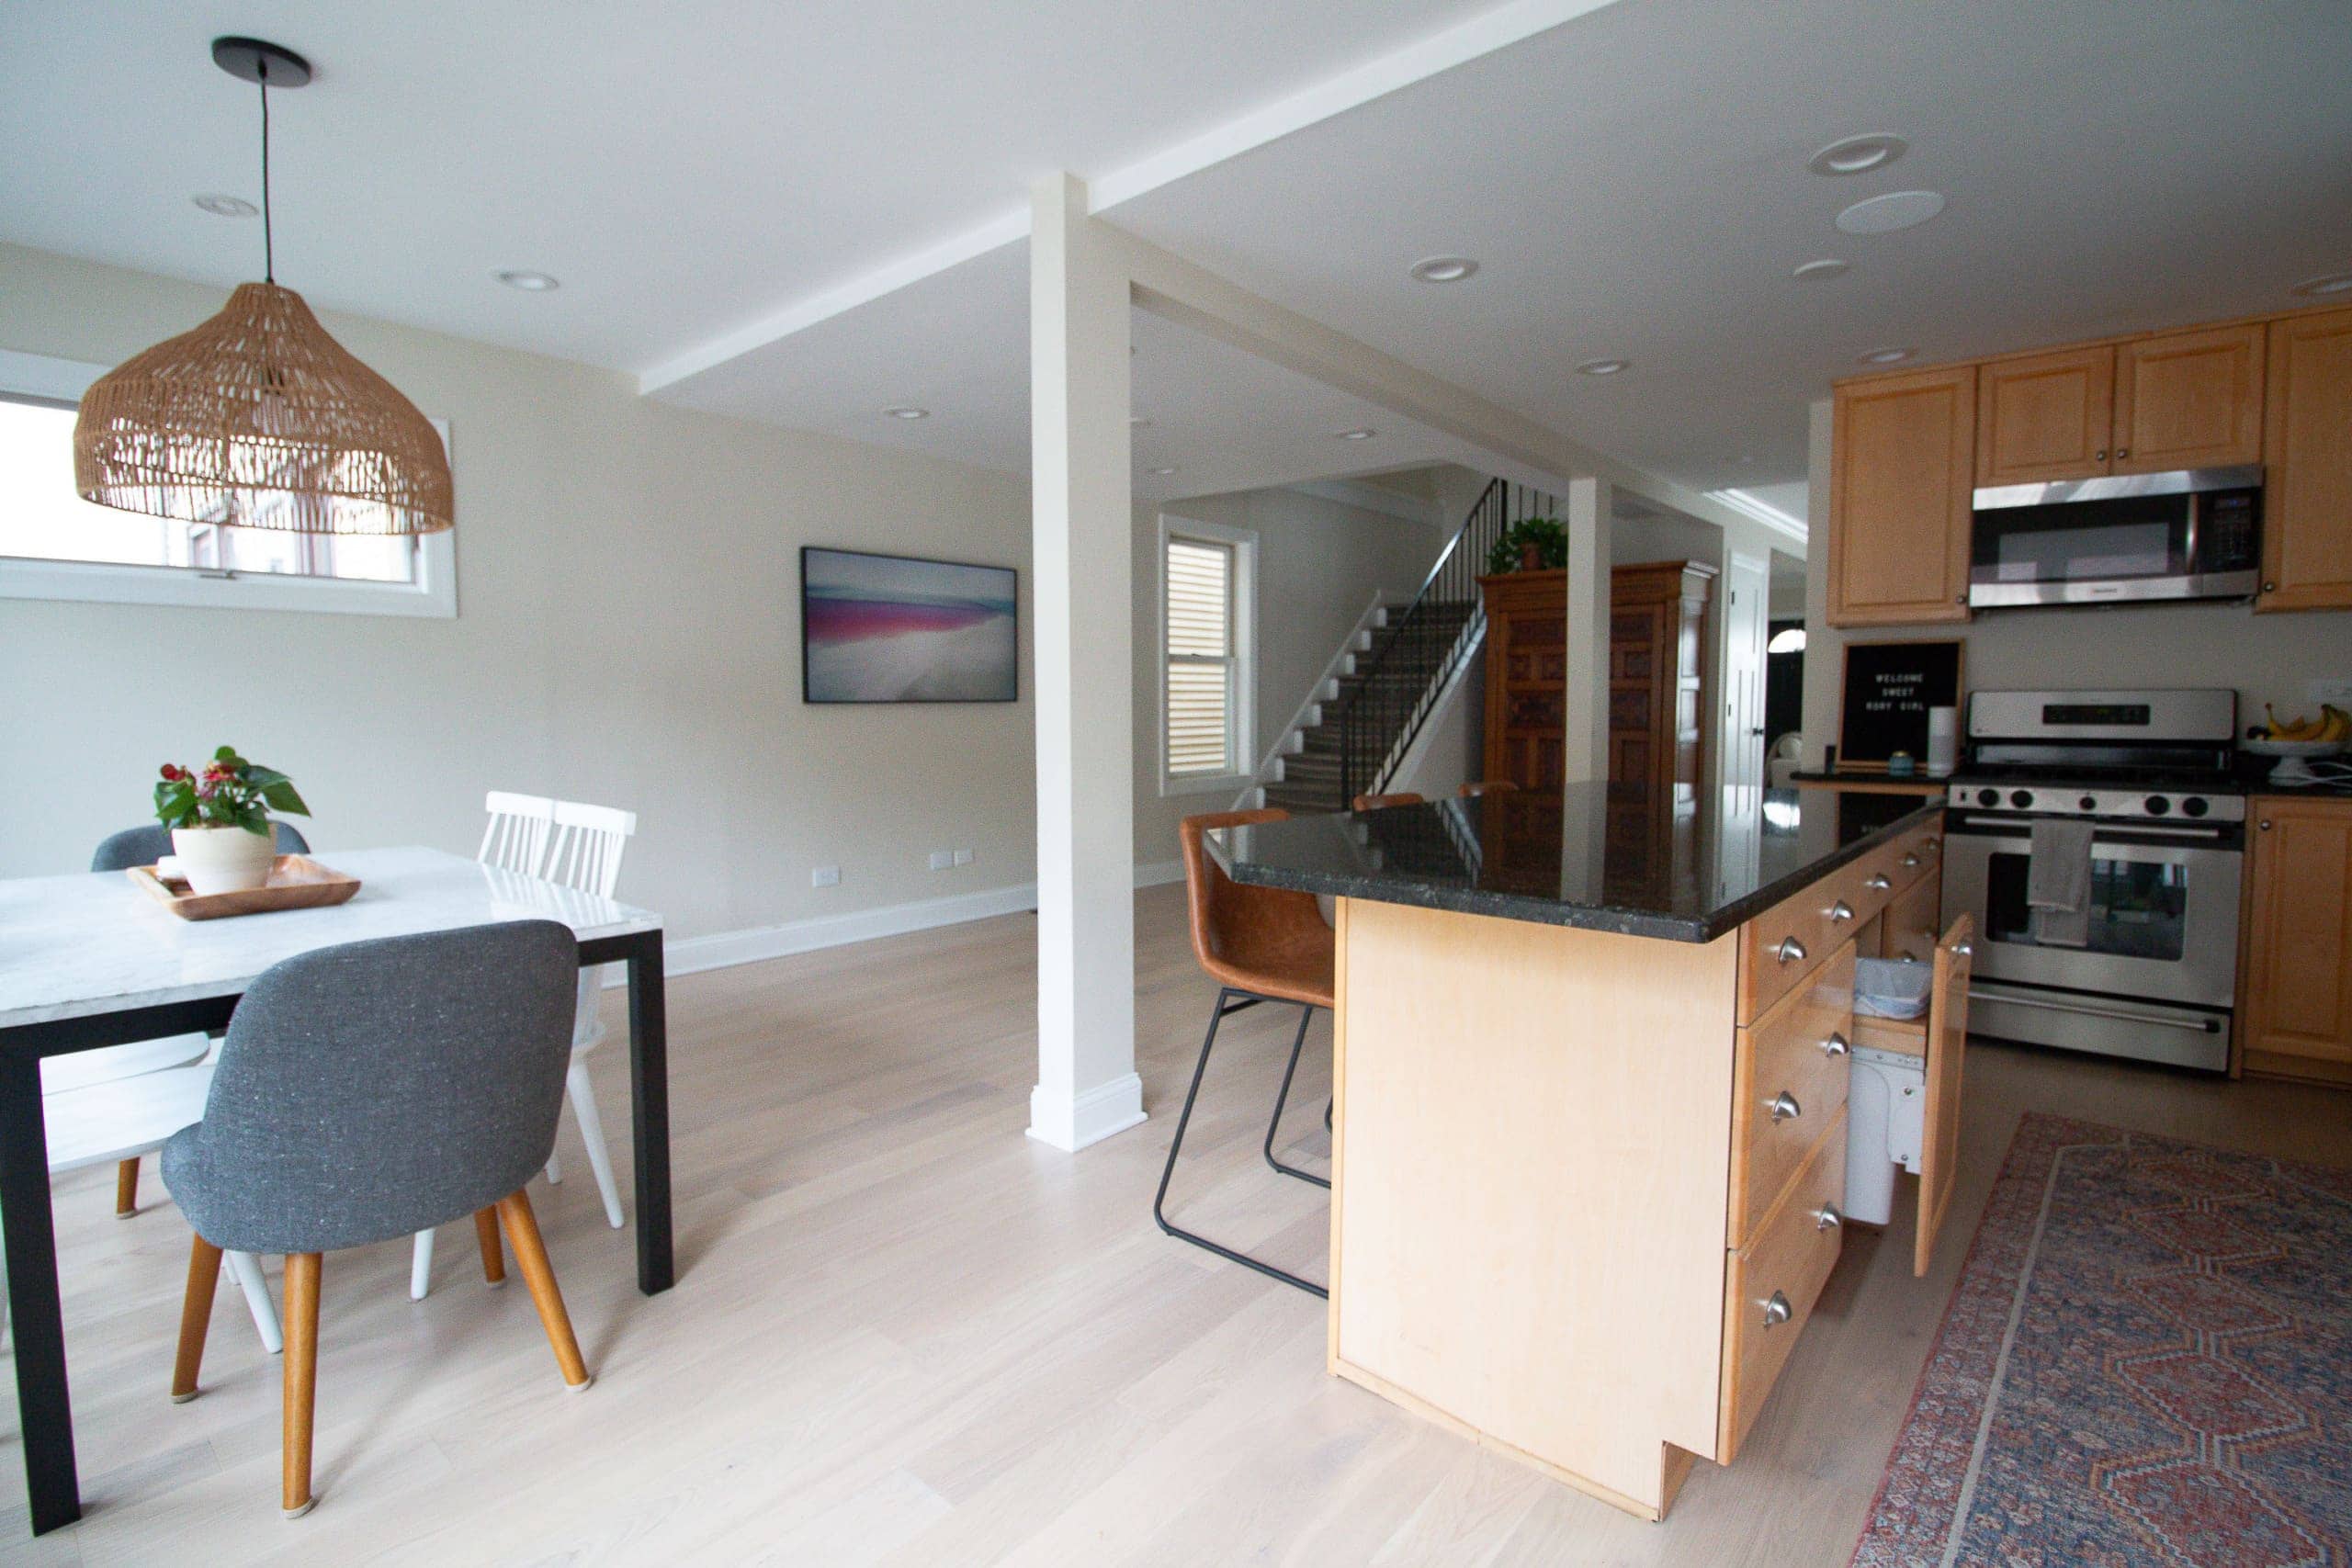
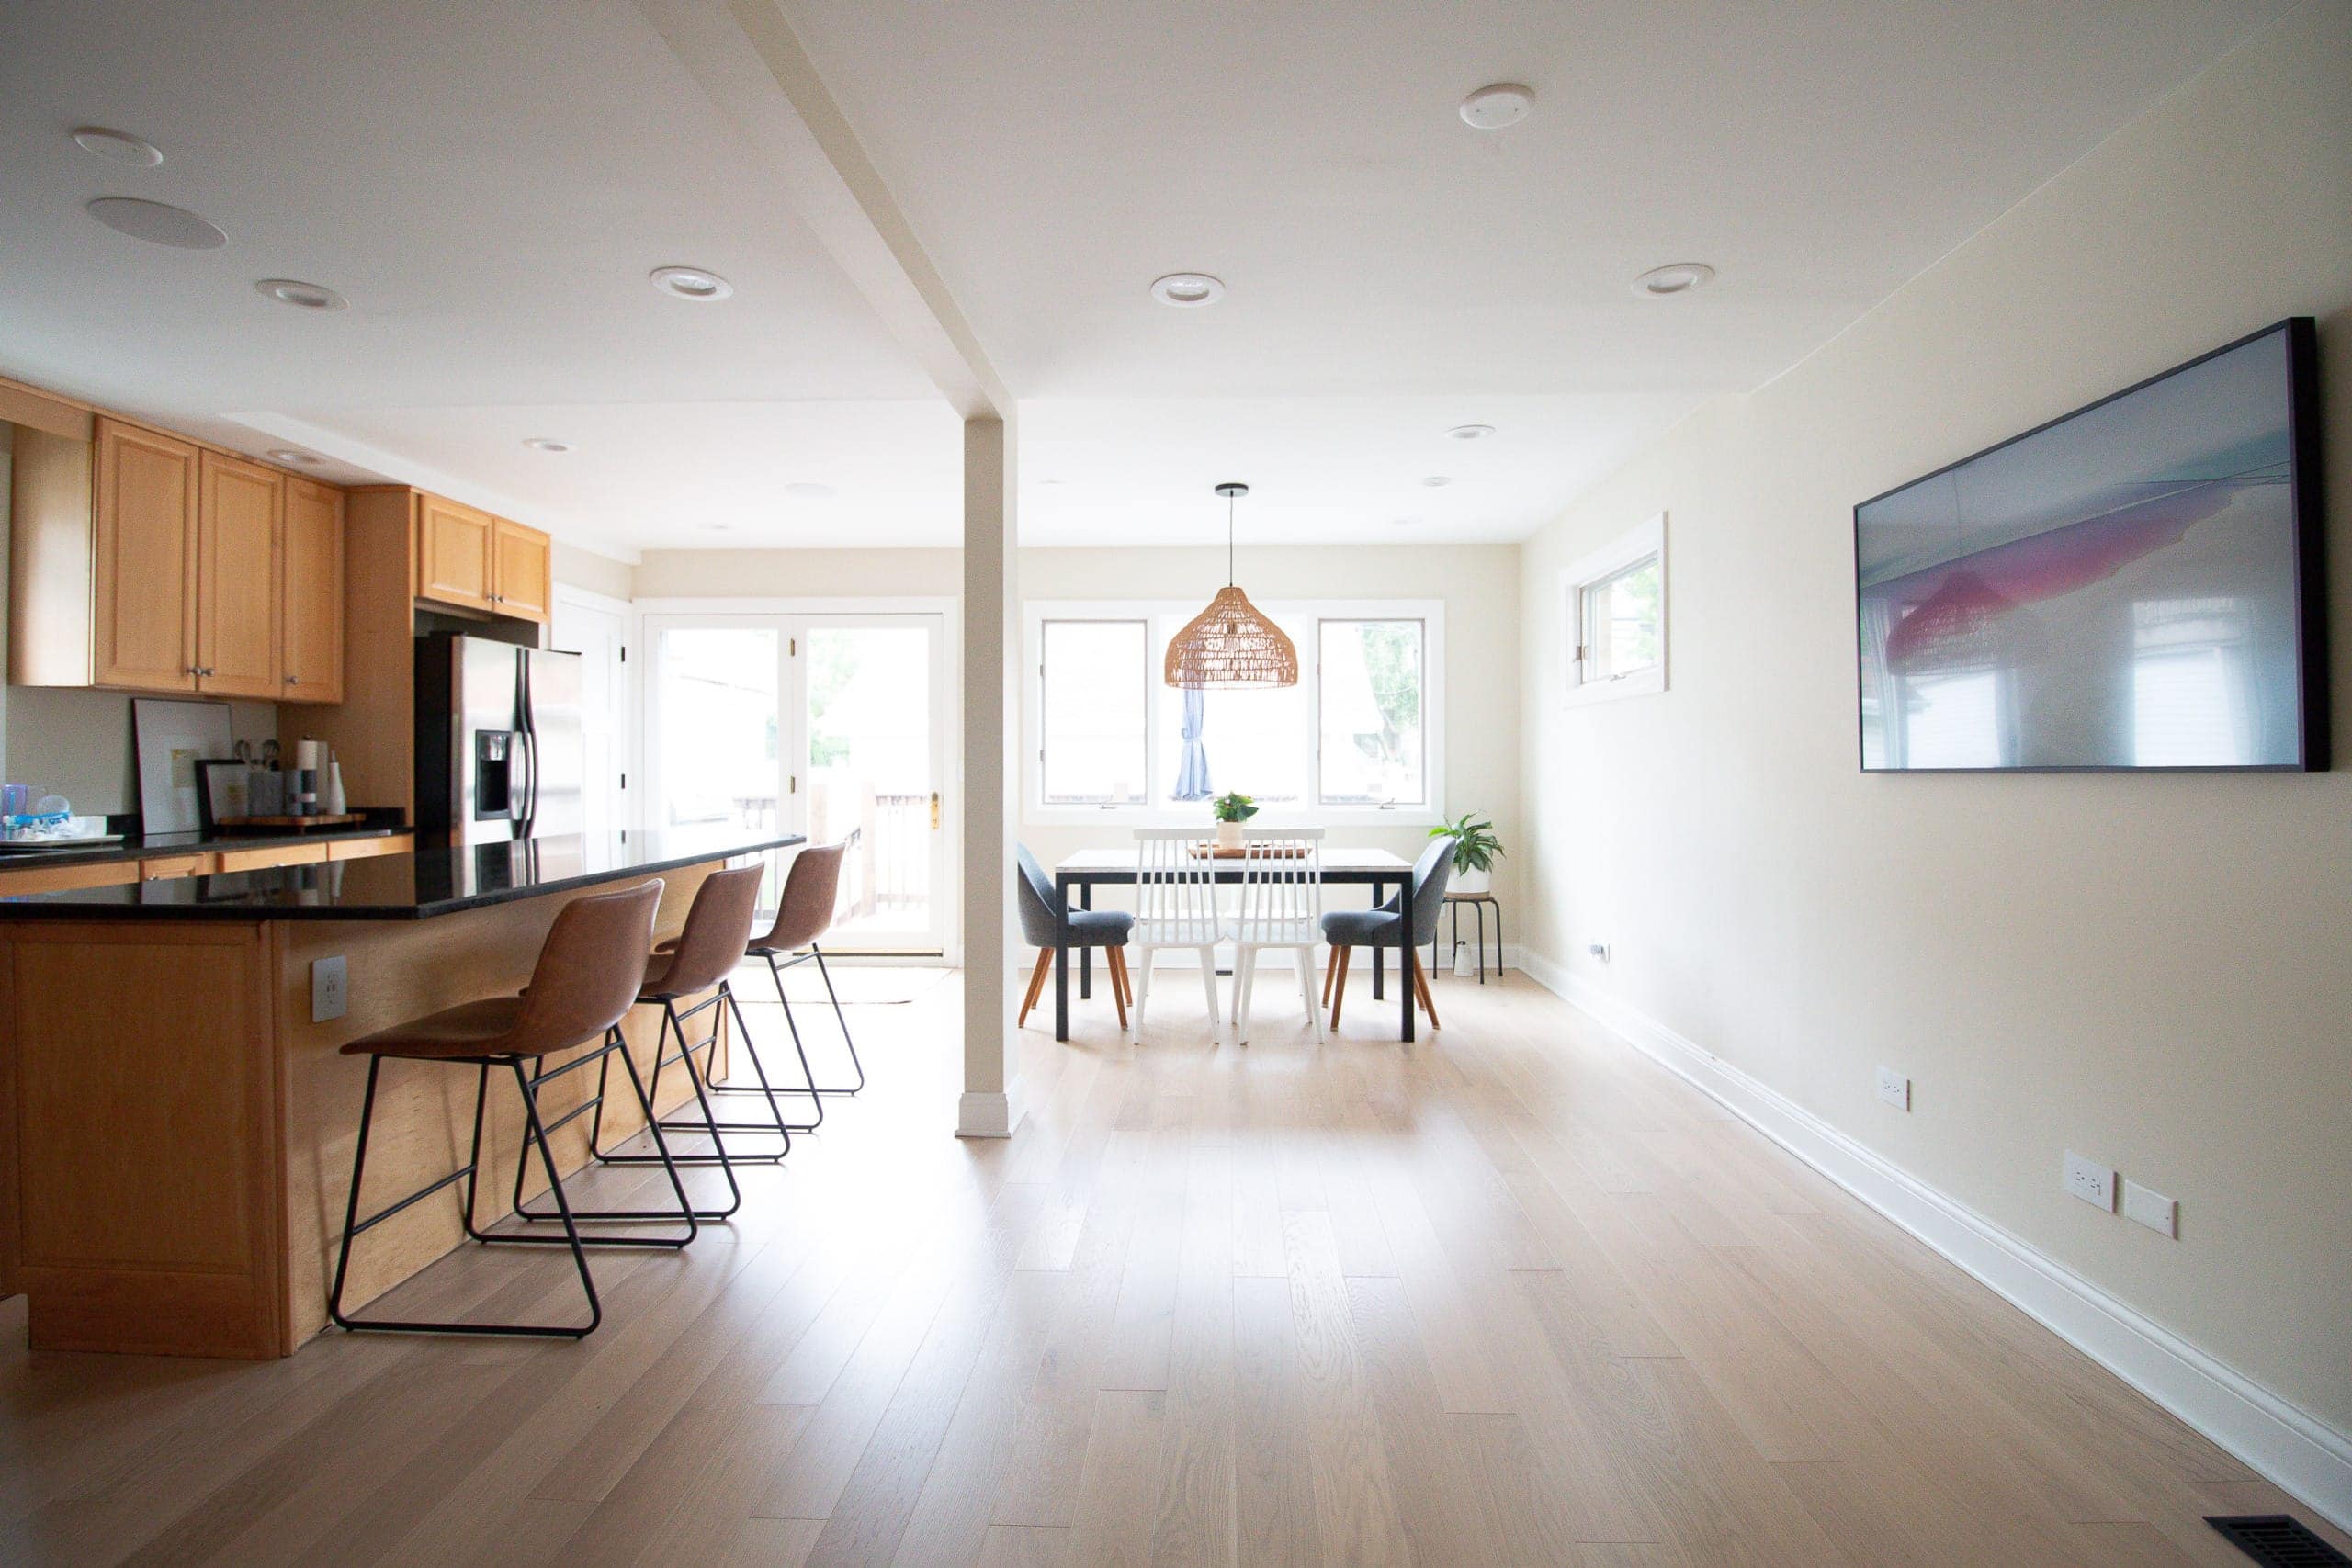 Here are a few wide views of the kitchen in real life. The biggest challenge I wanted to overcome with the new design was making it feel like one cohesive space. As of now, the right side of the room is empty and bare and the dining area feels very disjointed. We also aren’t making the best use of the space with only our Frame TV up on that long wall.
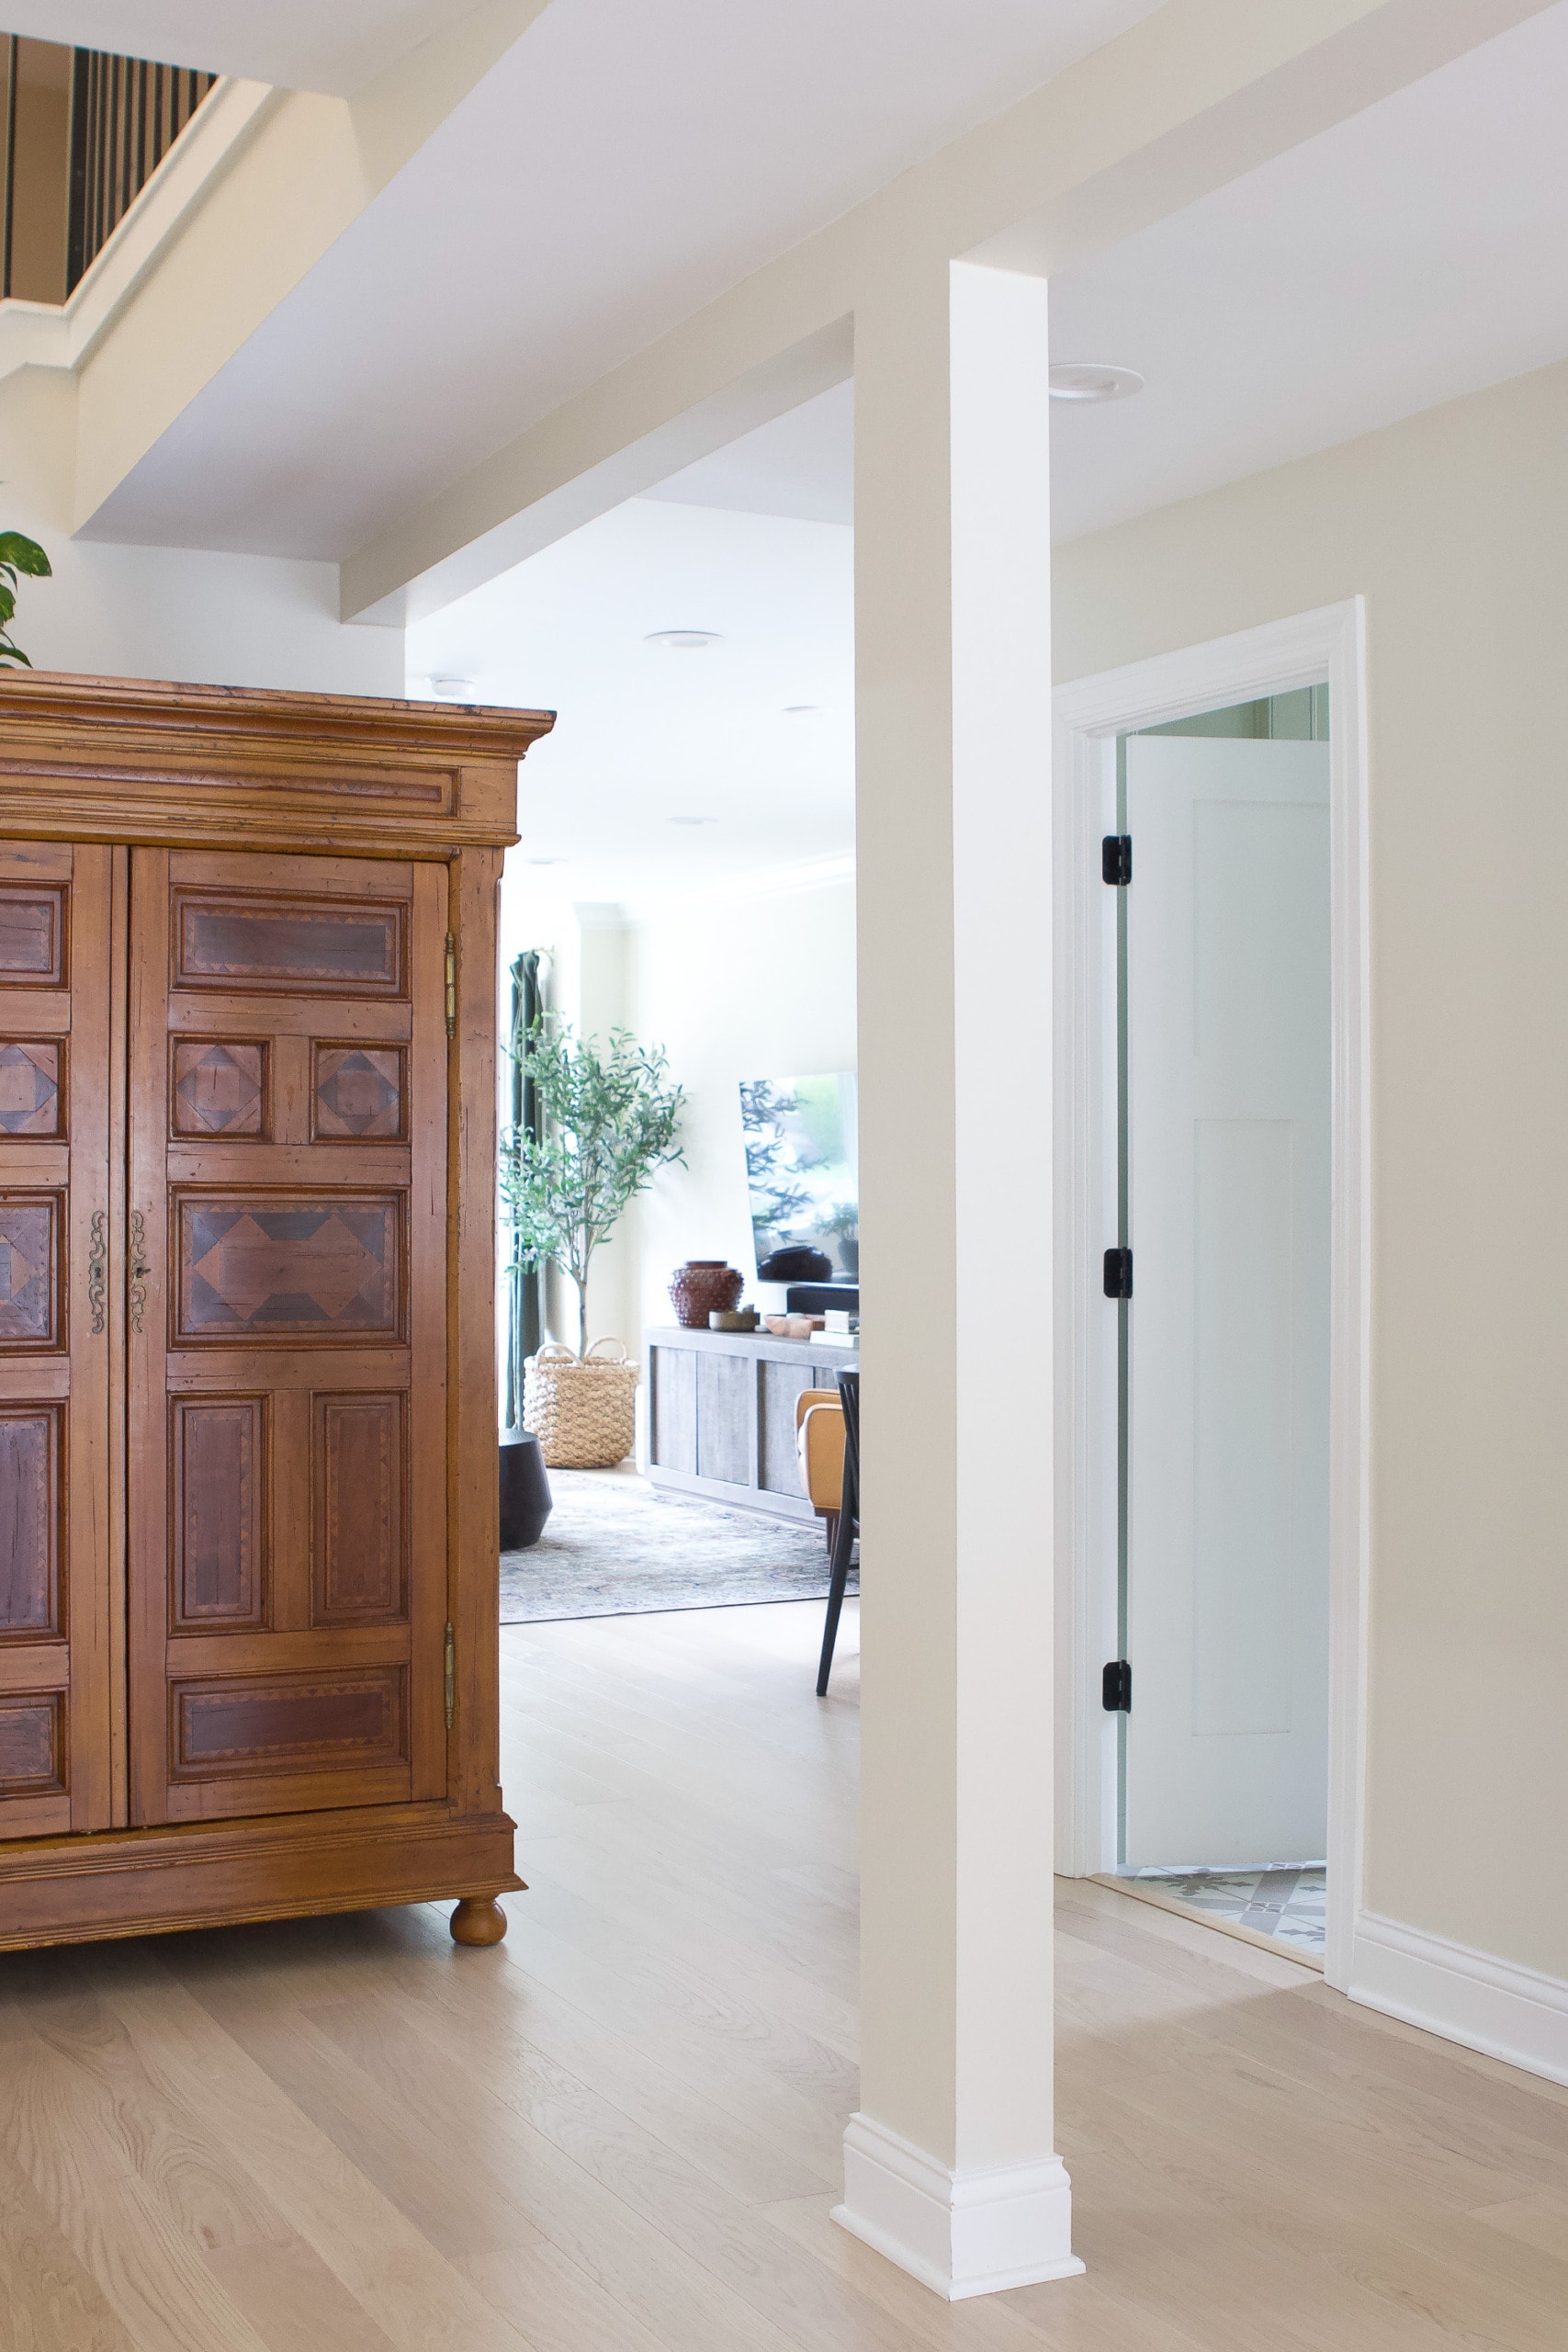
The other challenges are the two posts in the kitchen. I originally hoped that we could get rid of them and put a new steel beam in. However, after consulting with a structural engineer and the beam installer (my good friends at American Beam and Steel), it isn’t possible with a span this long. The beam would have to be so thick that the ceiling would come down way too low. Not to mention, it would have tripled our kitchen renovation budget. So, the two posts have to stay and become a part of the new design.
Our New Kitchen Layout
As I mentioned last week, I worked with Claire from Centered by Design to create the new kitchen layout. She took all of the measurements, drew up two layout options, and then we chose the one that we felt best suited our needs.
After working with the cabinet designer and meeting with my contractor, we’ve since changed the following layout quite a bit, but for the most part, the big pieces will remain where they’re located in this drawing. Please ignore the measurements for the cabinetry because much of that has changed! 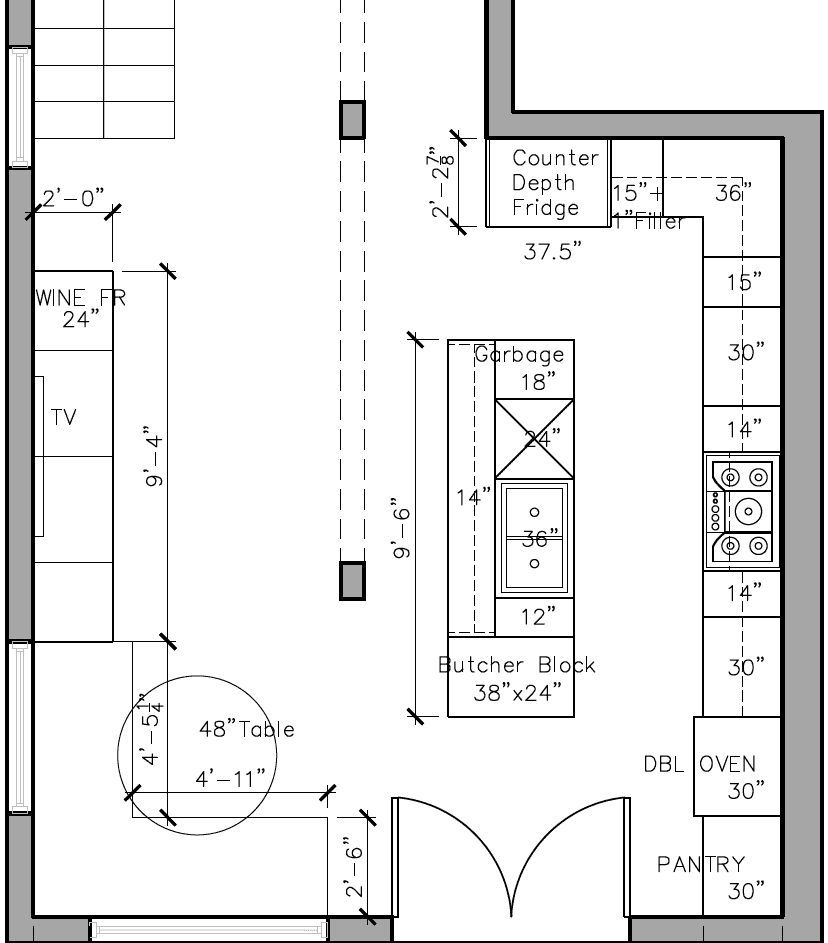
Here’s an overhead view of our new kitchen setup! Essentially all of the appliances have been moved. The sink is in the island, the fridge is on the top, and the double oven and range are to the right. On the left side, you’ll see a wet bar area (well, technically a “dry bar” since we don’t have a sink there). Then, on the bottom, we have a dining banquette and table (so cozy!). 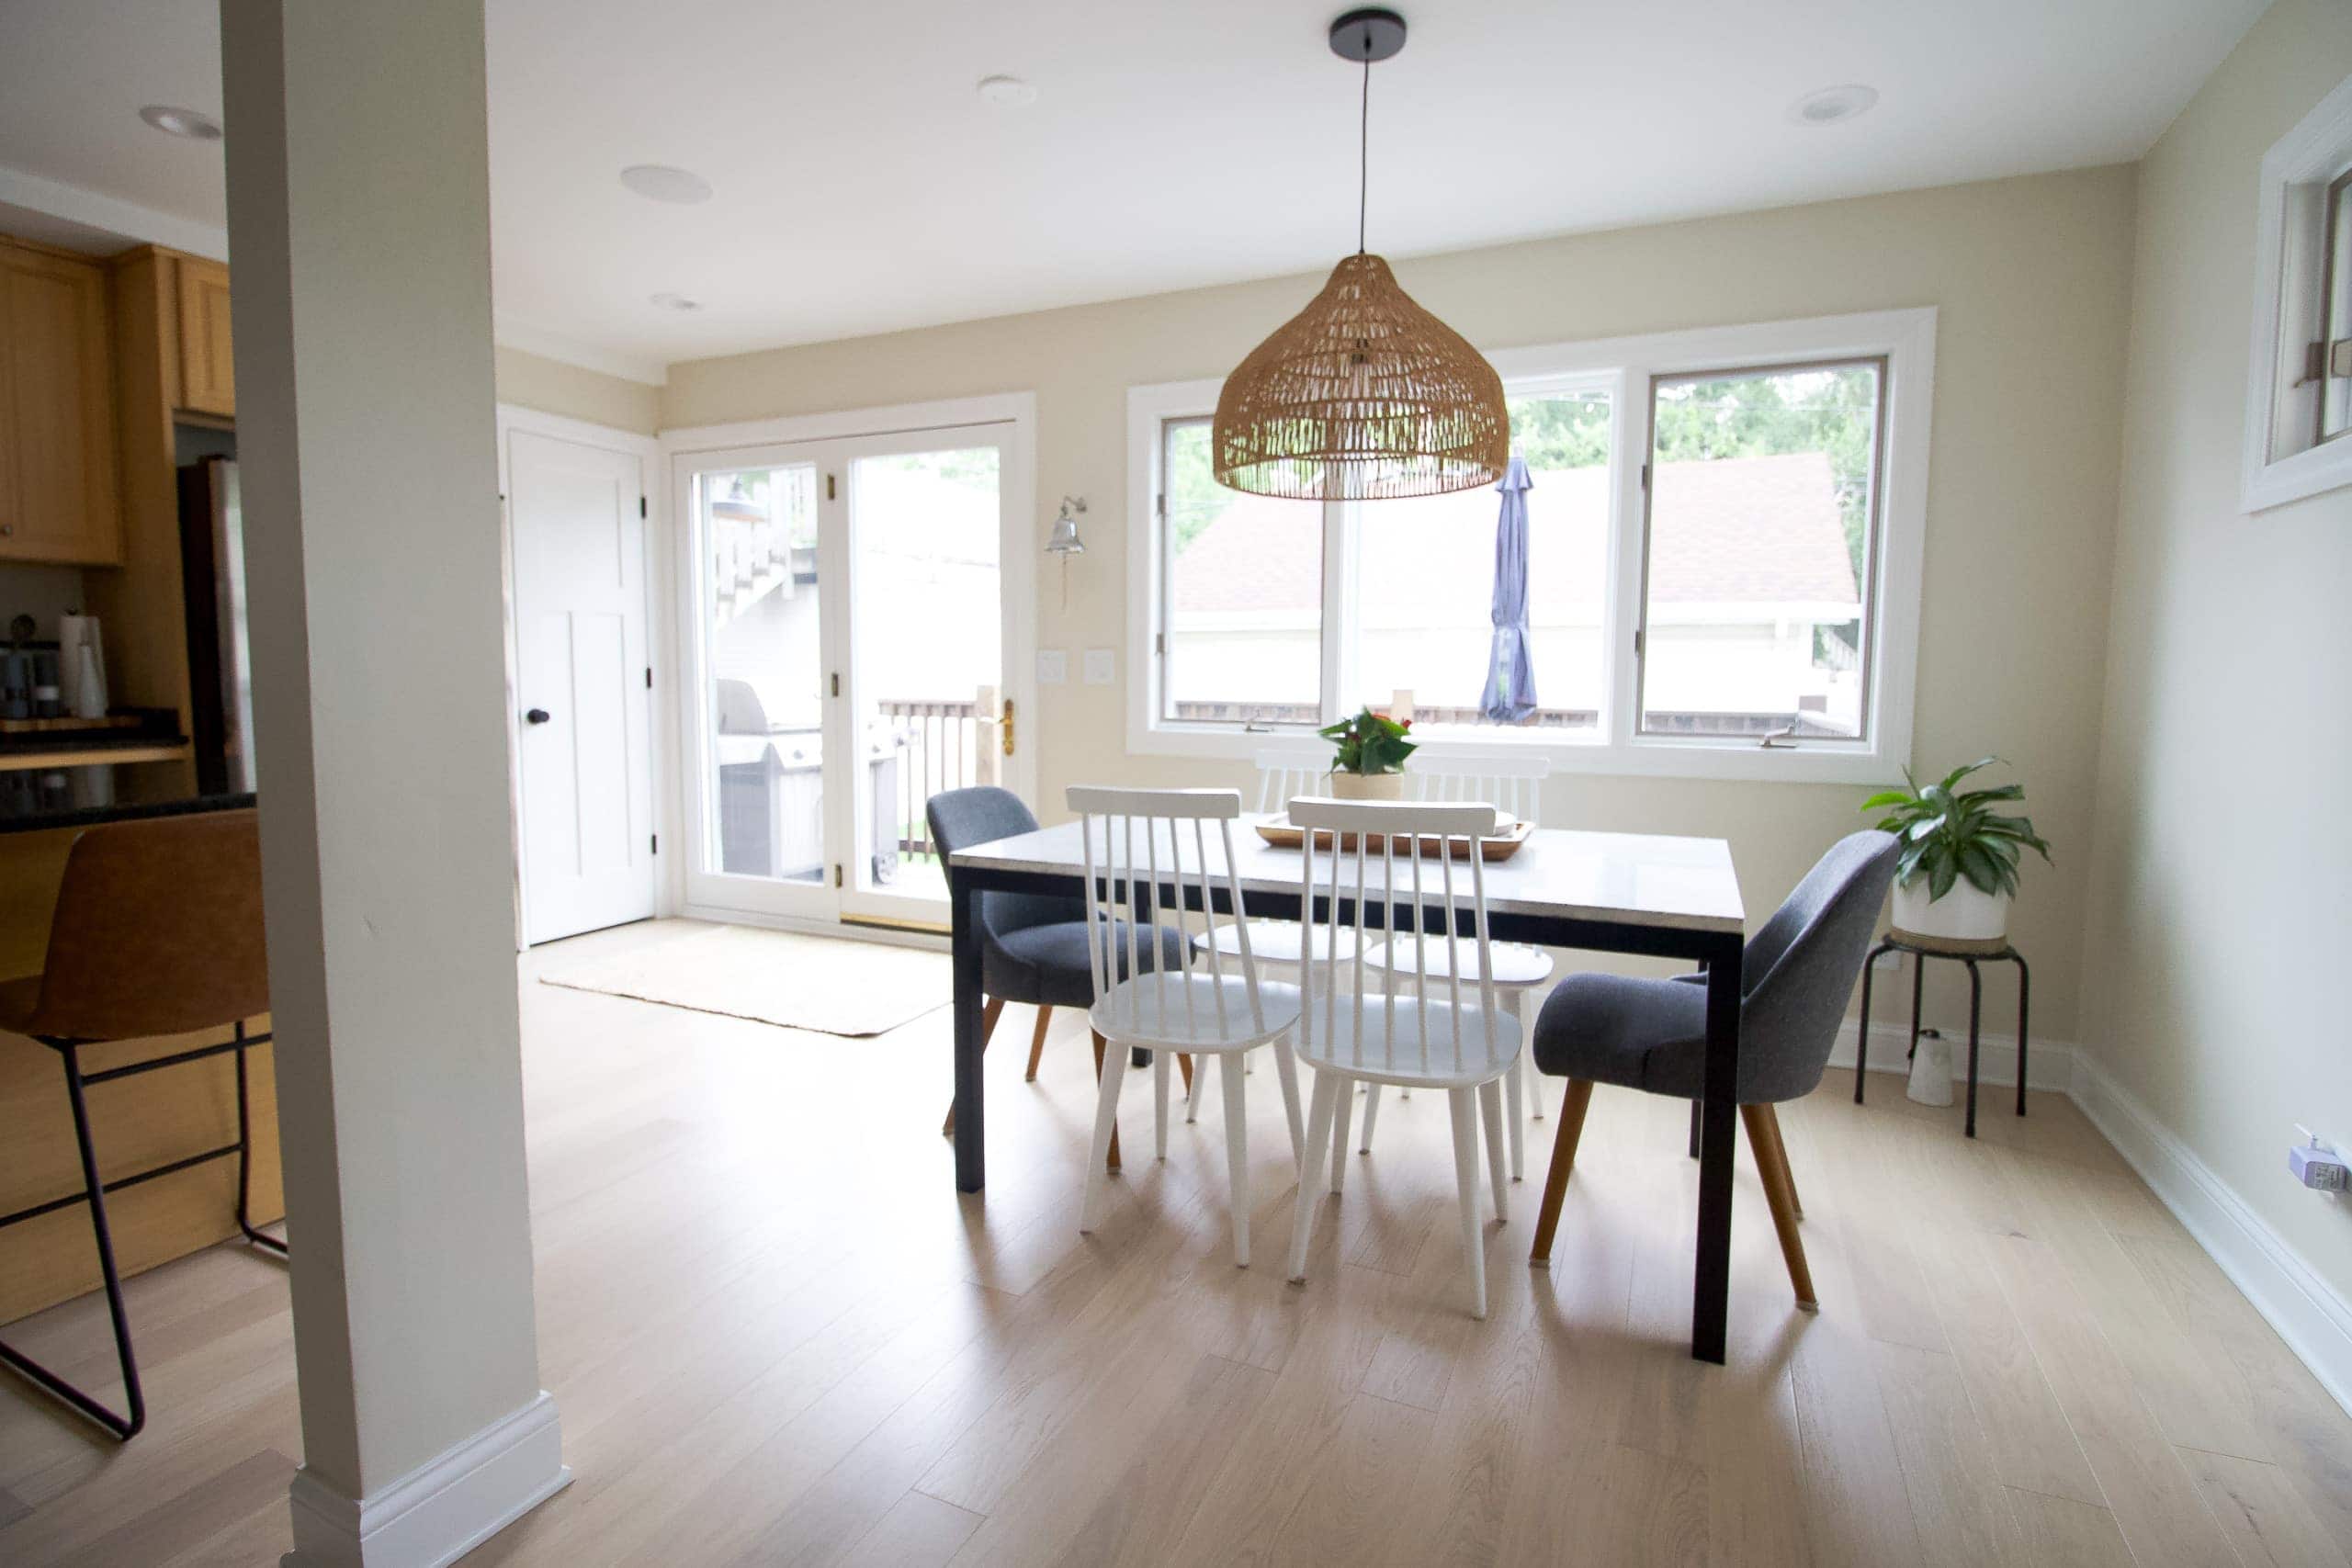
These drawings have French doors and new windows that are moved slightly to the right of the originals. However, after consulting with my contractor, we realized that moving these doors and windows was going to cost an arm and a leg and add weeks onto the project. Instead, we decided to keep these windows in place and get a new sliding door. 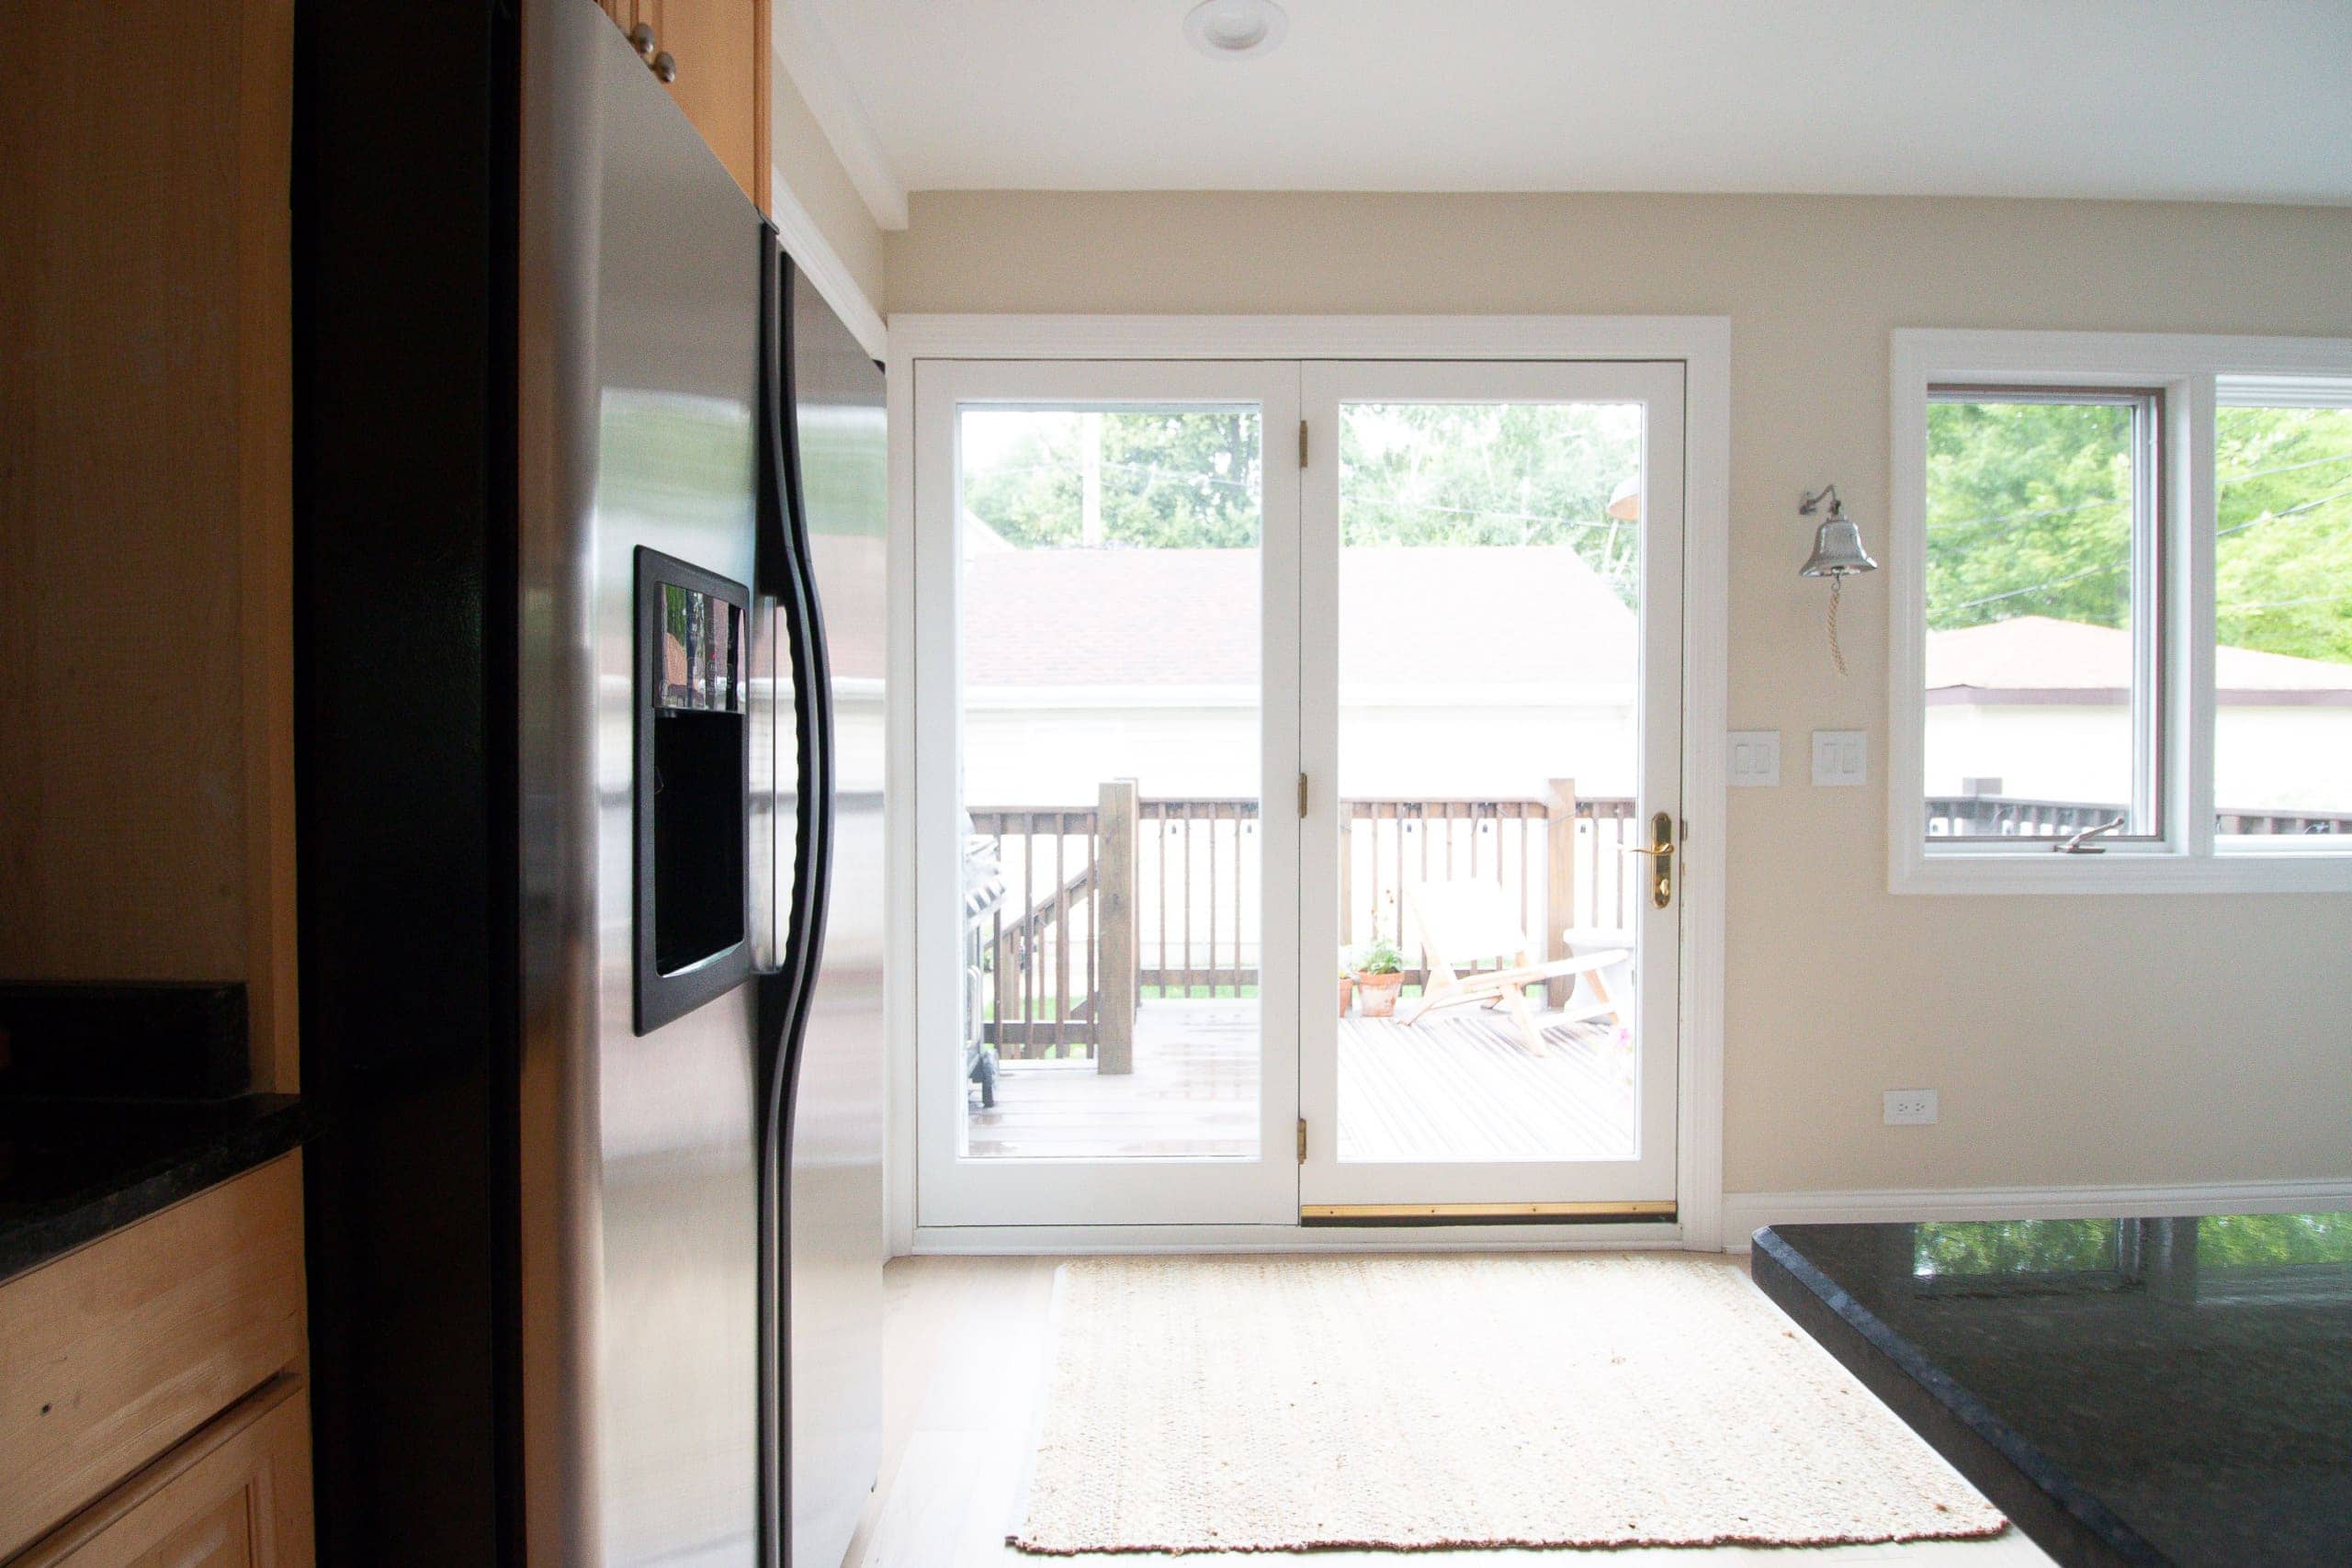
The new door will be a tiny bit smaller, but not much. Because the cabinets will flank the whole wall, we needed a few more inches, beyond our current pantry door. If we left the outside doors as they are, the cabinets would bump right into the glass. A new door was the best solution and a slider will work even better in this space. It means a larger island for us!
The Range Wall
Let’s go wall by wall and discuss the new layout. 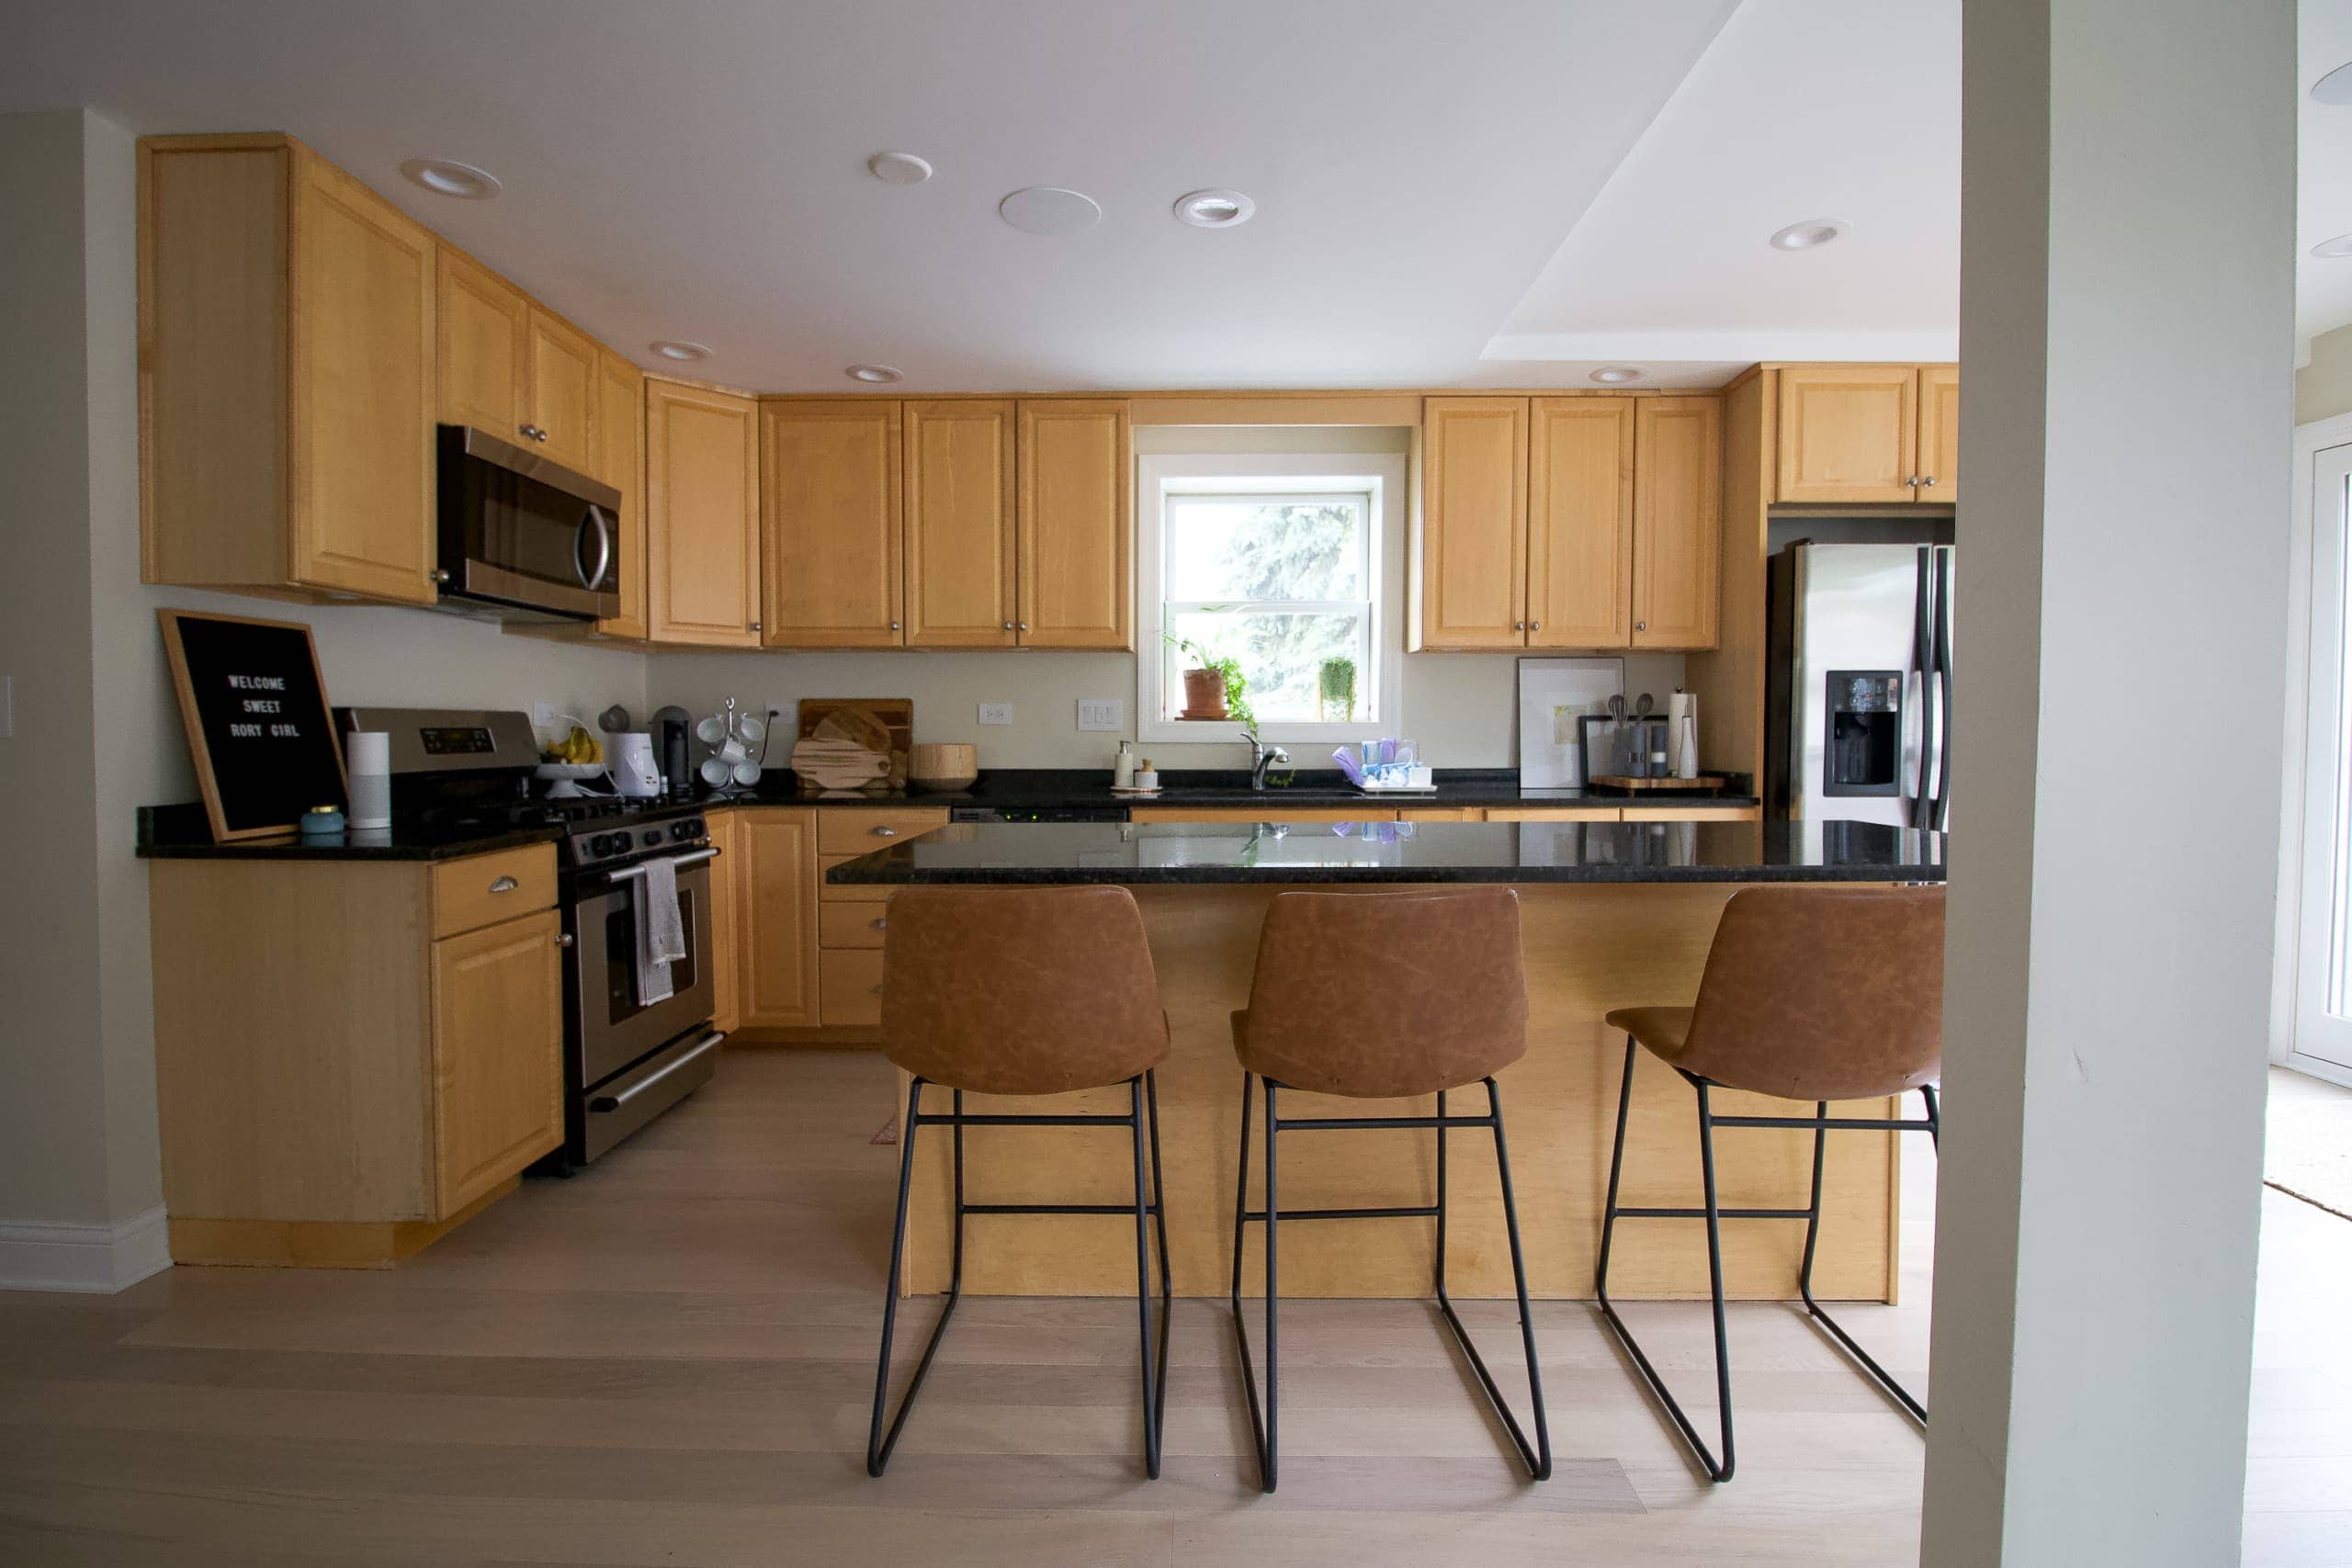
Here’s the current view of this wall and below is the new setup. 
This drawing is from our cabinet designer, Joseph, from our local Lowe’s store. He is the BEST! There are tons of details to share about the cabinetry process, so I’ll have a post all about the cabinets coming to the blog very soon. Let’s just say Finn, Joseph, and I have spent hours and hours analyzing every single cabinet and drawer in order to make the most of this space.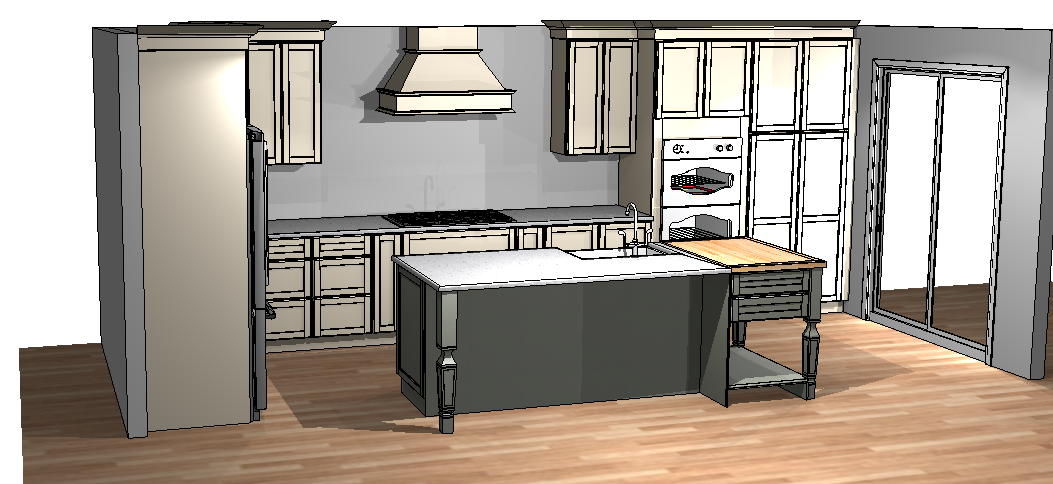
Yes, we will be removing the window over the sink (sad face). I never like removing windows from a room because I’m all about that natural light, but removing it made things work in here and I’d rather have a functional kitchen than one more window. Plus, we get tons of natural light from the huge windows and doors on the back of the house.
Anyway, the range and hood will now be the centerpiece of the kitchen. I’m excited because I know this will be a showstopper and a great focal point. The drawing doesn’t show it, but we’ll have open shelving flanking the hood. Finn really wanted a double oven, so instead of a gas range/oven combo, we have a range with drawers for pots and pans beneath it. To the right, we’ll have a double oven with the pantry next to it. The pantry will house our microwave and all of our food.
The Fridge Wall
The refrigerator will head to the stove area and I think it will be a much better spot for this huge appliance.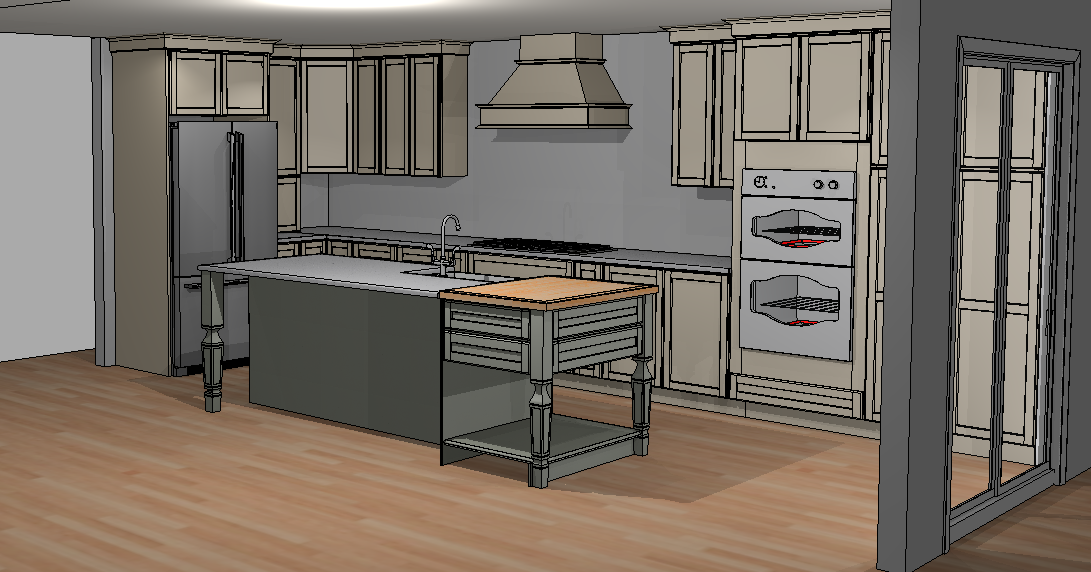
The fridge will be all the way to the left on this wall with cabinets to the right of it. The area to the right of the fridge will be an appliance garage to house our coffee maker, toaster, bottle warmer, etc., but again, we will review all of that in detail in the cabinetry blog post.
Our new fridge will have French doors and a freezer on the bottom. Holy smokes, am I excited to get a new fridge. No more leaking with a towel under it 24/7 to mop up the water! Hallelujah!
The Island

Our current island (complete with our “ghost” garbage can) will be changing in BIG ways! First of all, it will be a lot larger. Our current island is 7.5 feet long and our new one will be almost 9 feet long. We will still have seating for at least three people, maybe four. Plus, the island will house our sink, dishwasher, garbage can pullout (hopefully one that stays closed!), and my favorite area – the butcher block cutting board.
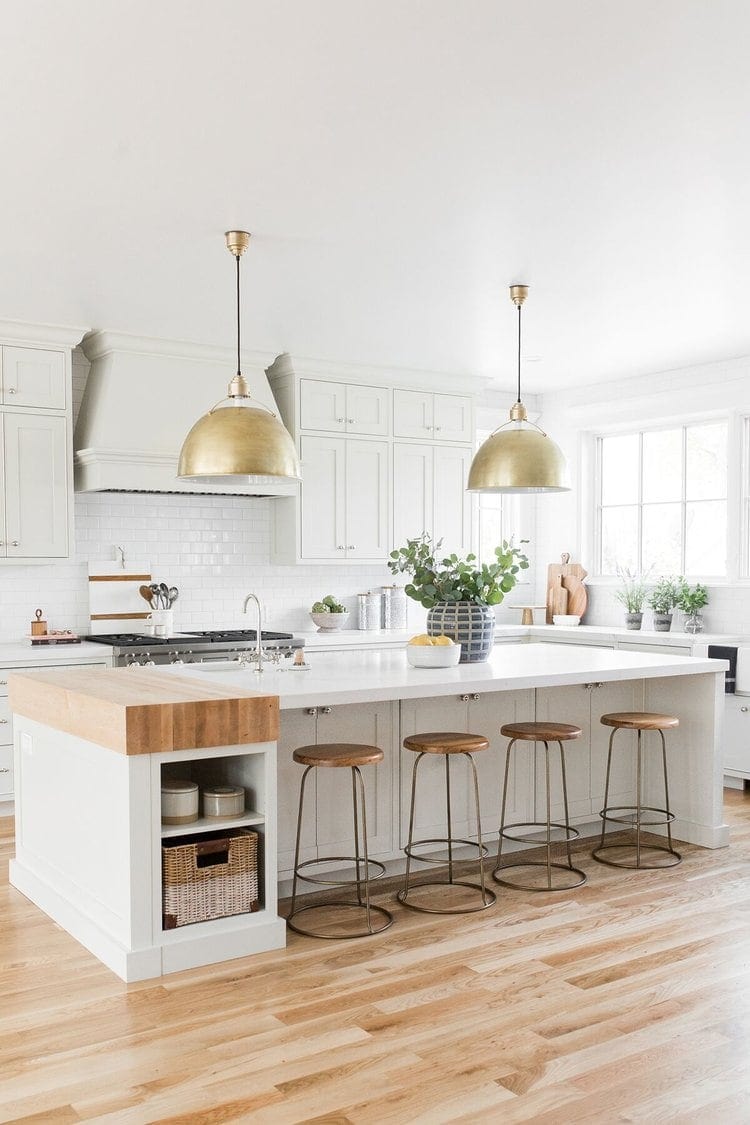
Photo and Design via Studio McGee
Because Finn is the chef in our household, he had a lot of ideas for what he wanted for his dream kitchen. A large butcher block for cutting will take up space on one end of the island, similar to the inspiration picture above. This will be a thick slab of wood where he can chop when cooking. My mom had a butcher block island in her old kitchen and loved it! It was the best place to do food prep and there was never a need to pull out a cutting board.
The Dry Bar Wall

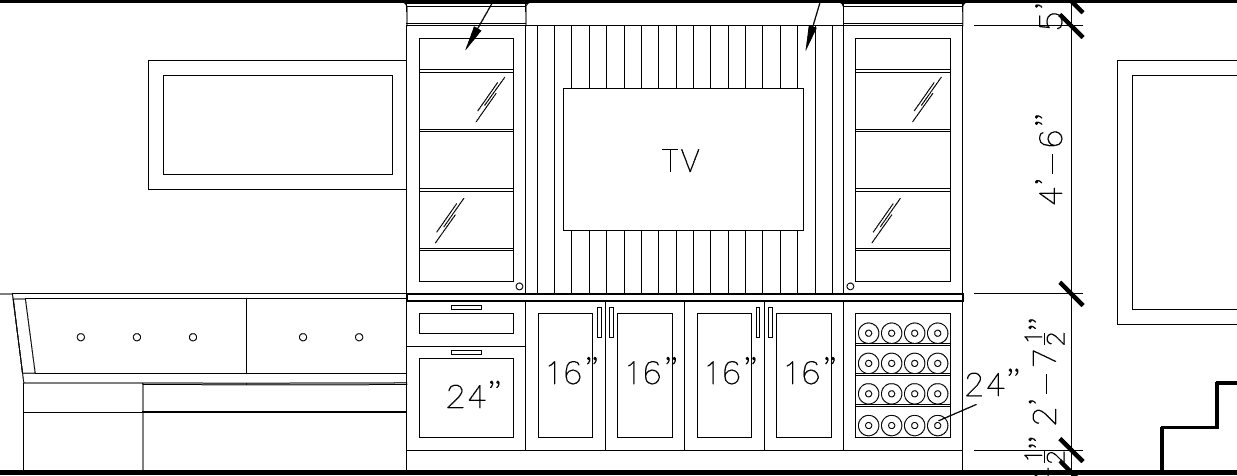
Yay, we have life on this side of the room! No longer will we just have a big ol’ television on the wall. We will be creating a little dry bar area over here with cabinets and a wine fridge. Finn really wanted to keep the Frame TV in here so he can watch sports (if they’re ever back) and cook all day long. So we decided to make our TV the centerpiece of this space with beadboard behind it. Luckily, it looks like art so I’m on board. The “art” will be flanked by two tall glass cabinets. This is where we’ll have our wine glasses and other pretty serving ware. We’ll also have tons of storage over here with the extra cabinets and drawers. I’m thinking we’ll keep a lot of our entertaining essentials in this area (napkins, platters, placemats, etc.)
I’m really excited about the little beverage center because it will be a great place to keep wine, pop, and LaCroix cold. I feel like those drinks are always taking up a lot of space in our main fridge, so it will be nice to have a dedicated drink fridge.
The Dining Area
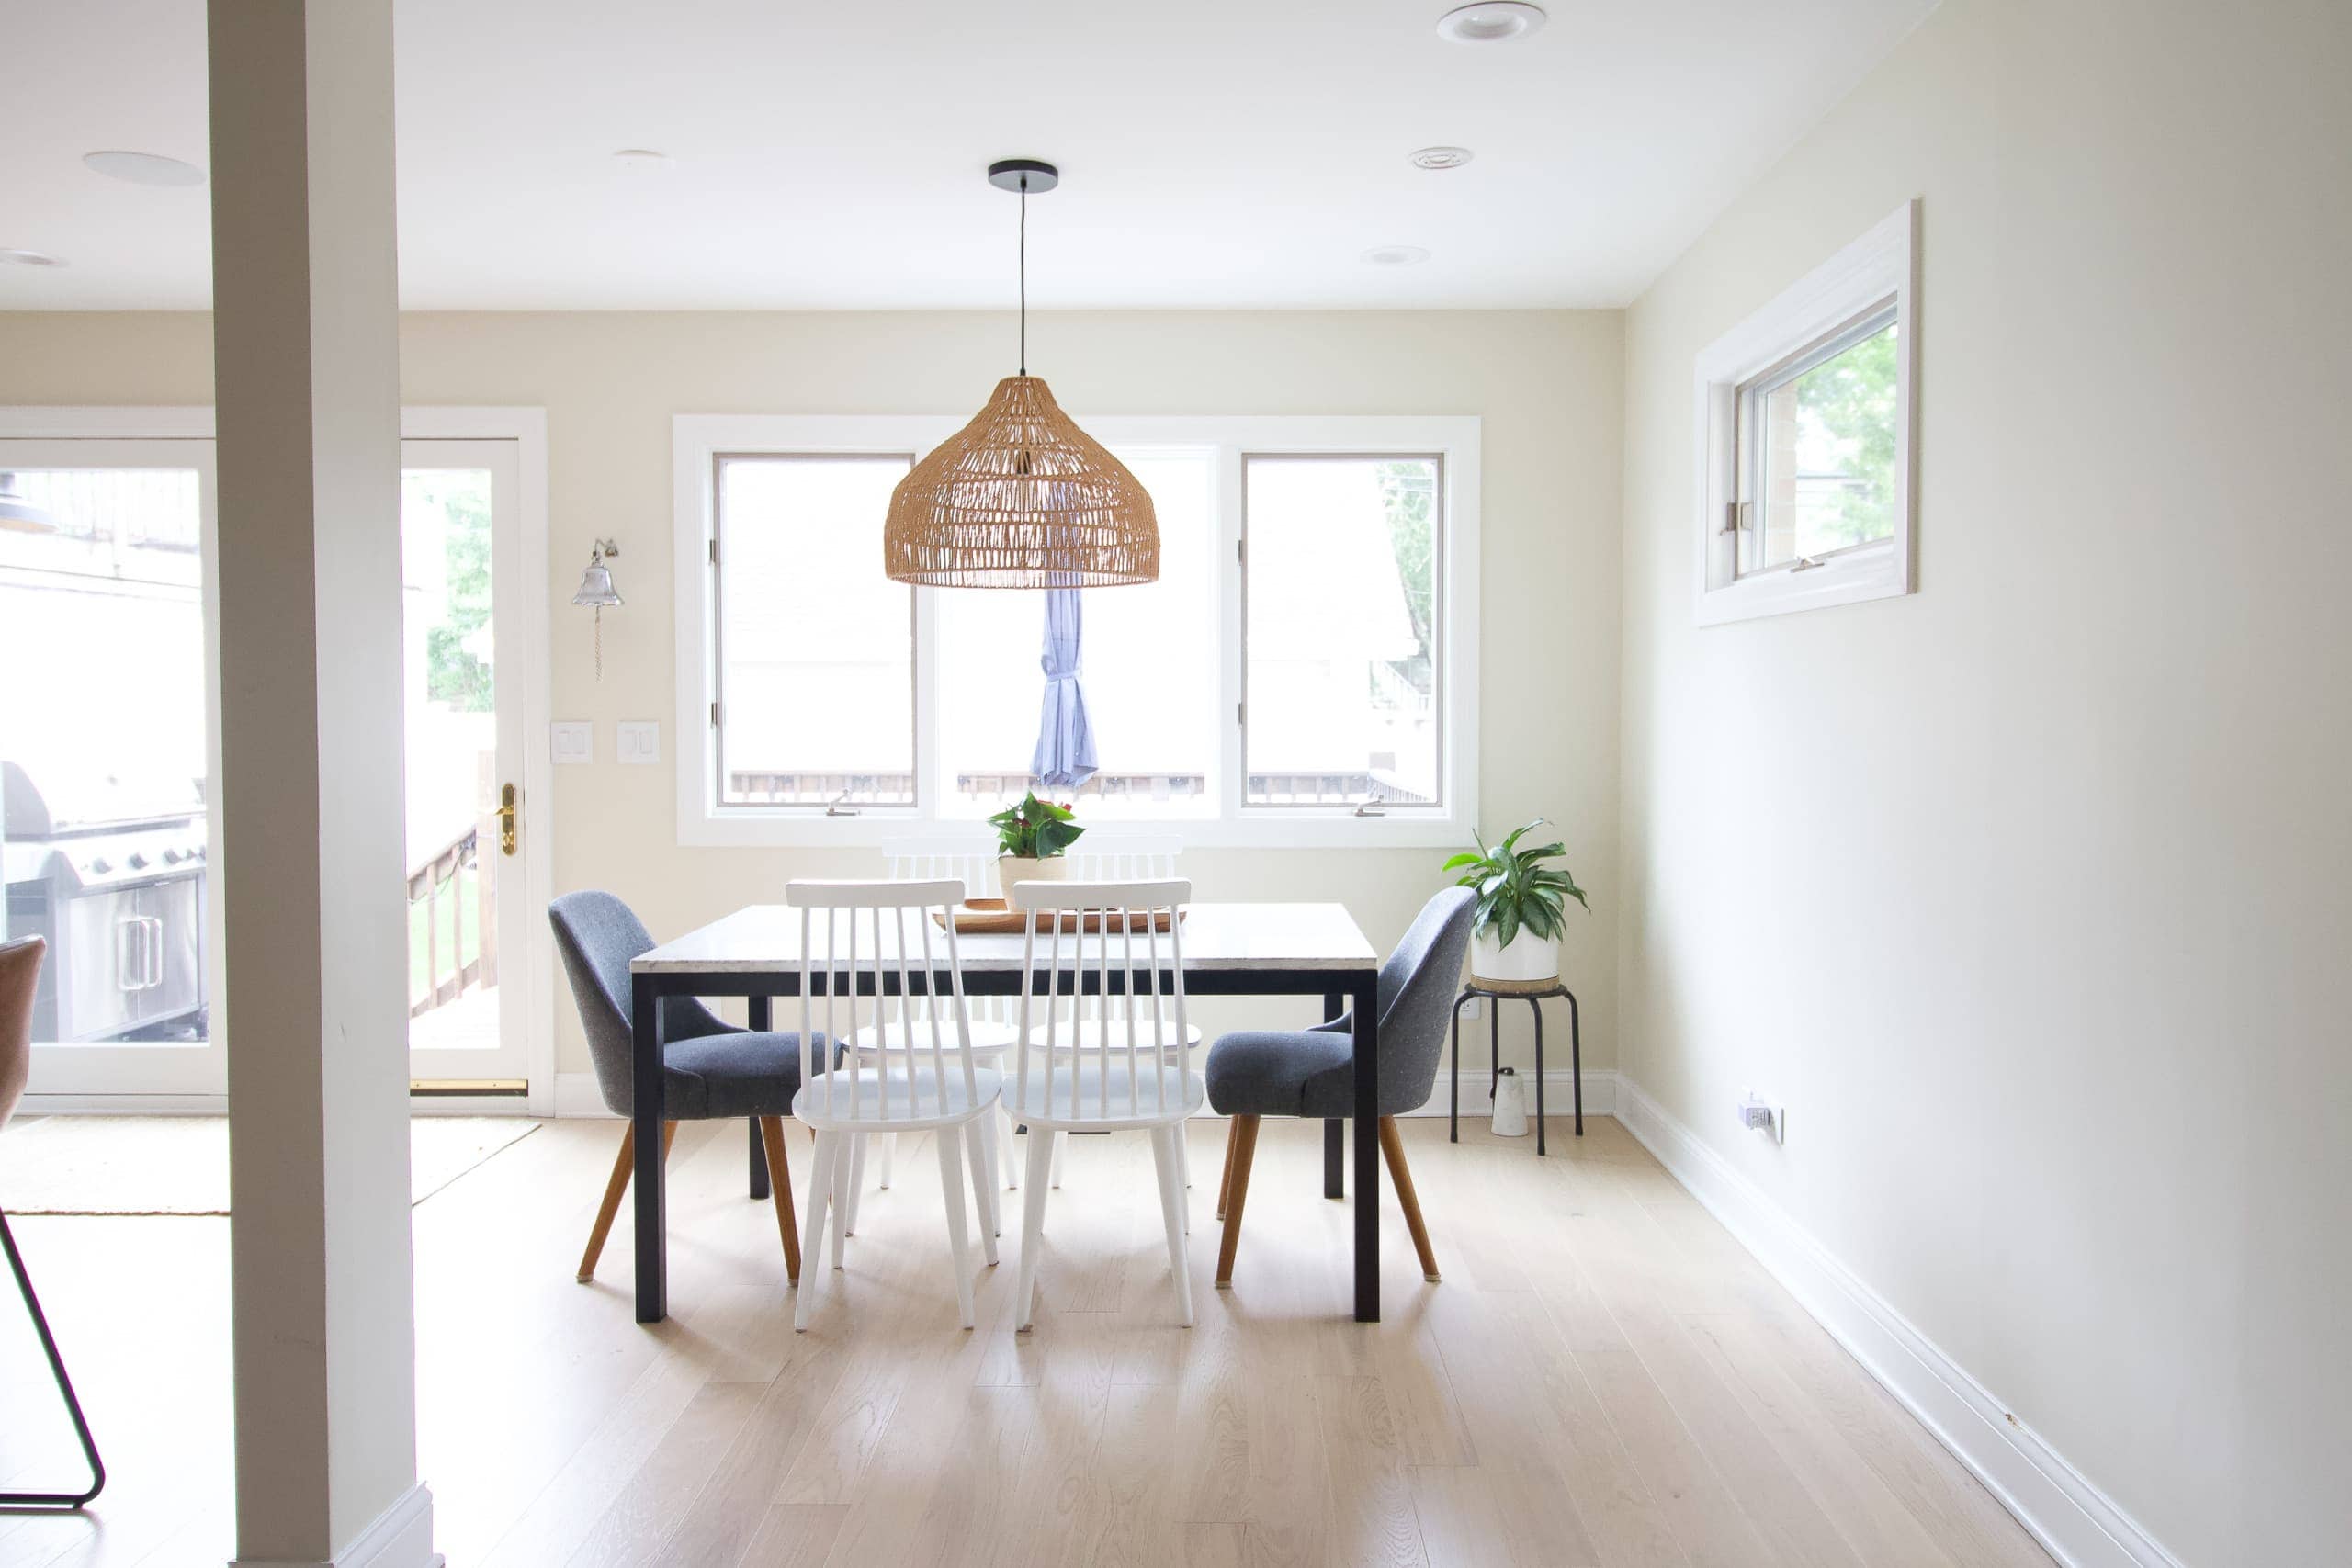
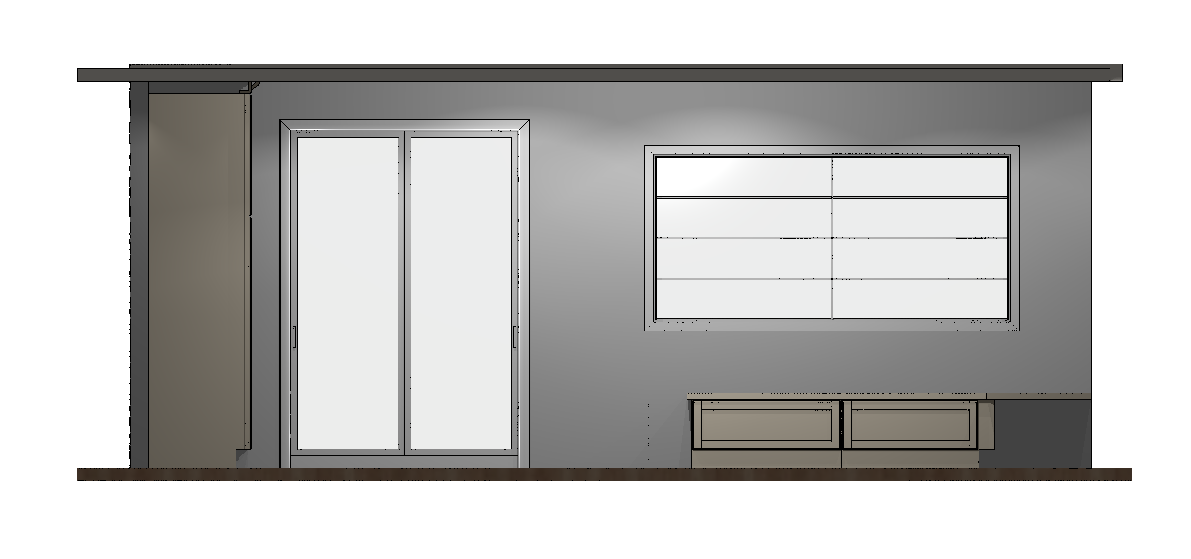
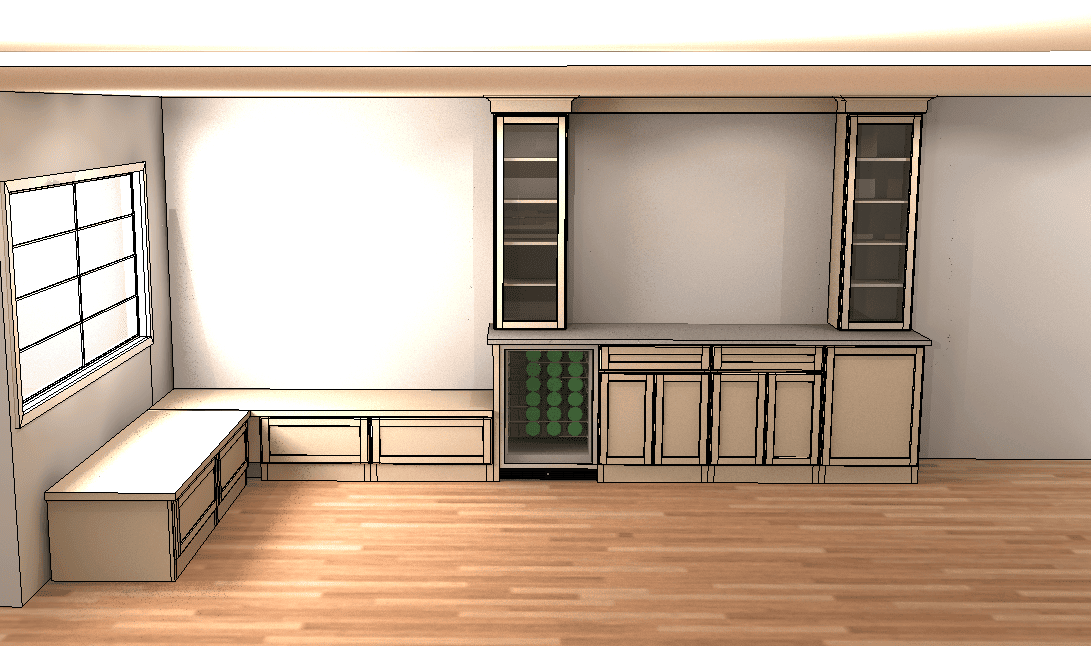
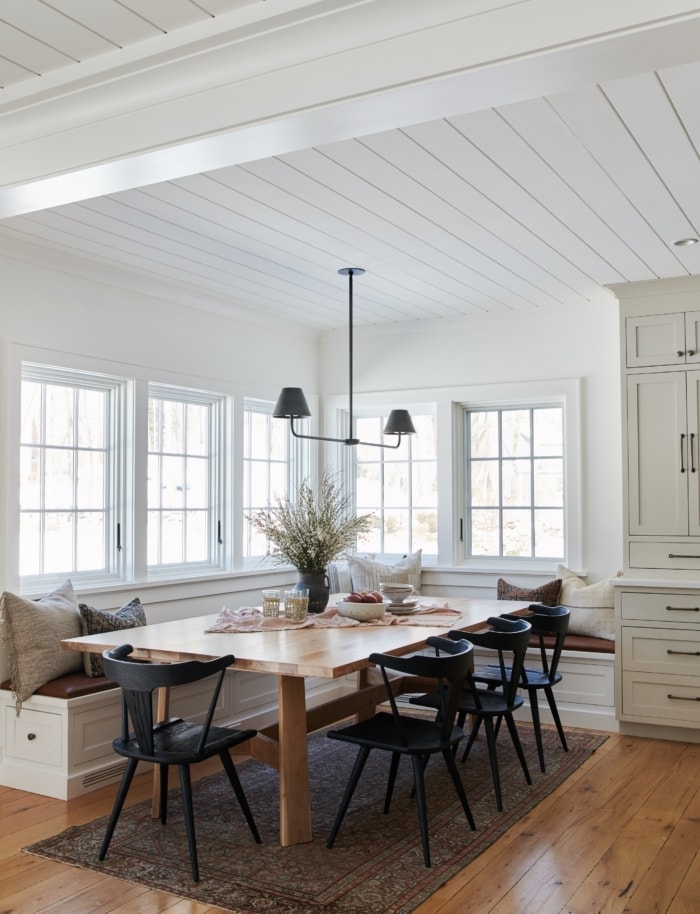
Photo via Amber Interiors
We will have built-in banquette seating here with drawers on the bottom for extra storage. I’m excited because we will have tons of seating! The new table is 71 inches long (bigger than our marble table), so I can have three chairs on one side, a head chair, and then all of the banquette seating. It will be a cozy breakfast nook and I’m using the above photo as my main inspiration for the space. I’m thinking we will have a faux leather cushion (easy to wipe), wood table, dark chairs, and a patterned rug underneath. I can’t wait to see it all come together!
What’s Next?
So there you have it – our new kitchen layout! On Thursday, I’ll be diving into more details about the design of the space, the colors, the inspiration, the overall vibe for this new room. I have lots of gorgeous inspiration photos to share and I’m hopeful we’ll be able to recreate the looks I’m digging. Stay tuned…
Casey
Catch Up On Our Kitchen Renovation
- Kitchen Before Photos
- Hiring a Designer
- Our New Kitchen Layout
- Design Plan & Mood Board
- Single vs Double Bowl Sink
- Ordering Our Kitchen Cabinets
- Tasks To Do Before a Kitchen Renovation
- Our Old Kitchen Is Out
- Creating Our Electrical Plan
- Our Kitchen Cabinets Are In!
- Kitchen Hardware Guide
- Dining Nook Design Plan
- Choosing Quartz Countertops
- Painting the Kitchen
- Our Dining Room Nook
- Finding a Kitchen Runner
- Our New Lighting
- Our Wood Butcher Block
- The Kitchen Renovation Timeline
- The Big Kitchen Reveal
- What I Learned from Our Kitchen Renovation
- Kitchen Before & After Video
- Our Kitchen Appliances
- Renovation Budget & Cost


